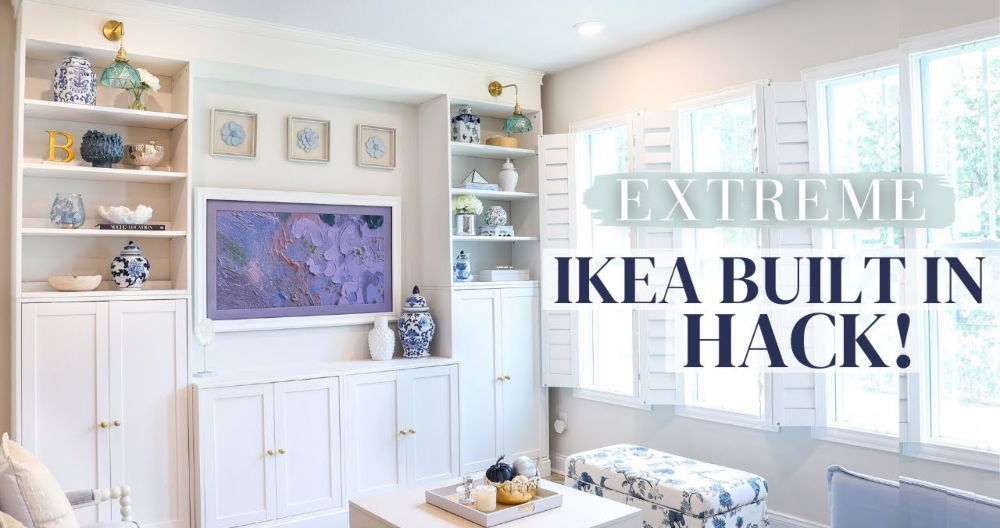
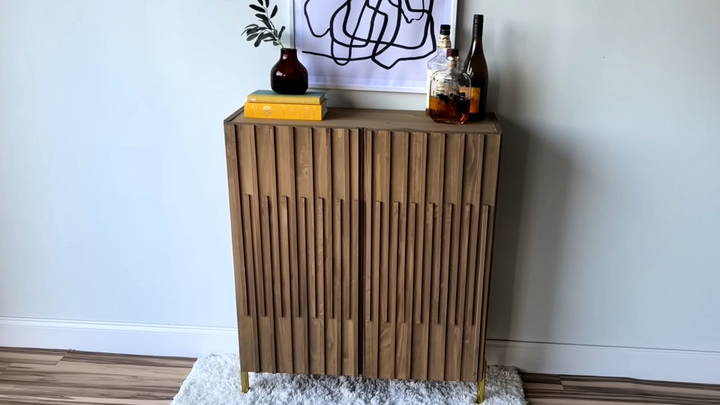
Today, I want to share with you an exciting journey I embarked on—a delightful adventure filled with creativity and a touch of DIY magic. Our focus today is an IKEA Ivar hack that transformed a simple cabinet into a chic and functional bar cabinet. Whether you're looking to build a coffee bar or a stylish drinks station, this project is a fantastic way to add a personal touch to your home. Let's dive in!
Why an IKEA Hack?
IKEA is synonymous with affordable furniture that boasts both simplicity and potential. When I laid eyes on the Ivar cabinet, I instantly envisioned its transformation into a functional yet stylish bar cabinet. The allure of a DIY IKEA hack lies in its ability to yield something unique and personal, a piece that stands out and serves a specific purpose, all while keeping costs relatively low.
Materials Needed
- IKEA Ivar Cabinet: The blank canvas for our project.
- Trim Pieces: To add texture and visual interest to the cabinet doors.
- Stain: I opted for a water-based stain for its ease of application and quick drying time.
- Cabinet Feet: To elevate the cabinet to a more functional height.
- Tools: A Brad nailer, screws, a miter saw, and a drill for assembly and adjustments.
Step by Step Instructions
Transform your space with DIY IKEA IVAR hack! Discover step-by-step instructions for unique, creative storage solutions perfect for any DIY enthusiast.
Step 1: Assembling the Ivar Cabinet
The IKEA Ivar cabinet is quite straightforward to assemble, but as with all IKEA furniture, it's essential to follow the instructions meticulously. The most challenging part might be adjusting the door hinges to ensure the doors hang evenly. A pro tip: patience is your best friend during this step.
Step 2: Prepping for Staining
After assembly, I removed the doors to prepare for staining. It was crucial to start with an even base, so I applied a slip coat of water to the wood before staining. This little trick helps in achieving a smoother finish and a more even application of the stain.
Step 3: Staining
Choosing a water-based stain was a game-changer. It's not only less toxic and easier to clean up but also dries faster than oil-based options. This means you can progress with your project without long waiting periods. I applied it with an applicator pad, working in sections to ensure even coverage.
Step 4: Customizing the Doors
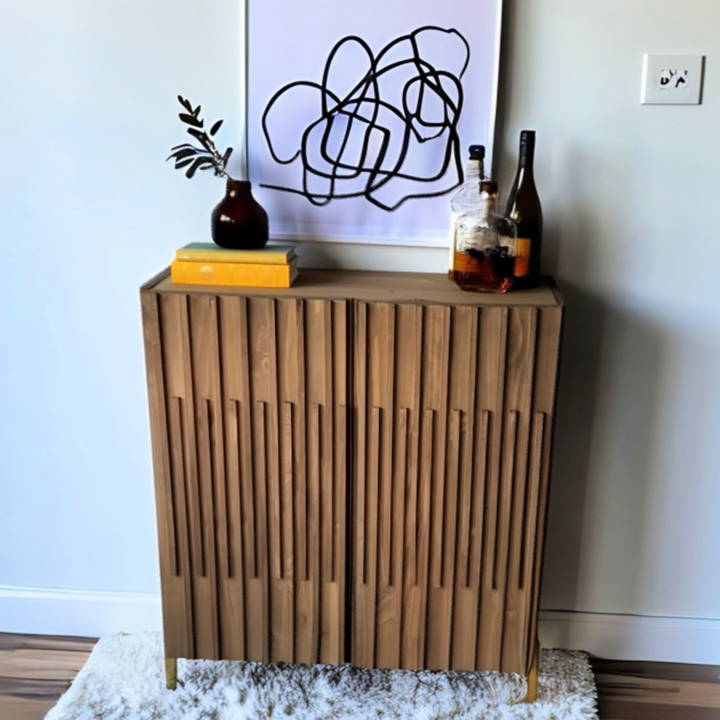
The idea was to build a door design that adds character. I decided to add trim pieces in a staggered pattern to build texture. Measuring and cutting the trim with precision was crucial. Once cut, staining each piece separately before attaching them to the doors ensured a uniform look. The attachment was achieved with my brad nailer, using a spacer to maintain consistent spacing between each trim piece.
Step 5: Adding Feet
Elevating the cabinet not only lends it the ideal height for a bar cabinet but also gives it a more distinguished look. Installing the feet required some adjustments due to the cabinet's design. Making sure the cabinet is level when attaching the feet is vital; using washers helped achieve this. The choice of feet can drastically influence the final look, so consider this step thoughtfully.
Step 6: The Finishing Touches
Adding or leaving out hardware can change the aesthetic of your cabinet. I chose to forego additional hardware since the doors featured a built-in handle, maintaining a sleek and uncluttered look. Finally, staining the interior gave the cabinet a fully finished appearance.
Anchoring Your Cabinet
Safety always comes first. The Ivar cabinet, especially after modification, can become top-heavy and should be securely anchored to a wall to prevent tipping.
This DIY project was rewarding, challenging my creativity and problem-solving. The result is a functional and eye-catching piece of furniture. Total cost was under $200, offering great savings without sacrificing style or quality.
Customization Tips for Your IKEA Ivar Hack
When it comes to personalizing your IKEA Ivar unit, the possibilities are endless. Here are some practical tips to help you customize your Ivar hack in a way that's both unique and harmonious with your living space:
- Choose Your Theme: Start by deciding on a theme or style that reflects your personality. Whether it's Scandinavian minimalism, bohemian chic, or modern industrial, having a clear theme will guide your customization choices.
- Selecting Colors: Colors can dramatically transform your Ivar unit. Opt for hues that complement your room's color scheme. If you're feeling adventurous, consider using contrasting colors for the inside and outside of the shelves for a pop of visual interest.
- Adding Hardware: Swapping out the standard knobs or handles with something more distinctive can make a big difference. Browse hardware stores or antique markets for unique pieces that can serve as conversation starters.
- Incorporate Textures: Use fabrics, wallpapers, or wood stains to add texture to your Ivar. This can be as simple as lining the back panel with a patterned wallpaper or adding a cushioned seat to the top of a shelving unit.
- Light It Up: Installing LED strips or puck lights under shelves can showcase your items and add warmth to the room. Plus, it's a functional addition that helps you find things in dimly lit areas.
- Functional Add-ons: Think about how you can increase the functionality of your Ivar. Adding hooks for keys, a rod for hanging clothes, or wheels for mobility can turn your Ivar into a multi-purpose piece.
- Display with Purpose: Arrange items on your shelves in a way that's both aesthetically pleasing and practical. Group similar items together, use baskets for smaller objects and leave some open space to avoid a cluttered look.
- Maintain Simplicity: While customization is exciting, it's important not to go overboard. Keep your modifications tasteful and aligned with the original design for a cohesive look.
Follow these tips to build a stylish, unique, and functional Ivar hack that adds character to your space. Successful customization reflects your individuality and harmonizes with your decor.
Troubleshooting Common Issues with IKEA Ivar Hacks
When embarking on an IKEA Ivar hack, you might encounter a few hiccups along the way. Here's a helpful guide to troubleshooting common issues, ensuring your project stays on track:
- Stability Concerns: If your Ivar unit wobbles after assembly, double-check all connections. Tighten any loose screws and ensure the unit is level. For added stability, consider securing it to the wall with brackets.
- Paint Problems: When painting, if the finish isn't smooth, it could be due to the wood not being properly sanded or the paint not being well mixed. Sand down any rough patches and apply a thin, even coat of paint, allowing it to dry fully between layers.
- Shelf Alignment: If shelves aren't aligning, it's often because the side units aren't perfectly vertical. Use a spirit level to adjust the sides until they're straight, then reposition the shelves.
- Door Installation: Doors not fitting correctly can be a common issue. Check the hinges and make sure they're aligned and tightened. Adjust the screws to ensure the doors hang evenly and close properly.
- Adhesive Accidents: When using adhesives for wallpapers or laminates, bubbles or peeling might occur. Smooth out any air bubbles with a flat tool and apply additional adhesive if the edges start to peel.
- Hardware Hassles: If new knobs or handles don't fit, measure the screw size and depth needed. Visit a hardware store with these measurements to find the correct fit for your unit.
- Lighting Glitches: For lighting installations, if the lights flicker or don't turn on, ensure all connections are secure and the power source is functioning. Always follow the manufacturer's instructions for electrical components.
- Accessory Adjustments: Adding accessories like hooks or rods should be straightforward. If they don't fit, check if you have the right tools and fixtures for the material you're drilling into.
By keeping these tips in mind, you'll be well-equipped to handle any challenges that arise during your IKEA Ivar customization.
FAQs About IKEA IVAR Hack
Discover creative faqs about the Ikea Ivar hack. Learn tips, design ideas, and troubleshooting for transforming your IKEA Ivar into a stylish masterpiece.
An IKEA IVAR hack involves creatively modifying or repurposing the IVAR storage system to suit personal tastes or needs. This can include painting, adding new hardware, or combining units for a custom design.
You can personalize your IVAR cabinet by staining or painting it in your desired color, adding stylish knobs or handles, and even attaching legs or mounting it on the wall for a floating effect.
Yes, simple hacks include adding gold accents such as handles and legs to elevate the look or making a chevron pattern on the door fronts for a mid-century vibe.
Absolutely! The IVAR cabinet can be hacked to serve as a desk base with a countertop, a wardrobe by stacking units, or even a changing station for babies by placing two cabinets back-to-back.
Inspiration for IVAR hacks can be found on home decor websites, social media platforms like Instagram, and DIY blogs, where many users share their unique and creative transformations.
Final Thoughts
Tackling this DIY Ikea Ivar hack was a rewarding experience. It combines creativity, skill, and practicality. Whether you need a chic bar cabinet for your dining area or a minimalist coffee bar for your kitchen, this is a project that offers both form and function. If you decide to try this out, I'd love to hear about your experience and see your results.


