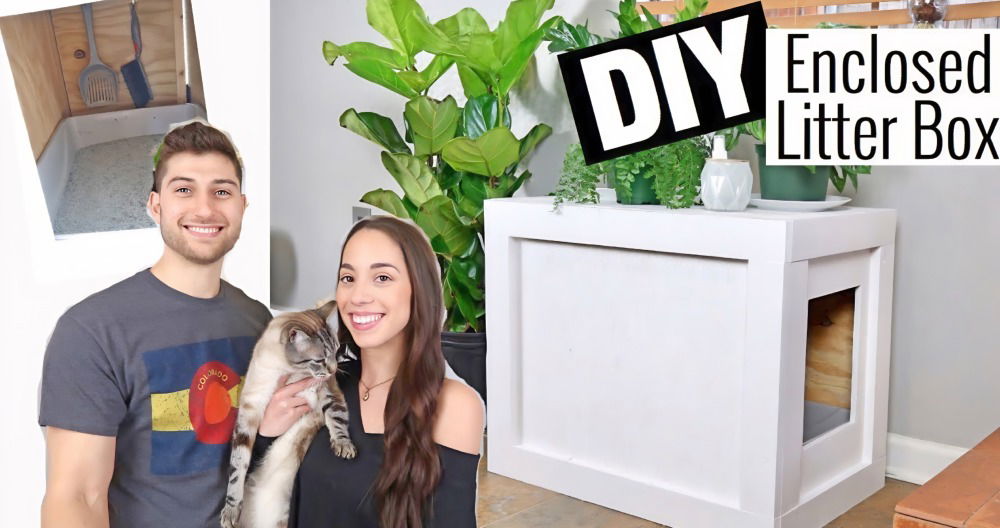
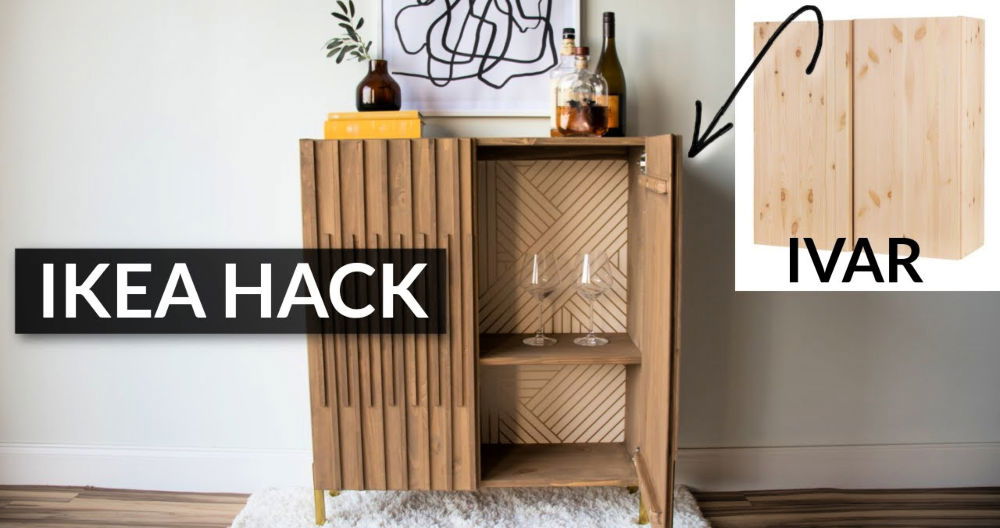
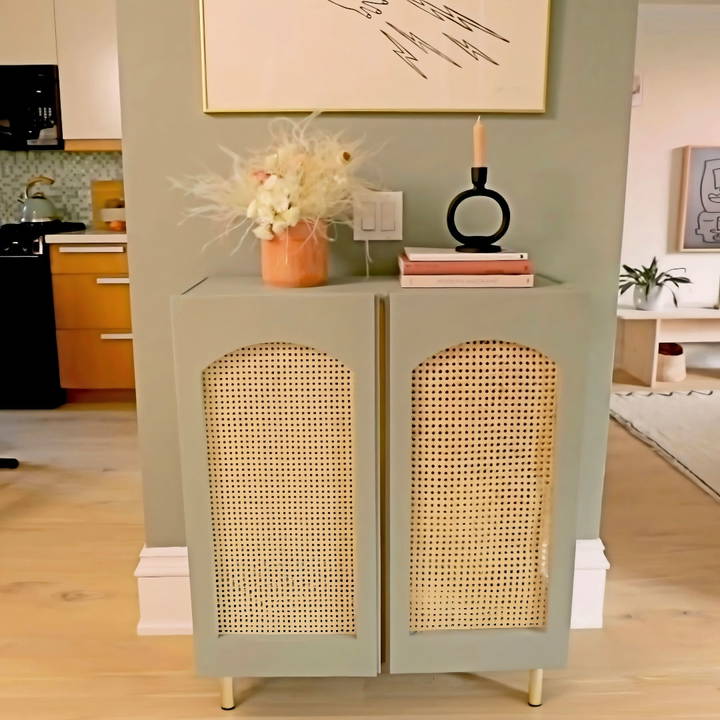
Learn how to turn an ordinary Ikea Ivar cabinet into a chic and discreet litter box for my cat, Lottie. Tackling this project not only satisfied my creative DIY urges but also helped me save space in my home while keeping Lottie's litter situation both functional and aesthetically pleasing. If you're looking to achieve a similar result or seek inspiration for a unique IKEA hack, follow along as I guide you through the steps of this rewarding process.
Discover the IKEA litter box hack to build a stylish, budget-friendly hidden litter solution for your home. An easy DIY guide for cat owners.
Understanding the Need for a Litter Box Hack
Living in a compact downtown Toronto apartment meant space was at a premium. The open space between my kitchen and living area was cluttered with Lottie's litter box. It was an eyesore. Inspired by several DIY hacks and armed with determination, I decided to tackle this project head-on.
What You'll Need
- Ikea Ivar Cabinet: I chose this for its size and customizability. Make sure to choose the size based on your cat and litter box dimensions.
- Paint & Painting Supplies: Pigeon by Farrow & Ball for that chic, cohesive look through the space.
- Cane Webbing: To add a stylish touch to the cabinet doors.
- Tools: Jigsaw, drill, paintbrushes, rollers, level.
- Protective Eyewear: Safety first!
- Hardware Store Supplies: Wood for trim, wood filler, polyurethane sealant, and legs for the cabinet.
Step by Step Instructions
Upgrade your cat's space with this easy Ikea litter box hack. Follow our simple, step-by-step DIY instructions for a stylish, functional cat area!
Step 1: Planning and Prepping
Measure your space and the litter box to ensure the cabinet you've selected fits. I initially chose the smaller Ivar but ended up switching to a larger size for added comfort for Lottie. Remember, a comfortable cat is a happy cat.
Step 2: Painting the Wall and Cabinet
I started by painting the designated wall with my chosen pigeon shade to build a statement. While the wall dried, I unboxed the Ivar cabinet and painted all parts. If you want that seamless look, choosing the same color for the wall and cabinet does wonders.
Step 3: Customizing the Cabinet
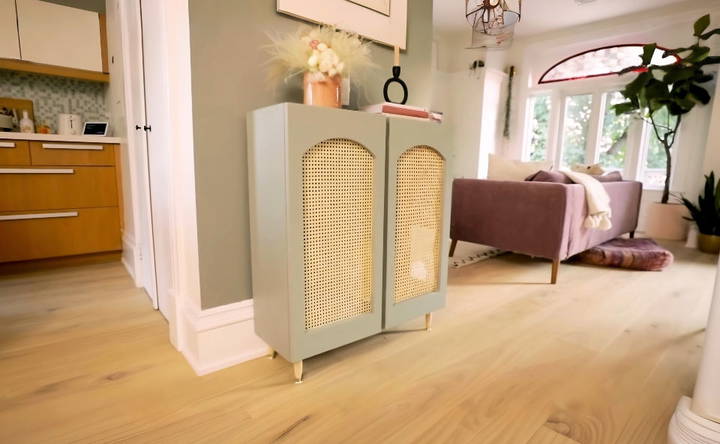
Customizing the cabinet was the most creative part. I opted for an arch cutout for Lottie's entry on the side of the cabinet, keeping aesthetics and practicality in mind. Using a jigsaw, I cautiously cut out the entry, sanding down the edges for a smooth finish. Remember to wear protective eyewear during this step.
Step 4: Adding the Cane Webbing
Soaking the cane webbing in warm water made it pliable and easy to work with. I tightly stretched and stapled it behind the cutout arches I made on the cabinet doors. This not only added a stylish touch but ensured proper ventilation for Lottie.
Step 5: Assembling and Finishing Touches
After the paint had dried and the cane had been attached, I assembled the cabinet, following the Ikea instructions but with my modifications. The wooden trim around the entry and the legs I picked out added the perfect finish. Sealing the inside with polyurethane ensured easy cleanup and odor containment.
Step 6: Styling and Installation
The final step was to style the cabinet in a way that blended seamlessly with my home d* écor. Placing styling books, a candle, and a dried floral arrangement on top, I turned this once purely functional piece into a statement decor item. Lottie took to her new bathroom almost immediately, and I couldn't have been happier.
Customization Ideas for Your IKEA Litter Box Hack
When it comes to personalizing your IKEA litter box hack, the possibilities are endless. Here are some creative ideas to make your litter box not only functional but also a stylish addition to your home:
Choose a Theme
- Select a theme that matches your home decor or your cat's personality. Whether it's a minimalist look, a vibrant pattern, or even a whimsical design, let your creativity shine.
Paint It Up
- Paint the exterior of the IKEA unit to blend with your room's color scheme. Use non-toxic paint to ensure it's safe for your furry friend.
Add Some Flair
- Decorate the litter box with stickers, decals, or washi tape. This is a simple way to add a personal touch without permanent changes.
Functional Add-Ons
- Consider adding shelves or hooks to the side of the unit for storing scoops and bags. A small mat inside the entrance can help catch any litter stuck to your cat's paws.
Comfort Matters
- Ensure the inside of the box is comfortable for your cat. Add a soft mat or rug that can be easily removed and cleaned.
Ventilation
- Good airflow is essential. Install a small, battery-operated fan or ventilation grills to keep the area well-ventilated and odor-free.
Easy Access
- If your cat prefers privacy, add a curtain or flap over the entrance. Make sure it's easy for your cat to move in and out.
Lighting
- A small, motion-activated light inside can help older cats or those who prefer nighttime visits to see better.
Think Eco-Friendly
- Use recycled materials for any additional decorations or modifications. It's good for the planet and often more cost-effective.
By incorporating these ideas, you'll build a litter box that's as unique as your cat while ensuring it fits seamlessly into your living space.
Troubleshooting Common Issues
When undertaking the IKEA litter box hack, you might encounter a few hiccups along the way. Here's a helpful guide to troubleshooting common issues, ensuring a smooth and successful project:
Difficulty in Cutting the Entrance Hole
- Solution: Measure twice and cut once. Use a pencil and ruler to mark the exact dimensions before cutting. If you're using a saw, ensure it's sharp and suitable for the material. For a cleaner cut, apply masking tape along the cutting line to reduce splintering.
Litter Spillage Outside the Box
- Solution: To minimize litter spillage, place a litter-catching mat outside the entrance. Consider making a raised lip at the entrance or using a top-entry design to contain the litter.
Unpleasant Odors
- Solution: Good ventilation is key. Install charcoal filters or use odor-absorbing litter. Regular cleaning is also essential to keep odors at bay.
The Box is Too Dark Inside
- Solution: Install a battery-operated LED light that turns on when your cat enters. Choose a light with an auto-off feature to conserve battery life.
The Hack Doesn't Fit My Home's Aesthetic
- Solution: Customize the exterior with contact paper, fabric, or paint that complements your home decor. Add decorative elements like plants or artwork on top of the unit to integrate it into your space.
The Unit is Unstable
- Solution: Ensure all screws and joints are tightened. If necessary, secure the unit to the wall with brackets for added stability.
Difficulty in Cleaning
- Solution: Use a liner inside the litter box for easier cleanup. Choose materials that are waterproof and wipeable for the interior surfaces.
Cat Refuses to Use the Modified Box
- Solution: Gradually introduce your cat to the new box. Place it next to the old one and encourage exploration with treats or catnip. Ensure the entrance is easily accessible and the interior is inviting.
Address these common issues to make your IKEA litter box hack clever, practical, and loved. Patience and detail will ensure your DIY project's success.
Maintenance and Cleaning Tips
Keeping your IKEA litter box hack clean and well-maintained is crucial for the health and happiness of your cat, as well as for ensuring your home stays fresh. Here are some straightforward tips to help you with maintenance and cleaning:
Regular Scooping
Scoop the litter box at least once a day to remove waste. This prevents odors and keeps the litter fresh for longer.
Litter Replacement
Replace the entire litter every two weeks or as needed. This helps to control odors and maintain cleanliness.
Deep Cleaning
Once a month, empty the litter box completely and clean it with a mild, non-toxic cleaner. Rinse thoroughly and dry before refilling with fresh litter.
Odor Control
Use baking soda at the bottom of the litter box before adding new litter to help neutralize odors naturally.
Liners
Consider using a liner in the litter box for easier cleanup. Make sure it's snug but also easy to remove without spilling.
Washable Mats
Place a washable mat under the litter box to catch any stray litter. This keeps the surrounding area clean and is easy to maintain.
Monitoring
Keep an eye on the amount of litter used. Too much can lead to wastage, while too little may not be effective in absorbing waste.
Ventilation
Ensure the area around the litter box is well-ventilated. This helps to disperse any odors and keeps the air fresh.
Inspection
Regularly inspect the litter box for any cracks or damage that could harbor bacteria and replace if necessary.
Training
If you have multiple cats, train them to use separate litter boxes. This can help prevent the spread of disease and make cleaning easier.
By following these tips, you can ensure that your IKEA litter box hack remains a clean, odor-free, and inviting space for your cat to do their business.
FAQs About IKEA Litter Box Hack
Discover answers to common questions about the IKEA litter box hack. Get tips, ideas, and solutions for a stylish and functional pet space.
An IKEA litter box hack involves modifying an IKEA furniture piece to conceal a cat's litter box. The goal is to build a functional and aesthetically pleasing area for your cat's needs while keeping the litter box out of sight.
Select a piece that fits your space and your cat’s size. Popular options include the IKEA Cabinet, Besta unit, or Hol table. Ensure the furniture is large enough to accommodate the litter box and allows easy access for your cat.
Yes! There are simple hacks that require minimal tools and effort. For example, some IKEA units can be adapted by just adding a cat door to the side. If you’re not comfortable with DIY, consider seeking help from a friend or a professional.
To reduce odor and litter tracking, place a litter mat inside the cabinet to catch excess litter as your cat exits. Regular cleaning and using an enclosed space can also help contain odors and mess.
Safety is paramount when modifying furniture for your cat. Make sure there are no sharp edges where you've cut an entrance. Sand down any rough areas to prevent injury. Additionally, ensure the furniture is stable and won't tip over when your cat enters or exits. Using furniture anchors can add extra stability. Always choose non-toxic materials and paints, as cats may chew or scratch their surroundings.
Final Thoughts
This IKEA litter box hack not only served as an efficient way to conceal Lottie's litter box but also transformed a mundane piece into a complimentary decor element within my space, offering both form and function. You might find yourself reevaluating other furniture pieces around your home for potential hidden functionality!


