I remember the thrill of deciding to revamp my bedroom space with a DIY IKEA vanity. Inspired by countless Pinterest boards and YouTube tutorials, I was determined to build an elegant, functional space without burning a hole in my wallet. I knew that if I played my cards right, I could construct something beautiful using the IKEA Alex drawers and Linmon tabletop.
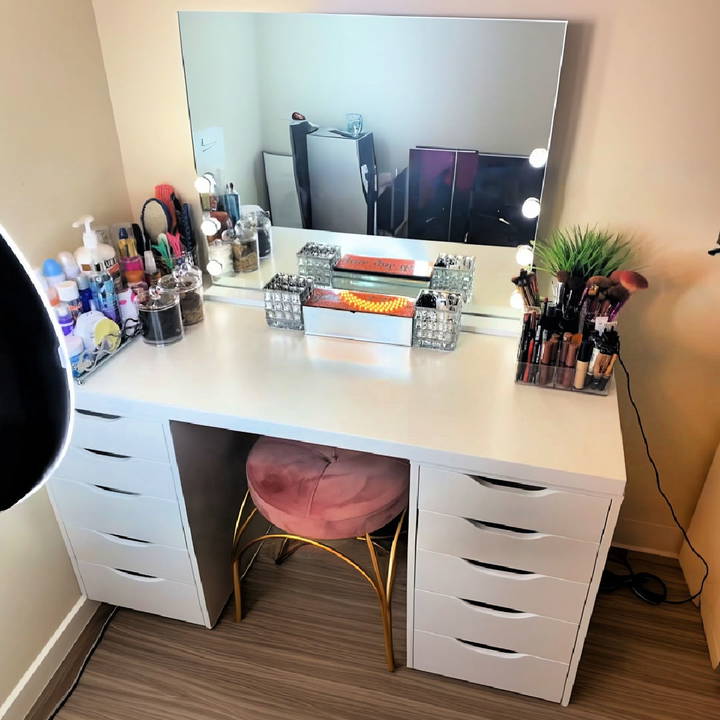
Here's a step-by-step guide to how I transformed a simple idea into a chic vanity, which I hope will also help you achieve your DIY goals. Discover the ultimate IKEA makeup vanity hack to transform your beauty space affordably and stylishly.
Materials Needed and Their Purpose
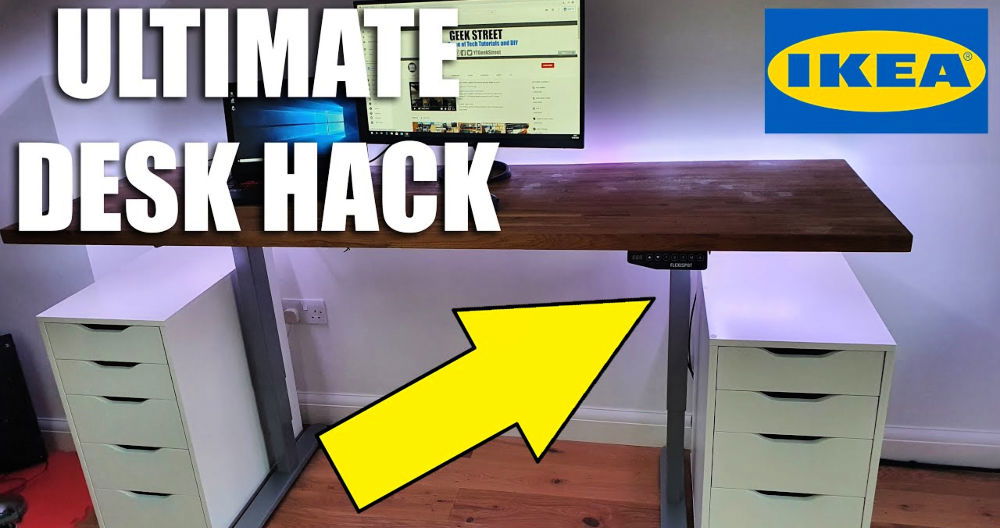
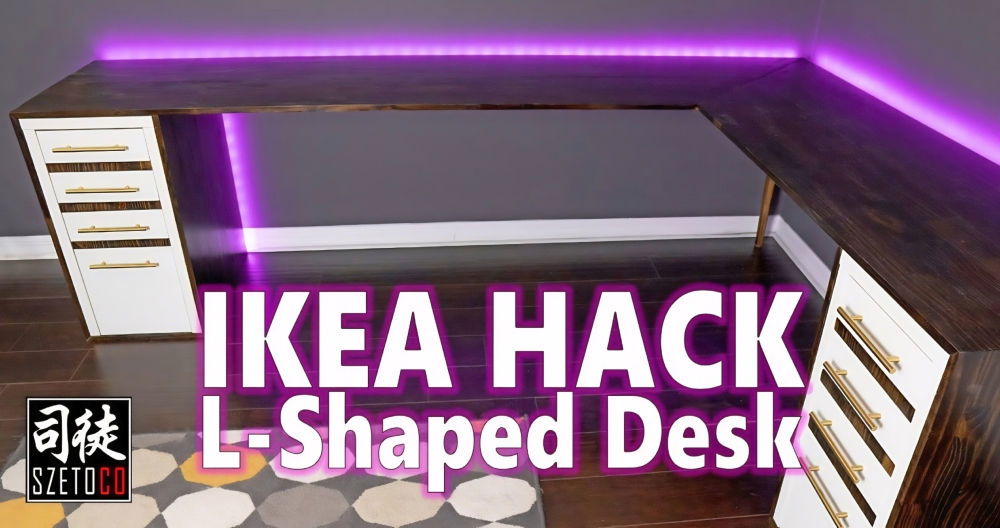
- IKEA Alex Drawer Units: These are the backbone of our vanity. They provide ample storage space for makeup, accessories, and other essentials. I opted for two units to balance the tabletop and ensure enough legroom.
- Tabletop: I chose the Linnmon tabletop for its sleek finish and durability. Its size was perfect for the space I had in mind, offering enough surface area for all my vanity essentials.
- Screws and Tools: A basic toolkit, including a screwdriver and a drill, is necessary for assembling the pieces and securing the tabletop to the drawers.
- Measuring Tape: Precision is key to ensuring your vanity fits perfectly in your designated space. A measuring tape helps align and space the drawers evenly.
- Optional Decor: Personalize your vanity with accessories like a stylish mirror, organizers, or a comfy stool. These are not just functional but also enhance the overall look of your vanity.
Step by Step Instructions
Transform your space affordably with our easy, step-by-step IKEA makeup vanity hack instructions. Beautify your space today!
Step 1: Assembling the Alex Drawers
Start by assembling your IKEA Alex drawer units according to the instructions provided. Take your time with this process to ensure everything aligns perfectly. Remember, these drawers will support the weight of your tabletop, so stability is crucial.
Step 2: Planning Your Layout
Before securing the tabletop, arrange the Alex drawers in the location where you intend to set up your vanity. Use your measuring tape to ensure equal spacing on both sides. This step is vital for achieving a balanced look and making sure there's enough legroom.
Step 3: Securing the Tabletop
Initially, I considered attaching the tabletop directly to the drawers using the pre-drilled holes on the Alex units. However, I noticed the alignment was slightly off, which could result in an uneven setup. Instead, I decided to securely place the tabletop on the drawer units without fastening them. This approach not only provided stability but also flexibility to rearrange if needed.
Step 4: Adding Personal Touches
Once your vanity's structure is in place, it's time to add your personal touches. A good-quality mirror is a must-have for any vanity setup. You can either mount a mirror on the wall above your vanity or opt for a freestanding one. Additionally, invest in some organizers to keep your makeup and accessories tidy. Finally, a comfortable stool can make all the difference in making a cozy and inviting vanity area.
Customization Ideas for Your IKEA Makeup Vanity
Building a makeup vanity that reflects your personal style and meets your needs can be a rewarding DIY project. Here are some customization ideas to inspire you:
- Choose Your Color Palette: IKEA furniture often comes in neutral colors, which makes it perfect for customization. Decide on a color scheme that complements your room. For a classic look, consider white, black, or natural wood tones. If you're feeling adventurous, go for bold colors like pink, turquoise, or even metallics.
- Add Decorative Knobs and Handles: Swapping out the standard knobs and handles on your vanity drawers can make a big difference. Choose designs that match your theme, whether it's vintage, modern, or eclectic.
- Use Creative Lighting: Good lighting is crucial for a makeup vanity. Consider installing LED strip lights around the mirror for a clean, modern look. For a more glamorous touch, add a string of fairy lights or a small chandelier above the vanity.
- Organize with Accessories: Keep your makeup and tools organized with drawer dividers, trays, and holders. These can be found in various materials, such as acrylic, bamboo, or fabric. They not only keep things tidy but also add to the overall aesthetic.
- Personalize with Artwork: Hang your favorite prints or photos above the vanity. This adds a personal touch and can be an excellent source of inspiration as you get ready each day.
- Incorporate Plants or Flowers: A small vase with fresh flowers or a potted plant can bring life to your vanity area. Choose low-maintenance plants that thrive indoors.
- Experiment with Textures: Mix different materials and textures for a unique look. A faux fur rug, a velvet chair, or a wooden tray can add depth to your vanity's design.
- Mirror, Mirror on the Wall: The mirror is the focal point of any vanity. Consider the shape and frame style that best fits your space. An ornate frame can add elegance, while a simple, frameless mirror suits a minimalist aesthetic.
The key to a successful customization is to make it truly yours. Have fun with the process, and don't be afraid to express your individuality!
Safety Precautions for Your IKEA Makeup Vanity
When setting up and using your IKEA makeup vanity, safety should always be a priority. Here are some key precautions to keep in mind:
- Stable Setup: Ensure that your vanity is on a stable, level surface to prevent tipping. If your vanity comes with a wall attachment for extra stability, make sure to use it.
- Electrical Safety: If you're adding lighting around your vanity, be cautious with the wiring. Use only certified electrical components, and if you're not confident in doing it yourself, seek help from a professional electrician.
- Safe Storage: Store heavy items, like hairdryers or large bottles of products, in the lower drawers to lower the center of gravity and reduce the risk of the vanity tipping over.
- Childproofing: If you have children, consider childproof locks on drawers containing sharp objects or toxic substances like nail polish remover.
- Mirror Safety: When installing a mirror, ensure it's securely attached to the vanity or wall. A falling mirror can be dangerous.
- Tool Use: If your vanity hack involves cutting or drilling, always wear protective eyewear and follow the tool manufacturer's safety instructions.
- Ventilation: Some beauty products can be flammable or emit fumes. Use these products in a well-ventilated area, away from open flames.
By following these safety tips, you can enjoy your vanity with peace of mind, knowing you've taken steps to prevent accidents.
FAQs About IKEA Makeup Vanity Hack
Discover all you need to know about the popular IKEA makeup vanity hack, from setup tips to product recommendations, in our comprehensive FAQ guide.
An IKEA makeup vanity hack involves creatively repurposing and enhancing IKEA furniture to create a personalized makeup vanity. It’s a popular way to achieve a custom look and functionality without the high cost of bespoke furniture.
Yes, lighting is a crucial element of any makeup vanity. You can install LED light strips or use a lamp to brighten the area. IKEA offers various lighting solutions that can be easily integrated into your vanity setup.
When assembling your vanity, make sure all components are securely fastened. Use brackets if necessary to stabilize shelves or mirrors. Always follow the assembly instructions provided by IKEA and consider adding a backing board or securing the vanity to the wall for additional support.
To maximize storage, consider adding drawer dividers or storage boxes within the drawers for organized compartments. You can also utilize vertical space by installing floating shelves above the vanity or using a pegboard on the wall to hang frequently used items. Another clever hack is to attach magnetic strips under the tabletop to hold metal accessories and tools.
Personalizing your vanity is all about the details. Choose a color scheme that complements your room and consider painting the vanity to match. Swap out the standard knobs with decorative ones to add a unique touch. You can also apply adhesive contact paper or use washi tape to build patterns or designs on the drawer fronts. Adding plants, photos, or artwork around the vanity can also tie it into the room's overall aesthetic.
Final Thoughts
In conclusion, this IKEA makeup vanity hack can transform your space without breaking the bank. These simple modifications can add both style and functionality to your vanity setup. By using affordable Ikea items creatively, you can build a stunning makeup station tailored to your needs.


