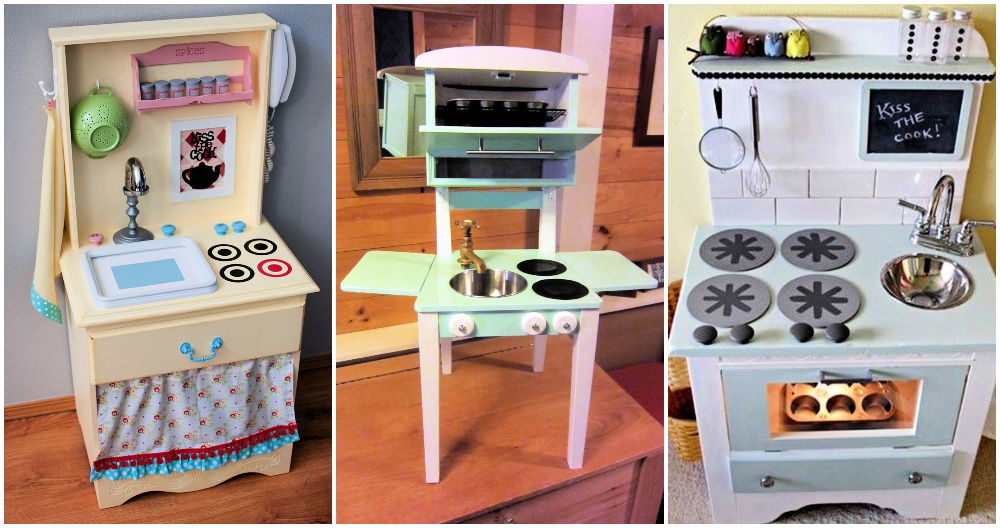
Ever since I first laid eyes on the IKEA DUKTIG play kitchen, I knew it had the potential to become something truly special. As a parent with a knack for DIY projects, I saw beyond its plain appearance and was excited by the prospect of turning it into a custom creation for my little chef.
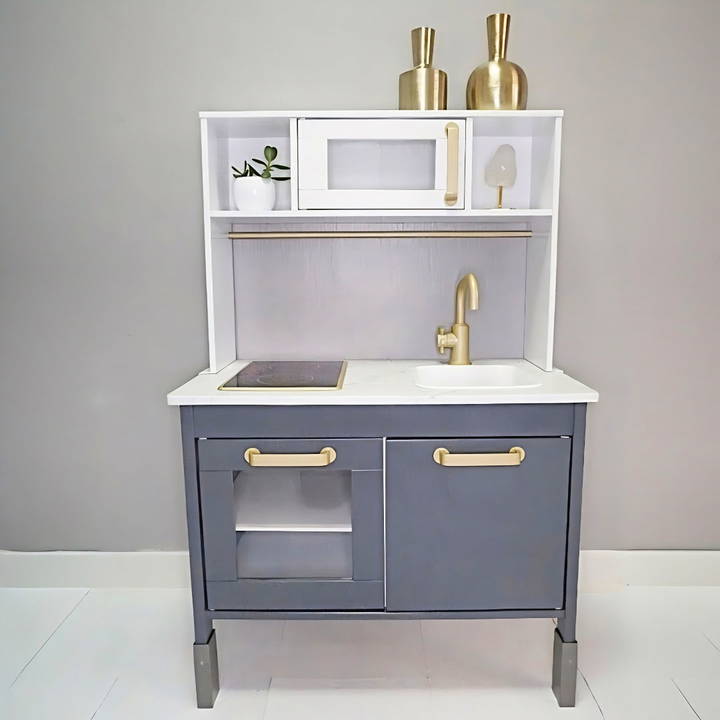
In this article, I'll guide you step-by-step through the process of transforming an IKEA play kitchen, sharing my personal experience while ensuring the advice is filled with insightful tips. So grab your tools, and let's dive into this fun and creative project!
Choosing the Project
The IKEA DUKTIG play kitchen is a minimalist, wooden kitchenette that is beloved for its simplicity and potential for customization. When I stumbled upon the makeover video by LifewiththeSisters, I was instantly inspired. I saw beyond the basic structure to what it could become with a bit of imagination and elbow grease.
Materials Needed and Their Purpose
Before diving into the hack, I carefully selected materials that would not only bring the vision to life but also ensure durability and safety.
- Sandpaper: Essential for smoothing out any rough edges on the wooden surfaces to prepare them for painting.
- Primer and Paint: Non-toxic, child-safe paints and primers are crucial for making a lasting and safe finish.
- Adhesive Vinyl: Ideal for customizing the backsplash with a vibrant pattern without the mess of paint.
- New Hardware: Switching out the basic knobs for more stylish ones adds an instant upgrade.
- Clear Coat: A non-toxic, clear sealant to protect the paint job from inevitable wear and tear.
Step by Step Instructions
Transform your Ikea play kitchen with our easy step-by-step instructions. Achieve a stylish upgrade with simple hacks and tools.
Preparation is Key
First, I disassembled the play kitchen to make each piece accessible for sanding and painting. Every surface was sanded down to ensure the primer and paint would adhere properly.
Prime Time
Once the pieces were smooth, I applied a non-toxic, child-safe primer. This step is crucial for a lasting paint job, especially on surfaces that will endure rigorous playtime.
Let the Painting Begin
Choosing a soft, pastel color palette, I painted each piece with care, applying several thin coats rather than a single thick coat. This approach reduces drips and ensures a smooth finish.
Adding Personality with Vinyl
For the backsplash, I chose a bright, adhesive vinyl with a playful pattern. This not only added a pop of color but was also a significantly quicker and cleaner process than painting a detailed design.
Stylish Hardware
Replacing the basic IKEA knobs with more contemporary ones instantly elevated the look. I selected knobs that were not only stylish but also easy for little hands to grasp.
Seal the Deal
After everything was painted and had thoroughly dried, I applied several coats of a clear, non-toxic sealant to protect against scratches and spills.
Reassembly
With all the pieces painted, sealed, and dry, I reassembled the kitchen, paying close attention to the instructions to ensure everything was secure and properly aligned.
Challenges and Solutions
One of the biggest challenges I faced was ensuring the paint finished was durable and could withstand the enthusiastic play of a four-year-old. I found that investing in a high-quality, non-toxic sealer and applying multiple thin coats of paint, allowing ample drying time between coats was key to overcoming this hurdle.
The Joy of DIY
The look of sheer delight on my niece's face, when she saw her new play kitchen, was overwhelmingly rewarding. It reminded me of the joy and satisfaction that comes from making something with your own hands, especially when it brings happiness to others.
Personalization Ideas for Your IKEA Play Kitchen
Customizing an IKEA play kitchen can be a fun project. Here are tips to make it suit your child's personality and match your home's style.
- Choose a Theme: Start by picking a theme that your child loves. Whether it's a favorite color, a beloved cartoon character, or a particular hobby, use this as the inspiration for your design. For example, if your child loves nature, you might opt for a garden-themed kitchen with green and brown tones and floral decals.
- Add a Personal Touch with Paint: A fresh coat of paint can completely transform the look of the play kitchen. Choose non-toxic, child-safe paint in colors that match your chosen theme. You can paint the entire kitchen one color or use several colors to build patterns or designs.
- Swap Out the Hardware: Changing the knobs and handles in the kitchen can make a big difference. Look for hardware that's easy for little hands to grasp. You can find knobs in various shapes, like stars or animals, which can add a playful touch.
- Build a Backsplash: A DIY backsplash can add a lot of character to the kitchen. Use adhesive vinyl or contact paper to build a tiled effect, or get creative with washi tape for a custom design.
- Fabric Details: If the kitchen has a curtain or any fabric elements, consider replacing them with fabric that fits your theme. This is an easy way to add patterns or characters without permanent changes.
- Personalized Name Sign: Make your child feel like a real chef with a personalized name sign. You can build this with stickers, paint, or a custom print that fits above the kitchen.
- Interactive Elements: Add elements that encourage play, like a menu board where your child can write daily specials or hooks to hang play utensils and pots.
- Light It Up: If the kitchen doesn't have a light, consider adding a battery-operated LED light under the shelf. It's safe for kids and adds a realistic touch.
- Storage Solutions: Personalize the storage by adding bins or baskets that match the theme. Label them with pictures or words to help your child learn where everything goes.
- Safety First: Ensure all materials and modifications are safe for children. Avoid small parts that could be a choking hazard, and ensure everything is securely attached.
Use these personalization tips to craft a unique and fun play kitchen reflecting your child's individuality. Keep it enjoyable and involve your child in the decisions to make it a special project.
Safety Tips for Assembling and Enjoying Your IKEA Play Kitchen
Ensuring the safety of your children while they play is paramount. When assembling and customizing your IKEA play kitchen, here are some key safety tips to keep in mind:
- Sturdy Assembly: Follow the IKEA instructions carefully to make sure every part is securely fastened. A stable kitchen is less likely to tip over or come apart.
- Anchor It: If possible, anchor the kitchen to a wall to prevent tipping. This is especially important if you have climbers who may try to scale the kitchen.
- Non-Toxic Materials: Use only non-toxic paints and finishes. Children often put their hands in their mouths, so it's crucial to use materials that are safe if ingested.
- Avoid Sharp Edges: If you're adding custom elements, ensure there are no sharp edges or corners where children could hurt themselves.
- Choking Hazards: Be mindful of small parts that could become loose and pose a choking hazard. Regularly check the kitchen for any pieces that might have come free.
- Heat Elements: If your kitchen has elements that simulate heat, like a light-up stove, make sure these are not hot to the touch.
- Electrical Safety: Avoid real electrical components. If you're adding lights, use battery-operated LEDs rather than anything that plugs in.
- Supervision: Always supervise young children during play, especially if they're using play kitchen tools that could be used improperly.
- Educate Your Child: Teach your child about kitchen safety. Explain that in a real kitchen, stoves are hot and knives are sharp, and establish rules for safe play.
- Regular Inspections: Periodically inspect the play kitchen for loose screws, worn parts, or damage that could cause injuries.
By following these safety tips, you can build a fun and secure environment for your child to engage in imaginative play. The goal is to foster a safe space for creativity and learning.
FAQs About IKEA Play Kitchen Hack
Discover the top FAQs about IKEA play kitchen hacks, including tips, materials, and customization ideas to enhance your child's play kitchen.
You can easily personalize your IKEA Duktig play kitchen by painting the hardware, such as handles, tap, and sink, with spray paint for a fresh look. Additionally, swapping out the plastic handles with ones that match your home’s style can make a significant difference. For a creative touch, consider adding a backsplash using wallpaper or adhesive tiles.
To enhance the interactive aspect of the play kitchen, you can incorporate elements that mimic real-life kitchens. This could include adding hooks for utensils, using contact paper to build a faux countertop, or installing LED touch lights for under-cabinet lighting. These additions can make the play experience more engaging and realistic.
Absolutely! The IKEA Duktig kitchen's neutral design makes it an ideal canvas for various themes. Whether you're aiming for a retro, modern, farmhouse, or vintage vibe, you can achieve it by selecting appropriate colors, patterns, and accessories to match your desired theme.
For a cost-effective update, consider using leftover materials from other projects, such as paint or wallpaper. You can also look for affordable hardware replacements online or at local hardware stores. Simple changes like these can have a big impact without breaking the bank.
When customizing the play kitchen, always use non-toxic, child-safe materials. Ensure that all small parts are securely attached to prevent choking hazards and avoid sharp edges by choosing appropriate materials and installation methods. Regularly inspect the kitchen for any wear and tear to maintain a safe play environment.
Final Thoughts
The transformation of the IKEA play kitchen has shown me how a simple object can be elevated into a unique masterpiece with a little creativity and effort. It's more than just a play set; it's a testament to what can be achieved when creativity meets practical application. I hope this guide has provided valuable insights and encouragement for your own DIY endeavors.


