Transforming a simple piece of furniture into something uniquely yours can be truly satisfying. When I decided to give an IKEA RAST hack, turning it into an eye-catching nightstand, I embarked on a creative process filled with insightful steps and choices. This guide will help you explore all the necessary steps, tips, and materials needed for a successful transformation.
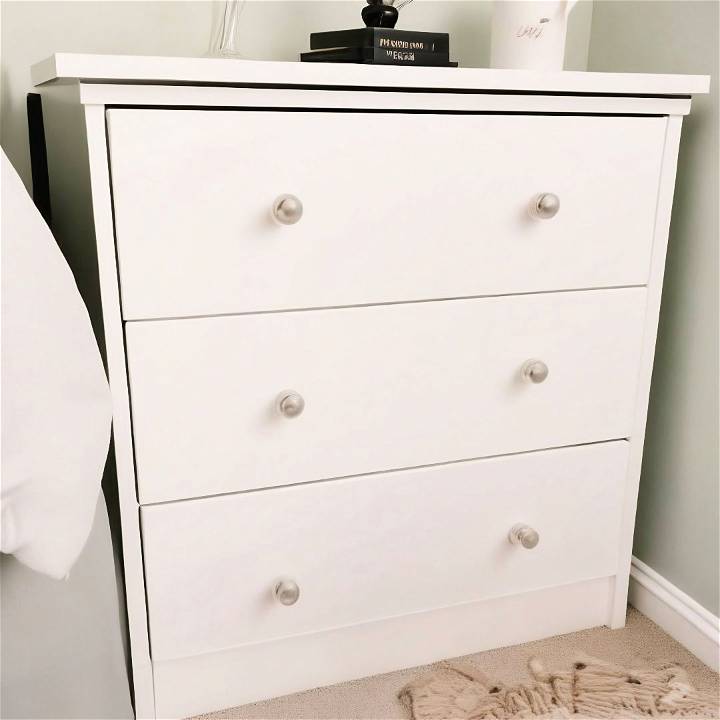
My experience in upgrading the IKEA RAST dresser involved careful planning and detailed execution. From selecting the right paint and tools to the final touches that make a big difference, I’ll share all the handy tips that can make your project smooth and enjoyable. Ready to start your own nightstand transformation? Discover the next steps and bring your ideas to life.
Choosing the Materials
Before diving into the makeover, selecting the right materials was key. I opted for:
- Zinsser 1-2-3 Primer: This primer is excellent for ensuring that the paint adheres well and provides a smooth finish.
- PPG Diamond in Satin Finish: I wanted a durable paint with a slight sheen, and this one was perfect.
- Wood glue, hammer, and finish nails: Essential for attaching the new wood top securely.
- High-density foam roller: For a smooth paint job, avoiding visible brush strokes.
- Variety pack sandpaper: Starting from coarse-grit for initial sanding to fine-grit for a smooth finish.
- Wood for the new top: Custom cut to give an overhang look, making the nightstand appear more elegant.
Step by Step Instructions
Learn how to transform your dresser with our step-by-step instructions, from prepping and priming to painting and sanding for a perfect finish.
Step 1: Preparing the Dresser
The first step involved lightly sanding the dresser. This was crucial for removing any rough spots and ensuring the primer would stick. It also allowed me to start with a fresh, clean surface.
Step 2: Priming with Care
Once sanded, I applied a coat of Zinsser 1-2-3 Primer. The primer is essential, especially for raw wood, as it prevents the wood from absorbing too much paint and ensures an even finish. This step sets the foundation for a lasting and durable paint job.
Step 3: Attaching the New Wood Top
For the new top, I went with a design that had an inch overhang on the sides and a half-inch overhang from front to back. The dimensions were carefully selected to give the piece a more customized and high-end look. After measuring and cutting the wood, I used wood glue and finish nails to attach it securely. This not only added to the aesthetic but also increased the functionality of the dresser by providing more surface area.
Step 4: The Painting Process
After priming, it was time for the paint. I applied two coats of PPG Diamond in a Satin Finish for that perfect blend of durability and elegance. I found that using a high-density foam roller gave me the smoothest finish, avoiding the dreaded brush strokes.
Step 5: Sanding the Final Touches
For a bit of sparkle, I chose glass knobs that beautifully complemented the newly painted dresser. However, the screws that came with the knobs were too long, so I had to employ a simple yet effective hack using washers to bridge the gap. This not only secured the knobs but also added to the custom look I was aiming for.
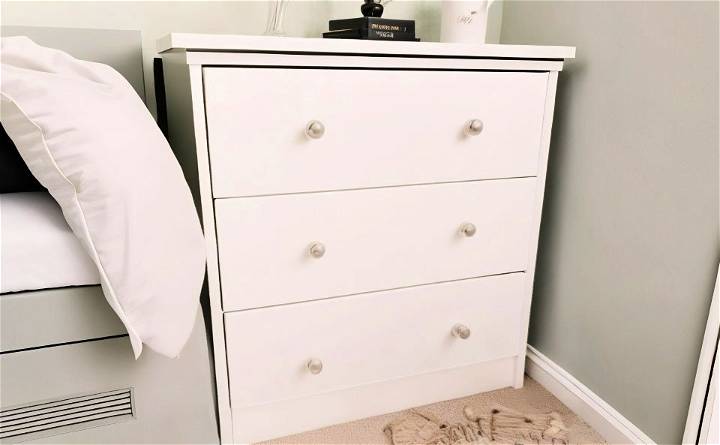
The result was stunning. The nightstand is functional and elegant. The glass knobs shine delightfully, and the paint's smooth finish shows the care taken.
Key Takeaways
Throughout this makeover journey, here are some valuable insights I gained:
- Never underestimate the power of prep work. Sanding and priming set the stage for a flawless finish.
- Custom adjustments, like adding a wood top with an overhang, can elevate the look of any piece.
- Sometimes, you need to be creative with solutions, like using washers to adjust the length of screws for the knobs.
Personalization Ideas for Your IKEA Rast Dresser
Transforming your IKEA Rast dresser into a piece that reflects your personal style doesn’t have to be complicated. Here are some simple yet effective ideas to personalize your dresser:
- Choose Your Color Palette: Think about the colors that make you feel at home. Do you prefer warm, cozy tones or cool, calming shades? Paint your Rast dresser to match your mood. For a unique touch, consider using chalk paint for a matte finish or milk paint for a distressed look.
- Swap Out the Hardware: The knobs and pulls on your dresser can dramatically change its appearance. Replace the standard hardware with something that speaks to your style—vintage brass for an antique feel, sleek chrome for a modern touch, or colorful ceramic for a playful vibe.
- Add Some Texture: Use fabric, wallpaper, or wood veneer to add texture to the drawer fronts. This can create depth and interest, making your dresser stand out. Adhesive contact paper is a great option for an easy and reversible update.
- Get Creative with Legs: Elevate your dresser—literally—by adding or changing its legs. Hairpin legs can give it a mid-century modern look, while chunky wooden legs can add a rustic charm.
- Stencil or Freehand Designs: If you’re artistically inclined, draw or stencil a design onto the drawers. Geometric patterns, floral motifs, or even a simple monogram can make your Rast uniquely yours.
- Top It Off: The top of your dresser is prime real estate for personalization. Consider adding a glass top for a sleek surface, or use reclaimed wood for a warm, rustic finish. You can also use the top as a canvas for decoupage with maps, book pages, or fabric.
- Inside Matters Too: Don’t forget the inside of the drawers! Line them with scented drawer liners or decorative paper. It’s a hidden detail that adds a delightful surprise every time you open a drawer.
Personalization means making choices that show who you are. Mix and match ideas to create something unique. Most importantly, have fun! Your IKEA Rast dresser is a blank canvas for your creativity.
Maintenance and Care for Your IKEA Rast Dresser
Keeping your IKEA Rast dresser in top condition is straightforward and doesn’t require much effort. Here’s how you can maintain its beauty and functionality over time:
- Regular Cleaning: Dust the dresser regularly with a soft, dry cloth. For stains or spills, use a damp cloth with mild soap. Avoid harsh chemicals that can damage the wood finish.
- Protect the Surface: Use coasters or placemats to prevent water rings and scratches. If you’ve painted your dresser, consider a clear sealant for extra protection.
- Tighten Hardware: Over time, drawer knobs and screws may loosen. Check them every few months and tighten them as needed to ensure everything stays secure.
- Drawer Care: Avoid overloading drawers to prevent sagging or damage. If the drawers start to stick, apply a small amount of beeswax or soap on the runners for smoother operation.
- Avoid Direct Sunlight: Prolonged exposure to sunlight can fade the wood. Position your dresser away from direct sun or use curtains to filter the light.
- Humidity Control: Wood can warp in high humidity. Keep the room well-ventilated or use a dehumidifier during damp seasons.
- Touch-Ups: If the paint chips or the wood gets nicked, touch up the area with matching paint or a furniture repair marker.
By following these simple care tips, your IKEA Rast dresser will continue to look great and serve you well for years to come.
FAQs About IKEA Rast Hack
Discover everything you need to know about the IKEA rast hack in our comprehensive faqs, from customization tips to step-by-step guides.
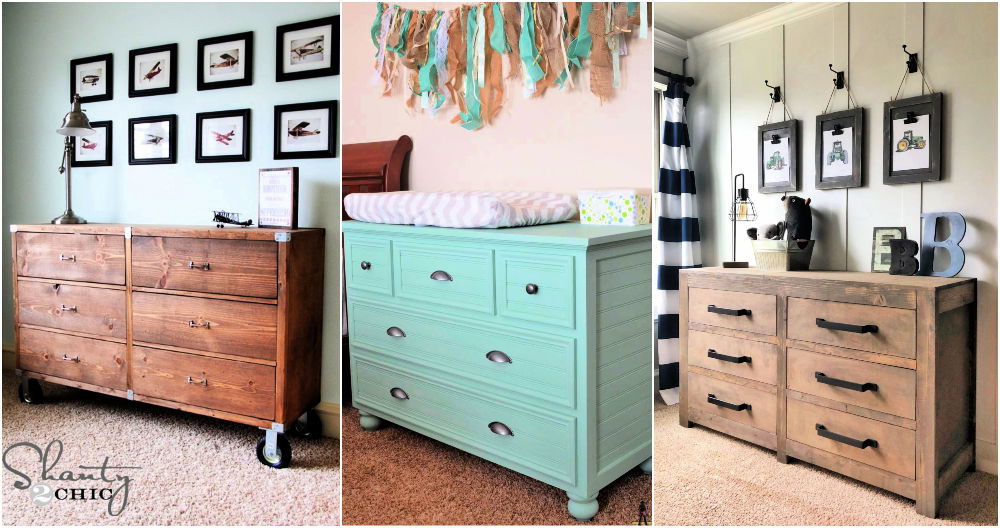
The IKEA Rast dresser is a simple, solid pine chest of drawers that’s become a favorite for DIY enthusiasts. Its popularity stems from its affordability, plain design, and the fact that it’s made of unfinished wood, making it a blank canvas for creative hacks.
Absolutely! Here are a few ideas:
Rustic Hallway Dresser: Add legs and wood embellishments for a rustic look.
Vintage Suitcase Fronts: Paint and accessorize to mimic the look of stacked vintage suitcases.
Mid-Century Modern Style: Keep it simple with a stain and retro legs for a classic mid-century modern vibe.
Bar Cart: Transform it into a mobile bar cart with paint, casters, and hardware.
Library Card Catalog: Create a nostalgic piece by mimicking the look of an old library card catalog.
Here are some tips to ensure a great result:
Preparation: Sand the wood if necessary and apply a primer if you’re going to paint it.
Hardware: Upgrade the knobs or pulls for an instant visual lift.
Stability: When adding legs, ensure you reinforce the bottom with additional wood to support the new legs.
Finishing Touches: Don’t forget the power of stain or paint to change the look completely. Seal with a clear coat for durability.
Yes, consider the following:
Functionality: Decide on the dresser’s purpose post-hack. This will guide your design choices.
Budget: Factor in the cost of additional materials and tools.
Space: Measure your space to ensure the hacked dresser will fit and function well.
Skill Level: Choose a project that matches your DIY skills to ensure a successful transformation.
There are many resources online where you can find step-by-step guides and inspiration for your IKEA Rast hack. Websites like IKEA Hackers, The Spruce, and various DIY blogs offer detailed tutorials that can help you through the process. Remember to check the difficulty level and required tools before starting your project.
Final Thoughts
Tackling a DIY IKEA RAST dresser makeover was a fulfilling project that breathed new life into an ordinary piece of furniture. The process taught me the importance of patience, precision, and creativity in transforming something basic into something beautiful. Whether you're an experienced DIYer or a novice, I hope my journey inspires you to take on your project, infusing your personality and style into your living space.


