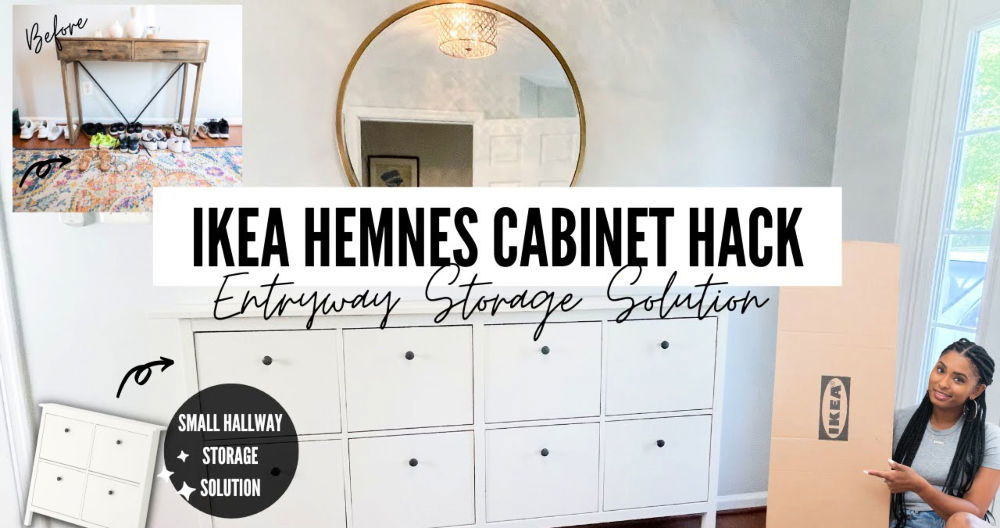
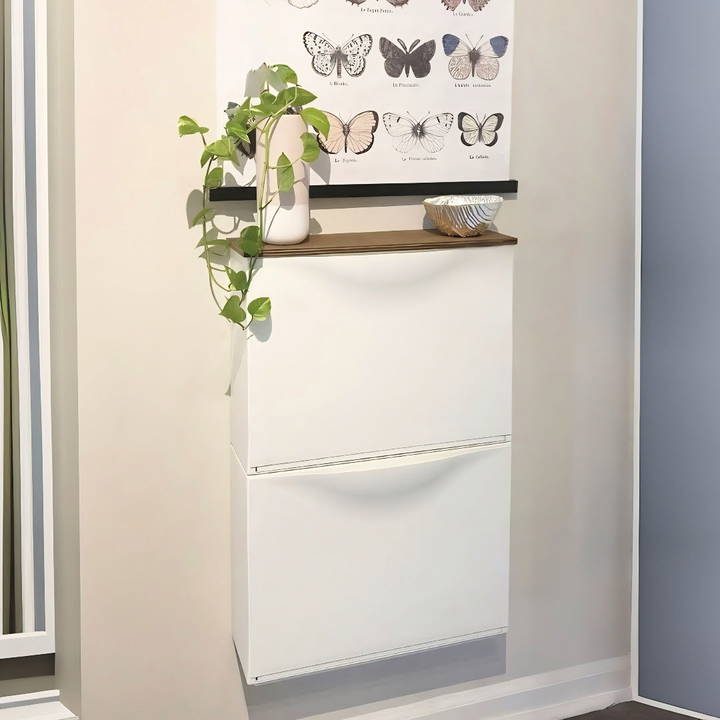
Hi there, I'm Gabby. Welcome or welcome back to my blog! Today, I'm excited to share a small entryway makeover using an IKEA Trones hack that I discovered. My goal was to build a beautiful and functional entryway table from an IKEA shoe cabinet. After much planning and execution, I'm thrilled with the results and eager to guide you through the step-by-step process.
Understanding the Space and Setting Objectives
Before diving into the makeover, I evaluated my entryway's existing state. It is a tiny space, directly off my kitchen. To the right is an eyesore of an electrical panel and an old security system. Opposite is my pantry, which I previously revamped (check out that makeover too!). My objective was clear: I needed to introduce storage for shoes, keys, wallets, and other essentials while enhancing the aesthetics.
Choosing the Right Furniture: IKEA Trones Shoe Cabinet
The IKEA Trones shoe cabinet emerged as the perfect solution due to its practicality and size. Here are a few reasons why I chose this particular item:
- Flexible Storage Options: The set includes two cabinets, which are excellent for storing shoes, coats, and bags. Despite being made of plastic, its utility is unquestionable.
- Space-Friendly Dimensions: At only seven inches deep, it's ideal for tight spaces like mine, allowing placement behind the door without obstruction.
Materials Needed:
- IKEA Trones shoe cabinet: The star of the show, chosen for its compact size and storage efficiency.
- Wooden board: To build a sophisticated top for the Trones, making it look more like an entryway table.
- Wood stain (Special Walnut): To give the wooden top a richer appearance and enhance its texture.
- Foam brush and clean rags: For applying and wiping off the wood stain.
- Wall anchors (50 pounds): To securely mount the Trones to the wall, ensuring it can hold the weight of stored items.
- Gorilla wood glue: For attaching the wooden top to the Trones, ensuring a sturdy and seamless integration.
Step by Step Instructions
Discover easy step by step instructions on ikea trones hack to transform your storage solutions with creative and practical DIY ideas.
1. Staining the Wood
I started by staining the wooden board with a foam brush and meticulously working the stain in the direction of the wood grain. This process not only enhances the visual appeal of the board but also provides a durable top surface for the entryway table. Wiping off the excess with a clean rag, I achieved a consistent and professional-looking finish.
2. Mounting the Cabinet
With the stain drying, I turned my attention to the Trones cabinet. The first step involved deciding on the exact placement and marking the drilling points with a pencil. I opted for 50-pound wall anchors to ensure the cabinet's stability, given my plans to store shoes and heavier items inside.
3. Building a Sophisticated Top
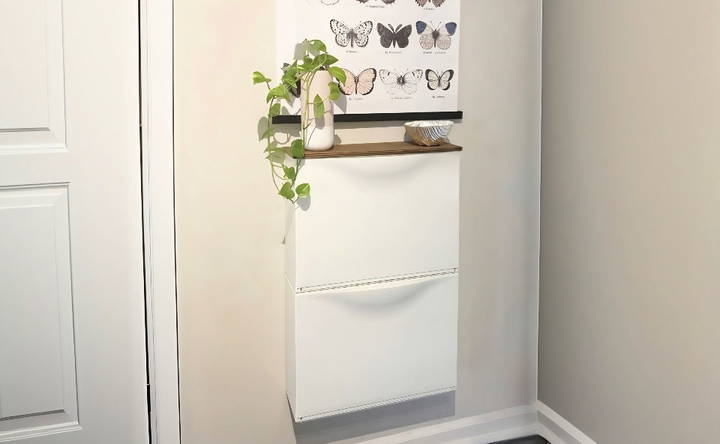
For a more polished and custom look, I attached the stained wooden board on top of the Trones. To prevent the top from shifting, I glued two smaller wood pieces to its bottom, fitting snugly into the cabinet's indent. This clever addition promised a seamless integration, transforming the Trones into what appeared to be a bespoke piece of furniture.
With the main structure done, it was time to style the space. I hid an old security panel with oversized art and added decor like a spray-painted mirror to match metal accents, a chic bowl for keys, and a vase for greenery.
Customization Ideas for IKEA Trones
When it comes to adding a personal touch to your IKEA Trones, the possibilities are endless. Here's how you can transform this versatile piece to fit your unique style and needs:
- Choose Your Palette: Start by selecting a color scheme that reflects your personality and complements your space. Whether you prefer soft pastels, vibrant hues, or classic neutrals, painting your Trones can instantly uplift the look.
- Add Texture and Patterns: Consider using contact paper, wallpaper, or fabric to add texture or patterns to the Trones' surface. This can range from geometric shapes to floral designs, depending on the ambiance you're aiming for.
- Functional Flair with Hardware: Swap out the standard knobs or handles with something more ornate or modern. Brass pulls, leather straps, or even hand-painted ceramic knobs can make a big difference.
- Top It Off: Utilize the top surface of your Trones for additional customization. A wooden top can add warmth and provide a sturdy surface for decor items or practical use.
- Inside Story: Don't forget the inside! Lining the interior with a contrasting color or pattern can be a delightful surprise when you open the cabinet.
- Legs to Stand On: Elevate your Trones by adding legs. This not only changes the height for practical reasons but also can shift the entire aesthetic from floating to grounded.
- Light It Up: Incorporating lighting, such as LED strips inside or under the Trones, can build ambiance and improve functionality in darker spaces.
- Accessorize: Lastly, accessorize your Trones with items that serve your needs and enhance its appearance. Baskets, bins, and dividers can help organize the space, while decorative items like vases or frames can add character.
The key to successful customization is to ensure it not only looks good but also serves your lifestyle and needs. With these ideas, your IKEA Trones will become a reflection of your personal style and a functional piece in your home.
Troubleshooting Common Issues with IKEA Trones Hacks
When customizing your IKEA Trones, you might encounter a few hiccups along the way. Here's how to troubleshoot some of the most common issues:
Paint Not Adhering
- Solution: Ensure the surface is clean and apply a primer suitable for plastic surfaces before painting. Lightly sanding can also help the paint adhere better.
Wallpaper Peeling Off
- Solution: Use a strong adhesive designed for the material you're applying. Make sure the surface is free of dust and moisture before starting.
Difficulty Aligning Multiple Units
- Solution: Measure and mark your wall before mounting. Use a level to ensure everything is straight. Consider using a template for consistent placement.
Doors Not Closing Properly
- Solution: Check if the units are mounted evenly and adjust if necessary. If the problem persists, the hinges may need tightening or replacing.
Trones Becoming Unstable with Added Legs
- Solution: Choose legs that can support the weight and ensure they are securely attached. If the unit is wall-mounted, make sure it's properly anchored.
LED Lights Not Working
- Solution: Double-check the wiring and connections. Ensure the power source is reliable and the LED strips are compatible with the Trones material.
Storage Unit Looks Bulky
- Solution: Opt for lighter colors and sleek hardware to maintain a minimalist look. Use mirrors or glossy finishes to give the illusion of more space.
Accessories Not Fitting Inside
- Solution: Use organizers and dividers that are specifically designed for the Trones dimensions. Custom-fit inserts can maximize the storage capacity.
By addressing these common issues, you can ensure your IKEA Trones hack is not only stylish but also functional and durable.
FAQs About IKEA Trones Hack
Discover everything you need to know about faqs about ikea thrones hack: installation tips, design ideas and customization options.
IKEA Trones is a versatile storage unit that’s primarily designed for shoe storage but can be adapted for various uses around the home. It’s a sleek, space-saving cabinet that can be used in entryways, kitchens, bedrooms, and even as a floating nightstand or a console table.
You can personalize your IKEA Trones by adding a countertop in a contrasting or light color to match your space. Painting or spray painting the unit in a color of your choice is a quick and easy makeover. Additionally, you can add different pulls and handles to enhance its appearance.
Absolutely! IKEA Trones can be hacked to serve as a floating vanity, laundry cabinet, sheet music storage, or even stacked vertically to build a tall storage unit. Its shallow design makes it ideal for tight spaces where you need organized storage.
Yes, IKEA Trones can be creatively used as a space divider. By adding a glass piece on top or arranging several units creatively, you can divide a room while adding storage and aesthetic value.
When mounting IKEA Trones, ensure you have a drill and screws for secure attachment. Plan the placement carefully, especially if you're stacking units vertically, to ensure stability and safety. Always follow the manufacturer's instructions for wall mounting to prevent accidents.
Final Thoughts
Wrapping up, upgrading tiny entryway with an IKEA Trones hack can transform your space into an organized and stylish area. By utilizing the versatile and affordable Trones, you can maximize storage while keeping your entryway clutter-free. This simple yet effective hack not only enhances the aesthetics but also offers practical solutions for small spaces. So, get creative and give your entryway a fresh, new look with this innovative idea!


