Installing a drop ceiling in a basement can be an excellent way to add a finished look to the space while providing access to overhead utilities. Drop ceilings, also known as suspended ceilings, have grids that support lightweight ceiling panels, making them easy to remove if you ever need to access wiring, plumbing, or ductwork. Below, we'll walk you through each step of installing a drop ceiling, including essential planning, the necessary tools, and specific tips for a smooth process.
Tools and Materials Needed
Discover essential tools and materials needed for hot tent camping to ensure a safe and warm outdoor experience in any season.
Tools:
- Tin Snips
- Utility Knife
- Straight Edge
- Drill
- Tape Measure
- Hammer
- Chalk Line
- Self-tapping Screws
- Laser Level (or traditional level)
- Painter's Tape or Bar Clamps (optional for solo work)
Materials:
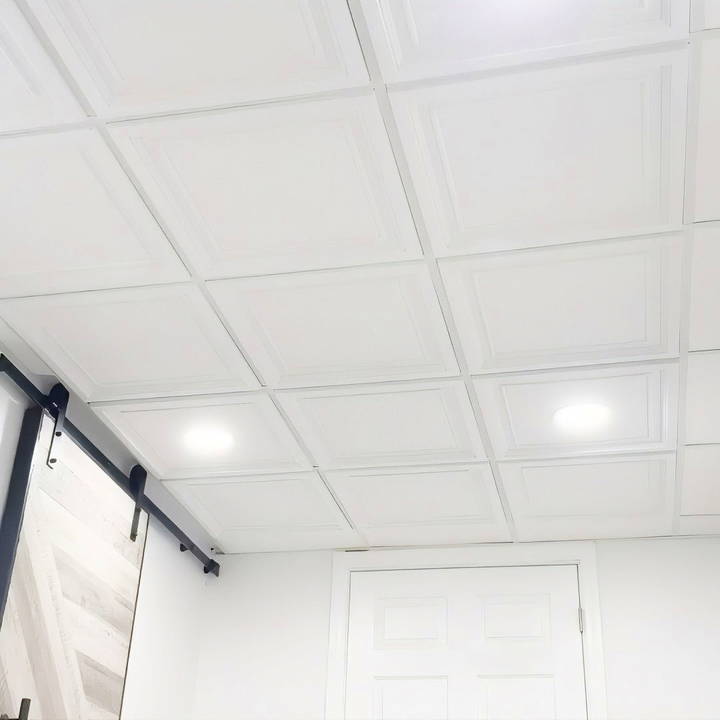
- Drop Ceiling Panels (e.g., Armstrong's Shallow Coffer Panels or Flat White Panels)
- QuickHang Hardware (for ease of installation)
- Grid System components (main beams and cross tees)
- Wall Moldings
- Recessed Lights (optional)
Step by Step Instructions
Learn how to install a drop ceiling with our step-by-step guide. From planning to finishing, achieve a professional look with ease.
Step 1: Plan the Drop Ceiling Layout
Good planning is crucial for a successful drop ceiling installation. Before you even start, measure your room carefully to ensure you know exactly how many ceiling panels and grid components you'll need.
- Measure the Room: Determine the room dimensions, noting any obstructions like pipes or ducts.
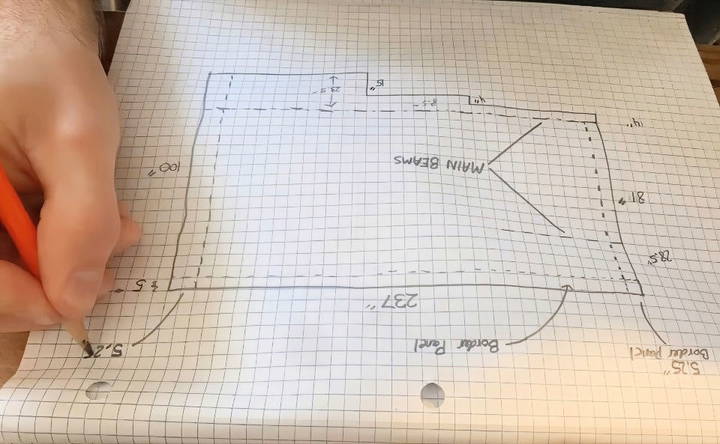
- Sketch the Layout: Either use graph paper or a digital tool. Online resources, like Armstrong's layout calculator, can simplify this by allowing you to enter room dimensions, ceiling joist direction, and panel size to calculate panel needs and determine border widths.
- Plan Border Panels: Calculate even borders by dividing the remaining space after placing full panels. For instance, if you have a 132-inch wall and need five full 24-inch panels, you'll be left with 12 inches. Divide this by two to have a six-inch border panel on each side.
Step 2: Install Wall Moldings
Wall moldings are crucial as they hold the perimeter of the ceiling grid in place.
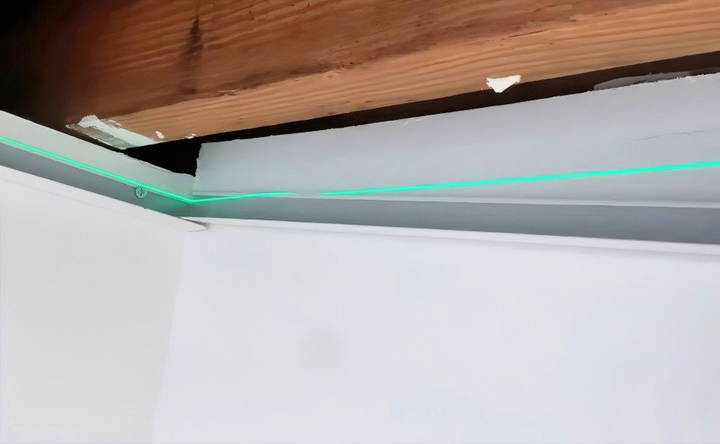
- Mark a Level Line: Use a laser level to establish a level line on all four walls, marking where the top of the wall moldings should go. Confirm with the ceiling's manufacturer on the clearance needed below the ceiling joists.
- Attach the Wall Moldings: Position the 90-degree wall molding along the marked line and secure it to the studs with self-tapping screws every 16 inches. If working alone, painter's tape or clamps can help hold one end while you secure the other.
- Inside and Outside Corners: For inside corners, butt the ends of the moldings together.
- For outside corners, mark and cut 45-degree angles with tin snips for a clean, mitered finish.
Step 3: Install Hanger Wire or QuickHang Hardware
To support the center of the grid, you'll need to install either a hanger wire or QuickHang hardware, depending on your preference.
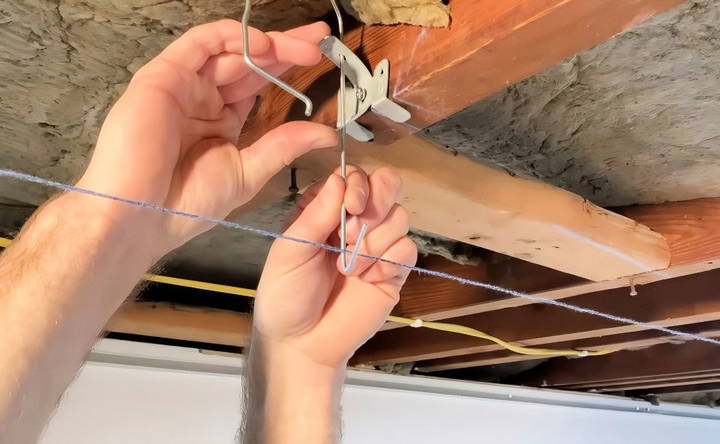
- Set Up QuickHang Hardware: Attach QuickHang brackets to the ceiling joists at measured intervals, either the length of a border panel or a full panel away from the wall molding.
- Use a Chalk Line or Laser Level: Measure and snap a chalk line or use a laser level to ensure all brackets are level.
- Space Out Brackets: Each bracket should be no more than four feet apart to provide adequate support.
- Install the QuickHang Hooks: Insert the QuickHang hooks into each bracket. Adjust their height using a string line at the top of the wall molding to ensure they are all level.
Step 4: Prepare and Hang the Main Beams
The main beams are the structural elements of the drop ceiling grid, and they need precise installation for an even and square ceiling.
- Cut the Main Beams: Before placing the beams, trim the ends so that the first cross tee slots align with your planned border panel. Cut the top and bottom of the beam with tin snips to fit neatly against the wall molding.
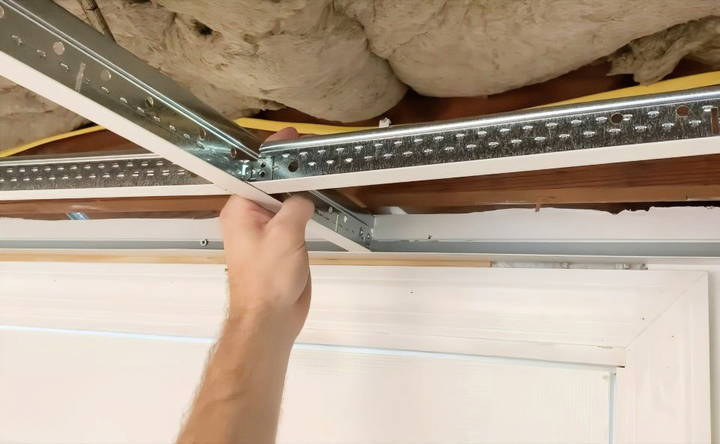
- Attach the Main Beams to the Hooks: Place the cut end of the main beam on top of the wall molding, threading the hooks through the beam's perforations.
- Connect Beam Sections: If your room requires longer beams, connect additional beam sections by aligning the tabs at each end and pressing them until they click into place.
- Space Beams 4 Feet Apart: Ensure beams are evenly spaced, as this determines the structure of the entire ceiling grid.
Step 5: Install Border and Cross Tees
After setting up the main beams, it's time to add the border and cross tees that complete the grid structure.
- Install Border Tees: Cut the border tees to fit between the wall molding and main beam. Insert one end into the main beam and rest the other on the molding.
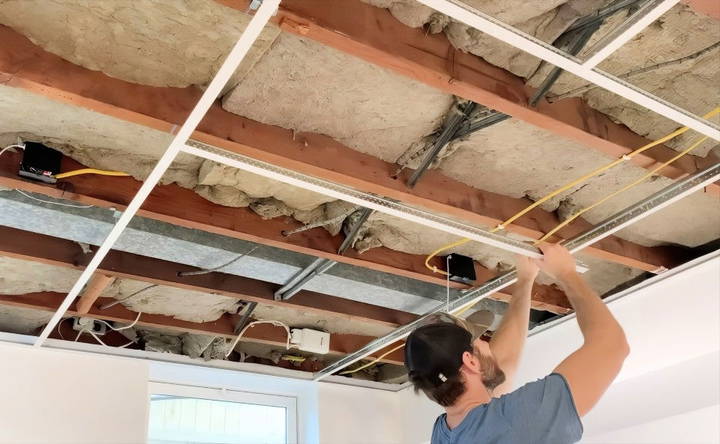
- Add Cross Tees: Insert four-foot cross tees between the main beams, lining them up with the border tees. Repeat this process for all four-foot sections.
- Square the Grid: Measure the diagonal distances across each grid opening. If both diagonal measurements match, the grid is square. Adjust as needed until all measurements are equal.
Step 6: Install Remaining Grid Components and Level the Ceiling
- Install Remaining Tees: Continue filling in the grid by adding all necessary two-foot cross tees between the four-foot cross tees if you're using two-by-two panels.
- Level the Grid: Use a magnetic level on each main beam to confirm that everything is level. Adjust the QuickHang hooks if necessary to ensure all sections are even.
Step 7: Install Drop Ceiling Panels
Once the grid is complete and level, you're ready to install the ceiling panels.
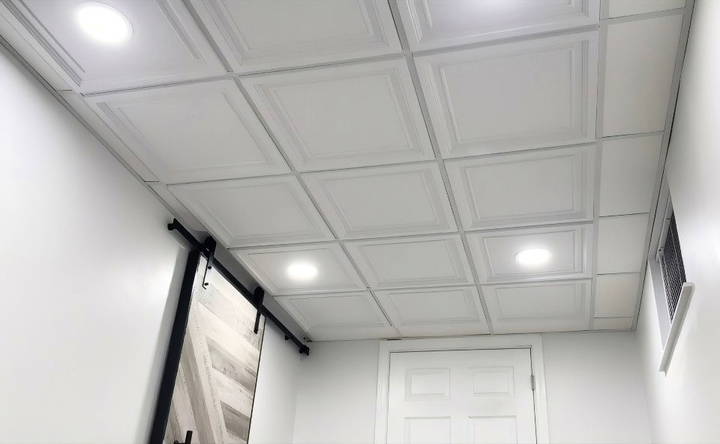
- Insert Full Panels First: Tilt each panel into the grid at an angle and gently lower it until it rests securely. Armstrong's shallow coffer and flat white panels offer easy installation.
- Cut Border Panels as Needed: Measure the size of your border panels, mark them on the back of each panel, and score them with a utility knife for a clean snap. Insert the cut panels into the grid along the borders.
- Install Recessed Lighting (Optional): If your design includes recessed lights, mark and cut out openings in the panels using the provided template. Insert each light, ensuring the tabs engage for a secure fit, and connect the wiring as per the manufacturer's instructions.
Tips for a Professional Finish
- Clean Hands for PVC Panels: Many drop ceiling panels, especially PVC-based ones, are prone to visible fingerprints. Wash your hands thoroughly before handling them.
- Mind Ceiling Fixtures: Plan for any light fixtures or air vents in advance. These may require cutting into panels, so use a template for precision.
- Insulation and Soundproofing: After installing wall moldings but before hanging the grid, consider adding soundproofing or insulation for added comfort, especially in basements.
Final Steps and Project Wrap-Up
Once all the panels are in place, step back and inspect the ceiling for level, alignment, and any minor adjustments needed.
Additional Considerations:
- Maintenance Access: Ensure you can easily remove specific panels if you need to access utilities in the ceiling.
- Check Manufacturer's Guidelines: For further adjustments, refer to the ceiling manufacturer's instructions, particularly for more complex designs or materials.
Congratulations on completing your drop ceiling installation! This project may take time, but it's a great way to improve the look of your basement while offering practical benefits. Regularly check for any adjustments and keep extra panels and parts on hand for quick repairs or replacements.
By following these steps, you'll have a beautiful, accessible, and efficient ceiling that transforms your basement into a polished, functional space.
FAQs for Installing a Drop Ceiling
Explore easy solutions and expert tips in our FAQs for installing a drop ceiling to ensure a smooth and efficient installation process.
A drop ceiling provides easy access to utilities like plumbing and wiring, which is especially helpful for repairs or upgrades. Additionally, drop ceilings offer flexibility for adding features such as recessed lighting or soundproofing, making them ideal for basements with potential water or utility issues.
Most manufacturers suggest a 4-inch clearance between the joists and the drop ceiling. This spacing allows for sufficient airflow and room for installing recessed lights or other fixtures.
If your walls are not perfectly square, install two main beams with two cross tees and check for square before adding more beams. This method allows you to adjust without wasting materials if adjustments are needed due to uneven walls.
Yes, you can. However, ensure that all grid connections and hooks are tightly secured to prevent any loosening due to vibration. Additionally, choose sturdy panels to minimize rattling.
Plan your lighting layout before installing the grid. You can use standard recessed lighting fixtures or opt for “wafer lights” that don’t require a can, which are compatible with shallow ceiling spaces.
To build a professional border, divide the remaining space on each wall by two, then cut panels to achieve equal borders on each side. Mitering the corners at 45 degrees also builds a neat, finished appearance.
PVC-based panels are recommended for basements as they are moisture-resistant. Installing proper ventilation and addressing any potential leaks before installation will also help prevent moisture issues.
For angled ceilings, measure from the highest point to the lowest to determine panel alignment. Use shorter hooks on the higher side to ensure an even grid. If necessary, consider installing a soffit for consistency.
Yes, drop ceiling panels, especially lighter PVC options, can support LED recessed lights as they typically weigh only a few ounces. Ensure the panels are securely positioned within the grid to support the fixtures over time.
While drywall generally costs less per square foot, a drop ceiling's maintenance and accessibility benefits may offset the initial price difference, especially in areas prone to plumbing or electrical updates.


