Installing vinyl plank flooring can seem daunting, but I promise it's manageable. My first time was a learning adventure. I started by clearing the room and ensuring the floor was clean and smooth. After watching a few videos and reading instructions, I felt more confident.
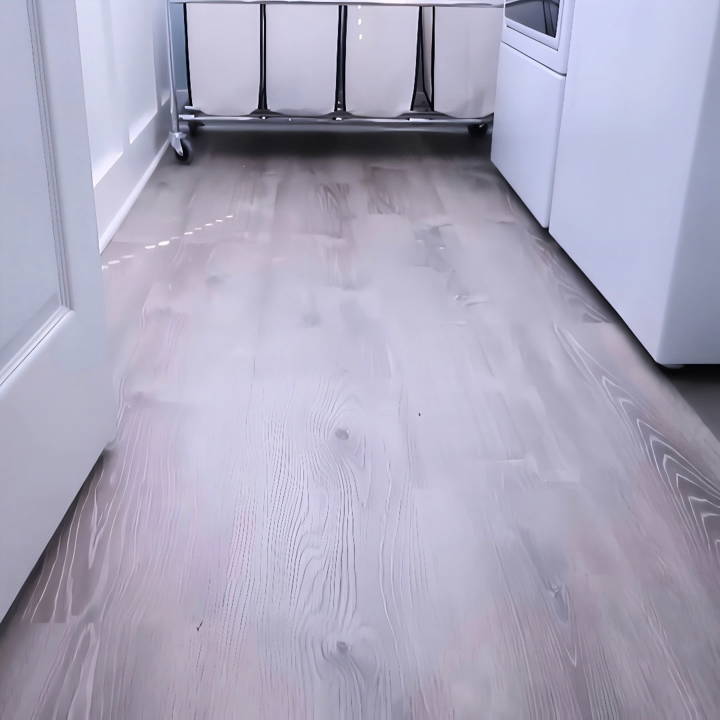
The process was like assembling a large puzzle. Measuring and cutting the planks to fit was a bit challenging, but the satisfaction of seeing the finished floor made it worth it. With patience and accurate cuts, I transformed my room into a new, beautiful space.
If you're ready to enhance your home with vinyl plank flooring, these tips will guide you through a successful installation. I'm here to help with simple instructions to get you started.
What is Vinyl Flooring?
Vinyl flooring is made from a combination of synthetic materials, primarily polyvinyl chloride (PVC), which is engineered to resemble natural materials like stone, wood, or ceramic tiles. It comes in several forms, including sheets, tiles, and planks.
Benefits of Vinyl Flooring
- Durability: Vinyl is resistant to scratches, dents, and stains, making it ideal for high-traffic areas.
- Water Resistance: Most vinyl flooring is waterproof, so it's perfect for rooms prone to moisture.
- Ease of Installation: Vinyl can be installed over most existing floors and doesn't require special tools or skills.
- Affordability: It is generally less expensive than hardwood or stone flooring.
- Comfort: Vinyl floors are softer underfoot compared to other hard surfaces.
- Variety of Styles: With a wide range of colors and patterns, vinyl can mimic other flooring materials or offer unique designs.
Types of Vinyl Flooring
- Sheet Vinyl: Sold on rolls and is great for large, seamless installations.
- Vinyl Tiles: These are easy to replace individually if damage occurs.
- Luxury Vinyl Planks (LVP): Designed to closely mimic hardwood flooring.
- Luxury Vinyl Tiles (LVT): These replicate the look of stone or ceramic tiles.
Consider vinyl flooring for DIY projects based on the room's function, budget, and style. It mimics natural materials affordably and easily maintained, ideal for practical and stylish home updates.
Preparing for the Installation
Learn why clearing and painting are essential before choosing and planning your vinyl planks installation for a flawless and durable finish.
Why Clearing and Painting is Essential
The first step involved moving out the laundry machines and everything else in the room, which amusingly revealed hidden socks under the dryer. Use this opportunity to paint or finish any unattended parts of your room. I also removed the quarter-round molding to prepare for the installation. For those with baseboards like my wainscoting, you might want to leave them unless you're ready for a huge undertaking.
Choosing and Planning Your Vinyl Planks
I opted for vinyl planks a little under 4 feet long and just under 8 and 3/4 inches wide. Prioritize picking a style that complements your room. Planning is crucial to avoid short boards at the beginning or end of a row. You can either follow the installation instructions, nerd out with a 3D model, or simply use graph paper for layout planning.
Step by Step Instructions
Learn how to install vinyl plank flooring step-by-step: starting, cutting, measuring, spacing, locking, overcoming obstacles, and finishing touches.
Starting Off
Always begin on the left side of your room. I pried up the transition piece between the current floor and the carpet, cutting back the carpet for the new transition strip. Filling in any gaps is essential for a seamless installation.
Cutting and Measuring
Vinyl plank flooring allows for easy customization with just a utility knife, but for longer cuts, power tools like a circular saw, jigsaw, or table saw prove more efficient and precise. Ensure your cuts take into account the room's dimensions and any irregularities in wall straightness.
Spacing and Locking
Maintain a quarter-inch gap between the floor and walls, using wedge spacers for accuracy. This ensures the floating floor has room to expand and contract. When connecting planks, angle and tap them into place, ensuring seams are staggered for a natural look.
Overcoming Obstacles
My room had several obstacles, including door jambs and an overflow drain. Undercutting door jambs allows the flooring to slide underneath for a cleaner look. For the overflow drain, measuring accurately and using a Forstner bit maked a seamless integration around the obstacle.
The Finishing Touches
Reinstalling the quarter-round molding and transitioning pieces gave the room a finished appearance. Ensure the molding is nailed into the baseboards, not the flooring, to allow for movement.
Reflections and Results
Looking back, the process of installing vinyl plank flooring was as rewarding as it was instructional. The key takeaways for me were the importance of accurate measurements, the efficiency of using the right tools for specific cuts, and the aesthetic impact of planning planks layout.
The flooring revamped my laundry room and gave a durable, easy-to-clean surface perfect for busy areas. For beginners, plan carefully, use power tools for precise cuts, and be patient. Attention to detail makes renovations manageable and rewarding.
Design Ideas and Inspiration
When it comes to personalizing your space, vinyl flooring offers a plethora of design possibilities. Whether you're aiming for a modern, rustic, or classic look, vinyl flooring can help you achieve your desired aesthetic. Here's how you can draw inspiration and get creative with vinyl flooring designs:
- Embrace Patterns and Textures Vinyl flooring comes in an array of patterns and textures that can mimic the look of real wood, stone, or ceramic tiles. Consider herringbone or chevron patterns for a dynamic effect, or opt for textured vinyl that feels like natural wood grain underfoot.
- Color Your World Unlike traditional flooring materials, vinyl offers bold color choices. From vibrant hues to deep tones, you can select vinyl that complements your walls and furniture. Use lighter shades to make small rooms appear larger, or choose dark colors for a cozy, intimate atmosphere.
- Mix and Match: Don't be afraid to mix different vinyl styles. Combine wood-look planks with stone-look tiles to define different areas in an open-plan space. This can also add visual interest and define zones within a room.
- Make Borders and Accents: Use vinyl tiles to make borders around the room or accentuate certain areas, like under a dining table or around a kitchen island. This not only adds a decorative touch but also helps protect high-traffic areas.
- Go Beyond the Floor Vinyl isn't just for floors. Apply vinyl tiles to walls for a waterproof backsplash in the kitchen or bathroom. This can tie the room's design together and make cleaning a breeze.
- Consider the Environment When selecting your vinyl, consider the amount of natural light in the room. Glossy finishes can reflect light and brighten up a space, while matte finishes can provide a more subdued, sophisticated look.
- Think Long-Term: Choose a design that you'll love for years to come. While it's tempting to go with the latest trend, consider how the style will age with the rest of your decor. Classic patterns and neutral colors are timeless choices.
Use these ideas to make a stylish, functional vinyl floor. Choose a design you love, keep it simple, and enjoy a beautiful, durable space.
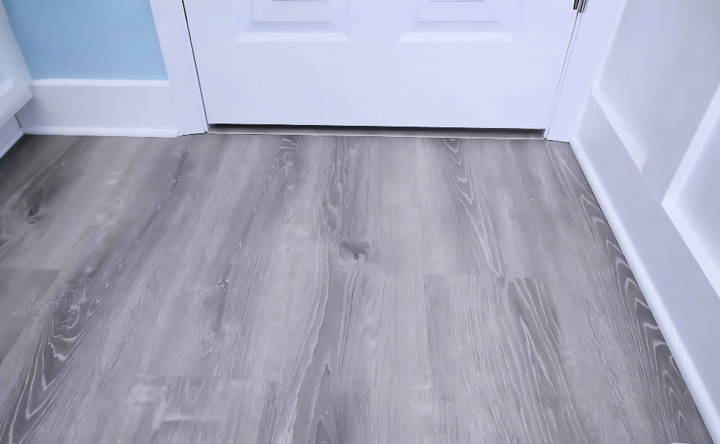
Post-Installation Care
After successfully installing your vinyl flooring, it's important to know how to maintain its appearance and extend its lifespan. Here's a straightforward guide to caring for your new floor:
Immediate Post-Installation Care
- Let it Settle: Avoid walking on the floor for at least 24 hours after installation to allow the adhesive to set.
- Initial Clean: Sweep or vacuum to remove any installation debris. Then, gently mop with a vinyl-approved cleaner.
Routine Maintenance
- Daily Cleaning: Sweep or vacuum regularly to keep the floor free of dirt and grit that can scratch the surface.
- Mopping: Use a damp mop with a mild cleaner. Avoid harsh chemicals that can damage the vinyl.
Dealing with Spills and Stains
- Act Quickly: Clean spills immediately to prevent staining.
- Stain Removal: Use a soft cloth and a vinyl-specific cleaner for tough stains. Rinse thoroughly with water after cleaning.
Preventing Scratches and Dents
- Furniture Pads: Place protective pads under furniture legs to prevent scratches.
- Heavy Items: When moving heavy items, lift rather than drag them across the floor.
Long-Term Care
- No Waxing: Modern vinyl flooring has a built-in shine and doesn't require waxing.
- Sunlight Protection: Use curtains or blinds to protect the floor from long-term sun exposure, which can cause fading.
Repairing Damages
- Minor Scratches: Use a repair kit designed for vinyl flooring to fill in small scratches.
- Plank Replacement: If a section is severely damaged, you can replace individual planks or tiles.
Follow these simple care tips to keep your vinyl floor looking new for years. Regular maintenance and quick spill cleanup are key.
FAQs About DIY Vinyl Flooring
Discover answers to all your frequently asked questions about DIY vinyl flooring. Get tips, tricks, and helpful insights for your flooring project!
Before you begin, it’s important to understand that vinyl flooring comes in various types, such as luxury vinyl planks (LVP) which are known for their high-quality finish and ease of installation due to the click-lock system. Ensure you have the necessary tools, like a tape measure, utility knife, spacers, and a rubber mallet. Also, prepare your subfloor by cleaning and leveling it.
Vinyl plank flooring is considered a manageable DIY project. It doesn’t require the precision needed for tile or the heavy-duty work associated with hardwood floors. With a systematic approach and the right tools, installing vinyl planks is achievable for most DIY enthusiasts.
Yes, you can install vinyl flooring over concrete, wood, or existing vinyl as long as the surface is flat and clean. However, it's not recommended to install over uneven surfaces like laminate flooring. Always check the manufacturer's instructions for specific guidelines.
The subfloor must be clean, dry, and level. Any debris or irregularities can affect the installation and final appearance. Use a sander if necessary to smooth out any rough areas. For concrete subfloors, consider using a moisture barrier if recommended.
Maintaining your vinyl plank flooring is straightforward and essential for its longevity. Here are some tips:
Regular Cleaning: Sweep or vacuum regularly to remove dirt and grit that can scratch the surface.
Wet Mopping: Use a damp mop with a mild cleaner designed for vinyl floors.
Avoid Harsh Chemicals: Steer clear of abrasive cleaners and scrubbers, which can damage the flooring.
Protect from Sunlight: Use curtains or blinds to protect the floor from prolonged exposure to direct sunlight, which can cause fading.
Furniture Pads: Place felt pads under furniture legs to prevent scratches and dents.
Conclusion:
Wrapping up, installing vinyl plank flooring can be a straightforward and rewarding home improvement project. Following the steps and tips provided in this guide on how to install vinyl plank flooring ensures a professional-looking finish. Vinyl plank flooring installation not only enhances the aesthetics of your space but also adds durability and ease of maintenance. Enjoy your new floor and the transformation it brings to your home!


