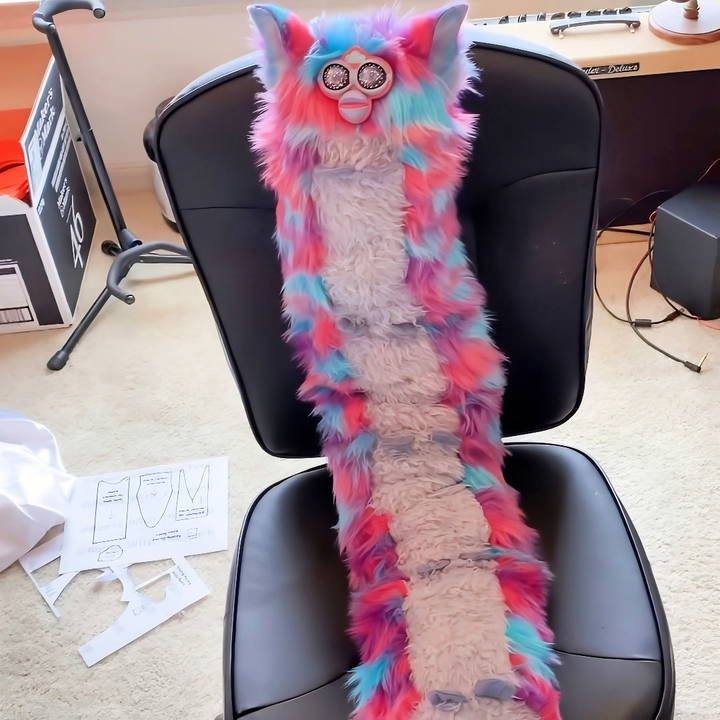
Furbies are iconic toys from the 1990s that have seen a resurgence in popularity thanks to creative DIY projects like the "Long Furby." Whether you're a Furby fan or just looking for a unique craft project, a Long Furby is an attention-grabbing and playful creation. This guide will lead you through every step to breathe new life into a classic Furby, transforming it into your very own DIY long Furby—a playful and unforgettable masterpiece that puts a quirky twist on an iconic toy.
Materials You Will Need
Before you start, gather the following materials:
- Faceplate: A "vegan" 3D-printed faceplate (instead of using an original Furby).
- Fabric or Faux Fur: Choose your desired fur type for the Furby's long body.
- Sewing Machine or Needle and Thread: You can sew by machine or hand.
- Scissors and Craft Knife: For cutting fabric and faux fur.
- Pins: To hold fabric in place while sewing.
- Measuring Tape: For accurate dimensions.
- Wire or Ball Jointed Spine: For making a poseable Furby.
- Craft Paint and Sealant: For painting the faceplate.
- Strong Adhesive: To attach the faceplate and other parts.
- Felt and Wire: For feet, facial features, and other customizations.
- Stuffing Material: Polyester stuffing to fill the body.
With these tools and materials ready, let's dive into making your Long Furby.
Step by Step Instructions
Make your own long furby with our step-by-step guide. From preparing the faceplate to adding the finishing touches, craft your unique Furby!
Step 1: Prepare the Faceplate
Most DIY Long Furby projects start with the face. Instead of buying and modifying an existing Furby, this guide uses a 3D-printed faceplate. You can find these vegan faceplates on Etsy or other crafting marketplaces.
- If you wish to customize the faceplate, begin by painting it. Choose colors that match your aesthetic. You can even add glitter or glow-in-the-dark paint for an extra quirky touch. Apply a sealant to protect the paint.
- If you prefer a realistic touch, add some fake eyelashes to the faceplate. This gives your Furby a unique and expressive look.
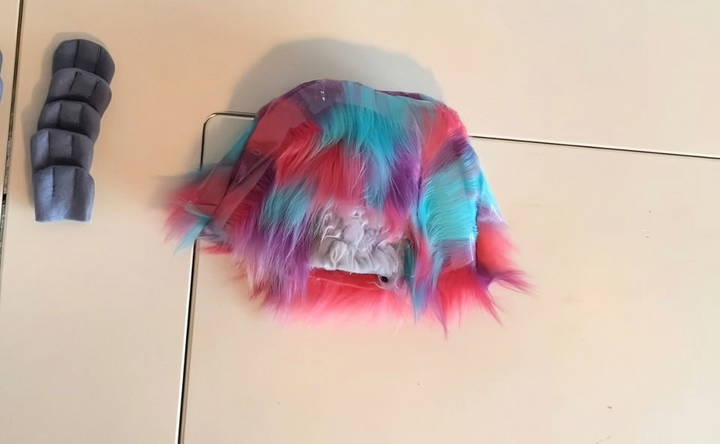
Let the paint and adhesive dry completely before moving on to the next step.
Step 2: Cutting the Fabric
Now it's time to focus on the body of your Long Furby.
- Choose Your Fabric: For the body, pick a fabric or faux fur in a color or pattern that complements your faceplate. The type of fur you choose is important for both aesthetic and ease of sewing.
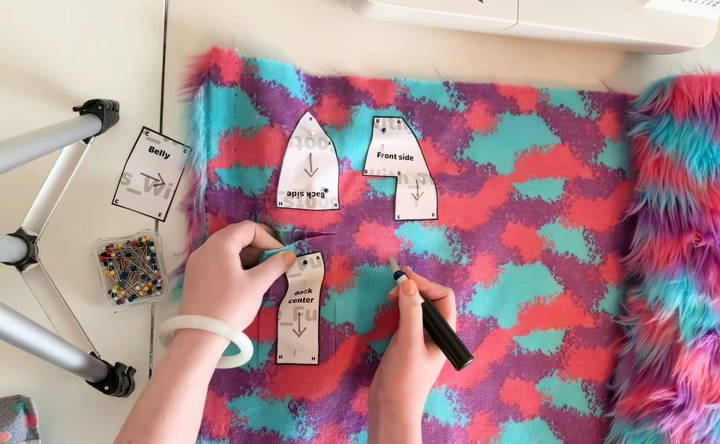
- Use a Pattern: Follow a pattern to cut out the body pieces. You can find many free patterns online, including the one from "BootsWithTheFerb" on Instructables, which is recommended. Make sure you cut:
- Two front body pieces
- Two side body pieces
- One belly piece (this can be a contrasting color for a fun effect)
- Cut Carefully: When cutting faux fur, use a craft knife and be cautious. Cut only the fabric backing, not the long strands of fur. This prevents the fur from becoming uneven.
- Add Seam Allowance: Add a small seam allowance around the edges of the fabric. This step helps prevent shrinking the Furby once sewn together.
Step 3: Assemble the Body
Now that you have your fabric pieces, it's time to sew them together.
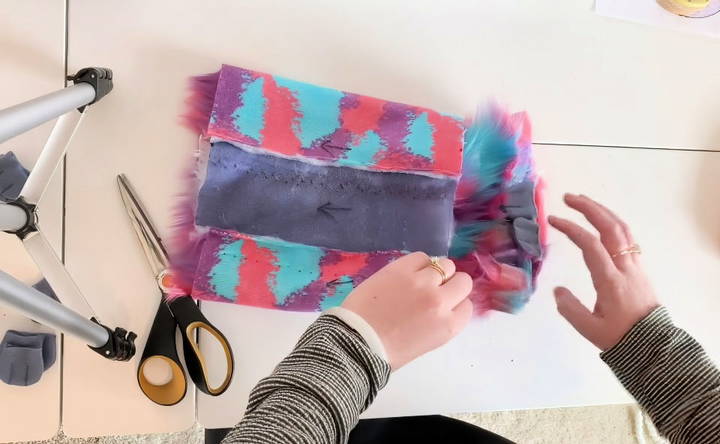
- Start with the Back: Pin and sew the back pieces together. Attach the side-back pieces to the center-back piece, ensuring the fur direction aligns.
- Front Pieces: Sew the front body pieces together, adding the belly piece between them. This section is a little tricky, so go slowly, especially if you're using a machine.
- Tip: Use tape to keep the fur out of the seams while sewing. After sewing, you can brush the fur out, resulting in a smooth and seamless look.
- Make the Head: Once the front and back are complete, sew the front and back pieces together, forming the Furby's head. At this point, the basic body of your Long Furby should start to take shape.
Step 4: Make the Feet (Optional)
Long Furbies often have multiple sets of tiny feet, giving them a caterpillar-like appearance, sometimes referred to as a “Counter Furby” or "Caterpie Furby."
- Cut Out Felt: For each foot, cut out two small shapes from felt.
- Sew and Flip: Sew the two felt pieces together, leaving a small opening. Flip them inside out and add tiny “toe beans” using contrasting felt or fabric.
- Attach the Feet: Sew the feet onto the body wherever you'd like. Some prefer a minimal look with no feet, while others love the idea of many tiny legs.
Step 5: Lengthening the Body
This is where your Long Furby becomes, well, long.
- Measure the Length: Decide how long you want your Furby to be. A typical Long Furby ranges from 24 to 36 inches, but you can go as long as you like.
- Segment the Body: It's easier to sew the body in segments rather than one long piece. Cut segments approximately 9 inches long, ensuring the width matches the belly and body pieces you've already maked.
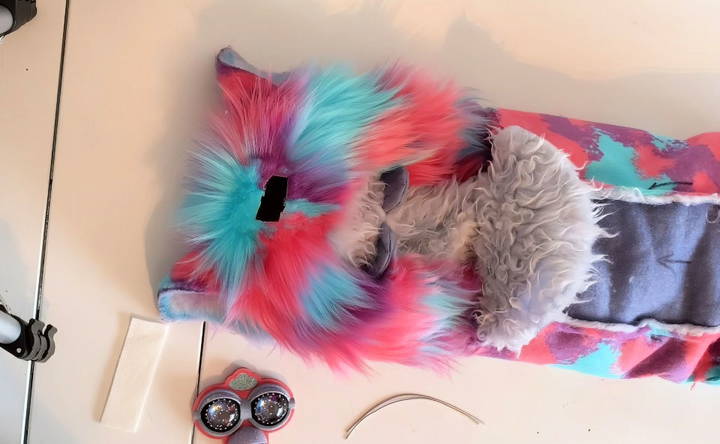
- Sew the Segments Together: Attach the body segments together one by one. If you're adding extra feet, sew them in between segments as you go.
Step 6: Adding the Spine
For a poseable Furby, you'll need to insert a wire or ball-jointed spine inside the body. This gives your Furby flexibility and lets it hold different poses.
- Insert the Spine: Place the wire or ball-jointed armature inside the body. Make sure it is centered.
- Secure the Faceplate: Attach the faceplate by trimming the fur around the face and gluing the faceplate to the fabric. You may want to reinforce the faceplate with wire glued behind it and then attached to the spine for extra stability.
Step 7: Stuff the Body
Once the spine is in place, it's time to stuff your Long Furby.
- Use Polyester Stuffing: Begin filling the body with polyester stuffing, working from the head down. Keep the stuffing evenly distributed and avoid overstuffing, which could distort the shape.
- Hand Stitch the Bottom: After the body is stuffed to your satisfaction, use a hand stitch to close the bottom of the Furby.
Step 8: Finishing Touches
Now that your Long Furby is assembled and stuffed, you can add some final customizations.
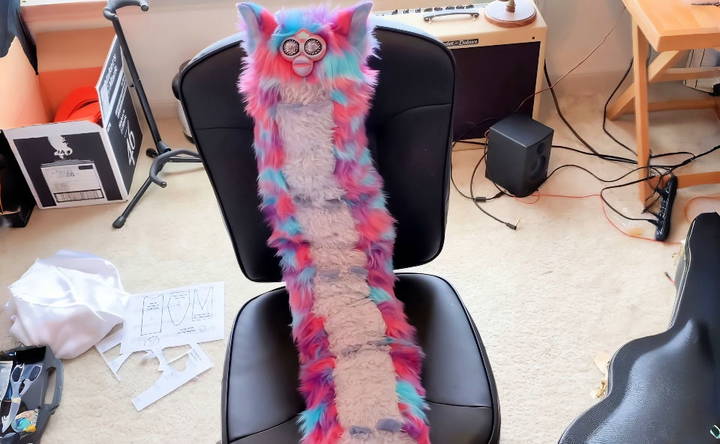
- Mohawk or Mane: Add a tuft of fur, felt, or yarn to the head to give your Furby some flair.
- Accessories: Consider adding jewelry, ribbons, or other accessories to personalize your Furby.
- Glowing Eyes: If you want an extra eerie touch, paint the eyes with glow-in-the-dark paint.
Step 9: Show Off Your Creation!
Once you've finished all the steps, your Long Furby is ready to impress (or frighten) friends and family. The beauty of this project is that no two Long Furbies are the same. From color choices to feet placement, your Furby can be as unique as you want it to be.
Final Tips:
- Take Your Time: Crafting a Long Furby can be time-consuming, especially if you're new to sewing or working with faux fur. Don't rush the process.
- Get Creative: Experiment with different fur textures, faceplate designs, and customizations.
- Keep the Furby Balanced: While stuffing, be sure the spine stays centered to avoid a lopsided Furby.
Making a DIY Long Furby is a fun and rewarding craft project that can range from cute to creepy, depending on your design choices. Enjoy the process, and don't forget to share your creation with fellow Long Furby enthusiasts online!
FAQs About DIY Long Furby
Discover answers to common FAQs about DIY long furby, including crafting tips and creative ideas for your unique plush project.
To attach the faceplate, trim the fur around the area where the faceplate will go, ensuring that the adhesive bonds well. Add a small piece of felt behind the faceplate for extra support, and glue the faceplate to the fabric. You can also attach wire from the back of the faceplate to the spine for additional stability.
For a standard 3-foot Long Furby, you will need about 1/2 yard of your main body fabric and 1/4 yard for the belly (if using contrasting fabric). If you're making a larger Furby, adjust accordingly.
A flexible armature or wire is commonly used for the Furby’s spine. A ball-jointed spine or wire armature works well for this purpose. You can find 1-foot segments of the spine from various crafting sources. For a 3-foot Furby, you’ll need three segments.
Yes! You can hand sew the Long Furby using a running backstitch. While this takes longer than using a machine, it will still provide strong seams. Just make sure to double your thread for added durability.
To keep the fur from getting caught, tape the fur away from the seams before sewing. Once the seam is complete, use a brush to fluff the fur back over the seam. This trick helps create a neat and professional finish.
Cut small felt pieces to create each foot, sewing two pieces together and flipping them inside out. Attach the feet between body segments, or wherever you prefer. You can hand sew or machine sew them onto the body.
Yes! You can opt not to include a spine, which will make your Furby more of a plush toy. Simply sew the body segments together and stuff the Furby as you would any stuffed animal, skipping the armature.
Pay attention to the direction of the fur when cutting. Most patterns will include arrows showing fur direction. Cut with a sharp craft knife, taking care not to cut the fur itself, just the fabric backing.
For a 3-foot Long Furby, around 1 to 2 pounds of polyester stuffing is typically sufficient. Adjust the amount based on how firm or soft you want the Furby to be.
Yes! You can sculpt a faceplate out of clay or moldable plastic if you don't want to purchase one. There are also free 3D-printable faceplate templates online, or you could commission a local 3D artist to make one for you.


