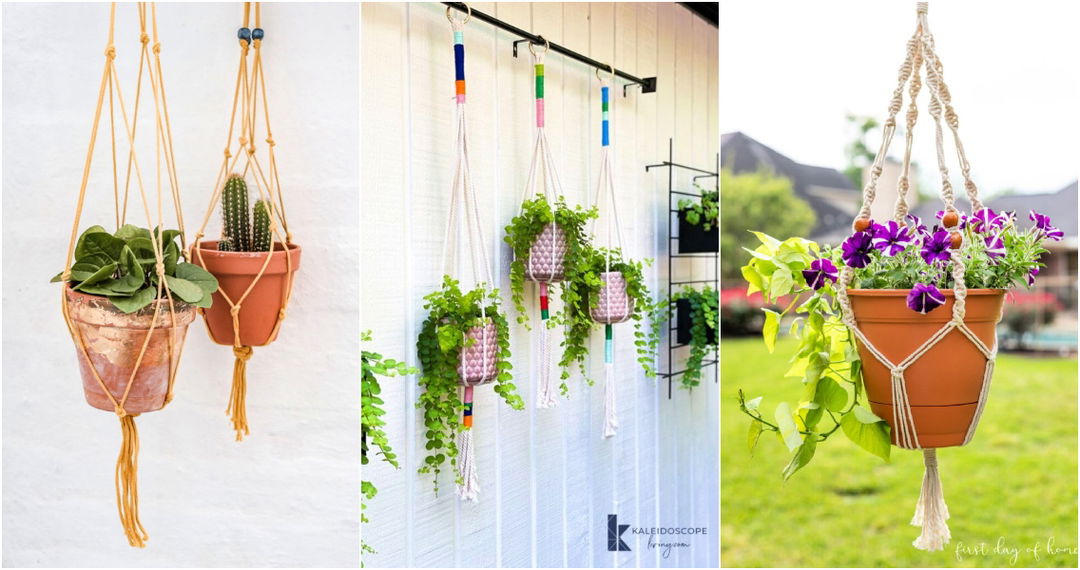
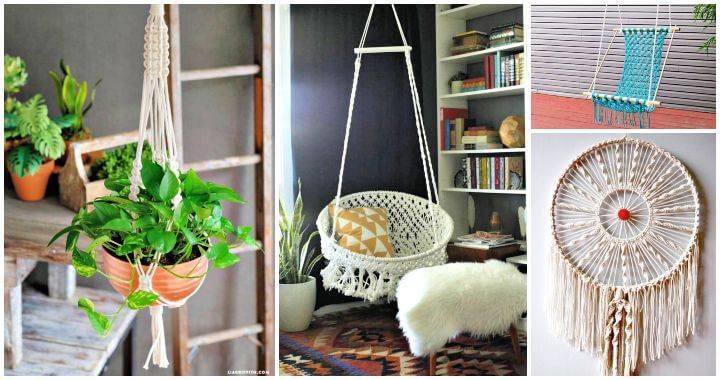
Making a stylish macrame plant hanger can be a fun and rewarding DIY project. Whether you are looking to add a touch of boho charm to your home decor or simply enjoy crafting, a macrame plant hanger pattern is an excellent choice. These patterns are designed to be easy and enjoyable, making it possible for anyone to make beautiful plant hangers. By following a few simple steps, you can craft a stunning piece that adds both style and function to your space.
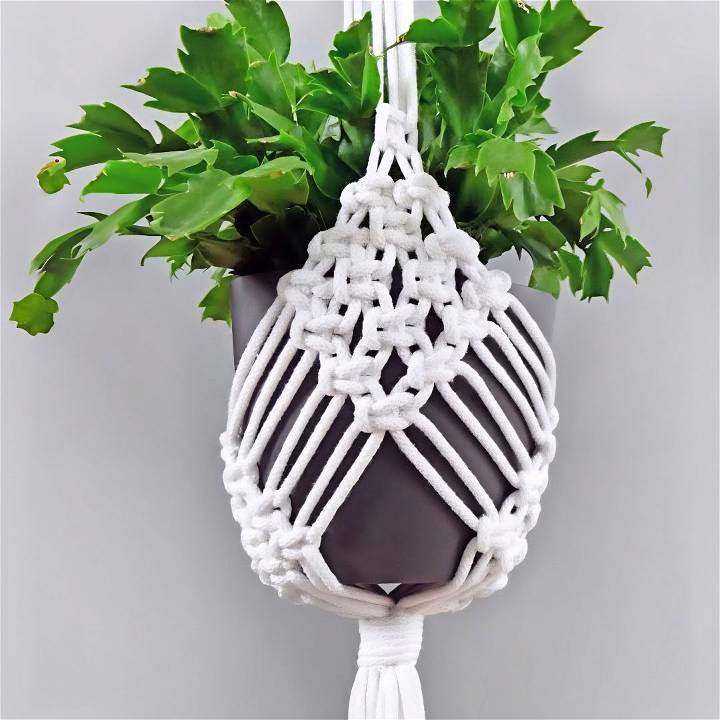
To start your DIY macrame plant hanger, you'll need some basic supplies like cord, a ring, and scissors. There are many different designs to choose from, so you can find one that matches the look and feel of your home. With clear instructions and a bit of patience, you can complete your project and enjoy the results.
Ready to get crafting? Let's explore the next section for step-by-step instructions and tips on making your own macrame plant hanger.
Gathering the Materials
The first step in any DIY project is gathering your materials. For this macrame plant hanger, you will need:
- 5mm Thick Braided Cotton Cord: This thickness is ideal for durability and ease of handling. You'll need two lengths of 350 cm (around 138 inches), two lengths of 250 cm (about 99 inches), and twelve lengths of 160 cm (approximately 63 inches).
- Ring Diameter - 5 cm (2 inches): This will act as the starting point for your hanger.
- Pot to Hang: The pot size determines how your hanger will look. For this design, a pot with a diameter of 15 cm (6 inches) and a height of 13 cm (5 inches) works perfectly.
- Patience and Creativity: Perhaps the most critical materials! This project requires not only physical materials but also a dose of patience and creativity.
Step by Step Instructions
Make a beautiful macrame plant hanger with our step-by-step instructions: basics, a half-knot spiral, attaching cords, diamond design, and finishing touches!
Step 1: Starting with the Basics
I began by cutting the cords according to the required lengths. Then, I folded each group of cords in half to determine their midpoints, which I attached to the 5 cm ring using a simple loop technique. This process makes the foundation from which the rest of the design will flourish.
Step 2: Forming the Half Knot Spiral
The diamond design starts with a beautiful half-knot spiral. I took two of the 350 cm cords and two of the 250 cm cords, setting them as my working cords. The rest, the shorter ones, were positioned in the middle. By tying a series of half knots, I maked a spiral texture that served as the captivating beginning of my hanger. This section can be as long as you prefer, but I found that around 10 cm made for a perfect introduction to the design.
Step 3: Attaching the Cords
This step required concentration as I attached the twelve 160 cm cords to the central cords using square knots. It was essential to ensure each knot was tight and positioned closely to its neighbors to achieve a uniform look. This process formed the backbone of the diamond design, with each cord contributing to the overall pattern.
Step 4: Crafting the Diamond Design
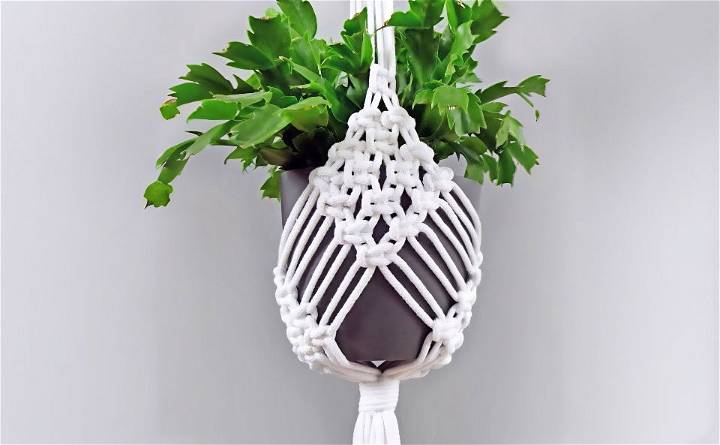
Making the diamond design was the most exciting part. Starting at the same level, I took four cords and made square knots, gradually bringing cords from adjacent groups closer together to form the diamond's outline. This required a careful eye to ensure the diamonds were symmetrical and evenly spaced. It was a bit challenging at first, but as I progressed, I found myself getting into the rhythm of the knots, and the design began to take shape organically.
Step 5: Finishing Touches
Once the desired length of the plant hanger was achieved and the diamond design was complete, I finished off the project by gathering all the cords and tying a large gathering knot. This not only secured the hanger but also added a neat, professional-looking finish to the piece. I trimmed the excess cord to make a tassel at the bottom, adding an extra bohemian flair.
Final Thoughts and Tips
- Patience is Key: Don't rush the process. Enjoy the act of making something by hand, and don't worry if you make mistakes. Macrame is forgiving, and imperfections add character.
- Customization: Feel free to play around with the length of the spiral or the size and number of diamonds. Making it your own is the best part of DIY.
- Practicing: Before starting on the actual project, practice making the half-knot spiral and square knots with spare cords. This will help you get a feel for the correct tension and technique.
Customization Ideas for Your Macrame Plant Hanger
Making a macrame plant hanger is not just about following a pattern; it’s an opportunity to express your creativity and add a personal touch to your home decor. Here are some customization ideas to make your macrame plant hanger uniquely yours:
- Choose Your Colors: Start by selecting cord colors that match your style or the room where you’ll hang your plant hanger. You can use natural tones for a bohemian look or bright colors for a playful vibe.
- Incorporate Beads: Adding beads is a simple way to embellish your plant hanger. Wooden, ceramic, or glass beads can be threaded onto the cords at various points to make patterns or add a pop of color.
- Vary the Knots: Experiment with different knotting techniques to make texture and interest. For example, alternating square knots and spiral knots can give your plant hanger a unique twist.
- Adjust the Length: Tailor the length of your plant hanger to fit the space where it will hang. Longer hangers look great in high-ceilinged rooms, while shorter ones are perfect for cozy spaces.
- Add a Tassel: A tassel at the bottom of your plant hanger can add flair and movement. You can make a tassel with a leftover cord or choose a contrasting color for an eye-catching effect.
- Dye Your Cord: If you’re feeling adventurous, try dyeing your macrame cord. You can make an ombre effect, tie-dye patterns, or even solid colors to match your decor.
- Mix Materials: Combine different materials like leather, yarn, or ribbon with your macrame cord for a mixed-media look. This can add texture and contrast to your design.
- Play with Width: Use cords of different thicknesses to play with the scale of your knots. Thicker cords make a bold statement, while thinner cords can be used for delicate details.
The beauty of macrame is in the details. Take your time, enjoy the process, and don’t be afraid to try something new. Your plant hanger is a reflection of your creativity, so let it shine!
Knot Techniques and Variations
When it comes to macrame, knots form the foundation of every design. Understanding various knot techniques and how to apply them can transform your plant hanger into a work of art. Here’s a guide to some essential knots and their variations:
Basic Knots:
- Square Knot: This is the most common macrame knot. To tie a square knot, cross the right cord over the left, then under the two center cords and up through the loop on the left side. Repeat the process, starting with the left cord to complete the knot.
- Lark’s Head Knot: Use this to attach your cords to the dowel or ring at the top of your hanger. Fold your cord in half, place the loop under the dowel, and pull the cord ends over the dowel and through the loop.
Variations to Try:
- Half Hitch: This variation involves looping one cord around another. It’s great for making diagonal or curved lines in your design.
- Double Half Hitch: For a more secure and decorative look, the double half hitch involves two consecutive half hitch knots. It’s perfect for outlining shapes or adding detail.
- Spiral Stitch: By repeating half square knots without alternating cords, you make a spiral stitch. It adds a twist to your hanger and is visually striking.
Combining Knots:
- Mix and match different knots to make patterns. For example, a row of square knots followed by a section of spiral stitches can add complexity to your design.
- Introduce beads or rings between knots for added decoration and texture.
Tips for Mastery:
- Practice makes perfect. Start with scrap cords to practice your knots before moving on to your actual project.
- Maintain even tension on your cords for a uniform look.
- Don’t be afraid to undo and redo knots. It’s part of the learning process.
By mastering these knots and experimenting with their variations, you’ll be able to add intricate details and personal flair to your macrame plant hangers.
Troubleshooting Common Issues in Macrame
Macrame is a rewarding craft, but like any creative endeavor, it can come with its own set of challenges. Here are some common issues you might encounter while making a macrame plant hanger, along with straightforward solutions to keep your project on track:
Tangled Cords:
It’s easy for cords to become tangled when you’re working with multiple strands.
- Solution: Hang your project from a fixed point and comb out the cords regularly. Work slowly and methodically to prevent tangling.
Uneven Tension:
Consistent tension is key to a neat finish, but it can be tricky to maintain.
- Solution: Practice maintaining the same grip strength when knotting. Use pins to secure your work to a board to help keep tension even.
Knot Confusion:
With various knots involved, you might forget which knot comes next.
- Solution: Keep a reference guide handy, or use markers to remind you of the knot sequence. Repetition will also help you memorize the patterns.
Wrong Knot Size:
Sometimes knots can end up too big or too small.
- Solution: Measure the length of cord you use for each knot until you get a feel for the right amount. Consistency will come with practice.
Frayed Ends:
Cutting cords can sometimes lead to fraying, making it hard to work with them.
- Solution: Use sharp scissors to cut cords cleanly. Seal the ends with a bit of clear glue or by quickly passing them through a flame.
Dropping Stitches:
If you drop a stitch, your pattern could be thrown off.
- Solution: Count your knots after each row to ensure you haven’t missed any. If you find a mistake, gently undo the knots back to the error and re-knot correctly.
Color Bleeding:
If you’re using dyed cords, the color may bleed when wet.
- Solution: Test-wash a small piece of the cord before starting your project. Use colorfast cords or seal the dye according to the manufacturer’s instructions.
By anticipating these common issues and knowing how to address them, you’ll be better prepared to make beautiful macrame pieces without frustration. Patience and practice are your best tools in mastering macrame.
Maintenance and Care Tips for Macrame Plant Hangers
Keeping your macrame plant hanger in top condition ensures it remains a beautiful part of your home for years to come. Here are some practical tips for maintaining and caring for your macrame creation:
Regular Dusting:
Dust can accumulate on the cords over time.
- Solution: Gently shake your plant hanger outdoors to remove loose dust. For a deeper clean, use a soft brush or a lint roller.
Spot Cleaning:
Accidental spills or stains may happen.
- Solution: Address spills immediately by blotting with a damp cloth. Use a mild detergent for stains, but avoid harsh chemicals that can damage the fibers.
Washing:
Your plant hanger may need an occasional wash.
- Solution: Hand wash your macrame in lukewarm water with a gentle soap. Rinse thoroughly and squeeze out excess water without wringing. Lay flat to dry.
Avoiding Sun Damage:
Direct sunlight can fade the colors.
- Solution: Hang your plant hanger in a well-lit area but out of direct sunlight. If you want to display it near a window, use a UV-filtering curtain.
Preventing Mold and Mildew:
Plants need watering, which can lead to moisture issues.
- Solution: Ensure your plant pot is well-drained, and never let the hanger sit in water. If your hanger gets wet, dry it completely before hanging it back up.
Storage:
If you need to store your plant hanger, do it properly.
- Solution: Store your macrame in a dry, cool place. Roll it loosely and place it in a breathable cotton bag to prevent creases and protect it from dust.
Regular Inspections:
Check for any signs of wear and tear.
- Solution: Look for fraying or weak spots in the cords. If you find any, you can make repairs using similar cord material.
By following these simple maintenance and care tips, you’ll keep your macrame plant hanger looking as good as new. Regular upkeep not only preserves the beauty of your hanger but also the health of the plant it holds.
FAQs About Free Macrame Plant Hanger Pattern
Learn everything about free macrame plant hanger patterns. Discover answers to common questions and get started on your macrame project today!
When selecting a macrame cord, consider the following:
Thickness: Thicker cords are stronger and make larger knots, while thinner cords are better for detailed work.
Material: Cotton is popular for its softness and ease of use, but there are also synthetic options like nylon or polypropylene.
Color: Choose a color that complements your decor or plant.
Certainly! Here are a few basic knots to get you started:
Square knot: A foundational knot used in many patterns.
Spiral knot: Creates a twisted pattern.
Half hitch: Useful for making diagonal or horizontal lines.
Lark’s head: Commonly used to attach the cord to the ring.
Caring for your macrame plant hanger is simple:
Dust regularly: Use a soft brush or cloth.
Wash occasionally: Hand wash with mild soap and water, then air dry.
Avoid prolonged exposure to sunlight: To prevent fading.
Trim loose ends: To maintain a neat appearance.
There are many resources online where you can find free patterns, such as:
Macrame for Beginners: Offers step-by-step video tutorials.
Marching North: Provides a variety of patterns with tutorials and videos.
DIY Crafts and Its Overflowing: Share FAQs and patterns for different skill levels.
Made From Yarn: Features a collection of easy patterns suitable for beginners.
Once you’re comfortable with the basics, you can experiment with various creative variations such as:
Two-tone designs: Use two different colored cords to add a unique twist.
Beaded accents: Incorporate beads into your knots for added decoration.
Multiple tiers: Make hangers with several levels to hold multiple plants.
Different shapes: Try making square, spiral, or even heart-shaped hangers.
Mixed materials: Combine macrame with materials like leather or metal for a modern look.
Conclusion:
In conclusion, making a macrame plant hanger pattern to DIY your boho home decor adds a personal touch to your space. With a simple macrame plant hanger pattern, you can craft unique and stylish decor that enhances your home's aesthetic. Enjoy the process and the beautiful results of your DIY macrame plant hanger project.


