I remember the day clearly: my sister-in-law and I walked into a well-known bridal store, her eyes full of excitement and dreams of her perfect wedding day. Amongst the gowns that floated like ethereal clouds, there it was, a very simple DIY wedding veil that effortlessly blended with the dress she adored. However, when we checked the price tag, it was a whopping $250. No lace, no beads, just tulle. I chuckled and said, "I can make this for you at a fraction of the cost." And with that promise, my journey to making a beautiful, budget-friendly wedding veil began. In the end, it cost only about $32.
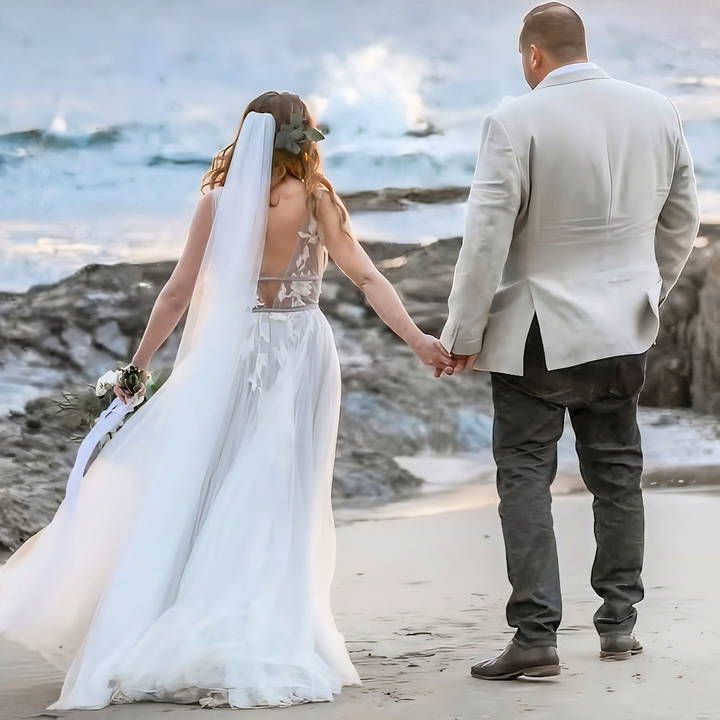
Being a part of someone's special day is incredibly rewarding, especially when you can add a personal touch to it. Making a DIY wedding veil is not only economical but also fun, and I'm here to guide you step-by-step through the process.
Gathering the Materials
Before diving in, gathering the right materials is essential. Each item plays a crucial role in the construction of the veil, ensuring it turns out just right.
- Tulle: The primary material required is tulle. This fabric is known for its soft, delicate appearance and the ability to drape beautifully. You'll need enough tulle to cover the length from where it will hang on your head to the desired finish, plus a little extra. Remember, it's always easier to cut away excess than to need more later.
- Thread: Having the right thread is vital. I used a contrasting thread initially for the gathering because it helps in easily making neat pleats. Later, I replaced it with a thread that matched the tulle color to maintain a seamless look.
- Needle: A needle is necessary for stitching the veil. Ideally, you want something sturdy yet thin enough to slip through tulle smoothly. I also used a blunt needle with a large eye for certain parts of the process to weave the ends securely.
- Veil Comb: A comb is used to attach the veil to your head. They are inexpensive and come in various sizes, so pick one that fits comfortably in your hair. A cleverly placed comb can ensure the veil stays in place throughout the day.
- Rubber Bands (Optional): A little trick I discovered was using rubber bands that match your hair color. Secure them into tiny ponytails where the comb will go. This makes an anchor point, preventing the veil from slipping.
- Measuring Tape and Pins: Both are essential for accuracy. The tape measures the tulle accurately, while the pins help hold the fabric in place while cutting.
Step by Step Instructions
Learn how to make a veil with easy steps from tulle prep to comb attachment. Perfect guide for making your personalized wedding veil.
Step 1: Preparing the Tulle
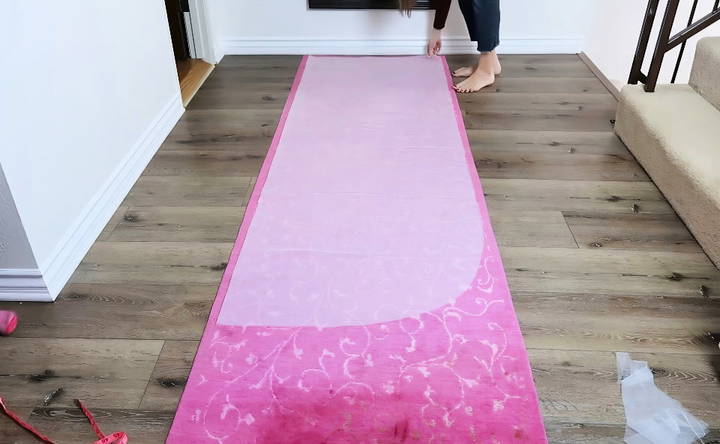
Begin by laying out your tulle on a flat surface. Fold it in half to ensure it's even. Use the measuring tape to determine the length you're targeting, keeping in mind that you can always shorten later if necessary.
Once folded, measure, and either pin the spot or mark it with chalk or a fabric marker. This step provides a guide to cutting accurately. Using scissors, cut a smooth curve along the edge—this will be the bottom of your veil.
Step 2: Gathering the Top
Now, using your needle and contrasting thread, gather the top edge of the tulle. Small stitches are key here; go up and down across the fabric. As you stitch, pull the thread slightly to form gentle gathers that will make the beautiful cascading flow of the veil.
Anchor the ends of the collected gathers to match the width of the comb. Simply take a few securing stitches on each side.
Step 3: Securing the Gathers
Take the thread that matches your tulle, and with your needle, stitch over the gathered edge with a simple backstitch. This reinforces the gathers and locks them in place. For extra security and a flatter finish, do a second row of backstitching.
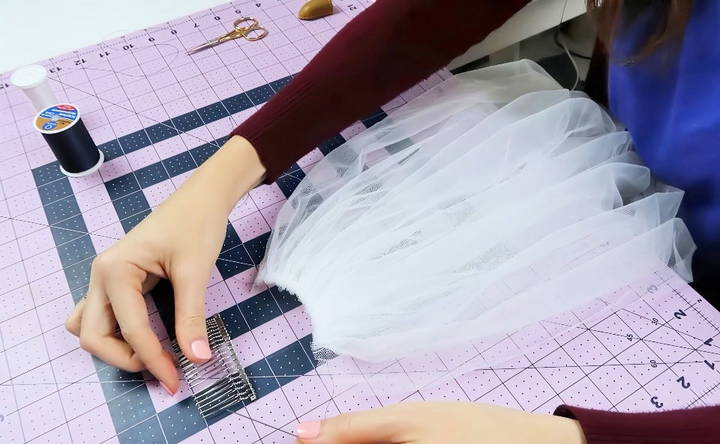
Step 4: Preparing the Comb
Cut a piece of tulle that matches the width of your comb. Wrap it around the spine of the comb, weaving in and out between the tines. This layer makes a sturdy base for what will be the top attachment point.
Using the blunt needle, thread through the wrapped tulle securely. Once done, snip off any excess fabric and threads.
Step 5: Attaching the Veil to the Comb
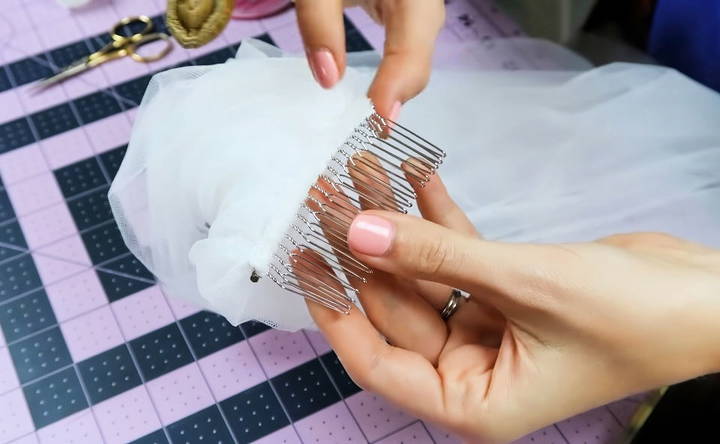
Line up the gathered edge of your veil with the wrapped tulle on the comb. Using a regular needle and matching thread, sew the veil to the comb, passing through each section like weaving. Keep your movements steady and consistent, making sure the veil is securely attached.
Once you've sewn across, flip the comb over, and stitch any underside flaps down, so they lay flat against the fabric foundation.
Final Thoughts and Tips
Discover essential final thoughts and tips for personalizing your veil, adding finishing touches, and testing the perfect fit for your wedding day.
Finishing Touches
Once the stitching is complete, your veil should be ready to wear! Make sure to remove any pins or chalk markings. Give it a gentle shake to let it fall naturally and inspect it visually to ensure no parts are loose.

Personalizing Your Veil
Although simplicity was key for my sister-in-law, adding personal touches can truly make it your own. Consider adding embellishments like tiny sequins, lace edges, or even floral details, depending on your wedding theme.
Testing the Fit
Before the big day, practice wearing the veil. Slide the comb under your styled hair where the rubber band anchors were placed. Walk around, dance, and move about to ensure it stays in place and feels comfortable.
Advanced Techniques
Making a veil can be a rewarding project, and adding advanced techniques can make your veil truly unique. Here are some advanced methods to elevate your veil-making skills.
Adding Multiple Tiers
- Measure and Cut Fabric: Decide on the number of tiers you want. Common choices are two or three tiers. Measure and cut each tier separately. Ensure each tier is slightly shorter than the one below it for a cascading effect.
- Layering the Tiers: Lay the longest tier flat. Place the next tier on top, aligning the edges. Repeat for additional tiers.
- Gathering and Attaching: Gather the top edges of all tiers together. Sew the gathered edges to a comb or headpiece.
Customizing with Embroidery
- Choose Your Design: Select a design that complements your dress. Floral patterns and initials are popular choices.
- Transfer the Design: Use a water-soluble pen to draw the design onto the veil fabric.
- Embroidering: Use a fine needle and matching thread. Follow the drawn lines with small, even stitches.
Adding Lace Appliqués
- Select Lace: Choose lace that matches or complements your dress.
- Cut Appliqués: Carefully cut out the lace motifs.
- Attach to Veil: Pin the lace motifs onto the veil. Sew them in place with small, invisible stitches.
Making a Beaded Edge
- Choose Beads: Select beads that match your dress and other accessories.
- Sew Beads: Thread a fine needle with matching thread. Sew beads along the edge of the veil, spacing them evenly.
Tips for Success
- Practice First: Try these techniques on scrap fabric before working on your veil.
- Take Your Time: Advanced techniques require patience and precision.
- Seek Inspiration: Look at bridal magazines and online resources for ideas.
By incorporating these advanced techniques, you can make a veil that is not only beautiful but also uniquely yours.
Troubleshooting Common Issues
Making a veil can be a fun and creative project, but sometimes things don't go as planned. Here are some common issues you might encounter and how to fix them.
Fixing Uneven Edges
- Identify the Problem: Lay the veil flat on a large surface. Check for any uneven or jagged edges.
- Trim Carefully: Use sharp fabric scissors. Trim the edges slowly and carefully, following the natural curve of the veil.
- Smooth the Edges: If the edges are still rough, use a fine-grit sandpaper to gently smooth them.
Securing the Comb
- Check the Attachment: Ensure the comb is securely sewn to the veil. Tug gently to test its strength.
- Reinforce the Stitching: Use a strong, matching thread. Sew the comb to the veil with multiple stitches, ensuring it is firmly attached.
- Add Extra Support: For added security, use a small piece of fabric or ribbon to wrap around the comb and veil, then sew it in place.
Dealing with Wrinkles
- Steam the Veil: Hang the veil in a bathroom while running a hot shower. The steam will help relax the fabric and remove wrinkles.
- Use a Steamer: If you have a fabric steamer, use it to gently steam the veil. Hold the steamer a few inches away from the fabric to avoid damage.
- Iron with Care: If necessary, use a low-heat iron. Place a thin cloth between the iron and the veil to protect the fabric.
Correcting Uneven Gathering
- Assess the Gathering: Lay the veil flat and check the gathered area for evenness.
- Adjust the Gathers: If the gathers are uneven, gently pull the fabric to redistribute it evenly.
- Secure the Gathers: Once the gathers are even, sew them in place with small, tight stitches.
Fixing Loose Embellishments
- Identify Loose Areas: Check the veil for any loose beads, lace, or other embellishments.
- Reattach Carefully: Use a fine needle and matching thread. Sew the loose embellishments back in place with small, secure stitches.
- Reinforce Attachments: For added security, sew over the embellishments a few times to ensure they are firmly attached.
Tips for Success
- Take Your Time: Rushing can lead to mistakes. Work slowly and carefully.
- Use Quality Tools: Sharp scissors, strong thread, and a good needle can make a big difference.
- Practice on Scrap Fabric: Before making adjustments on your veil, practice on a piece of scrap fabric to get the technique right.
By addressing these common issues, you can ensure your veil looks beautiful and professional.
FAQs About How to Make a Veil
Discover all you need to know with our FAQs about how to make a veil, from materials to techniques, perfect for DIY brides and crafters.
Decide on the length: Veils can be shoulder-length, elbow-length, fingertip-length, or even floor-length.
Measure the fabric: Use a measuring tape to measure the desired length and width. Add a few extra inches for adjustments.
Cut the fabric: Lay the fabric flat and cut it according to your measurements. Make sure the edges are even.
Gather the fabric: Create small pleats at the top of the veil where it will attach to the comb.
Sew the pleats: Use a needle and thread to sew the pleats together securely.
Attach the comb: Sew the gathered fabric onto the comb. Make sure it's secure so it stays in place when worn.
Yes, you can make a no-sew veil:
Choose a pre-trimmed fabric: Silk chiffon or lace works well.
Shape the fabric: Use pins to create the desired shape.
Attach the comb: Use fabric glue or strong adhesive to attach the fabric to the comb.
Choose your embellishments: Beads, lace trim, or ribbon are popular choices.
Attach the embellishments: Sew or glue them onto the veil. If using glue, make sure it dries completely before wearing the veil.
Evenly distribute: Ensure the embellishments are evenly spaced for a balanced look.
Measure the fabric: Decide on the lengths for both tiers. The top tier is usually shorter and can serve as a blusher.
Cut the fabric: Cut two pieces of fabric according to your measurements.
Layer the fabric: Place the shorter piece on top of the longer piece.
Gather the top edges: Make small pleats along the top edges of both pieces.
Sew the pleats: Sew the pleats together to secure both layers.
Attach to the comb: Sew the gathered fabric onto the comb, ensuring both layers are securely attached.
Conclusion: Adding Magic to Your Wedding
Making a DIY wedding veil was more than just a cost-saving endeavor; it became a symbol of love and collaboration for my sister-in-law's wedding. The process was enjoyable and rewarding; knowing something made with my own hands contributed to such an important day was incredibly gratifying.
If you're considering embarking on this creative journey, I strongly encourage you. Not only will you save money, but you'll also make a lasting memory with something truly personalized. So grab your materials, and get started on making a veil that perfectly complements your wedding vision.


