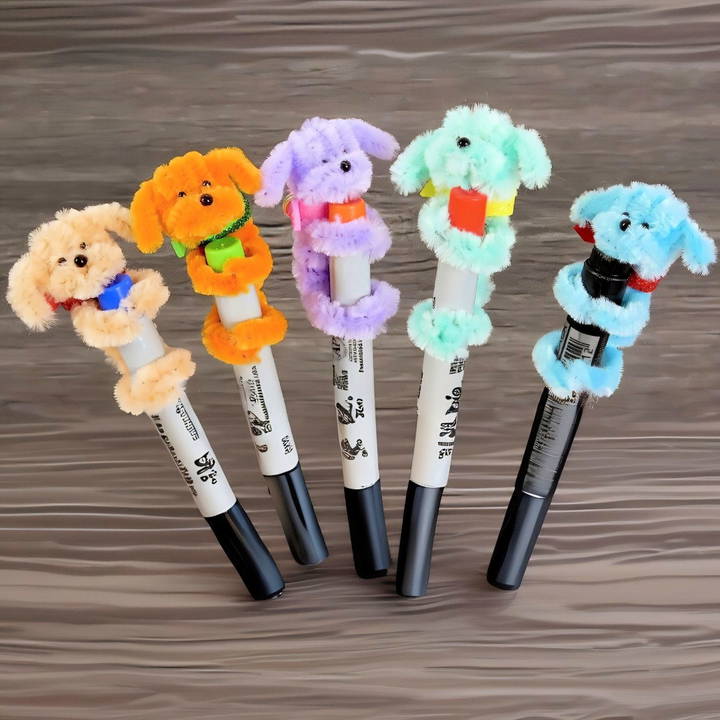
Making a DIY pipe cleaner dog is a fun, easy, and budget-friendly DIY craft project that brings out creativity in both kids and adults. Based on the provided instructions, you will learn about crafting a charming little pipe cleaner dog with just a few materials. Whether you're looking to make a cute decoration, a playful accessory, or a gift, this tutorial will have you crafting your pipe cleaner pup in no time.
Materials You'll Need
Before diving into the crafting process, gather the following materials:
- Pipe Cleaners: At least two for the body and additional ones if you want extra volume or distinct colors for different parts.
- Marker or Pen: Used as a form to shape the dog's ears.
- Toothpick: Helps with small details like shaping the nose.
- Beads: Tiny black beads work well for the eyes and nose.
- Ruler: Optional, but helpful for ensuring uniform leg lengths.
With these materials at hand, you're ready to begin creating your adorable pipe cleaner dog!
Step by Step Instructions
Learn how to make a pipe cleaner dog with step-by-step instructions, from shaping the ears to final styling, plus tips for success.
Step 1: Shaping the Ears
The first step in creating your pipe cleaner dog is to make the ears:
- Form a Spiral: Start with one end of a pipe cleaner and wrap it around a pen or marker to make a spiral. This spiral will form one of the dog's ears.
- Duplicate the Shape: Repeat the process on the other side of the pen or marker with the same pipe cleaner to make the second ear. This ensures both ears are similar in size and shape.
- Position the Ears: Once you have two ear spirals, gently open them up and arrange them. These will be placed around what will become the dog's face.
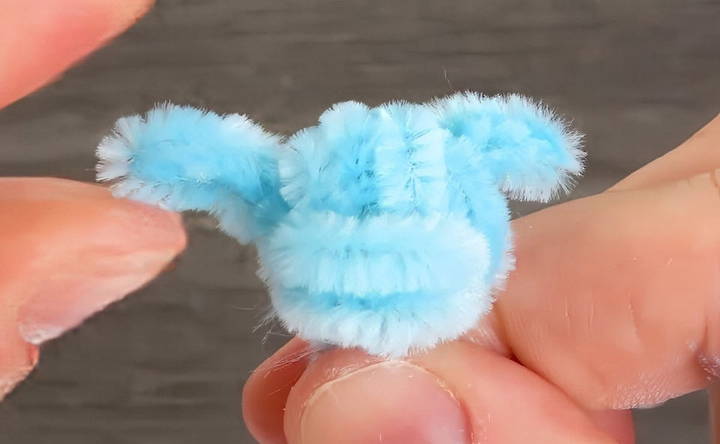
Step 2: Building the Face
With the ears in place, the next part is to shape the dog's face:
- Wrap Around the Face: Take one end of the pipe cleaner and wrap it around the area where you want the face to be. This piece will hold the ears in position and give structure to the head.
- Secure the Ears: Attach another pipe cleaner by twisting it with the first one to make a sturdy frame for the head.
- Define the Face Shape: Twist the pipe cleaner a few times around the “neck” area. This will add volume and shape to the head, creating a rounded face where you can later add eyes and a nose.
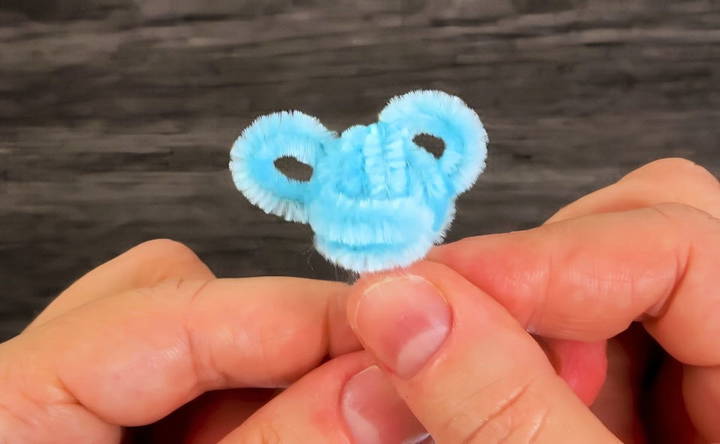
Step 3: Adding Details to the Face
To bring the dog's face to life, small details like eyes and a nose are essential:
- Make the Nose: Use a toothpick to finish the end of the face by twisting it into a small shape resembling a nose. This tiny detail will give the face more personality.
- Attach Beads: Place small beads onto the pipe cleaner for the eyes and nose. If you don't have beads, you can twist tiny bits of pipe cleaner to form small circles that resemble eyes and a nose.
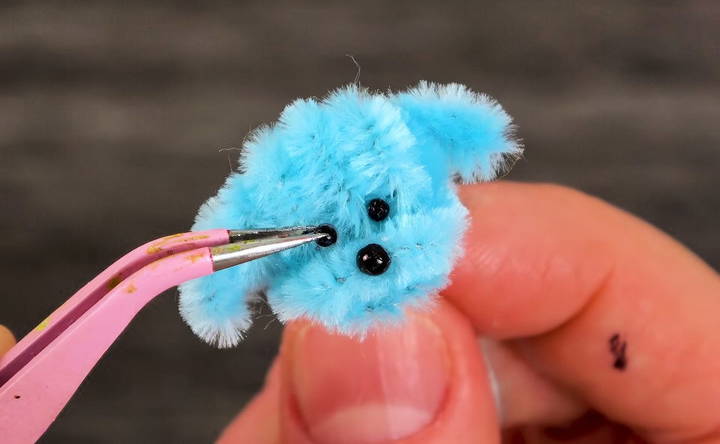
Step 4: Forming the Legs
The legs of the dog provide stability and help it stand up on its own. Here's how to make them:
- Measure and Twist: Using a ruler, measure a section of the pipe cleaner for each leg. Twist the pipe cleaner exactly seven times to make a consistent length for all four legs.
- Make the Second Front Leg: After making the first front leg, measure and twist another section of the pipe cleaner in the same way to make the second front leg.
- Form the Back Legs: Repeat the process for the back legs. Ensure that each leg is the same length for a balanced look.
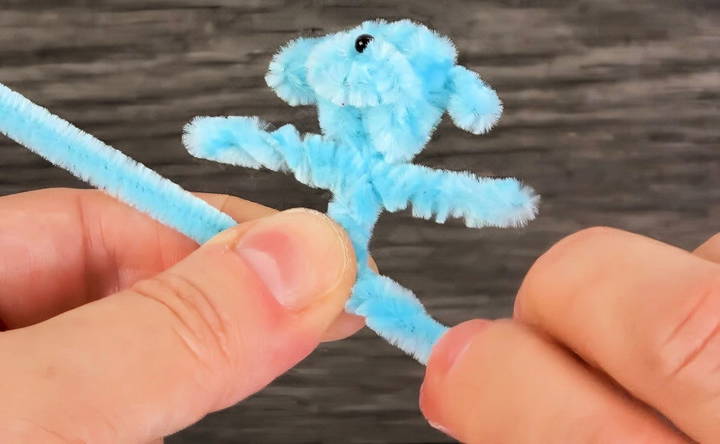
Step 5: Constructing the Body
Now, it's time to give your dog some body shape and definition:
- Twist and Shape: Twist a fresh piece of pipe cleaner around the center area between the legs. This will form the main body section of the dog.
- Add Extra Pipe Cleaners (Optional): If you'd like a fuller look, wrap additional pipe cleaners around the body to add more volume. This will make the dog look sturdier and cuter from all angles.
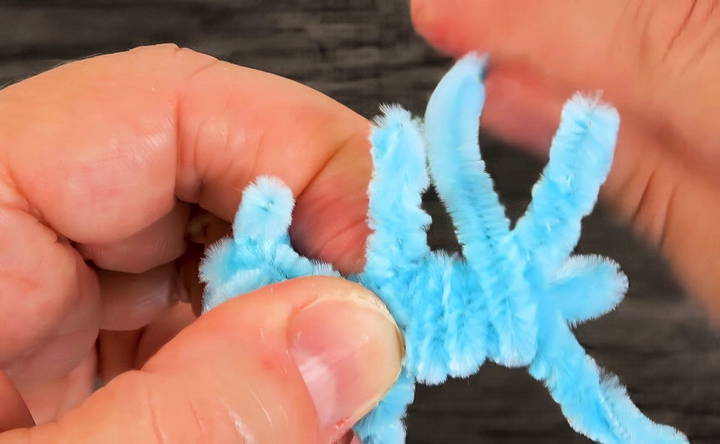
Step 6: Shaping the Tail
No dog is complete without a tail, and creating one is simple:
- Twist the Tail: Take the end of one of the pipe cleaners and twist it to form a small, curled tail.
- Attach to the Body: Place the twisted section at the back of the dog's body and secure it by twisting it around the body frame.
Step 7: Final Adjustments and Styling
To make your pipe cleaner dog look even cuter and more put together, add a few finishing touches:
- Check the Shape: Look at your dog from different angles to make sure all parts, like ears, legs, and tail, are positioned correctly and balanced.
- Make a Collar: If you want to add a little flair, make a collar by twisting a small section of pipe cleaner around the neck.
- Bend and Adjust: If any parts feel too loose, you can make small adjustments by bending or re-twisting sections of the pipe cleaner for added stability.
Tips for Success
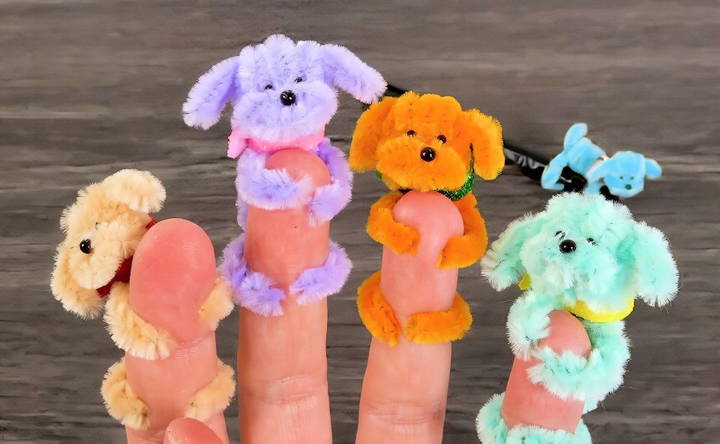
- Experiment with Colors: Pipe cleaners come in a variety of colors, so feel free to mix and match to make a unique look for your dog.
- Practice Makes Perfect: The first attempt may not look exactly as you'd hoped, but pipe cleaner crafting improves with practice.
- Add Accessories: You can make small accessories, like a miniature bow or tag, using extra materials you might have on hand.
Conclusion
Crafting a pipe cleaner dog is a fantastic DIY project that combines creativity and hands-on crafting. With just a few materials and some twisting and shaping, you can make an adorable pipe cleaner pet. It's a perfect activity for kids and adults alike, whether for a rainy day project, a school craft, or just a bit of fun with friends. And as you grow more confident, you can try creating different animals or experimenting with new designs. Happy crafting!
FAQs About Pipe Cleaner Dog Crafting
Learn all about pipe cleaner dog crafting with easy instructions, materials needed, and tips for making adorable, fun DIY dog figures.
Absolutely! To make a larger dog, use longer pipe cleaners or add more volume by wrapping more around the body. For a smaller version, trim down the pipe cleaners and make fewer twists for parts like the legs and tail.
You can substitute the beads by twisting small sections of black pipe cleaner to make tiny circles for the eyes and nose.
Pipe cleaner dogs are relatively sturdy for display or light play, but they may get misshapen with too much handling. If you want it to last longer, avoid excessive bending and adjust it only when necessary.
Yes, you can use any cylindrical object, like a small brush handle or straw, to shape the ears. Ensure the size fits your preferred ear shape; thinner items make tighter spirals, while thicker ones make larger loops.
If your dog isn’t stable, adjust the legs by slightly bending them at the “paws” for balance. Consistently twisted legs help with evenness, so check that each leg is twisted the same number of times.
Absolutely! This technique can be adapted for other animals. For instance, to make a cat, you could shape pointed ears and a longer tail. Experiment with pipe cleaner twists to capture the features of different animals.
To add details, try using additional pipe cleaners for thicker body parts, or add small felt pieces for facial features like ears or a tongue. Beads and small buttons can also add character to your dog's face and body.
Yes, but adult supervision is recommended as beads and small pieces can pose choking hazards. Young children may need help with twisting and shaping for the best results.


