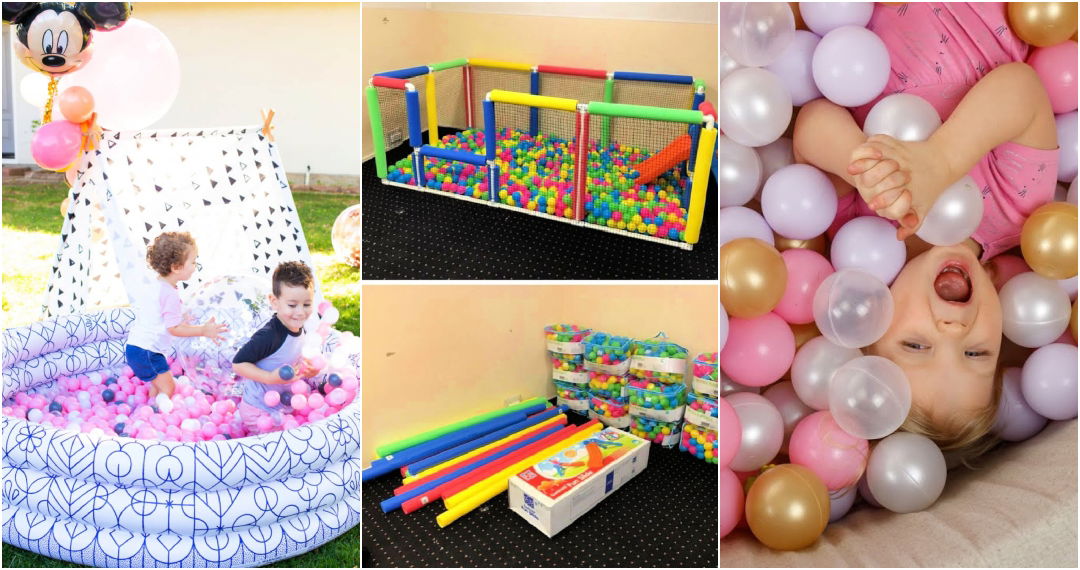
Building a DIY ball pit was one of the best projects I ever did for my family. It started with a simple idea and turned into a lively play area for everyone. I gathered all the materials from local stores, including a soft, inflatable pool and colorful plastic balls. My kids couldn't wait to dive in, and their smiles made all the effort worth it.
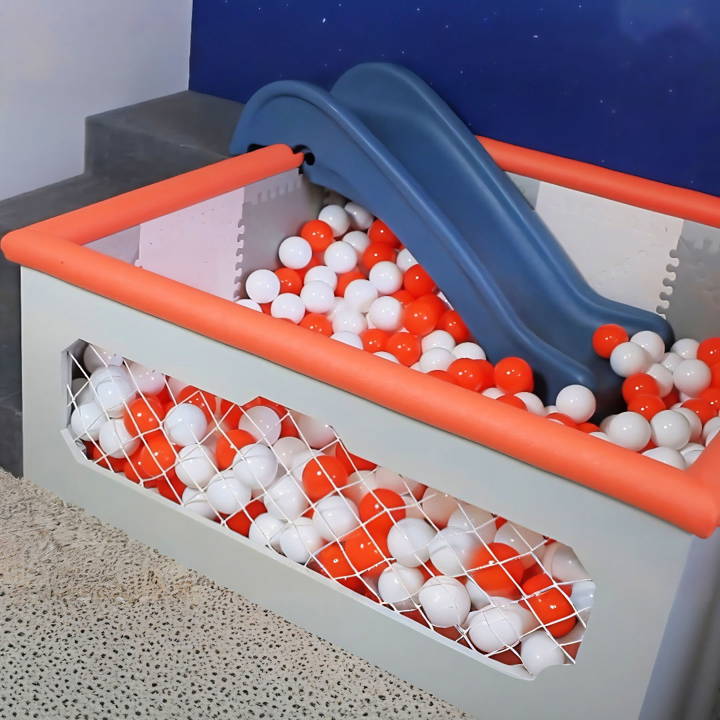
Seeing the joy on my kids' faces as they jumped into the ball pit made me realize how special family moments can be. This DIY ball pit project has brought us closer and made our home more fun.
I'm certain this guide will help you build your own ball pit, bringing endless joy and fun into your family life!
Materials Needed:
- Scrap Wood: For budget-friendliness and sustainability, we utilized scrap wood. This choice saved costs and allowed us to repurpose materials effectively.
- Carpet: Provides a soft landing for little feet, enhancing safety.
- Paint: Brightens up the ball pit, making it inviting.
- Pocket Hole Jig and Screws: Essential for securing the walls together robustly.
- Stapler: For attaching the net securely to the front of the ball pit.
- Pool Noodles: They served as protective padding, ensuring the play area is safe.
- Floor Play Tiles: Offer additional cushioning inside the ball pit.
- Hot Glue: Used for attaching pool noodles and floor tiles, proving to be surprisingly durable.
- Slide: The centerpiece of the project, bringing joy and excitement.
Step by Step Instructions
Learn how to build a DIY ball pit with our step-by-step instructions. Perfect for kids and fun indoor play. Easy, affordable, and safe!
Step 1: Cutting the Wood
First, we measured and cut all the boards using a table saw. Ensuring each piece was the correct size was crucial for assembling the stairs and the walls of the ball pit correctly.
Step 2: Building the Stairs
The three stairs, each 6 inches tall, did not require traditional stringers, saving on materials. Braces were attached to support the stairs - one side to the wall studs and the other to the ball pit wall. This approach provided a sturdy foundation for the stairs.
Step 3: Carpeting the Stairs
For safety and comfort, we carpeted the stairs. Cutting the carpet with a straight edge and a razor blade, we then glued it down. A homemade tool from scrap cardboard helped spread the glue evenly.
Step 4: Painting
While the glue dried, we painted the walls of the ball pit. Two coats of paint, with sanding in between, ensured a smooth, vibrant finish.
Step 5: Assembling the Ball Pit Walls
Using a pocket hole jig, we drilled holes and assembled the walls with screws. The design included a slot for the slide to be recessed into one of the walls, adding a fun element to the structure.
Step 6: Installing Safety Features
Safety was a top priority. We lined the top of the walls with pool noodles, cut to fit and secured with hot glue. The front of the ball pit got a net to catch overly enthusiastic jumpers, attached with a stapler, and later, covered with padding for extra safety.
Step 7: Laying the Floor
Old floor play tiles provided a soft base inside the ball pit. Cut to fit and glued down, they made the area even safer for play.
Step 8: Attaching the Slide
The slide proved to be an easier installment than anticipated. By attaching a wood block to its underside and securing it to the ball pit wall, it was firmly in place, ready for endless fun.
The Joy of Completion
Completing this ball pit with a slide and stairs brought immense joy, not just to Connor, but to our entire family. It's a symbol of love, crafted by hand, offering not only a safe space for play but also a wealth of memories to cherish. Working on this project underscored the importance of safety, creativity, and the joys of DIY crafting. It was a journey of learning new skills and putting them to use in the most loving way possible.
Tips for Success
- Plan Ahead: Ensure you have all materials and tools before starting.
- Safety First: Always prioritize safety features in the design.
- Be Creative: Use what you have and be resourceful in your approach.
- Enjoy the Process: Embrace the learning curve and have fun making something special.
How Many Balls Do You Need to Fill a Ball Pit?
The number of balls needed for a ball pit depends on a few things:
- Size of the ball pit: Measure the length, width, and depth of your ball pit in feet.
- Ball size: The most common sizes are 4" and 6" diameter balls.
A simple formula to estimate the number of balls:
- Multiply the length, width, and depth of your ball pit together.
- Divide that number by 8 (for 4" balls) or 27 (for 6" balls).
- Multiply the result by 500.
This formula will give you an estimate for a 75% fill level. You can adjust this percentage to your liking.
Example: For a ball pit that's 5 feet long, 4 feet wide, and 2 feet deep, using 4" balls, you'd need about 2500 balls.
For more precise calculations, you can use an online ball pit calculator. Several are available online, and they allow you to input your specific dimensions and desired fill level.
Customization Ideas for Your DIY Ball Pit
Making a DIY ball pit can be a fun and rewarding project. Not only does it provide a safe and enjoyable play area for children, but it also offers an opportunity to tailor the design to suit personal tastes and needs. Here are some customization ideas to make your ball pit unique:
Choose a Theme
Select a theme that resonates with your child's interests. Whether it's a favorite color, cartoon character, or a jungle adventure, the theme can guide your choice of colors and decorations. For example, a space-themed ball pit could include dark blue or black balls with glow-in-the-dark stars attached to the sides.
Add Interactive Elements
Consider incorporating elements that encourage active play. A small basketball hoop on one side of the pit or a target board for throwing balls can add an exciting challenge. These features not only enhance playtime but also help develop coordination and motor skills.
Incorporate Learning Tools
A ball pit can be educational as well as fun. You can include balls in different colors or numbers to introduce color recognition and counting. Make simple games like sorting the balls by color or number, which can be both entertaining and instructive.
Make It Sensory
For a sensory-rich experience, mix in balls with different textures or sizes. Some balls could have bumps for tactile stimulation, while others might be slightly larger or smaller to provide variety. This is particularly beneficial for younger children who are exploring their senses.
Personalize with Names
Personalize the ball pit by adding your child's name using soft foam letters or fabric. This not only makes the pit feel special but also helps in letter recognition and spelling for young learners.
Use Soft Lighting
Soft, safe lighting can build a calming atmosphere. LED string lights or battery-operated fairy lights around the edge of the ball pit can make it an inviting space, especially during quieter playtimes.
Consider Mobility
If you want the flexibility to move the ball pit, design it with portability in mind. Use lightweight materials and consider a collapsible structure that can be easily assembled and disassembled.
Safety First
No matter how you customize your ball pit, safety should always be the top priority. Ensure all materials are child-safe and non-toxic, and regularly inspect the pit for any potential hazards.
Incorporate these ideas to make a fun, engaging ball pit that also aids learning. Design it to adapt to your child's evolving interests and skills.
Age-Appropriate Designs for DIY Ball Pits
When designing a DIY ball pit, it's important to consider the age of the children who will be using it. Different ages require different safety features and engagement levels. Here's how you can build an age-appropriate ball pit:
For Toddlers (1-3 Years)
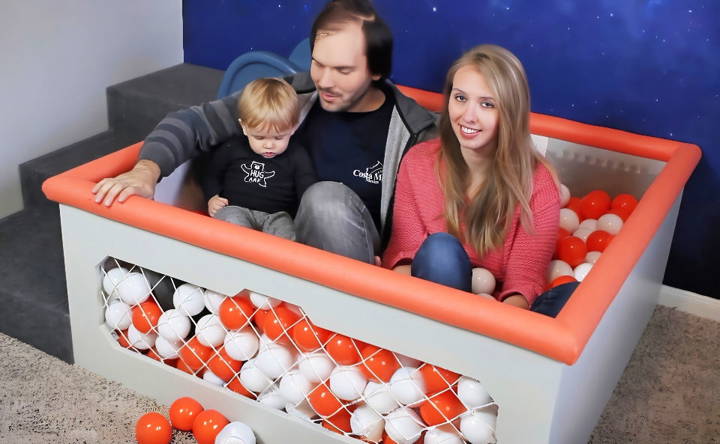
Toddlers are just beginning to explore their physical abilities, so safety is key. Use soft materials like foam padding around the edges and corners. Keep the pit shallow to prevent falls and ensure the balls are large enough to not be a choking hazard. Incorporate bright colors to stimulate their vision and simple shapes to help with recognition skills.
For Preschoolers (3-5 Years)
Preschoolers have more control over their movements and are full of energy. You can make the ball pit deeper for this age group and add elements like tunnels or mini slides to climb on and explore. Introduce balls of different sizes and textures to encourage sensory play. Always ensure that the materials used are sturdy and secure.
For School-Age Children (6-12 Years)
Children in this age group enjoy more complex play. Consider adding features like a basketball hoop or targets for throwing balls to promote active play and coordination. You can also introduce games that involve sorting or counting the balls for a fun learning experience. Make sure the structure is robust enough to handle more vigorous play.
For Teens and Adults
While ball pits are typically associated with younger children, they can be enjoyed by all ages. For older users, focus on durability and size. You can add more challenging elements like balance beams or obstacle courses within the pit. Ensure the pit is large enough to accommodate the size and weight of older users comfortably.
General Tips
- Accessibility: Consider the needs of all children, including those with disabilities. Ensure the ball pit is accessible and enjoyable for everyone.
- Adaptability: Design the ball pit so it can grow with your child. Features should be easy to change or upgrade as your child develops new skills and interests.
- Safety: At every age, safety comes first. Regularly check the ball pit for any wear and tear and maintain it to keep it a safe play space.
Design the ball pit for the right age group to build a fun, engaging, and safe space for kids. Keep it flexible to adapt as your child grows.
FAQs About DIY Ball Pit
Find answers to your faqs about DIY ball pit, including safety tips, materials, and cost-effective building instructions. Make endless fun at home!
Safety is crucial. Make sure the structure is stable and can’t collapse. The balls should be large enough to not be a choking hazard and made of non-toxic materials. Regularly check for and repair any damage to the structure or netting.
The number of balls you’ll need depends on the size of your pit and how deep you want the ball layer to be. A standard-sized ball pit might require hundreds to a few thousand balls. It’s best to calculate the volume of your pit and purchase accordingly.
Yes, you can set up a DIY ball pit outdoors, but make sure it's in a shaded area to prevent the balls from heating up. Also, consider a cover to protect it from weather and debris when not in use.
Clean the balls regularly with a gentle disinfectant to keep them hygienic. Check the structure for any loose parts or damage, and repair as needed. If the ball pit is not in use, store it in a clean, dry place to prevent mold and mildew.
To enhance the fun, consider adding features like a slide, tunnels, or a basketball hoop. Use materials that are safe and match the durability of your ball pit. For a slide, use smooth, sturdy plastic and secure it firmly to the pit. Tunnels can be made from soft, flexible materials like fabric-covered foam. Always ensure that any additions are securely attached and regularly inspected for safety.
Conclusion
I encourage you to get started with this project. Making a DIY ball pit is simple and truly rewarding for everyone in the family.


