Making a DIY cat scratching post is easier than you think. One weekend, I decided to build one for my playful cat, Whiskers. I used some simple materials like a wooden post, rope, and a wooden base. The process was straightforward and fun. Whiskers love it, and it has saved my furniture from scratches.
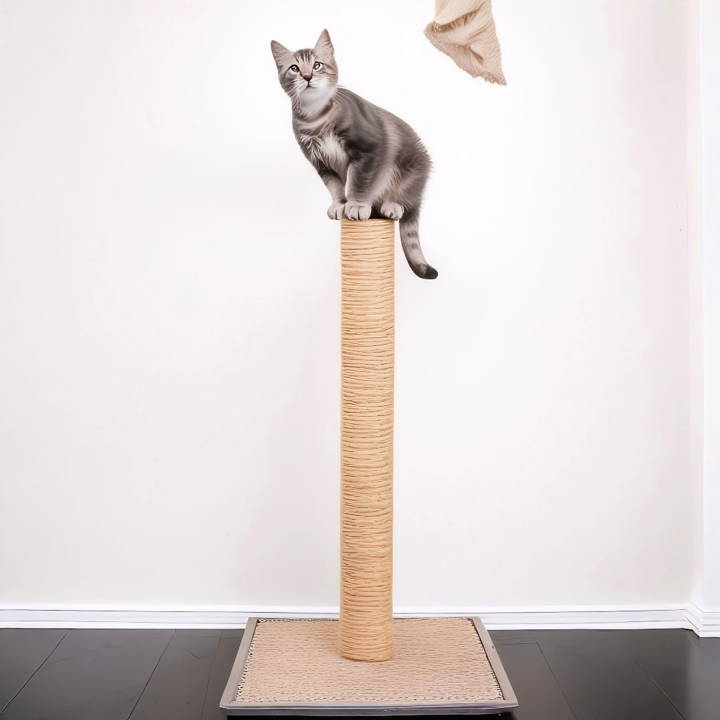
Building a DIY cat scratcher not only saves money but also provides a great project that you can feel proud of. I followed a step-by-step guide that made the entire process clear and easy. The satisfaction of making something useful and watching my cat enjoy it was truly rewarding.
These instructions will help you make one too. I'm confident they will help you and your cat enjoy a great time together.
Understanding Your Cat's Scratching Behavior
Cats scratch to keep claws sharp, stretch, and flex. This normal behavior acts as exercise, keeping them agile. Cats scratch to mark territory with scent glands on their paws, leaving a familiar smell for comfort.
Cats don't scratch to be destructive; it's instinctive and beneficial. Provide a scratching post to help them satisfy this natural urge.
By understanding why cats scratch and accommodating their needs, you can build a DIY scratching post that keeps your cat happy and your furniture intact. It's a win-win situation for both of you!
Planning and Gathering Materials
Learn efficient planning and gathering materials for your project. Discover the importance of each material and their specific roles for success.
Why Each Material is Needed:
- PVC Pipes: They form a sturdy base and post. PVC is durable, lightweight, and easy to work with.
- Sisal Rope: Cats love the texture of sisal for scratching. It also helps them shed the outer layer of their claws.
- Wooden Board: Serves as the stable base and top of the post. Provides weight and stability.
- Heavy-Duty Glue: Ensures that everything stays attached, especially the rope to the PVC pipe.
- Measuring Tape, Saw, and Scissors: These are used to measure and cut materials to the right size.
Step by Step Instructions
Learn how to make a DIY cat scratching post with our step-by-step guide. From planning to wrapping with sisal rope, build the perfect perch for your cat!
Step 1: Planning the Design
First, I measured the available space in my living room where the scratching post would be placed. Understanding that cats love to stretch while scratching, I decided on a height of about 3 feet for the post, which seemed sufficient for Whiskers.
Step 2: Preparing the Base
Using a wooden board cut into a 16x16 inch square provided a sturdy base. I used sandpaper to smooth out the edges, ensuring Whiskers wouldn't get any splinters during his adventures.
Step 3: Cutting and Preparing the Post
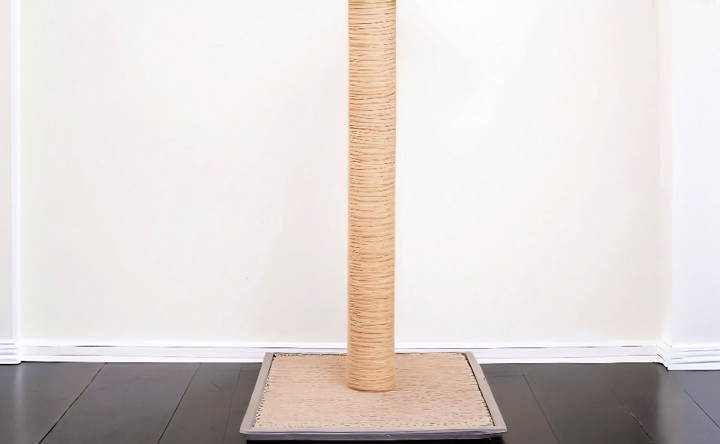
I chose a PVC pipe about 4 inches in diameter and cut it to a 3-foot length using a saw. I made sure to smooth out the edges for safety.
Step 4: Attaching the Post to the Base
To attach the PVC pipe securely to the wooden board, I drilled a hole in the center of the board big enough for the pipe to fit snugly. I then used a heavy-duty glue to fix the pipe in place, ensuring it was perfectly vertical. Waiting for the glue to dry entirely was crucial.
Step 5: Wrapping the Post with Sisal Rope
Starting at the bottom, I applied a line of glue along the PVC pipe and pressed the end of the sisal rope into it. I wrapped the rope tightly around the pipe, applying glue at intervals to keep it secure. This process was somewhat meditative but required patience and persistence, especially to keep the wraps neat and tight.
Step 6: Building a Top Perch
For added fun, I decided to add a small perch on top of the PVC pipe. I cut another piece of wood into a 12x12 inch square and glued it to the top end of the PVC pipe. This additional step was optional but made the scratching post more versatile and engaging for Whiskers.
Final Touches
After double-checking that everything was securely attached and the glue had dried, I placed the scratching post in Whiskers' favorite corner of the living room. It took him a few sniffs and curious looks before he gave it his first tentative scratch, but it wasn't long before he was happily clawing away, sparing my furniture in the process.
Customization Ideas
Make a DIY cat scratching post that's both functional and unique, ensuring it fits your home and your cat loves it. Here are some ideas to inspire you:
Match Your Decor
- Choose materials and colors that complement your home's style. If you have a modern aesthetic, consider a minimalist design with clean lines and neutral colors.
- For a more rustic look, use natural wood or recycled materials.
Think Multi-Purpose
- Combine the scratching post with a cat bed or perch to give your cat a place to relax and observe their surroundings.
- Add shelves or steps to build a mini cat tree, encouraging climbing and exploration.
Interactive Elements
- Attach toys or dangling items to the post for added fun. Cats often enjoy batting at objects or chasing them.
- Incorporate a puzzle feeder or treat dispenser to stimulate your cat's mind and reward them for using the post.
Personal Touch
- If your cat has a favorite blanket or toy, use similar textures or scents on the scratching post to attract them.
- Engrave your cat's name or a cute design into the post for a personal touch.
Safety First
- Ensure all materials are cat-friendly and non-toxic. Avoid anything that could splinter or be ingested.
- Make sure the post is stable and won't tip over when your cat uses it.
Customizing your DIY cat scratching post caters to your cat's needs and adds style to your home. A well-loved post means less furniture scratching!
Maintenance and Care Tips
Keeping your cat's scratching post in good shape is essential for its longevity and your cat's continued interest. Here are some straightforward tips to help you maintain and care for the scratching post:
Regular Inspection
- Check the post regularly for any signs of wear and tear. Look for loose parts, exposed nails, or staples that could harm your cat.
- Tighten any screws or bolts to ensure the post remains stable and secure.
Cleaning Routine
- Vacuum the scratching post to remove loose fur and debris. This helps keep your home clean and the post inviting for your cat.
- If the post has a fabric covering, spot clean any stains using a pet-safe cleaner.
Replace Worn Parts
- If parts of the post, like the sisal rope, become frayed or worn, replace them promptly. This keeps the post safe and attractive for your cat to use.
- Offer replacement parts like new scratching panels or ropes to keep the post feeling fresh.
Encourage Use
- If your cat loses interest, sprinkle the post with catnip or attach new toys to rekindle their curiosity.
- Place the post in your cat's favorite area to encourage frequent use.
Avoid Harsh Chemicals
- Never use strong cleaning agents or chemicals on the post. These can be harmful if your cat ingests them.
- Opt for natural cleaning solutions or simply use warm water and a mild detergent.
By following these tips, you can keep your DIY cat scratching post safe and fun for your cat, satisfying their scratching needs and protecting your furniture.
FAQs About DIY Cat Scratching Post
Discover essential faqs about DIY cat scratching posts. Learn tips, materials, and techniques to build the perfect scratching post for your cat.
Consider your cat’s size and scratching habits. The post should be tall enough for your cat to fully stretch while scratching. A good starting point is at least 24 inches tall. The base must be wide and heavy enough to prevent tipping.
Yes, you can use carpet. It's a softer alternative and can be more visually appealing. However, many cats prefer the texture of sisal rope, which is also more durable for scratching.
The key to stability is a heavy and wide base. You can add weight by using thicker wood or attaching additional materials like a tile or brick under the base. Make sure the base is at least as wide as the post is tall.
Yes, ensure all materials are non-toxic and safe for cats. Avoid loose parts that could be choking hazards. Securely fasten all components, so nothing wobbles or detaches. Regularly inspect the post for wear and tear to keep it safe for use.
Cats can be particular about new items in their environment. To encourage your cat to use the scratching post:
Place it near their favorite area or where they typically scratch.
Use catnip or a catnip spray to attract them to the post.
Play with your cat near the post to build positive associations.
Praise and treat your cat when they use the post to reinforce the behavior.
Conclusion
In conclusion, making your own DIY cat scratching post can be both fun and rewarding. By following these step-by-step instructions, you can build a unique scratching post that your cat will love. Whether you're saving money or looking for a personalized touch, making a cat scratching post at home offers a practical and enjoyable project. Enjoy the process and watch your feline friend relish their new creation!


