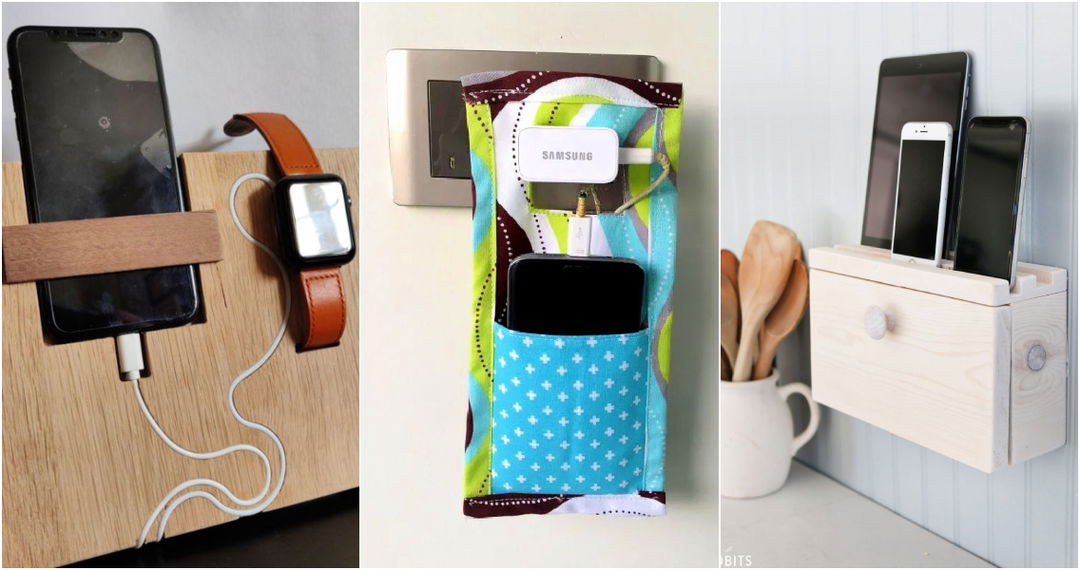
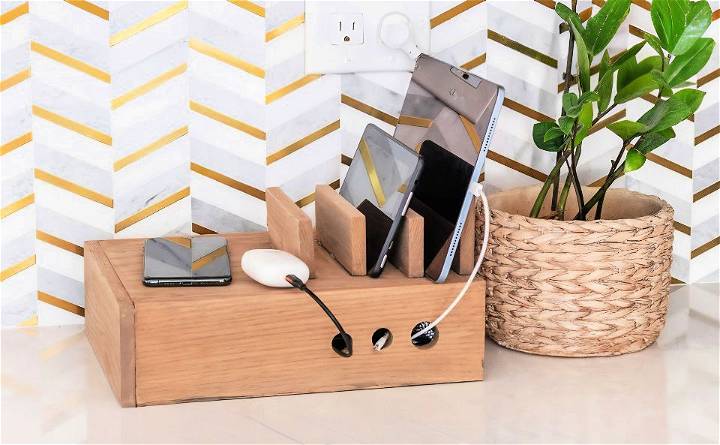
As someone who loves DIY projects and despises cable clutter, I embarked on making a DIY charging station with wireless charging. This endeavor was sparked by my frustration with the disorganized cords that seemed to take over my space. What I envisioned was not just a charging station but a piece of functional decor that could charge multiple devices without contributing to the chaos. This article is a step-by-step guide, gleaned from my personal experience, to help you build your own mess-free charging haven.
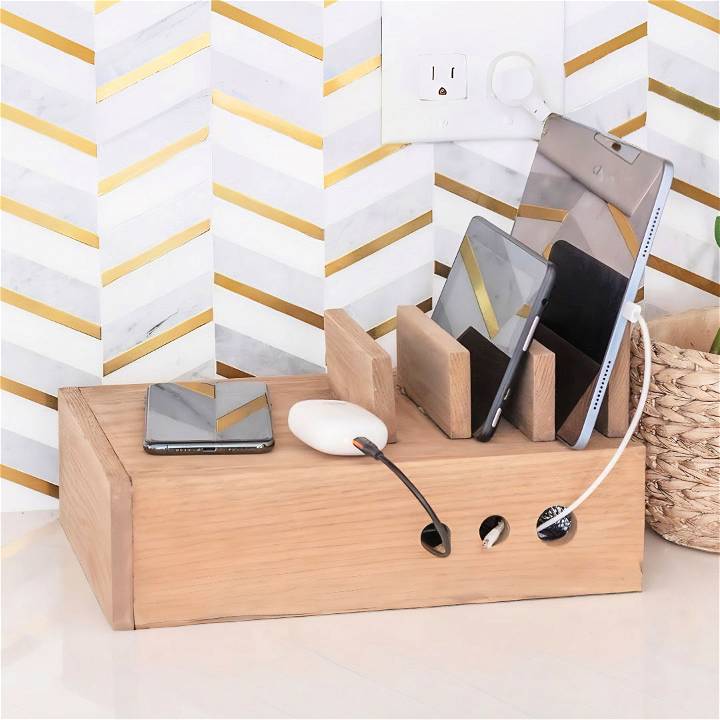
Materials Needed
- Oak Plywood: I chose oak plywood for its durability and aesthetic appeal. The amount you need depends on the size you want your charging station to be.
- Half-inch Oak Boards: These were used for the sides of the box, matching the oak plywood.
- Hot Glue Gun & Glue Sticks: Hot glue is perfect for holding pieces together temporarily without sacrificing too much strength.
- Finishing Nails: For added stability, though not absolutely necessary if you're using wood glue or screws.
- Wood Glue/Screws: Optional, for those who prefer a more robust construction.
- Small Square Wooden Dowels: These act as supports for the top lid.
- Wireless Charger: Essential for the wireless charging feature.
- Router & Straight Bit: For hollowing out the space for the wireless charger.
Why These Materials?
The choice of oak was due to its mixture of strength and aesthetic appeal—it's easy to work with but tough enough to hold the structure. Hot glue provides a quick and effective way to hold pieces in place, especially for beginners or quick projects. The rest of the materials facilitate the construction and functionality of the charging station.
Step-by-Step Guide
Learn how to make a DIY Charging Station in 7 easy steps: cut plywood, assemble the box, embed the wireless charger, organize cables, and more.
Step 1: Cut the Plywood and Boards
First, measure and cut your oak plywood and half-inch boards according to the size you desire. The size of your box will depend on how many devices you wish to charge.
Step 2: Assemble the Box
Using the hot glue gun, apply glue to the edges of the boards and press them together to form the box. If you've chosen to use wood glue or screws for extra strength, apply or drill them accordingly.
Step 3: Prepare the Top Lid
Cut up small pieces of the square wooden dowels and glue them inside the box. These will support the top lid where the wireless charger will be embedded.
Step 4: Embedding the Wireless Charger
Mark the position for the wireless charger on the top lid. Then, using a router with a straight bit, carefully hollow out the area for the charger. Patience is key here, as you need to make sure the depth is just right for the charger to function effectively.
Step 5: Finishing Touches
After ensuring the wireless charger fits perfectly, it's time to focus on aesthetics. Apply edge banding to hide raw edges, and stain the wood if desired for a professional finish.
Step 6: Organize Cables and Attach the Charger
Drill holes on the side of the box for cables to pass through. Place a power strip inside the box, and secure the wireless charger with hot glue on its edges only, to avoid adding unnecessary thickness between the charger and your devices.
Step 7: Test and Enjoy
With everything set up, plug in the power strip and test the charging station with your devices. Adjust the positions as necessary to ensure optimal charging.
Customization Ideas for Your DIY Charging Station
Making a DIY charging station is not just about functionality; it's also an opportunity to add a personal touch to your space. Here are some ideas to customize your charging station:
- Choose Your Style: Think about the overall look you want. Do you prefer a modern, sleek design or a more rustic, wooden one? Select materials that match your style, such as bamboo for a natural look or acrylic for a contemporary vibe.
- Color Coordination: Paint or decorate your charging station to complement the room it will be in. If it's for a common area, neutral colors might work best, while a personal space can have more vibrant hues.
- Add Labels: If you're making a multi-device station, label each section with the device name or the name of the family member who uses it. This will keep things organized and easy to find.
- Incorporate Wireless Charging: If you have devices that support wireless charging, consider integrating a wireless charging pad into your station. This adds convenience and reduces cable clutter.
- Cable Management: Use hooks, clips, or ties to keep cables tidy. You can also build a hidden compartment to store excess cable lengths.
- Accessibility Features: If you or someone in your household has accessibility needs, consider adding features like easy-to-use switches or voice-activated controls.
- Light It Up: Add small LED lights to indicate when devices are charging or to add a soft glow to the station at night.
- Make It Portable: If you often move around the house or travel, design your charging station to be portable. Use lightweight materials and add a handle for easy carrying.
- Eco-Friendly Materials: Use recycled or sustainable materials to make your charging station environmentally friendly.
By using these ideas, you'll make a charging station that's practical and reflects your personality. Keep it simple and focus on what's essential for you. Enjoy making something unique!
Troubleshooting Common Issues
When building your DIY charging station, you might encounter a few hiccups along the way. Here's how to troubleshoot some common issues:
Device Not Charging:
- Check if the power source is on and working.
- Ensure that the cables are properly connected to both the device and the charging station.
- Inspect the cables for any damage and replace them if necessary.
Overheating:
- Make sure there's enough ventilation around the charging station to prevent devices from overheating.
- Avoid placing the charging station in direct sunlight or near heat sources.
Loose Connections:
- Tighten any loose screws or connections that might be causing instability.
- Use cable ties or clips to secure wires and prevent them from disconnecting.
Short Circuits:
- Double-check all electrical connections to ensure they are correct and secure.
- If you're not confident in handling electrical components, seek help from a professional.
Wireless Charging Not Working:
- Confirm that your device supports wireless charging.
- Position the device correctly on the charging pad.
- Check the charging pad's connection to the power source.
LED Indicators Not Functioning:
- Verify that the LED lights are properly connected to the power source.
- Replace any faulty LEDs or resistors.
Station Not Recognizing Devices:
- Reset the charging station by unplugging it for a few minutes and then plugging it back in.
- Update any software if your charging station uses a smart system.
By fixing these problems, your DIY charging station will work well. Remember to prioritize safety and consult an expert if needed.
Energy Efficiency Tips
Making your DIY charging station energy-efficient is not only good for the environment but also for your electricity bill. Here are some tips to help you achieve this:
- Use Smart Power Strips: Smart power strips can cut off the power supply when devices are fully charged or not in use, preventing energy waste.
- Opt for Quality Cables: High-quality cables with good conductivity can charge devices faster and more efficiently, reducing energy consumption.
- Incorporate Solar Panels: If possible, add small solar panels to your charging station to harness renewable energy.
- LED Indicators: Use LED indicators to show when devices are charging. LEDs consume less power compared to other types of lights.
- Timers and Sensors: Install timers or motion sensors to turn off the charging station when it's not needed, especially overnight.
- Choose Energy-Efficient Chargers: Look for chargers with a high energy efficiency rating to minimize losses during charging.
- Regular Maintenance: Keep your charging station clean and dust-free to ensure it operates efficiently.
- Educate Users: If you're sharing the charging station with others, educate them about unplugging devices once they're charged.
By following these tips, you can build an energy-efficient charging station that's cost-effective and environmentally friendly.
FAQs About DIY Charging Stations
Get all your questions answered about DIY charging stations in this comprehensive FAQ guide. Learn how to build and customize your own charging station at home.
How can I ensure my charging station is safe to use?
Make sure all electrical connections are secure and use a power strip with surge protection. Avoid overloading the station with too many devices and check that all components are rated for the voltage and current they will carry. Regularly inspect for any signs of wear or damage.
Can I integrate wireless charging into my DIY station?
Yes, you can integrate wireless charging by installing a wireless charging pad into your station. Ensure it's compatible with your devices and securely connected to the power source. Follow the manufacturer's instructions for installation and use.
How do I manage cables to prevent tangling?
Use cable organizers, clips, or ties to keep cables neatly arranged. Designate specific spots for each cable, and consider making a hidden compartment within the station to store excess lengths of cables.
What are some customization options for my charging station?
Customize your charging station by choosing a design that fits your style, adding color or patterns, labeling sections for different devices, and incorporating features like LED indicators or portable handles for easy transport.
How can I make my charging station more energy-efficient?
Use smart power strips that turn off automatically when devices are fully charged, opt for high-quality cables for better efficiency, and consider adding timers or sensors to reduce power usage when the station is not in use.
Conclusion
Building this DIY charging station not only solved my cable chaos but also provided a satisfying sense of accomplishment. This project is a perfect weekend task for any DIY enthusiast looking to combine functionality with style. Remember, the beauty of DIY is in customization—you can adjust the dimensions, materials, and finishes to suit your style and needs.
The process might seem daunting at first, especially if you're new to woodworking or DIY. However, each step is an opportunity to learn and improve. My journey taught me valuable skills and gave me the confidence to undertake more ambitious projects. So, grab your tools and materials and transform that dreaded cable mess into a sleek, organized charging station today.


