Making your own DIY wall sconce can be an exciting project. I once needed extra lighting in my living room, so I decided to make one myself. With a few tools and materials, I designed a simple and modern sconce that fit my space perfectly. It not only provided light but also added aesthetic value to my room.
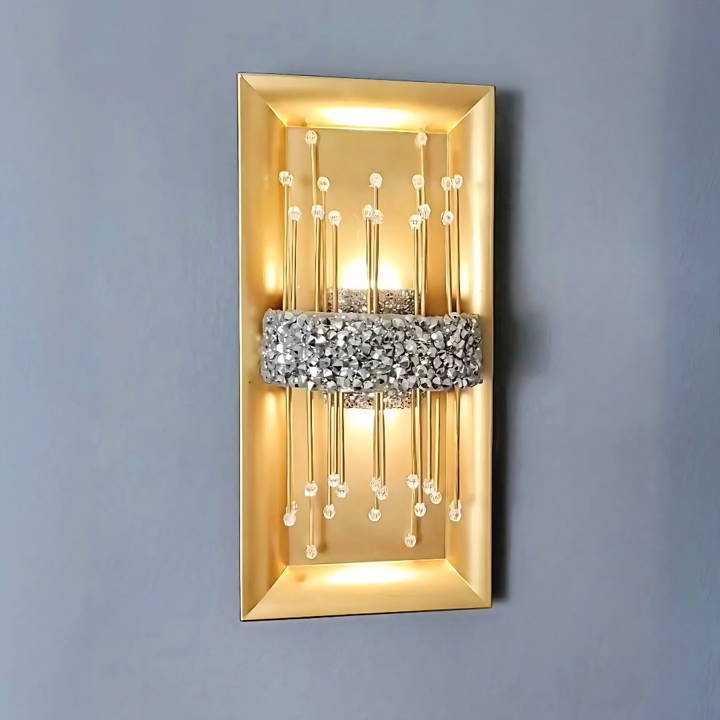
After finishing the project, I felt a sense of accomplishment. The steps were easier than I had anticipated, and the result was both functional and beautiful. Crafting a DIY wall light can transform any room while saving you money.
I'm helping with this guide because it will inspire you to make your own stylish sconces with ease.
Materials Needed and Their Purpose
Before diving into the crafting process, let's talk about the materials needed and why each is essential:
- Bamboo Skewers: Available at Dollar Tree, they form the main structure of the sconce. I used them to make a staggered design, offering depth and texture to the piece.
- Foam Discs: These serve as a base for the push lights, ensuring they're securely positioned within the sconce.
- Push Lights: Chosen for their ease of use and installation, push lights eliminate the need for wiring, making this project suitable for any room.
- Metallic Gold Spray Paint: I selected Rust-Oleum's metallic gold to give the sconce a luxurious finish, aligning with the glam aesthetic.
- Hot Glue and Construction Adhesive: While hot glue was used for initial placement, construction adhesive provided the long-term durability needed for such a decor piece.
- Decorative Add-ons: Clear gemstone beads and rhinestones from Hobby Lobby added that extra sparkle, critical for achieving the glam look.
- Ribbon: A beautiful ribbon not only concealed the push lights for a cleaner appearance but also added a decorative touch.
- Picture Hooks: These were used for mounting the sconce securely to the wall.
Step by Step Instructions
Learn how to make a DIY wall sconce at home with step-by-step instructions. From preparing the structure to final assembly, make your own stylish sconce.
1. Preparing the Structure
Firstly, I cut the bamboo skewers into various lengths to make a staggered effect. This step required precision, ensuring that each skewer was evenly cut for a symmetric design. I arranged these skewers around two foam discs that I had traced and cut out, defining the space for the push lights.
2. Building and Painting the Frame
After arranging the skewers, I proceeded to secure them with hot glue, reinforcing their structure. The charger plate from Dollar Tree served as the perfect frame for my sconce, which I then spray-painted along with the skewer arrangement in metallic gold for that luxurious finish.
3. Embellishing with Sparkles
Once the paint dried, I meticulously glued clear gemstone beads along the edge of the skewers and adorned the center with rhinestones, enhancing the glam factor. This step was both therapeutic and transformative, as the sconce began to take on a jewel-like appearance.
4. Final Assembly
With the decorative elements in place, I attached the ribbon around the foam disc to gracefully conceal the push lights. Last but not least, I affixed the picture hooks with E6000 adhesive for a reliable hanging solution.
Reflections on the Project
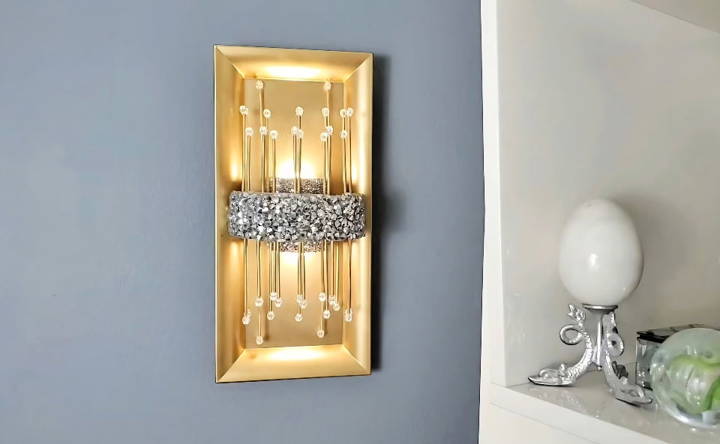
Seeing the completed DIY glam wall sconce hanging beautifully on my wall filled me with pride. Not only did this project allow me to save money by utilizing Dollar Tree items, but it also gave me a unique decor item that perfectly matched my personal style.
Tips for Success
- Patience is Key: Take your time with each step, especially when cutting the skewers and applying the decorative elements.
- Customize: Feel free to adjust the design to suit your taste, whether it involves changing the color scheme or adding different embellishments.
- Safety First: When using spray paint and construction adhesive, work in a well-ventilated area and follow all safety guidelines.
Customization Ideas for DIY Wall Sconces
Making a DIY wall sconce is not just about adding light to your space; it's about infusing your personality into your home. Here are some customization ideas to make your DIY wall sconces uniquely yours:
- Choose Your Style: Whether you prefer a modern, rustic, or vintage look, select a design that reflects your personal taste. Consider using materials like metal for an industrial feel or wood for a warm, rustic touch.
- Play with Colors: Paint your sconces to match or contrast with your wall color. Soft, neutral tones can make a calming effect, while bold colors can make a statement piece.
- Mix and Match Materials: Combine different materials such as glass, metal, and wood. For example, a wooden base with a metal holder or a glass shade can add depth and interest to your design.
- Add Textures: Use textured paint or add elements like beads, fabric, or decorative metalwork to give your sconces a unique finish.
- Incorporate Lighting Options: Choose from various lighting options like LED strips, fairy lights, or classic Edison bulbs to set the right mood.
- Personalize with Patterns: Stencil a pattern onto your sconce or use patterned washi tape for an easy and reversible design change.
- Functional Features: Add features like a dimmer switch or a motion sensor for added convenience and energy efficiency.
- Eco-friendly Choices: Opt for sustainable materials and energy-saving lights to make your project eco-friendly.
The key to a successful DIY project is fun and creativity. Your wall sconce should brighten your room and reflect your unique style.
Maintenance and Upkeep of DIY Wall Sconces
Taking care of your DIY wall sconces is essential to ensure they continue to brighten up your space effectively. Here's how you can maintain them with ease:
- Regular Cleaning: Dust your sconces regularly with a soft cloth to prevent dust accumulation. For glass parts, use a gentle glass cleaner to maintain clarity.
- Check the Fixtures: Periodically inspect the fixtures for any loose parts or damage. Tighten any loose screws and replace damaged components as needed.
- Bulb Replacement: Replace light bulbs as soon as they burn out. If you're using LED strips, ensure they are functioning correctly and replace them if they show signs of wear.
- Battery Check: For sconces using battery-powered lights, check the batteries regularly and replace them before they completely drain to avoid corrosion.
- Wire Management: Keep the wires neatly arranged and check for any signs of fraying or damage. Replace any damaged wires immediately to prevent electrical hazards.
- Update the Look: Refresh the look of your sconces from time to time by repainting or adding new decorative elements to match your evolving style.
By following these simple maintenance steps, you can enjoy your custom wall sconces for many years to come.
FAQs About DIY Wall Sconce
Find answers to faqs about DIY wall sconce projects. Get tips, tools, and expert advice for making stunning wall sconce lighting at home.
Safety is paramount when working with electricity. Make sure to:
Use UL-listed components
Follow the electrical code for your area
Insulate all connections properly
If unsure, consult with a qualified electrician.
Absolutely! DIY wall sconces are all about personalization. You can:
Choose materials that complement your space
Paint or stain wood elements
Use unique bulbs for different lighting effects
Adjust the size and shape to fit your wall space.
Yes, it can be. By making your own sconce, you can:
Save money by using materials you may already have
Avoid the markup on retail lighting fixtures
Create a custom look without the custom price tag.
Get inspired with these ideas:
Use mason jars for a rustic look
Repurpose old metal pipes for an industrial vibe
Make a minimalist sconce with a simple bulb and cord
Incorporate plants or greenery for a natural element.
Selecting the right bulb is crucial for both the look and efficiency of your wall sconce. Consider the following:
Brightness: Measured in lumens, choose a bulb that provides the level of brightness you need.
Color Temperature: Measured in Kelvin, bulbs with lower Kelvin numbers give off a warmer, yellowish light, while higher numbers result in cooler, bluish light.
Energy Efficiency: LED bulbs are more energy-efficient and have a longer lifespan than traditional incandescent bulbs.
Size and Fit: Ensure the bulb fits within the design of your sconce and is compatible with the bulb holder you're using.
Conclusion
In conclusion, making a DIY wall sconce is a fantastic way to add a modern touch to your home decor. With just a few materials and a bit of effort, you can craft beautiful and functional wall lights. This project is both enjoyable and rewarding, offering a personalized touch straight from your hands. Start your DIY wall sconce project today and brighten up your space with style and creativity!


