When I first stumbled upon string art, I was searching for an easy yet captivating way to make something beautiful with my hands. I found a fascinating video tutorial online that detailed a simple step-by-step process for making a string art heart, which seemed perfect for a beginner like me. Intrigued and eager to start my project, I decided to dive into this creative venture.
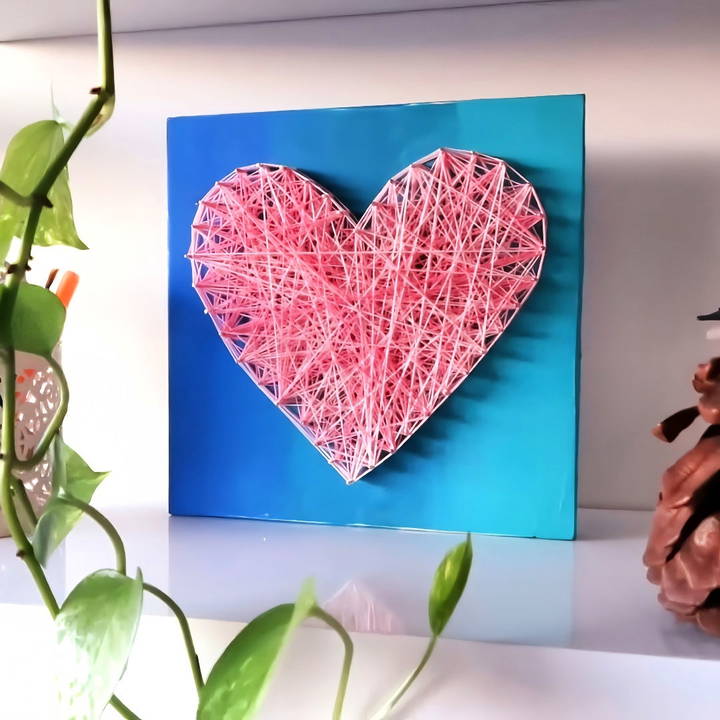
Making DIY string art is an exciting way to decorate your space or make thoughtful gifts without needing extensive artistic skills. Here's how I managed to craft a heart-shaped string art piece from scratch. Follow along, and you too can make something amazing and unique.
Gathering Materials: Setting the Stage for Creativity
Before I could start crafting, I needed a few essential materials. Let me share what each item is and why it's necessary for this project:
1. Wooden Board
I visited a local DIY store and made my way to the timber department. I was looking for a board that was roughly 20 cm wide and 18 mm thick. It's important to have a sturdy base for string art, as it needs to hold the nails firmly in place. At the store, you can get the board cut into 20 x 20 cm squares, but I opted to do this step at home.
2. Sandpaper
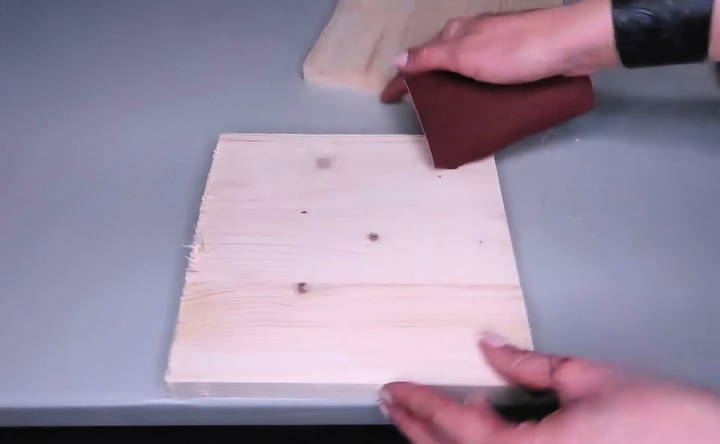
To ensure the edges of the wooden board were smooth and splinter-free, I used sandpaper. A neatly finished surface not only looks better but also prevents any accidental snags or injuries while working.
3. Acrylic Paint
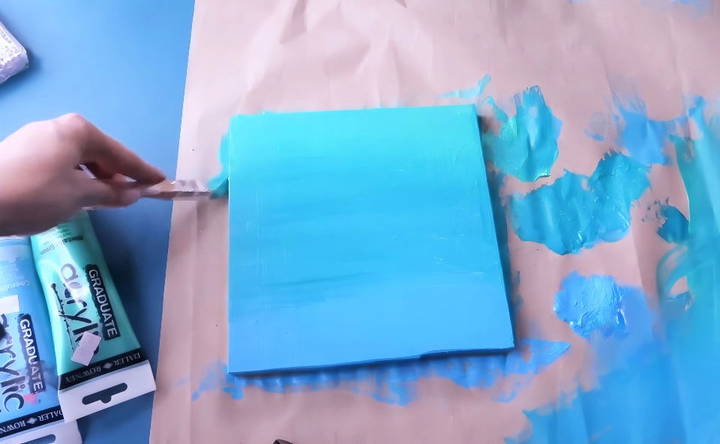
Paint serves as the backdrop for your artwork, adding color and flair to your creation. I chose some vibrant acrylic paints to coat the board, remembering to cover the edges for a seamless look.
4. Nails
I picked up a pack of small nails from the DIY store as they are an integral part of holding the string in place. They're affordable, and you don't need many for a single piece of art.
5. String
For this project, I opted for a smooth cotton string called Gamma Iris. This type of string is essential as it tangles well around the nails and looks neat. Don't worry if you can't find the exact brand—I've found that any similar smooth cotton string works just as well.
6. Paper and Pencil
I used a simple sheet of office paper and a pencil to outline the heart shape on my board. You can also print out a design if drawing isn't your strong suit.
7. Hammer
A small hammer is necessary to gently drive the nails into the board. Be cautious, as you want them to be secure but not completely driven into the wood.
8. Glue (optional)
To ensure the knots in the string are extra secure, a tiny drop of glue can make all the difference.
Step by Step Instructions
Learn DIY string art with our step-by-step guide. From preparing the wooden board to evaluating the finished piece, become a string art master!
Preparing the Wooden Board
With all my materials gathered, I started by preparing the wooden board. Here's how I did it:
Smoothing the Surface
I sanded down the edges and surface of the board with sandpaper until they were smooth to the touch. This step is crucial to avoid any rough patches that could cause problems later.
Painting the Background
Next, I grabbed my acrylic paints and started applying them to the board. Painting gave the project a vibrant base and enhanced the final look. Once the paint dried, I lightly sanded the surface again to make the wood grain pop—a small detail that adds texture and depth to the artwork.
Designing the Image
With the board prepped, it was time to make my design.
Drawing the Design
I laid a sheet of office paper over the wooden board and drew a heart shape using a pencil. Feel free to get creative here and try different shapes like stars or initials, especially if it fits your personal taste.
Placing the Nails
Now came the meticulous part of placing the nails. The key is to start at the corners of your shape:
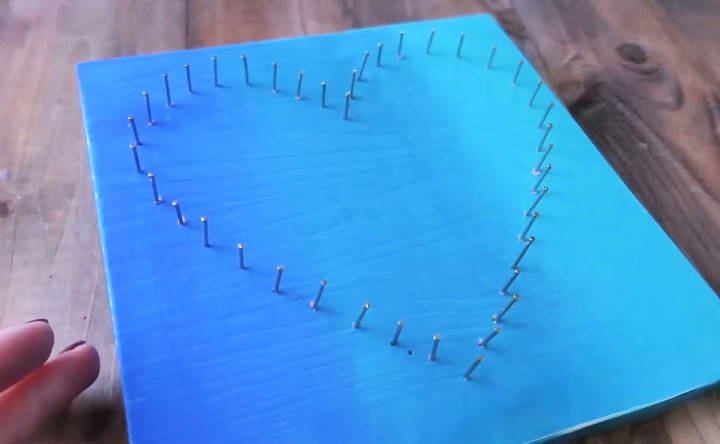
- Secure the Corners: I gently hammered nails into each corner of the heart. The idea is to have them sit a few millimeters above the board to leave enough room for the string.
- Follow the Outline: I continued placing nails along the outline of the heart, leaving about a 1 cm gap between each. This consistency ensures even distribution of the string later.
Once all the nails were in, I carefully peeled away the paper, leaving behind a perfect outline of nails ready to go.
Mastering the Art of Stringing
With the nails in place, the most exciting part was about to begin—working with the string.
Anchoring the String
I started by tying a knot at the end of the string, making sure it was secure. To make it extra reliable, I tied a triple knot around one of the nails at a corner. I applied a dab of glue to keep it from unraveling.
Outlining the Shape
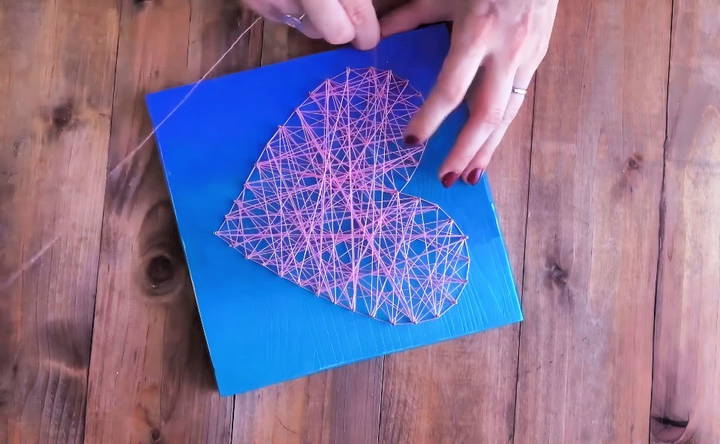
I first ran the string around the entire outline of the heart. This forms the framework and anchors the design.
Filling in the Design
Next, I began weaving the string through the nails, moving freely between them. This stage allows for creativity, so let your instincts take over. The goal is to fill the heart shape while keeping the string taut and within the contours of the outline.
Here's a simple tip: Press the string down to the base of the nails as you go along, and occasionally wrap it around a nail to secure it in place. This prevents slipping or loosening.
Finishing Touches
Once I was satisfied with the pattern, I made additional passes along the contour of the heart to give a finished look. It's essential to make a few layers around the edge, which gives a polished and completed appearance.
Changing String Colors
During my project, I decided to add a touch of uniqueness by incorporating a multicolored string. This change is effortless and adds vibrancy to your art piece.
- Cut the Current String: Select an appropriate point to stop, and cut the string, tying it securely beneath the nearest string loop.
- Start a New String: Attach the new string in the same way as before, starting it with a triple knot and securing it with glue as an option.
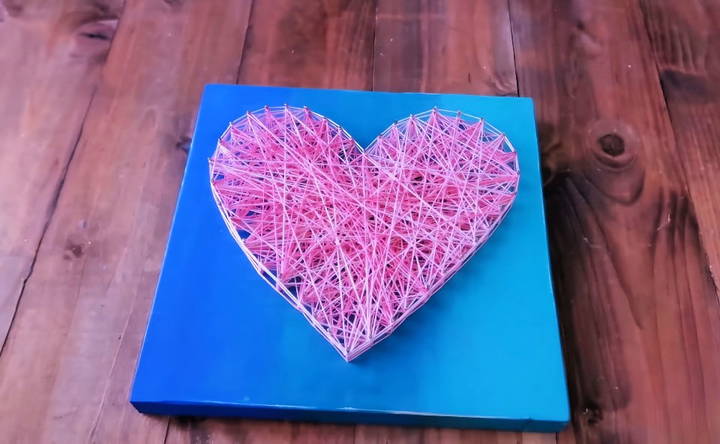
Completing the Art
As I tied the final knot, the sense of accomplishment was immense. To finish:
- Secure the Final Knot: I tied the last string under the nearest loop for added security parallel to previous efforts.
- Trim Excess String: Finally, I trimmed any excess string for a neat finish.
Evaluating the Finished Piece
After stepping back and admiring the completed heart piece, I couldn't help but feel immense pride in what I had crafted. It transformed into an elegant piece of room decor that would also make a meaningful gift.
Advanced Techniques in String Art
String art can be more than just simple designs. By using advanced techniques, you can make intricate and stunning pieces. Here are some methods to elevate your string art skills:
Layering
Layering involves making multiple layers of string to add depth and dimension to your artwork. Start with a base layer of string in one color, then add additional layers in different colors or patterns. This technique can make your design pop and look more complex.
Using Multiple Colors
Instead of sticking to one color, try using multiple colors of string. You can make gradients, rainbows, or even specific color patterns. This adds visual interest and can make your piece more vibrant.
Incorporating Beads and Other Materials
Adding beads, sequins, or other small decorative items can enhance your string art. You can thread beads onto the string before wrapping it around the nails or glue them onto the board. This adds texture and sparkle to your design.
Making 3D Effects
To make a 3D effect, use different lengths of nails. By varying the height of the nails, you can make parts of your design stand out more. This technique requires careful planning but can result in a striking piece of art.
Using Different Types of String
Experiment with different types of string, such as embroidery floss, yarn, or metallic thread. Each type of string has a unique texture and appearance, which can change the look of your artwork. Mixing different strings can also add variety and interest.
Combining String Art with Other Art Forms
Try combining string art with other art forms, like painting or wood burning. For example, you can paint a background on the board before adding your string art. This can make a more cohesive and artistic piece.
Making Custom Patterns
Instead of using pre-made patterns, try making your own. You can draw your design on paper first, then transfer it to the board. Custom patterns allow you to personalize your artwork and make it truly unique.
Tips for Success
- Plan Ahead: Sketch your design and plan your colors and materials before starting.
- Take Your Time: Advanced techniques can be time-consuming. Be patient and work carefully.
- Practice: Try out new techniques on small projects before applying them to larger pieces.
- Experiment: Don't be afraid to try new things and see what works best for you.
By incorporating these advanced techniques, you can take your string art to the next level.
Common Mistakes and How to Avoid Them
Making string art can be a fun and rewarding experience, but beginners often encounter some common pitfalls. Here are some mistakes to watch out for and tips on how to avoid them:
Choosing the Wrong Materials
- Mistake: Using low-quality or inappropriate materials can lead to frustration and poor results.
- Solution: Invest in good-quality string, nails, and a sturdy board. Cotton embroidery floss, small nails with flat heads, and a smooth wooden board are ideal for most projects.
Improper Nail Placement
- Mistake: Placing nails too close together or too far apart can affect the final design.
- Solution: Plan your nail placement carefully. Use a ruler or template to ensure even spacing. Typically, nails should be about 1 cm apart for most designs.
Inconsistent Tension
- Mistake: Applying inconsistent tension to the string can make the design look uneven and messy.
- Solution: Maintain a steady tension while wrapping the string. Practice on a small piece to get a feel for the right amount of tension.
Skipping the Outline
- Mistake: Not outlining the design first can make it difficult to follow the pattern accurately.
- Solution: Always outline your design with string before filling it in. This helps to define the shape and makes the filling process easier.
Overcomplicating the Design
- Mistake: Starting with a complex design can be overwhelming for beginners.
- Solution: Begin with simple patterns and gradually move to more complex designs as you gain confidence and skill.
Not Securing the String Properly
- Mistake: Failing to secure the string ends can cause the design to unravel.
- Solution: Tie knots at the beginning and end of the string. Use a small dab of glue to secure the knots and prevent them from coming loose.
Ignoring Safety
- Mistake: Not taking safety precautions can lead to injuries.
- Solution: Be careful when hammering nails. Use a thimble to protect your fingers and work on a stable surface to avoid accidents.
Rushing the Process
- Mistake: Trying to complete the project too quickly can result in mistakes and a less polished final product.
- Solution: Take your time and enjoy the process. String art requires patience and attention to detail.
Not Planning the Design
- Mistake: Jumping into the project without a clear plan can lead to a disorganized design.
- Solution: Sketch your design on paper first. Plan the colors, nail placement, and string paths before starting.
Using the Wrong Type of String
- Mistake: Using string that is too thick or too thin can affect the appearance and durability of the artwork.
- Solution: Choose the right type of string for your project. Embroidery floss is a popular choice because it is strong and comes in many colors.
By being aware of these common mistakes and following these tips, you can make beautiful and professional-looking string art.
FAQs About DIY String Art
Find easy answers to common questions about DIY string art, from materials to techniques, ensuring a successful crafting experience.
String art is a form of art where you create designs by stretching colorful threads or strings between nails or pins that are hammered into a wooden board or canvas. The threads crisscross and overlap, forming intricate patterns, shapes, or even words. It's a fun and accessible art form that can be enjoyed by people of all ages and skill levels.
The beauty of string art is that you can create almost any design you can imagine! You can find free templates and patterns online, or you can draw your own. Popular designs include geometric shapes, animals, flowers, and inspirational quotes.
Plan your design carefully. Decide on the size and complexity of your design before you start.
Mark your pattern accurately. If you're using a template, transfer it to your board carefully.
Use the right nails or pins. Choose nails or pins that are the right size and length for your project.
Start with the outline. String the outline of your design first, then fill in the details.
Be patient and have fun! String art takes time and patience, but the results are worth it.
There are many resources available to help you find inspiration for your string art projects. You can search online for tutorials, blogs, and social media groups dedicated to string art. You can also visit your local craft store or library for books and magazines about string art.
Absolutely! You can experiment with different types of string or thread to make unique effects. Embroidery floss, yarn, twine, and even thin wire can all be used for string art.
Reflection and Invitation
This string art project was not only an enjoyable creative endeavor but also reinforced my crafting abilities. Every step, from choosing the right materials to investing time in careful execution, made the process rewarding. I encourage you to try making your piece—it could be heart-shaped like mine or in a design unique to you.
I also invite you to reflect on the joy of making crafts and enjoying the fruits of your labor, whether it's for personal enjoyment or gifting. Feel free to reach out in the comments below and share your experience or any variations you made. There's always room for creativity in string art, and I'd love to see what you come up with.
Join me again soon for more crafting adventures, and remember that the joy of making is only a thread away!


