Making a popsicle stick catapult is a fantastic hands-on project for kids and adults alike. Not only is it fun to build, but it's also a great way to explore principles of physics, engineering, and creativity. This project requires only a few simple materials, most of which you might already have at home, making it an affordable and educational activity. Here's a step-by-step guide on making your own popsicle stick catapult, followed by some tips for testing and adjusting it to achieve better results.
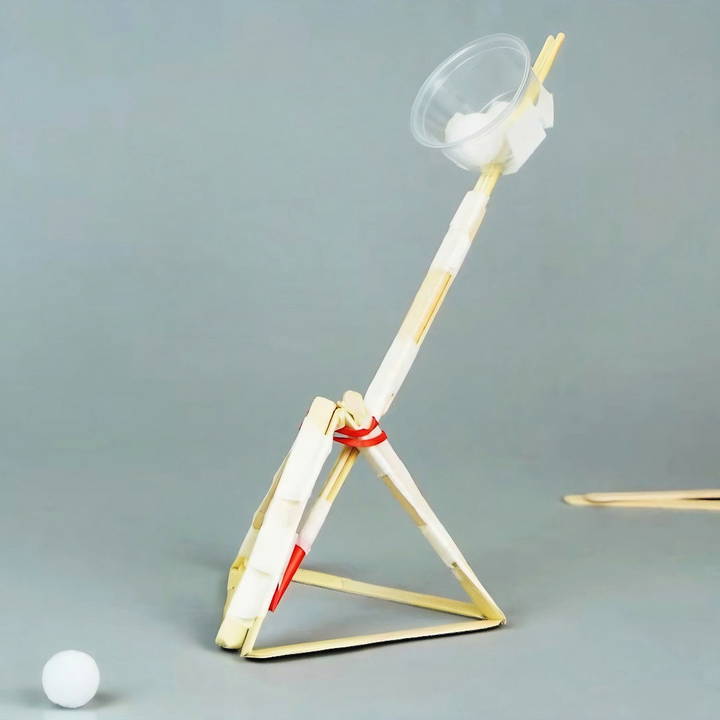
Materials You'll Need
To make your popsicle stick catapult, gather these items:
- Popsicle Sticks (at least 11)
- Wooden Skewers (3)
- Rubber Band
- Straw (cut to about 2 inches in length)
- Small Plastic Cup (for holding projectiles)
- Masking Tape (scissors will also be needed to cut the tape)
- Safe Projectiles like cotton balls, Styrofoam balls, or small pieces of sponge
Step by Step Instructions
Learn to make a popsicle stick catapult with our easy guide. Follow step-by-step instructions and tips for building and improving your design.
Making the Base with Popsicle Sticks
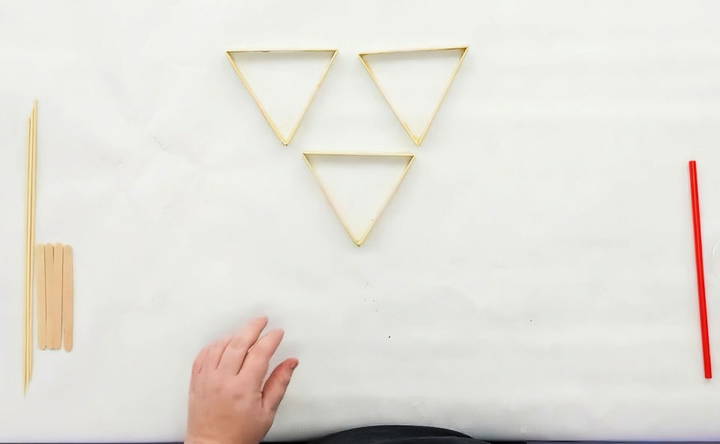
- Forming a Triangle: Start by laying out three popsicle sticks in a triangle shape. These sticks will form the base of your catapult and need to be sturdy.
- Securing with Tape: Take a piece of masking tape (about 1.5–2 inches long) and place it sticky side up. Place the end of a popsicle stick on the tape, followed by another stick. Ensure that the tips of the popsicle sticks don't touch at the corners. Once aligned, fold the tape over the ends to secure them together.
- Repeat for Stability: Repeat the above process to make two more triangles, resulting in three identical triangle bases.
Assembling the Catapult's Structure
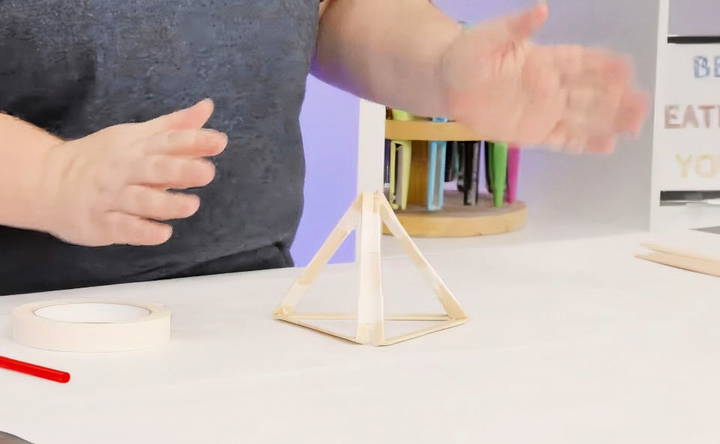
- Building a Pyramid Shape: Arrange the three triangles in a standing position to form a pyramid. Tape the triangles together along the sides using two to three pieces of tape per side for added stability.
- Reinforcing the Base: Once all three triangles are taped together securely, you'll have a pyramid structure that serves as the base of your catapult.
Constructing the Launch Arm
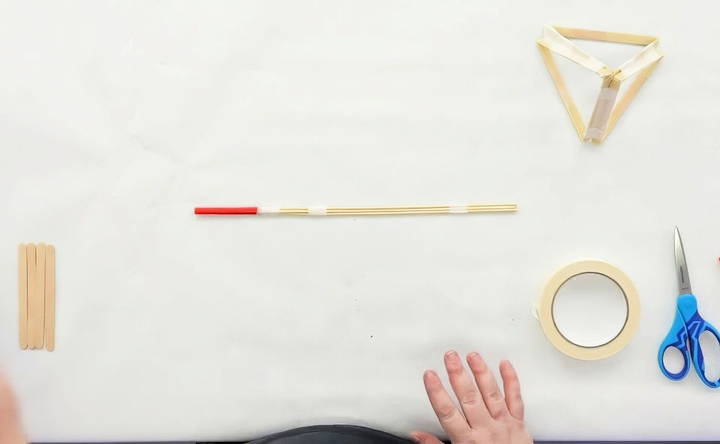
- Taping the Skewers: Take three wooden skewers and tape them together at one end. This will make a solid and sturdy arm for your catapult.
- Adding the Straw for a Pivot: Cut a piece of straw about 2 inches long. Try to insert all three skewers into the straw. If they don't all fit, inserting two skewers is fine. Slide the straw about an inch onto the skewers and tape it down securely. This straw will act as a pivot point when launching projectiles.
- Attaching Popsicle Sticks for Stability: Tape two popsicle sticks around the midpoint of the skewer arm, one on each side. This step provides extra stability for the launch arm and prevents wobbling during use.
Attaching the Launch Arm to the Base
- Making the Hinge with the Straw: To give the arm flexibility, bend the straw slightly. This bend acts as a hinge, allowing the arm to swing back and forth when launching.
- Securing the Arm to the Base: Position the arm along one side of the pyramid base, attaching it with tape so it sits against one of the popsicle sticks. Ensure it is secure but has enough space to move freely.
Adding Tension with a Rubber Band
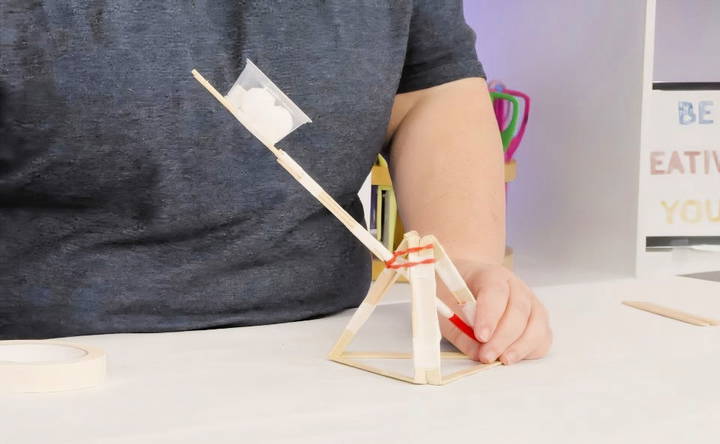
- Attaching the Rubber Band: Wrap the rubber band around one side of the base and loop it through the launch arm. This rubber band makes tension and helps propel the launch arm forward when released.
- Securing the Rubber Band: Ensure the rubber band is tight enough to make noticeable tension but not so tight that it makes the arm difficult to pull back.
Adding a Projectile Holder
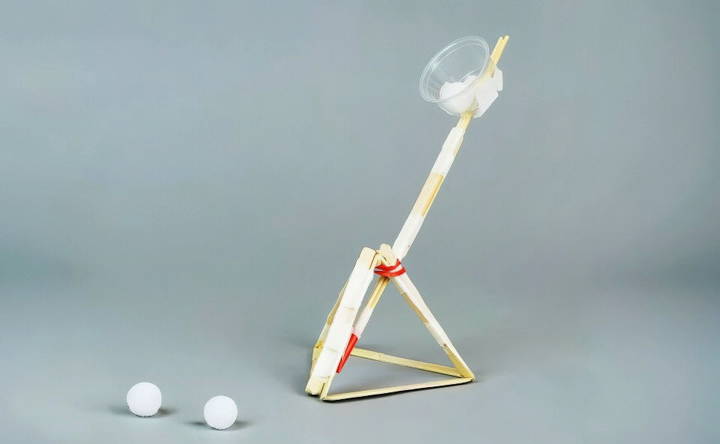
- Attaching the Cup: Tape a small plastic cup to the end of the launch arm. Leave a bit of space at the end of the sticks so that there's room to hold onto the catapult without touching the cup.
- Ensuring the Cup is Secure: Make sure the cup is firmly attached so that it can withstand the force of launching. This cup will hold the projectiles you intend to launch, so it's essential that it's stable.
Testing Your Catapult
- Load the Projectile: Place a small, lightweight object like a cotton ball or foam piece into the plastic cup. Avoid using anything too heavy, as the catapult is designed for small, lightweight items.
- Hold the Base: To keep the catapult steady, hold the base of the pyramid with one hand.
- Pull Back and Launch: With your other hand, pull back the launch arm until the rubber band is fully stretched. Release the arm and watch your projectile fly!
Tips for Improving Your Catapult
- Adjusting for Distance and Height: Experiment with the position and tension of the rubber band to see how it affects the distance and height of the launched projectile. Moving the rubber band higher or lower on the base, or adding more rubber bands, can change the power of your launch.
- Fine-Tuning Stability: If the launch arm wobbles or feels loose, add extra tape around the pivot point or use stronger adhesive materials. Ensuring the base is stable will also help with consistent launches.
- Testing Different Projectiles: Try launching different lightweight objects to see how each one flies. Objects with different weights, shapes, and textures will behave differently, giving you a chance to see physics in action.
Safety Precautions
- Avoid Pointing at People: Always aim the catapult away from people, pets, and fragile items. Even small projectiles can cause harm or damage if launched carelessly.
- Use Soft Projectiles: Stick with soft, lightweight objects that are safe for indoor play, such as cotton balls or small foam pieces.
- Supervise Young Builders: If working with young children, provide supervision during construction and testing. Ensure they understand the importance of safe handling.
Understanding the Physics Behind the Catapult
Building a popsicle stick catapult isn't just a fun craft; it's a great opportunity to learn about physics, specifically potential and kinetic energy.
- Potential Energy: As you pull back on the launch arm, the rubber band stretches, storing potential energy. The more tension in the rubber band, the greater the potential energy.
- Kinetic Energy: When you release the launch arm, this stored potential energy is converted into kinetic energy, propelling the projectile forward.
- Trajectory and Angle: Experimenting with the angle at which you pull back the arm can affect the path (trajectory) of the projectile. A higher angle may result in a higher arc, while a lower angle could increase distance.
Final Thoughts
Building a popsicle stick catapult is an exciting project that combines creativity, engineering, and a bit of scientific exploration. It's simple enough for children to understand but engaging enough for adults to enjoy. Whether you're making it for a school project, a science fair, or just for fun, this catapult will offer hours of entertainment and educational value.
FAQs About Popsicle Stick Catapult
Explore FAQs about making a popsicle stick catapult, with tips on materials, step-by-step building instructions, and fun physics insights.
If you don’t have popsicle sticks, you can use craft sticks, wooden chopsticks, or even thick cardboard strips. Just ensure they’re sturdy enough to withstand the tension of the rubber band without bending.
Yes, you can substitute the straw with a small tube, like a piece of pen casing or a short segment of thicker plastic tubing. The important part is that it holds the skewers securely to make a hinge.
To adjust the launch angle, experiment by changing the position of the rubber band on the arm or adding additional skewers or sticks to change the height of the arm's attachment point. Adjusting these factors can help you achieve higher or longer launches.
If your projectiles aren't reaching far, try tightening the rubber band or using a stronger one to increase tension. Also, check if the arm is taped securely to the base, as loose tape can absorb some energy and reduce launch power.
Soft projectiles, like cotton balls, marshmallows, small foam balls, or pieces of sponge, work well indoors. Avoid any hard or sharp objects to prevent damage or injury.
To make your catapult sturdier, use multiple layers of tape on high-stress areas like the pivot and base. Reinforcing the structure by adding extra sticks at the base or around the arm can also improve durability, especially if you plan to use it often.
Absolutely! This design is simple and effective for demonstrating principles of physics like potential and kinetic energy, trajectory, and tension. You can also make modifications and experiment with different materials to add originality to your project.


