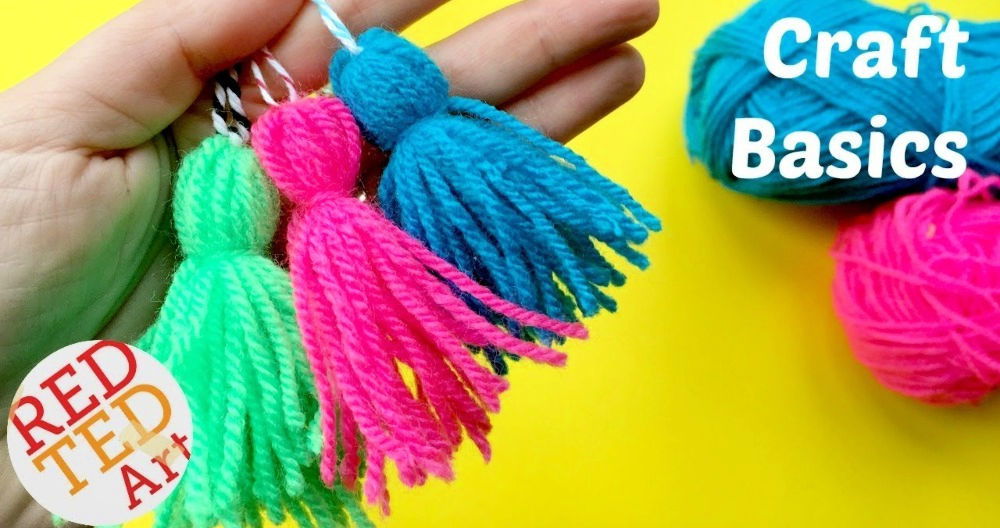
Adding tassels to your handmade projects is a fun and easy way to add a decorative element that can really elevate the final look. Whether you're working on a scarf, blanket, or any other project, tassels offer a beautiful finishing touch. In this tutorial, you'll learn how to make a tassel out of yarn, covering everything from the materials you'll need to tips for trimming and attaching them evenly.
Tassels may seem fiddly at first, but they're much easier to make than you might think. With the right tools and a bit of practice, you'll be making perfect tassels in no time. This guide is designed to be beginner-friendly, ensuring that even those new to yarn crafts can follow along with ease.
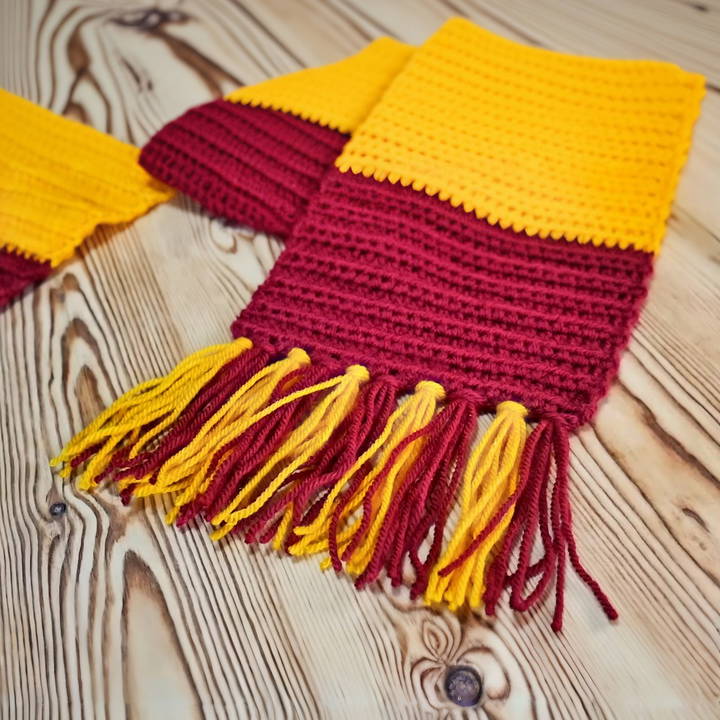
Materials You'll Need
Before we dive into the step-by-step process, let's first gather all the materials you'll need to make your tassels:
- Yarn: Choose a yarn that complements your project. You can use the same yarn used for your project or choose a different color for contrast.
- A flat object: This can be anything like a CD case, a piece of cardboard, or a book that allows you to wrap the yarn around it. The object's size will determine the length of your tassel.
- Scissors: Sharp scissors are crucial for cutting the yarn neatly.
- A crochet hook: You'll need this to help pull the yarn through when attaching the tassel to your project.
With these basic materials, you are ready to start making tassels.
Step by Step Instructions
Learn how to make a tassel out of yarn with step-by-step instructions and tips to troubleshoot common problems for perfect tassels every time.
1. Decide on Tassel Size
The first thing you need to determine is how long you want your tassels to be. A general rule is to make them about 3-6 inches in length, but the exact size is up to you and the project you are working on.
To make consistent tassels, choose a flat object to wrap your yarn around that matches the desired length of the tassel. A piece of cardboard, an old CD case, or even a small book are all great options.
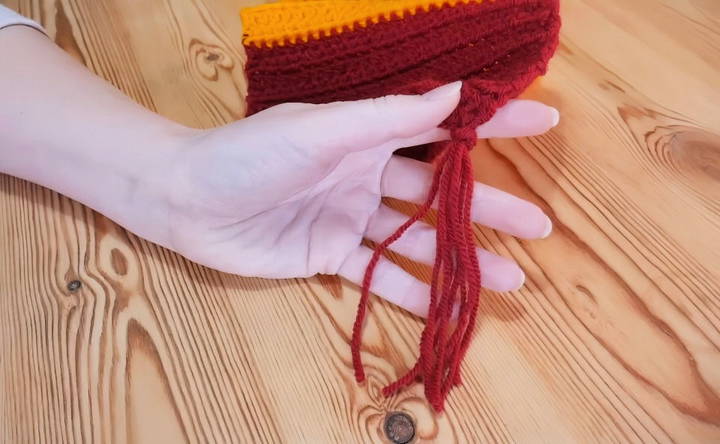
For instance, in a beginner project like a Harry Potter-inspired scarf, the creator used a CD case. The width of this object will determine the tassel length, but remember that you'll lose about an inch once the tassels are trimmed and evened out.
2. Wrap the Yarn
Once you've chosen the object, it's time to wrap the yarn around it. Here's how:
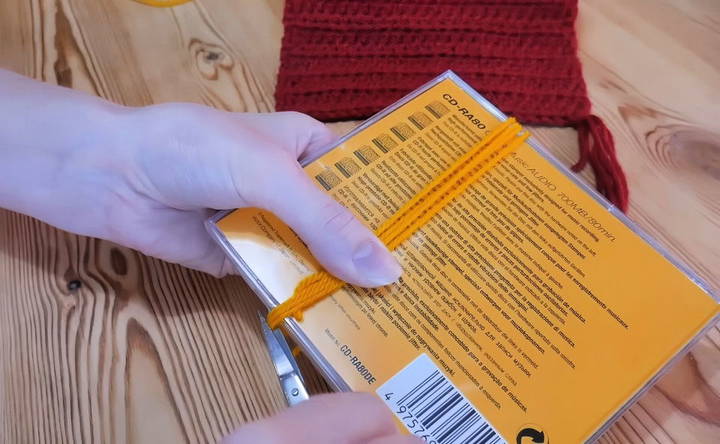
- Hold one end of the yarn against the edge of your object (the CD case or cardboard), leaving a tail hanging down.
- Wrap the yarn around the object. The number of times you wrap it depends on how thick you want your tassels to be. If you want tassels with eight strands, you should wrap the yarn four times. When you cut the yarn at the bottom, this will give you a total of eight strands.
For instance, if you're working with a Harry Potter-inspired scarf, the tassels might be eight strands thick, so you'll wrap the yarn around four times to get this effect.
3. Cut the Yarn
After wrapping the yarn around your chosen object the desired number of times, cut the yarn at the bottom of the object. Use your scissors to trim all the loops at the bottom, making sure to cut the yarn evenly.
It's important to cut the bottom where the tails are so that you get two loose ends. This ensures the yarn is ready for the next steps of making and attaching your tassel.
4. Prepare the Tassel for Attachment
Now that your yarn is cut, it's time to make the tassel itself and attach it to your project. Here's how:
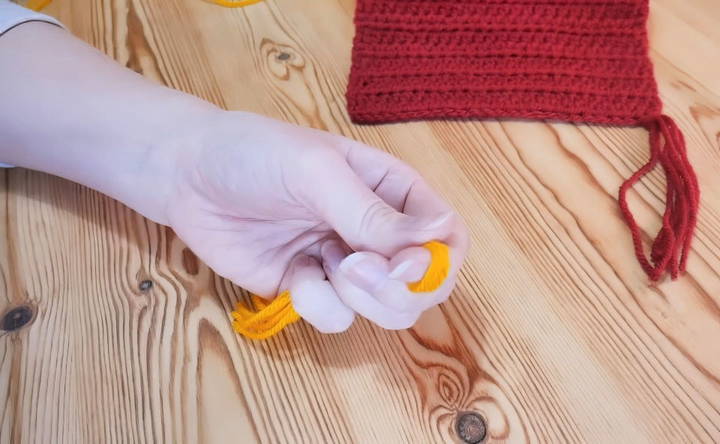
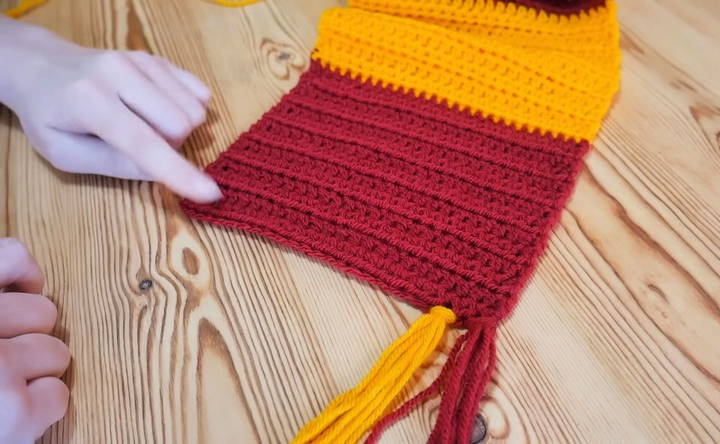
- Gather the yarn strands and fold them in half, making a loop at the top. This loop is what you will use to attach the tassel to your project.
- Use your crochet hook to attach the tassel to the edge of your project. Insert the hook from back to front (or front to back, but stay consistent) through the edge where you want the tassel to be. Pull the loop of yarn through the hole you made with the hook.
- Once the loop is through, take the loose ends of the tassel and pull them through the loop. Gently tug on the yarn ends to tighten the knot, securing the tassel to your project.
5. Spacing Your Tassels Evenly
When adding multiple tassels to a project, like a scarf or blanket, it's essential to space them evenly. Here's a good rule of thumb:
- First, decide how many tassels you want on each side. Make sure you keep the number of tassels the same on both sides of your project to maintain symmetry.
- If you're adding tassels to a scarf, for example, you could decide on having ten tassels on each side. Ensure that they're evenly spaced by measuring and marking the points where each tassel will go.
Consistency is key to achieving a professional finish, so be sure to plan ahead when deciding where each tassel will go.
6. Trimming the Tassels
After attaching the tassels, the final step is to trim them so they're all the same length. This might seem simple, but even trimming can make a big difference in how polished your project looks. Here's how:
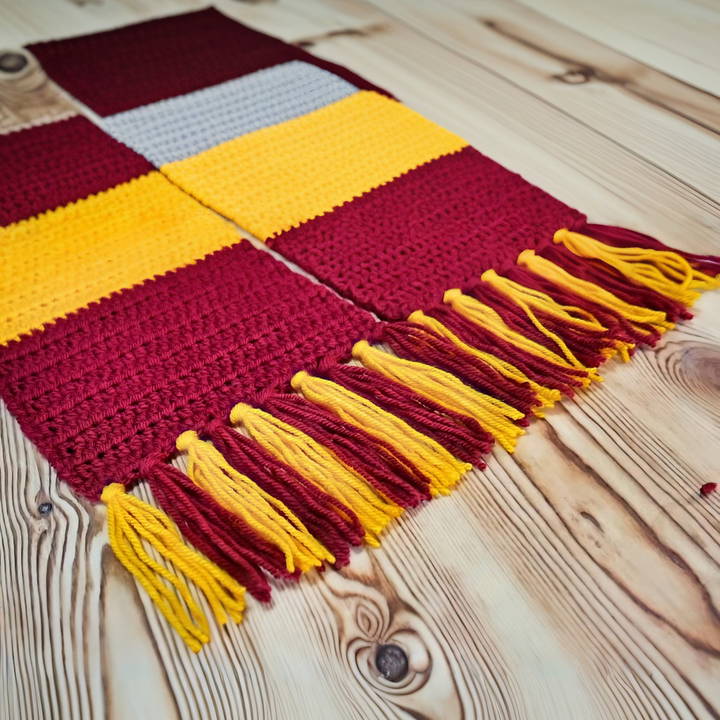
- Bring one end of your project (for example, a scarf) to the other side to compare the tassels. Line up the tassels from each side and check for length.
- Use sharp scissors to carefully trim any uneven strands. Cut along the edge of your tassels to make a neat, straight line.
Take your time with this step, as trimming the tassels is the final touch that gives your project a clean, professional look.
Tips and Tricks for Making Tassels
Discover expert tips and tricks for making tassels. Enhance your crafting skills with easy, step-by-step tassel creation techniques.
- Choose the Right Yarn: The type of yarn you use can affect how your tassels turn out. Thicker yarn will make fuller, more substantial tassels, while thinner yarn will make lighter, more delicate ones. Experiment with different yarns to see what works best for your project.
- Be Mindful of Yarn Stretch: Yarn tends to stretch slightly during the wrapping process, so don't pull too tightly when wrapping it around your object. Keep the tension even and gentle to avoid distorted tassels.
- Use a Ruler for Precision: If you want your tassels to be the exact same length, use a ruler to measure each one after trimming. This step ensures that all the tassels are consistent in size, giving your project a professional finish.
- Vary Your Tassel Styles: Tassels don't always have to be the same size or style. You can experiment by mixing yarn colors or making tassels of different lengths for a more dynamic and creative look. This works particularly well for fringe projects.
- Perfect for All Kinds of Projects: Tassels can be added to a wide range of projects, from scarves and blankets to handbags and home decor. They provide an easy way to add personality and flair to your crafts. Try using them on crochet pillows or adding them to the edges of shawls for a fun, stylish detail.
Troubleshooting Common Tassel-Making Problems
Discover solutions to common tassel-making problems. Enhance your crafting skills with expert troubleshooting tips and techniques.
- Tassels Unraveling: If your tassels seem to be coming undone or unraveling after you attach them, double-check that you've pulled the yarn tails through the loop securely. You can also tie an additional knot at the top of the tassel to ensure it stays in place.
- Uneven Tassels If your tassels are uneven after trimming, take the time to measure and line them up before cutting. It's easy to get carried away with trimming, but small corrections can make a big difference in the overall look.
- Tassels Looking Thin If you find that your tassels are looking too thin or sparse, simply add more yarn when wrapping around your object. You can also mix yarn types for added volume and texture.
Conclusion
Making tassels out of yarn is an easy and satisfying way to finish your crochet or knit projects. Whether you're adding a fringe to a scarf, blanket, or any other item, tassels bring a touch of elegance and fun. By following these simple steps and practicing, you'll be able to make beautiful tassels that perfectly complement your work.
So, next time you finish a project and feel it's missing something, consider adding a few tassels. They're quick to make, and the results are always impressive! Happy crafting!
FAQs About How to Make a Tassel out Of Yarn
Learn how to make a tassel out of yarn with our step-by-step guide. Discover answers to FAQs and master this easy craft today!
To prevent tassels from unraveling, ensure the knot you use to secure them is tight. You can also double-knot for extra security. For added durability, consider applying a small amount of fabric glue to the knot to keep it intact during wear or washing.
Yes, tassels can be machine-washed, but it's best to use a gentle cycle with cold water. Place your project in a laundry bag to protect the tassels from tangling. Allow it to air-dry to maintain the tassels' shape.
If you don’t have a crochet hook, you can use a yarn needle to attach tassels. Simply thread the yarn strands through the needle and pull them through your project to create the tassel loop.
To avoid fraying, trim the tassels neatly and consider applying a small dab of fabric glue to the ends. Alternatively, you can dip the ends in clear nail polish to seal the yarn fibers.
Yes, short tassels will stay secure if you tie them tightly. However, the shorter the tassel, the more important it is to ensure your knots are firm and well-placed to prevent any loosening during wear or use.
Use stitch markers or a strand of contrasting yarn to mark where you want each tassel before attaching them. This helps you achieve consistent spacing and alignment across the project.
Instead of cutting each strand separately, wrap yarn around an object like a CD case or piece of cardboard. This method saves time and ensures all strands are the same length when cut at once.
Tassels hold up well if securely knotted, but for children's items that require frequent washing, consider sewing the tassels into the fabric for added durability.
Yes! Mixing colors adds visual interest and can make a fun, multicolored effect. Simply alternate the colors when wrapping your yarn to make varied patterns in your tassels.
Carefully lay your project flat and compare tassel lengths. Trim any longer strands to match the shortest ones. Use sharp scissors to ensure a clean, even cut across all tassels.


