Painting flower pots is a fun and creative way to add a personal touch to your garden or indoor space. Whether you are an experienced DIY enthusiast or a beginner, painting terracotta flower pots can be a simple yet rewarding project that enhances the aesthetics of your surroundings. In this article, we will walk you through a detailed step-by-step guide on how to paint flower pots, including preparation, painting techniques, and sealing the pots to ensure they last. By the end of this guide, you'll have beautifully painted flower pots that you can proudly display.
Materials Needed for Painting Terracotta Pots
Before we begin, it's essential to gather all the materials you'll need. Here's a list of the basic supplies:
- Terracotta pots: These are available in various sizes and shapes at most gardening stores.
- Sanding paper: To smooth out the surface of your pots.
- Cleaning materials: A wet cloth, water, and dish soap for cleaning.
- Water-based sealer: Used for sealing the inside and outside of the pot to protect it from moisture.
- Acrylic or outdoor paint: These are durable paints that will hold up well on terracotta.
- Painter's tape: This helps make clean lines and patterns.
- Paintbrushes: Choose brushes of different sizes depending on your design.
- Clear lacquer or varnish: Used as a finishing coat to protect your paint.
- Gloves: Recommended to protect your hands while sealing and painting.
Step by Step Instructions
Learn how to make pretty DIY painted flower pots with our step-by-step guide, from prepping terracotta pots to advanced design techniques.
1. Preparing the Terracotta Pots
Proper preparation is crucial to ensuring that your paint sticks well and that your pots last a long time, especially if they're going to be outdoors. Here's how to prep your pots:
Cleaning the Pots
If you're using old terracotta pots, you'll want to start by cleaning them thoroughly. Dirt, old plant residue, and dust can affect how well the paint adheres to the surface.
- Wash with Soap and Water: Using a mixture of water and dish soap, clean the entire pot using a sponge or rag. Make sure to get rid of any visible stains or dirt.
- Rinse and Dry: After washing, rinse off the soap and let the pot dry completely. For a quicker drying process, use a dry cloth to wipe off the excess water. If the pot has previously held plants, ensure it is thoroughly dry, as any moisture left in the terracotta can prevent the sealer from adhering properly.
Sanding the Pot
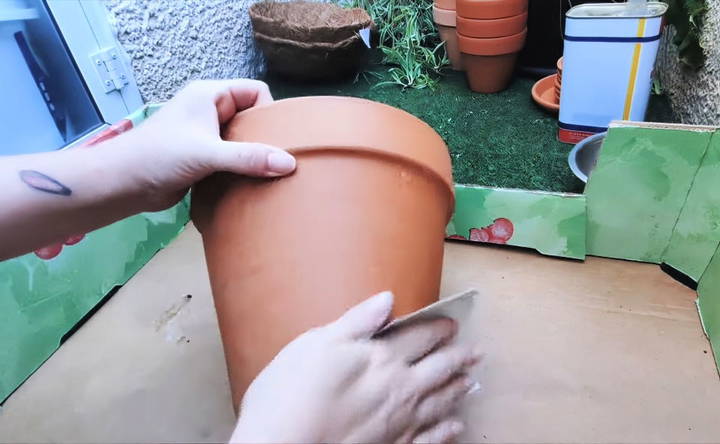
Once the pot is clean and dry, the next step is to sand it. Sanding helps smooth out rough edges and make a better surface for the paint to adhere to.
- Lightly Sand the Surface: Use fine-grit sandpaper (about 120-220 grit) to gently sand the entire outer surface of the pot. Focus on areas with visible imperfections or rough spots.
- Wipe Off the Dust: After sanding, wipe off the dust with a clean, dry cloth. This ensures that the surface is smooth and ready for sealing.
2. Sealing the Terracotta Pot
Terracotta is a porous material, meaning that it can absorb moisture over time. To prevent this, especially if you plan to use your pot outdoors, it's important to seal both the inside and outside. This helps prevent water from seeping through the pot and potentially damaging your painted design.
Choosing the Right Sealer
A water-based sealer is a great option because it's easy to work with, dries quickly, and is effective at protecting the pot. It also tends to have a lower odor compared to oil-based alternatives, making it more user-friendly for indoor projects.
Applying the Sealer
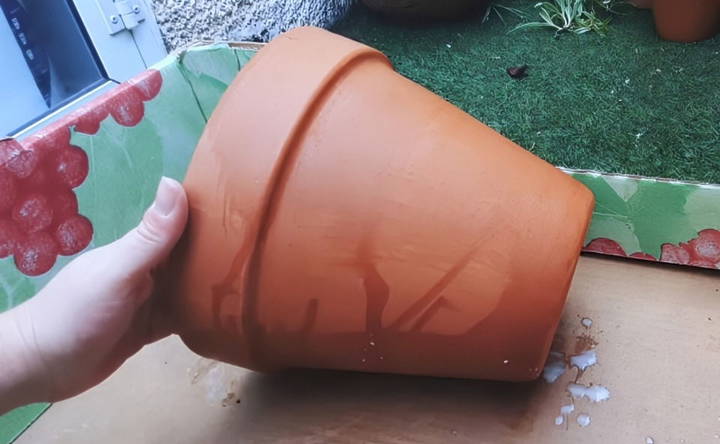
- Apply the First Coat: Using a brush, apply a thin layer of the sealer to both the inside and outside of the pot. Be sure to cover all surfaces to provide full protection. You can use gloves to protect your hands from the sealer's strong smell, as noted in the tutorial.
- Allow it to Dry: Let the pot dry for a few hours. The drying time may vary depending on the sealer brand you are using, so check the manufacturer's recommendations.
- Apply a Second Coat: Once the first coat is fully dry, apply a second coat of sealer. This additional layer will give the pot extra protection and ensure that no moisture penetrates the terracotta.
3. Painting the Terracotta Pot
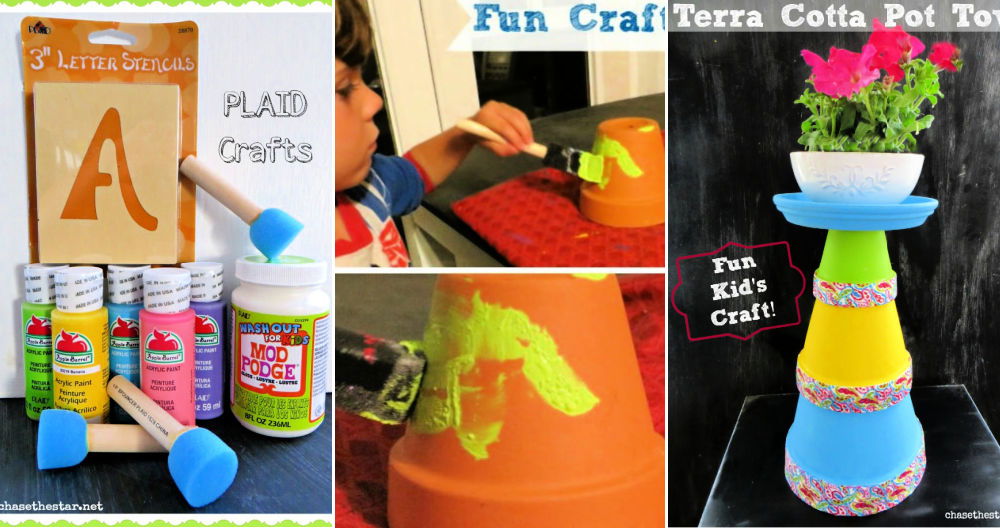
Now comes the fun part—painting your terracotta pot! Whether you want a simple solid color or a more intricate design, acrylic or outdoor paint works best because it is durable and weather-resistant.
Choosing Your Paint
For terracotta pots, acrylic paint is typically the best choice. It comes in a variety of colors, dries quickly, and provides a smooth finish. If your pots will be used outdoors, it's a good idea to choose outdoor or weather-resistant acrylic paint.
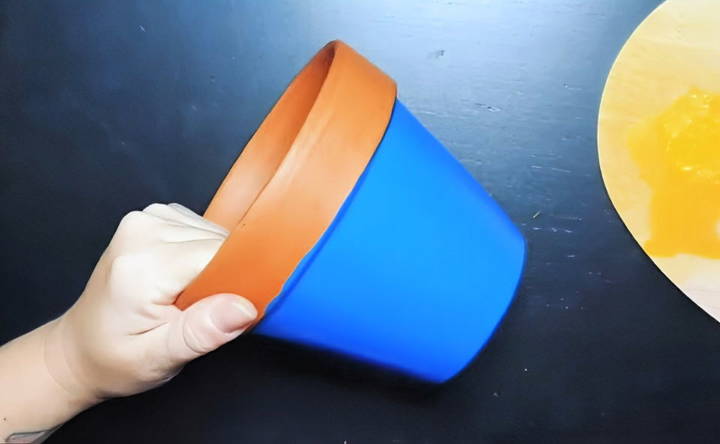
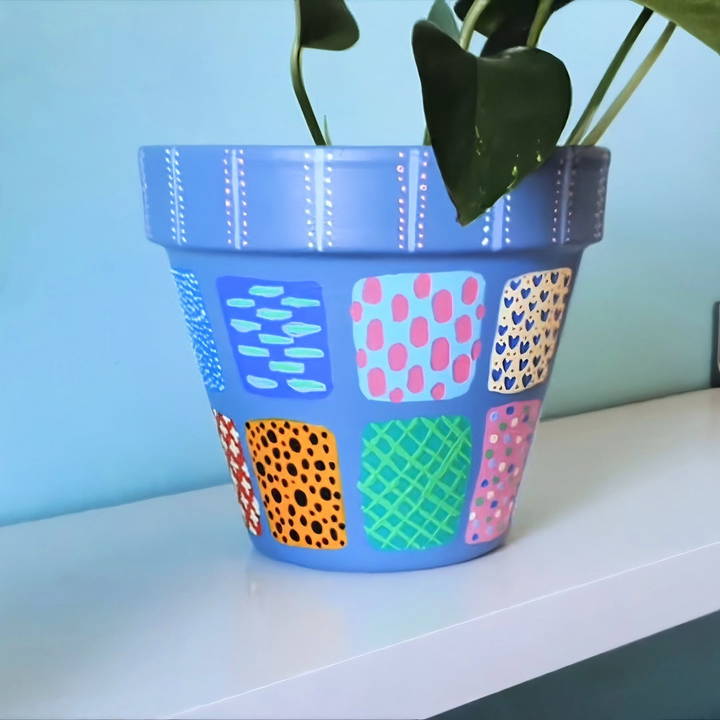
If you're going for a solid color, choose a paint that complements your garden or indoor space. For more intricate designs, such as patterns, stripes, or floral motifs, you'll need multiple colors.
Applying Painter's Tape for Clean Lines
Painter's tape is a handy tool if you want to make crisp, clean lines or patterns on your pots. For example, you can tape off areas to make stripes, geometric shapes, or even borders around the top rim of the pot.
- Taping the Design: Place the painter's tape on the areas of the pot you don't want to paint. Press down firmly to ensure the tape adheres well and prevents paint from seeping through.
- Painting Around the Tape: Using a brush or sponge, paint the areas around the taped-off sections. This technique ensures that you get clean lines once you remove the tape.
Applying the First Coat of Paint
Once your design is taped off, it's time to start painting. For best results:
- Apply a Thin Coat: Start with a thin, even coat of paint. This prevents brush marks and ensures a smooth finish.
- Allow it to Dry: Let the first coat dry completely before applying additional coats. Depending on the paint you're using, drying time can range from 1 to 2 hours.
- Apply Additional Coats: Apply a second or even third coat of paint as needed to achieve a rich, opaque color.
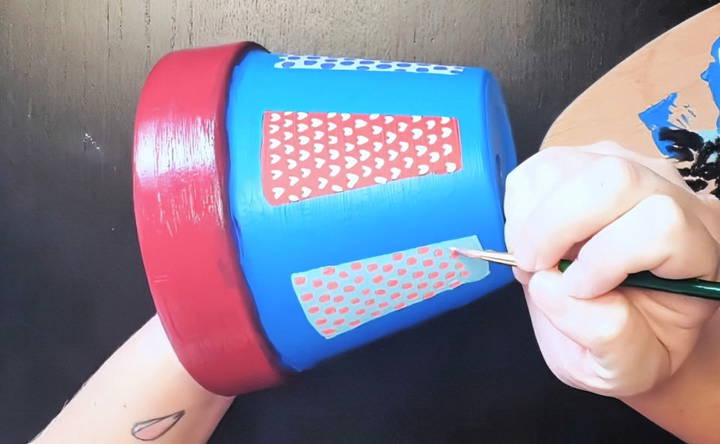
Removing the Painter's Tape
One of the keys to getting clean, professional-looking lines is to remove the painter's tape while the paint is still slightly wet. Waiting too long can cause the paint to peel off along with the tape, which can ruin your design.
- Carefully Remove the Tape: Once you've applied all the coats and are satisfied with the coverage, gently peel off the painter's tape while the paint is still tacky. If you notice any paint bleeding or imperfections, don't worry—you can touch them up later.
4. Sealing the Painted Design
After your paint has dried and your design is complete, the final step is to protect your masterpiece with a clear lacquer or varnish. This will ensure that the paint remains intact, even when exposed to water or outdoor conditions.
Applying the Clear Coat
- Choose a Clear Varnish or Lacquer: Select a clear sealant that is suitable for outdoor use if your pot will be outside. Many spray varnishes work well and provide a smooth, even coat. However, you can also use a brush-on varnish for more control.
- Apply the First Coat: Lightly spray or brush the clear coat over the entire pot. Be sure to cover the painted surface evenly.
- Let it Dry: Allow the varnish to dry completely before handling the pot. Depending on the product, this can take anywhere from a few hours to overnight.
- Apply a Second Coat (Optional): If the pot will be exposed to harsh outdoor conditions, consider applying a second coat of varnish for extra protection.
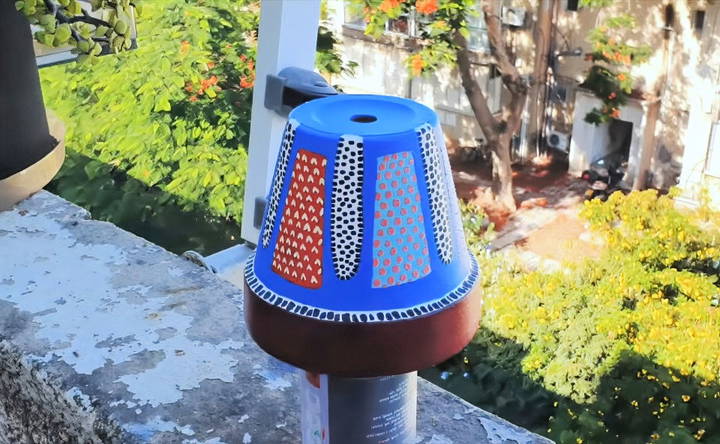
At this point, your terracotta pot is ready to be used! You can now plant your favorite flowers, herbs, or succulents and display your beautifully decorated pot in your garden or home.
5. Advanced Design Techniques for Painted Flower Pots
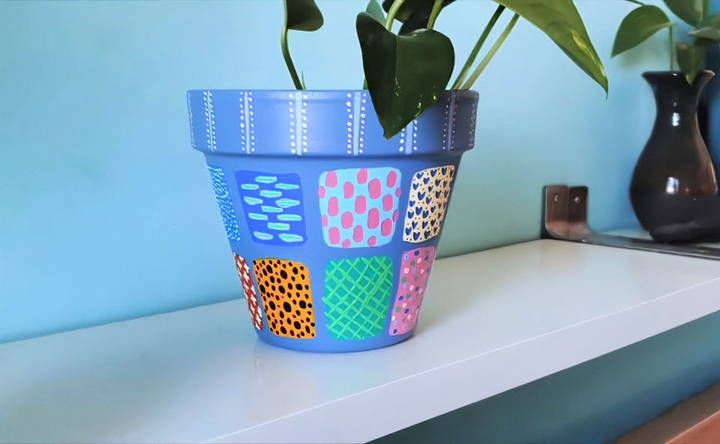
Once you've mastered the basics of painting terracotta pots, you can take your creativity to the next level with more advanced techniques. These ideas will allow you to add unique textures, patterns, and finishes to your flower pots, giving them a distinctive look that reflects your style.
Ombre Effect
The ombre technique is a popular choice for DIY projects and makes a beautiful gradient of colors that transition smoothly from light to dark. Here's how to achieve this effect on your terracotta pots:
- Select Your Colors: Choose at least three shades of the same color family. For instance, if you're going for a blue ombre, pick a light blue, medium blue, and dark blue.
- Start with the Lightest Shade: Begin by painting the entire pot with the lightest color. Allow this coat to dry completely.
- Blend the Medium Shade: Once the first layer is dry, apply the medium shade about halfway down the pot. To make the gradient, blend the transition between the light and medium shades using a sponge or a dry brush. Lightly dab or brush back and forth between the two colors until the lines between them soften.
- Add the Darkest Shade: Next, apply the darkest color at the bottom of the pot. Use the same blending technique to merge the medium and dark shades for a seamless gradient.
- Let it Dry: After completing the blending, allow the paint to dry completely before sealing the pot with a clear coat.
Stenciling Designs
Stencils are an excellent way to make intricate designs without needing advanced painting skills. You can find a wide variety of pre-made stencils at craft stores, or you can make your own with cardstock or stencil paper.
- Choose or Make a Stencil: Pick a design that complements your space, such as floral patterns, geometric shapes, or even animal motifs.
- Secure the Stencil: Using painter's tape, secure the stencil to the surface of the pot. Make sure it lies flat to avoid paint seeping underneath.
- Apply Paint: Use a stencil brush or a small sponge to dab paint over the stencil. Be careful not to use too much paint, as this can cause smudging. Apply several light coats if necessary, rather than a single heavy one.
- Remove the Stencil: Carefully lift the stencil off the pot before the paint dries. If there are any imperfections, use a fine brush to touch up the edges.
Using Metallic Paints
Metallic paints can add a luxurious finish to your flower pots, giving them a sleek and modern look. Gold, silver, and copper paints are especially popular for adding a bit of shine and sophistication.
- Choose a Base Color: Start by painting your pot with a solid base color, such as black, white, or any neutral tone that complements the metallic finish.
- Apply Metallic Accents: Once the base coat is dry, use metallic paint to add accents to the pot. This could include painting the rim, making stripes, or adding geometric designs.
- Seal the Pot: After the metallic paint has dried, apply a clear sealer to protect the design and prevent tarnishing, especially if the pot will be used outdoors.
Troubleshooting Common Painting Issues
Even with careful preparation and painting, you might run into a few common problems during the process. Here are some tips on how to fix them:
Paint Peeling or Chipping
Peeling or chipping paint is often caused by inadequate preparation or by moisture seeping through the porous terracotta. To avoid this:
- Ensure Proper Sealing: Always apply a water-based sealer to both the inside and outside of the pot before painting. This prevents moisture from reaching the painted surface.
- Avoid Overloading Paint: Apply thin coats of paint rather than thick layers. Thick coats are more prone to cracking and peeling over time.
- Use Outdoor-Safe Paints: If your pots are going to be exposed to the elements, make sure to use paint designed for outdoor use. Acrylic paint or specially formulated outdoor paints are your best options.
If your paint is already peeling, you can sand down the affected areas and touch up with fresh paint. Be sure to re-seal the pot afterward to prevent future peeling.
Uneven Paint Application
Uneven paint can occur if your brush strokes are too heavy or if you don't allow the paint to dry between coats. To fix this:
- Sand and Reapply: Lightly sand down any areas where the paint looks uneven, and then apply a fresh, thin coat of paint.
- Use a Sponge or Roller: For large areas, using a sponge or a small roller can help achieve a smoother, more even finish.
- Be Patient: Allow each coat of paint to dry fully before applying the next. This prevents the paint from clumping or streaking.
Paint Bleeding Under Painter's Tape
If the paint seeps under the painter's tape, your design may end up looking messy. Here's how to fix it:
- Touch Up the Edges: Use a fine brush to carefully touch up any areas where the paint bled. This will clean up the edges and make the lines look sharper.
- Prevent Future Bleeding: When applying painter's tape, press it down firmly along the edges to make a tight seal. You can also try using a thinner coat of paint to minimize bleeding.
Caring for Your Painted Flower Pots
Proper care is essential to keep your painted flower pots looking beautiful for years to come, especially if they are placed outside and exposed to the elements.
Protecting from Weather
If your pots are placed outdoors, they will face exposure to rain, wind, and sunlight, all of which can take a toll on the paint over time. Here's how to protect them:
- Apply a UV-Resistant Clear Coat: UV rays can fade painted surfaces, so applying a UV-resistant varnish or clear sealer will help prevent the colors from fading.
- Move Indoors During Winter: Terracotta pots can crack if exposed to freezing temperatures. During the colder months, bring your pots indoors or move them to a sheltered location.
- Use a Drainage Tray: Excess water can cause moisture to seep into the pot, potentially damaging both the paint and the terracotta. Always place a drainage tray under your pot to catch excess water.
Cleaning the Pots
To keep your pots looking fresh, regular cleaning is important, especially if they're kept outside where dirt and debris can accumulate.
- Wipe with a Damp Cloth: For light dirt or dust, simply wipe the pot with a damp cloth.
- Use Mild Soap and Water for Heavier Cleaning: If the pots are particularly dirty, mix a small amount of mild soap with water and gently scrub the pot with a soft sponge. Avoid using harsh chemicals or abrasive materials, as these can damage the paint or the sealer.
- Reapply Sealer as Needed: Over time, the protective clear coat may wear down. If you notice that the surface of your pot is starting to dull or crack, reapply a clear coat to refresh its protection.
Creative Ideas for Displaying Your Painted Pots
Once you've finished painting your flower pots, it's time to show them off! Here are some creative ways to display your newly painted pots:
- Group Them Together: Make a visual impact by grouping several painted pots together on a shelf or outdoor table. Use a variety of sizes and designs to make an eclectic look.
- Hang Them: Use macrame hangers or sturdy hooks to hang your painted pots from a porch ceiling or wall. This adds vertical interest and is perfect for small spaces like balconies.
- Use as Centerpieces: Painted flower pots make for beautiful centerpieces on outdoor dining tables. Pair them with lush, colorful plants for a stunning effect.
- Line a Pathway: If you're using outdoor pots, consider lining a garden path with your painted creations. This not only brightens up your garden but also adds a personal touch to your landscape.
Final Thoughts
Painting terracotta flower pots is a wonderful way to express your creativity while adding a splash of color to your home or garden. Whether you stick with simple solid colors or experiment with more advanced techniques like stenciling, ombre effects, or metallic finishes, the possibilities are endless.
Remember to take your time with each step—proper preparation, careful painting, and sealing will ensure that your pots not only look beautiful but also last for years to come. Most importantly, have fun with the process and enjoy the satisfaction of making something uniquely yours.
By following this comprehensive guide, you'll have all the tools you need to make stunning DIY painted flower pots that are perfect for any space.
FAQs on DIY Painted Flower Pots
Learn all you need to know with our FAQs on DIY-painted flower pots, from materials to techniques, perfect for brightening your home and garden.
No, a primer is not a substitute for a sealer. Primers prepare surfaces for paint, but they don’t provide the waterproof protection that a proper sealer does. Use a water-based sealer for best results.
Cracking can occur if the paint is too thick or if the sealer is applied before the paint is fully dry. Make sure each layer dries completely before applying the next.
Not sealing both sides can cause air bubbles to form between the paint and the terracotta. This may lead to peeling or bubbling over time.
If the pots are filled, sealing the inside becomes difficult. Focus on sealing and painting the outside only, and try to avoid excessive watering to protect your design.
Acrylic paint is the best choice for outdoor pots due to its durability and weather resistance. You should also apply a clear sealant to protect it from the elements.
Thin, streaky colors can result from using transparent paints. Opt for solid, opaque acrylics, and apply multiple thin coats, allowing each one to dry before the next.
Lacquer or clear varnish isn’t strictly necessary but provides an extra layer of protection to the painted design, especially if the pot is used outdoors.
Yes, you can use the same method on plastic or ceramic containers, but ensure you use a sealer and paint compatible with the material for the best results.
Typically, it's best to wait 24 hours between sealing coats, but always check the product's instructions for the best results.
Yes, leftover house paint can be used, especially for base coats. Just make sure to properly seal the pots before and after applying the paint.


