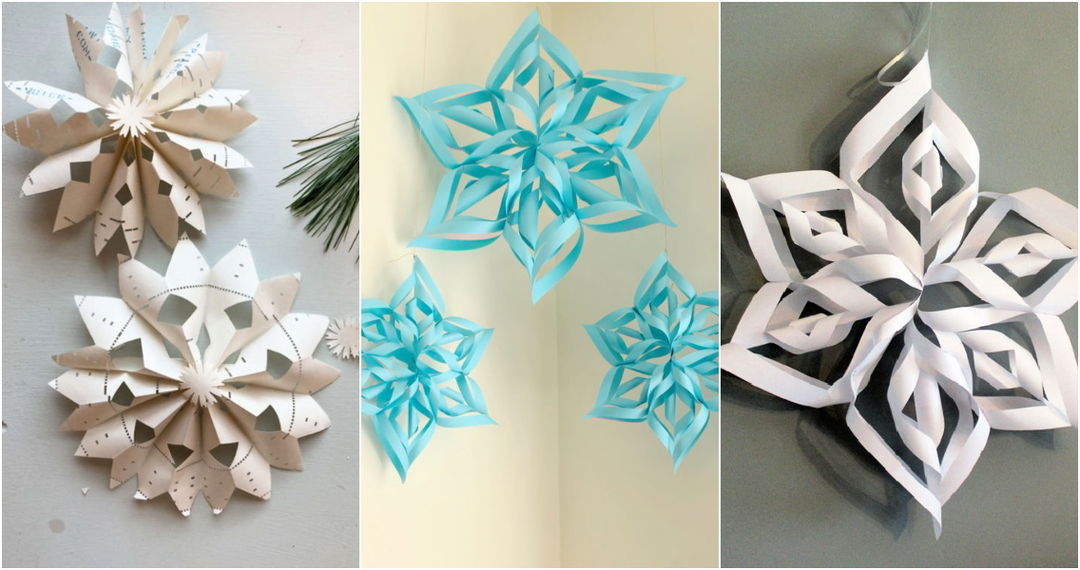
Making paper bag snowflakes is a simple and fun way to add a festive touch to your decor. You only need a few supplies - paper bags, glue, and scissors. Start by aligning several bags, gluing them together, and then cutting out your desired snowflake patterns. Once you unfold them, you'll see beautiful snowflakes ready to hang. This craft is perfect for adding a personal touch to holiday decorations.
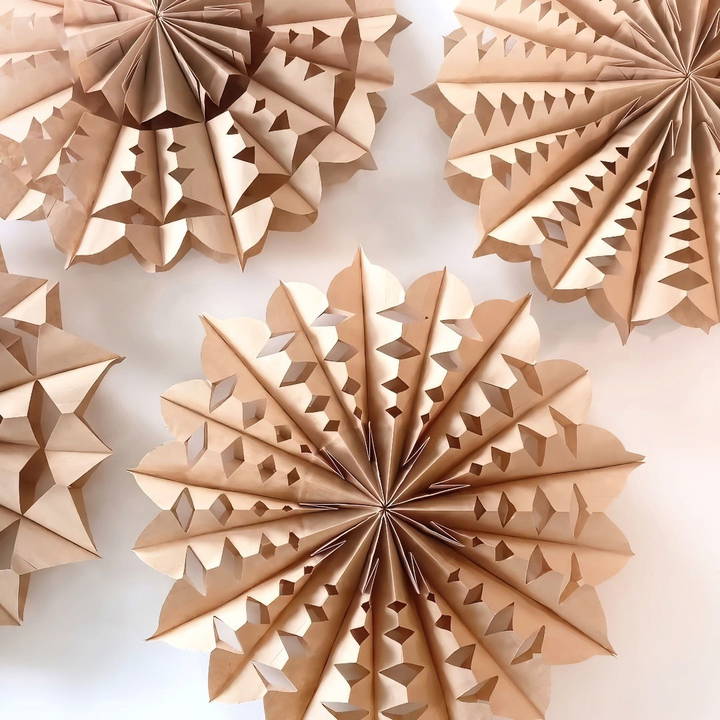
Not only are paper bag snowflakes easy to make, but they also offer a creative activity for all ages. They provide a cost-effective way to make stunning decorations without much effort. Plus, you get to choose the size and style of your snowflakes, making each one unique.
Ready to get started on making your festive décor truly your own? Move on to the next section for detailed instructions and tips.
Materials You'll Need
Before we dive into the steps, let's gather our materials. The beauty of this project is that it requires very few supplies, all of which are inexpensive and easy to find.
- Paper Bags: You'll need a total of nine brown lunch sacks for each snowflake. These are the same kind you'd use for packing lunches.
- Hot Glue Gun and Glue Sticks: This is crucial for sticking the paper bags together.
- Scissors: For cutting out your designs.
Why These Materials?
- Paper Bags: These are lightweight, inexpensive, and easy to work with, making them perfect for this craft.
- Hot Glue Gun: Provides strong bonding in a matter of seconds, which is necessary for keeping the layers together.
- Scissors: You need them to cut out intricate designs that will make your snowflakes unique.
Step by Step Instructions
Discover how to craft pretty DIY paper bag snowflakes with our step-by-step guide. Perfect holiday decor made easy in just 16 simple steps!
Initial Setup
Learn how to prepare your workspace and set up your first paper bag efficiently with our detailed initial setup guide.
Step 1: Preparing Your Workspace
Ensure your workstation is flat and clean. Lay out your materials so that everything is within reach.
Step 2: Setting Up the First Paper Bag
Place your first paper bag on the workspace with the flap side down and the flat side up.
Gluing the Paper Bags
Learn how to glue paper bags effectively. Follow our steps, from applying glue to adding and stacking each bag neatly for perfect results.
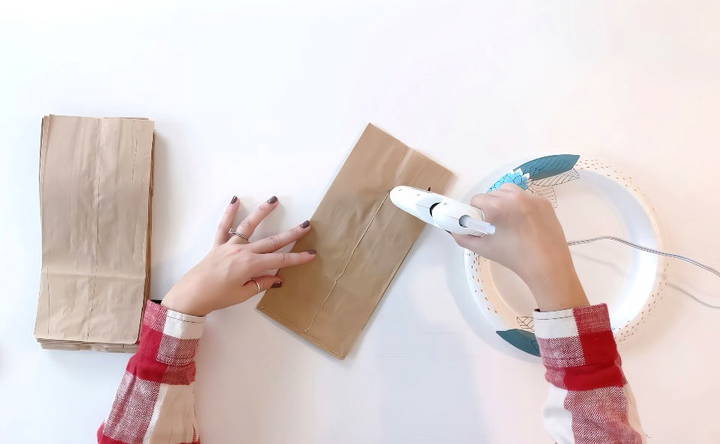
Step 3: Applying Glue
Take your hot glue gun and apply glue in a capital 'T' shape – a line across the bottom of the bag and a line down the middle seam.
Step 4: Adding the Second Bag
Stack a second paper bag on top of the first, ensuring the flap side is down and aligned perfectly with the first bag. Press them together gently—but be cautious as the glue can be hot.
Step 5: Continue Stacking
Repeat the gluing and stacking steps until you have glued four bags together.
Cutting Your Design
With these detailed guides, you can learn to make unique snowflakes. Explore steps for cutting designs and shaping edges. Perfect for DIY craft enthusiasts!
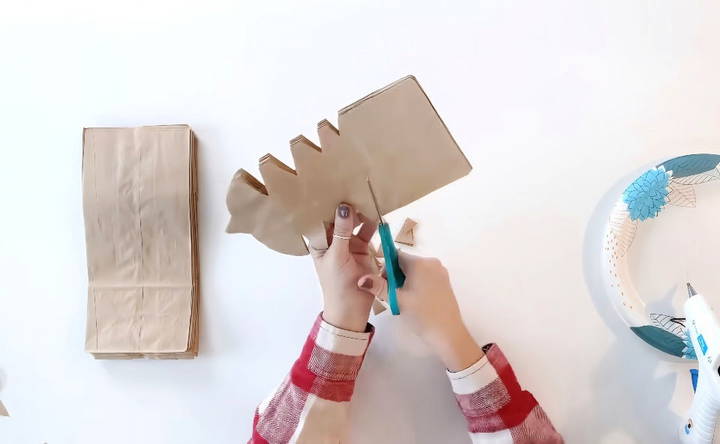
Step 6: Design Your Snowflake
Move the hot glue gun aside to avoid any accidents. Using your scissors, start cutting out a design on the bags. You can freehand your cuts or draw a design first with a pencil.
Pro Tip: Keep your design focused on the bag area and avoid cutting into the flap at the bottom.
Step 7: Shape the Edges
Cut along the sides to make shapes like triangles, circles, or curves. I usually start with something simple, like triangles.
Adding More Bags
Learn how to master adding more bags with our easy steps. Follow the steps for gluing, stacking, ensuring strength, and final cutting for perfect results.
Step 8: Continue Gluing and Stacking
Repeat the gluing and stacking steps with the remaining five bags, applying glue in the same 'T' shape.
Step 9: Ensure Strength
Push the newly glued layers together to make sure they stick well.
Step 10: Final Cutting
Turn the half-finished snowflake over and cut through the remaining layers to match the initial design.
Opening the Snowflake
Learn how to make a stunning snowflake with detailed steps: opening, inspecting, connecting ends, and fluffing. Follow our easy guide!
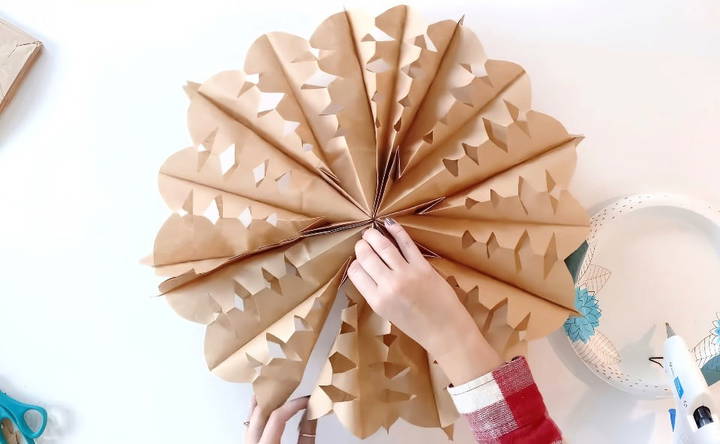
Step 11: Open and Inspect
Carefully start to open the snowflake to see the final design. Ensure all the edges are aligned.
Step 12: Connecting the Ends
Apply glue on the final bag, open the snowflake, and carefully stick the two ends together to form a full circle. Be cautious of the hot glue.
Step 13: Fluff and Adjust
Fluff your snowflake by gently pulling on the edges to make sure it's fully opened and even.
Hanging Your Snowflake
With our easy-to-follow steps, you can effortlessly make a hanging hole and add a string to your snowflake. This is perfect for holiday decorations!
Step 14: Make a Hanging Hole
Use a hole punch or scissors to make a small hole at the top of the snowflake. If you're using scissors, be extra careful not to tear the bag.
Step 15: Adding the String
Thread a piece of clear cording or fishing line through the hole and tie it off. This will make it easy to hang your snowflakes invisibly from the ceiling or on a wall.
Showcasing Your Snowflake
Learn how to showcase your snowflake effectively with step-by-step guidance. Learn the best ways to display and highlight your creations!
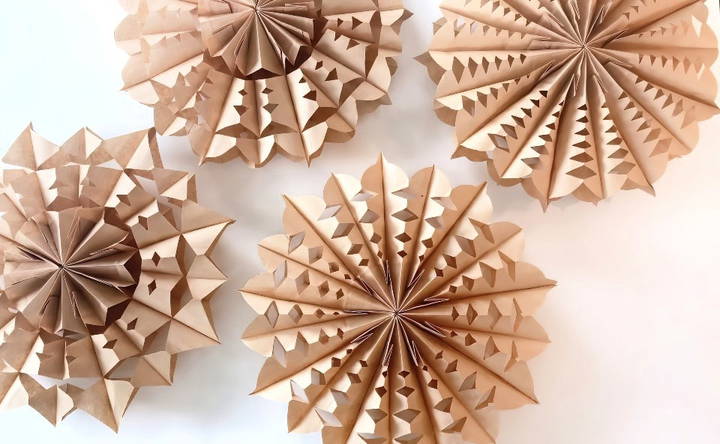
Step 16: Display
Find the perfect spot in your home to display your new creation. These make beautiful holiday decorations and add a festive touch to any room.
Tips and Variations
- Safety First: If you're doing this with kids, use a cool-temp glue gun or a strong craft glue to avoid burns.
- Design Variations: Try different shapes and patterns to make a variety of snowflakes. The sky's the limit!
- Experiment with Colors: While I used brown paper bags, you can experiment with white or colored bags for a different look.
Customization Ideas for Paper Bag Snowflakes
Making paper bag snowflakes is not only a fun and engaging activity but also a wonderful opportunity to express your creativity. Here are some customization ideas to make your snowflakes truly unique:
Choose Your Paper Bags Wisely:
- Color: While traditional snowflakes are white, don't be afraid to experiment with colored paper bags. They can add a vibrant touch to your decorations.
- Size: Play with different sizes of paper bags. Smaller bags are great for delicate snowflakes, while larger bags can make a bold statement.
Add Some Sparkle:
- Glitter: A little glitter goes a long way. To make your snowflakes shimmer, apply a light dusting of glitter.
- Metallic Pens: Use metallic pens to draw intricate designs on your snowflakes. This can add a touch of elegance.
Incorporate Textures:
- Ribbons: Attach ribbons to the ends of your snowflakes to add movement and texture.
- Fabric Scraps: Glue small pieces of fabric to your snowflakes for a cozy, tactile element.
Layer for Complexity:
- Multiple Layers: Combine several paper bags when cutting out your snowflakes for a more complex design.
- 3D Effects: Fold the tips of the snowflakes' arms to make a three-dimensional effect that stands out.
Theme Your Snowflakes:
- Seasonal Themes: Decorate your snowflakes with seasonal motifs, such as autumn leaves or spring flowers.
- Occasion-Based: Incorporate relevant shapes and colors to tailor your snowflakes for special occasions, like birthdays or weddings.
Light Them Up:
- LED Lights: Carefully place small LED lights within your snowflakes to make them glow.
- Candle Jars: Wrap your snowflakes decoratively around glass jars with candles inside for a warm, inviting ambiance.
The key to customization is to let your imagination run wild while also considering the overall aesthetic you want to achieve.
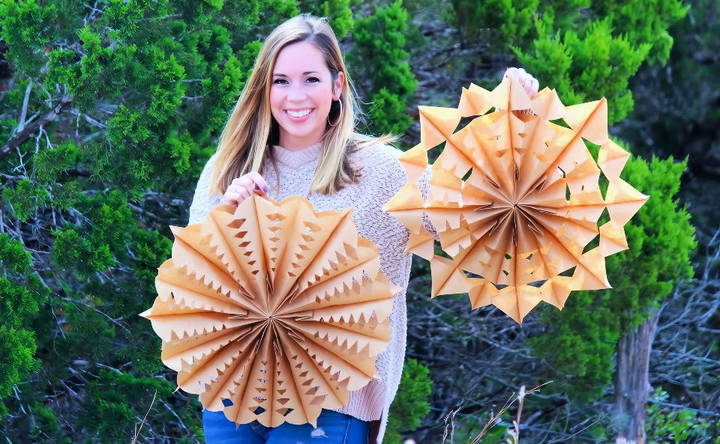
Advanced Techniques for Paper Bag Snowflakes
For those who have mastered the basics of paper bag snowflake creation and are looking to challenge themselves, here are some advanced techniques to try:
Intricate Cutting:
- Precision Tools: Use precision cutting tools like craft knives or scalpel blades for more detailed designs.
- Templates: Make or download intricate templates for precise and symmetrical patterns.
Embossing and Debossing:
- Embossing Tools: Utilize embossing tools to raise certain areas of your snowflake design, adding a tactile dimension.
- Debossing: Conversely, debossing presses down on the paper for an indented effect.
Layering and Shadowing:
- Contrasting Layers: Cut out snowflakes from different shades of paper bags and layer them for a shadow effect.
- Spacing Elements: Use foam spacers to separate layers and make depth.
Incorporating Mixed Media:
- Wax Paper: Add wax paper between layers for a translucent look.
- Foil Accents: Apply foil paper cutouts to your snowflakes for a reflective quality.
Quilling Techniques:
- Paper Strips: Use thin strips of paper bag material to quill spirals and shapes that can be attached to your snowflakes.
- Quilling Tools: Employ quilling needles to roll and shape the strips with precision.
Watercolor Effects:
- Watercolors: Paint your paper bags with watercolors before cutting to add a soft, blended color effect.
- Spray Bottles: Use spray bottles to apply a fine mist of paint for a gradient look.
Interactive Elements:
- Moving Parts: Design snowflakes with parts that can rotate or move, adding an interactive element.
- Magnetic Attachments: Incorporate small magnets to allow for easy repositioning on metallic surfaces.
Turn your paper bag snowflakes into detailed art by using advanced techniques. Practice patience and precision, and enjoy making.
Troubleshooting Common Issues with Paper Bag Snowflakes
When crafting paper bag snowflakes, you might encounter a few hiccups along the way. Here's how to solve some common issues with simple, easy-to-understand solutions:
Snowflake Tears During Cutting
- Solution: Use sharper scissors for cleaner cuts. If you're using a craft knife, make sure it has a fresh blade. Cut slowly and gently.
Doesn't Open Properly
- Solution: Ensure you're not cutting through all the folded edges. Leave a ‘spine' uncut to hold the snowflake together.
Snowflake Looks Uneven
- Solution: Fold the paper bag evenly and press down firmly to make crisp fold lines. Use a template for symmetrical patterns.
Difficulty in Making Complex Designs
- Solution: Start with simpler patterns and gradually work your way up to more complex designs. Practice makes perfect!
Snowflake Isn't Sturdy Enough
- Solution: Choose paper bags that are not too thin. You can also reinforce the snowflake with clear tape at the ‘spine'.
Glitter or Decorations Fall Off
- Solution: Apply a thin layer of glue and let it get tacky before adding glitter. For heavier decorations, use a stronger adhesive.
Snowflake Doesn't Hang Flat
- Solution: Iron the snowflake under a cloth on a low heat setting to flatten it. Be careful not to scorch the paper.
Solve these issues to craft perfect paper bag snowflakes. Embrace the learning process and enjoy your creative journey!
FAQs About DIY Paper Bag Snowflakes
This comprehensive FAQ is perfect for holiday crafting enthusiasts. It explains everything you need to know about making DIY paper bag snowflakes.
After cutting, simply pull apart the top of each side to reveal the snowflake design. Use tape to hold the snowflake open if you want to store it flat later. To display, you can add string to hang from the ceiling or use thumbtacks or glue dots to attach them to the wall.
Absolutely! This is a super easy and fun project for all ages. Children can easily participate in making these snowflakes, and it’s a great way to encourage creativity and motor skills.
Yes, you can use a mix of brown and white paper bags to add variety to your snowflakes. The number of bags you’ll need per snowflake is typically 7, but you can adjust this number based on the size of the bags and the design you prefer.
While there's no single “correct” way to cut your snowflakes, starting with a V-shaped cut at the top of the bag and then making small triangles on each side of the stack is a popular method. Feel free to experiment with different shapes and angles to make a variety of snowflake designs.
To preserve your paper bag snowflakes for future use, consider using tape to hold them together instead of glue. This way, you can easily take them apart and store them flat. Additionally, using high-quality paper bags and storing them in a dry place will help them maintain their shape and structure.
My Final Thoughts
This craft is not only easy and affordable but also incredibly rewarding. The transformation from simple paper bags to intricate snowflakes is something you have to see to believe. Plus, it's a great project to do with kids or friends.


