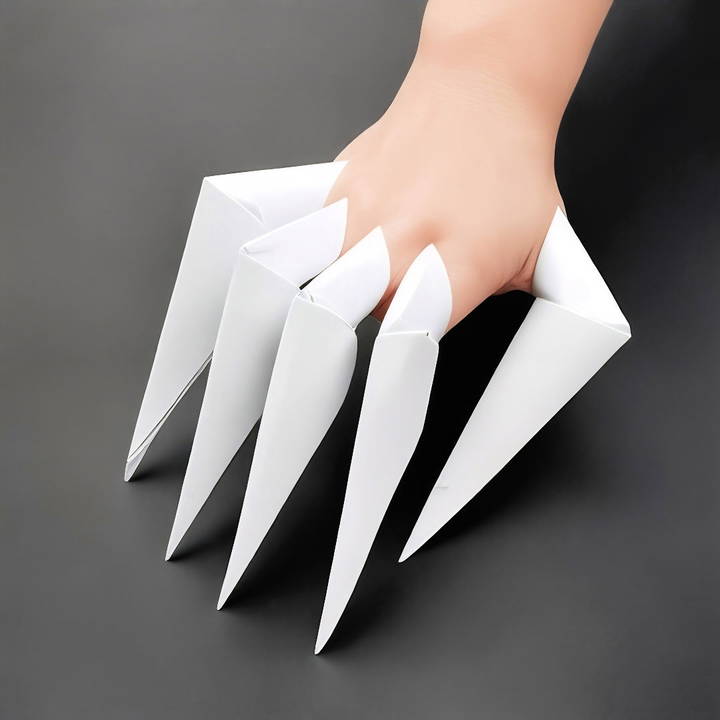
Making paper claws is an exciting and simple origami project that anyone can enjoy, regardless of age or skill level. These claws are not only fun to make but also serve as a great way to get creative with paper folding. Whether you're looking for a craft project for a rainy day or just want to impress your friends with your origami skills, paper claws are an easy and enjoyable way to dive into the world of paper crafting.
In this thrilling guide, we'll lead you step by step through making your own origami paper claws, inspired by the ultimate tutorial. Along the way, we'll share handy tips and clever tricks to ensure your new accessories are sharp, spooky, and absolutely spectacular. So grab some paper, ignite your creativity, and let's dive into the world of paper folding!
Materials You'll Need
Before we dive into the folding process, let's first make sure you have everything you need. The great thing about this project is that you only need one basic material: paper! Here's what you'll need:
- 10 sheets of standard printer paper (8.5 x 11 inches). This is the standard size of paper you'll find in most homes and offices.
That's it! Once you have your paper ready, you can begin folding.
Why Use 10 Sheets?
You'll be making one paper claw for each finger, which means you'll need 10 claws in total. Each claw is folded from a single sheet of paper. So, if you want to have a complete set of claws for both hands, 10 sheets are essential.
Step by Step Instructions
Learn to make paper claws with our easy step-by-step guide! Follow the folding instructions for perfect claws on all 10 fingers. Tips included!
Step 1: The Initial Fold
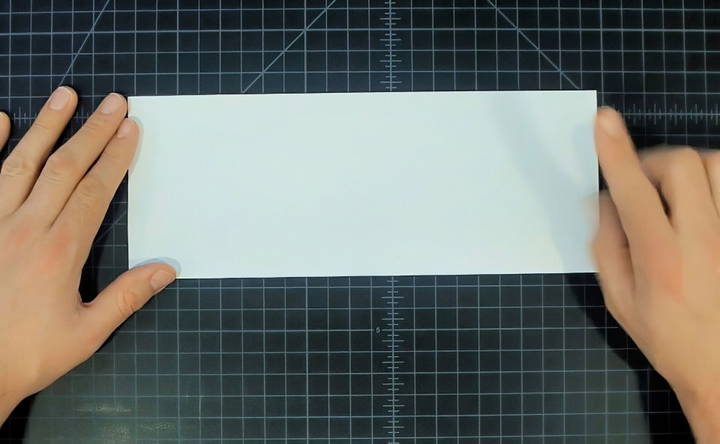
Start with one sheet of 8.5 x 11-inch paper. Lay the paper flat on a table in front of you in a landscape orientation.
- Fold the bottom left corner up towards the top left corner, making a diagonal fold. The edge should align perfectly with the top edge of the paper.
- Crease the fold sharply using your finger or a flat object, like a ruler or a pen.
After this first fold, you should see that you have maked a large triangle. Once you've creased it well, unfold it back to the original shape.
Step 2: The Triangle Fold
Next, you'll make a series of folds to transform the paper into a smaller triangle.
- Fold the bottom left corner toward the center of the page, ensuring that the edge aligns neatly with the middle crease you maked in the first step.
- Crease the fold well.
- Repeat the same step for the top left corner by folding it towards the middle crease.
By now, the paper should be taking on a diamond-like shape with both the top and bottom corners folded in.
Step 3: Make a Smaller Triangle
Now, let's start folding the other side:
- Fold the bottom right corner towards the center, just as you did with the left corners.
- Crease it well.
- Fold the top right corner towards the center in the same way.
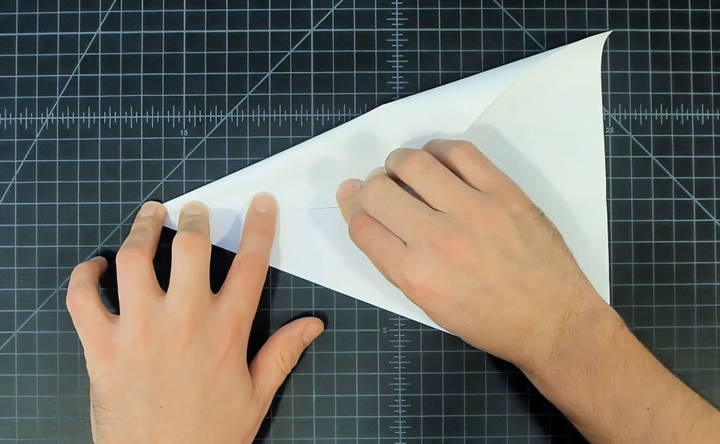
After making all of these folds, you should see that the paper resembles a compact triangle.
Step 4: The Valley Fold
At this stage, pick up the paper and fold it along the middle crease so that the two sides meet. This is called a valley fold in origami terms. Press it down firmly so that both sides stay together.
Step 5: Prepare for the Final Claw Shape
Now, with your paper folded into a tight triangle, you'll need to make one more key fold to give the paper the sharp, pointed shape of a claw:
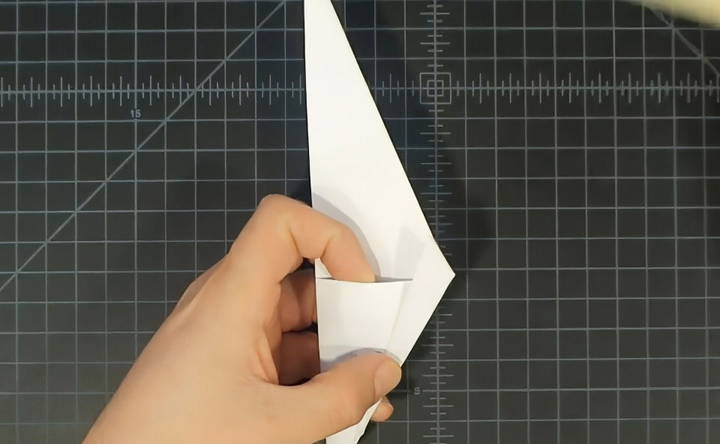
- Rotate the paper so that the bottom is horizontal.
- Press down on the paper with your left index finger while using your right hand to fold the top section over towards the bottom. You are essentially making a bend that will form the tip of the claw.
Step 6: Locking the Claw in Place
To lock the claw and keep it from unraveling:
- Locate the small pocket maked by the folds. It will be on one side of the folded triangle.
- Carefully tuck the flap from the top section into this pocket. This step is important because it will secure the claw in place and prevent it from coming apart.
Once the paper is tucked in tightly, the structure of the claw is complete.
Step 7: Repeat for All 10 Fingers
Now that you've made one claw, you'll need to repeat the same process for the other nine sheets of paper. Follow the exact steps above to make the additional claws for the rest of your fingers.
Wearing Your Paper Claws
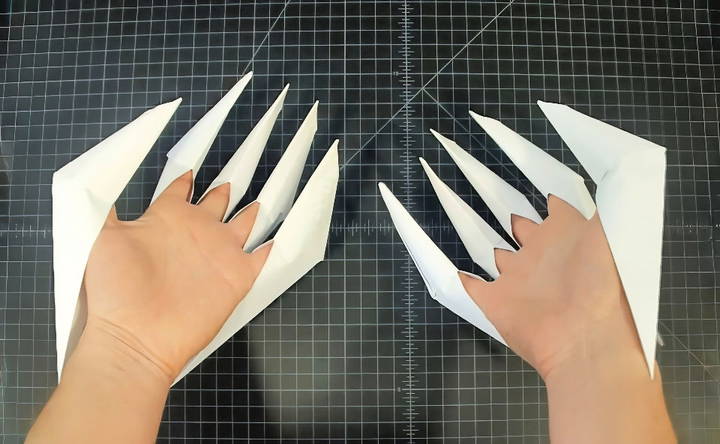
Once all 10 claws are completed, it's time to wear them! Here's how to do it:
- Insert your finger into the pocket at the base of each claw. This pocket acts like a little holder for your fingers.
- Press the claw so that it fits snugly around your fingertip.
Once all of your fingers are equipped with paper claws, you'll look like a fearsome creature ready for Halloween, a costume party, or just to have some fun around the house!
Tips for Success
Here are a few tips to help you make the best paper claws possible:
- Take your time with each fold. Precision is key in origami, and the neater your folds, the sharper and cooler your claws will look.
- Use a flat surface. Always work on a clean, flat table to ensure that your folds are crisp and accurate.
- Crease firmly. Each time you make a fold, use your fingers or a flat object to press down firmly and make a sharp crease. This helps the claw hold its shape better.
- Be patient. Especially if this is your first time making origami claws, it might take a little practice to get the folds just right.
Customizing Your Paper Claws
One of the fun aspects of making origami claws is that you can customize them in various ways to make them even cooler:
- Use colored paper instead of plain white paper for a more vibrant and eye-catching set of claws.
- Draw designs on your claws. Once you've folded your claws, feel free to add details like spooky patterns, blood marks, or even glitter.
- Make different sizes. While the tutorial above uses standard-sized paper, you can experiment with larger or smaller sheets to make claws of different sizes. Larger sheets will give you bigger claws, while smaller sheets will make more petite claws.
Fun Uses for Your Paper Claws
There are many fun and creative ways to use your paper claws once you've made them. Here are some ideas:
- Costume accessory: Paper claws are the perfect finishing touch for a last-minute costume. Whether you're dressing up as a monster, a werewolf, or a creature of your own design, these claws will add an extra spooky effect.
- Party trick: Surprise your friends at a party by showing off your homemade claws. They're sure to be impressed by your origami skills!
- Photography prop: If you enjoy taking creative photos, paper claws can make for a fun and unique prop to incorporate into your pictures.
- Craft project for kids: Making paper claws is a great activity for kids and can be done in groups for a fun crafting session.
Troubleshooting Common Issues
While making paper claws is generally easy, you might run into a few issues along the way. Here's how to solve them:
- The claw won't stay together: If the claw keeps unraveling, make sure you're tucking the final flap securely into the pocket. Press down firmly on the crease to keep everything in place.
- The folds are uneven: If your claw looks lopsided, go back to the initial folds and check that all the edges are aligned correctly. Accuracy in the first few folds is important to ensure the final claw looks sharp and symmetrical.
- The claw doesn't fit your finger: If the claw feels too loose or too tight on your finger, you can adjust the size by slightly tweaking the final few folds. You can also experiment with using different-sized paper.
Conclusion
Making paper claws is a simple, fun, and creative origami project that anyone can enjoy. With just a few sheets of paper and a little patience, you can make a set of claws that are perfect for costumes, parties, or just having fun at home. By following the step-by-step instructions outlined above, you'll have no trouble making your own claws in no time.
So, gather your materials and start folding! Whether you're a seasoned origami enthusiast or a complete beginner, paper claws are a great way to enjoy the art of paper folding. Happy crafting!
FAQs About Paper Claws
Discover everything you need to know about paper claws with this comprehensive FAQ guide, covering tips, creation steps, and common questions.
Accuracy from the first step is key. Focus on aligning each fold carefully with the previous creases. Using a ruler to press the paper flat can help ensure sharp, precise folds. Take your time and check each step to avoid issues later on.
Yes, A4 paper works well, although the claws might be slightly smaller compared to using US letter-sized paper. Make sure to follow the same folding techniques and adjust your folds for the best results.
If the claws are too tight or too loose, you can adjust the folds slightly in the final steps. For tighter claws, fold more snugly. For looser claws, leave a little more room when tucking the final flap into the pocket.
As the paper layers increase, especially near the final steps, it’s common for the folds to become thick. Pressing down firmly on each crease using a flat object, like the edge of a ruler, can help keep the folds sharp and easy to manage.
The process for folding claws for your thumbs is the same as for the other fingers. Follow the same steps, ensuring that the final fit is comfortable around your thumb. If it's too loose or tight, you can tweak the final folds to adjust the fit.
The final fold where you tuck the flap into the pocket is crucial for locking the claw in place. Ensure you push the flap firmly into the pocket and press down on all the creases to secure it. If needed, you can use a tiny piece of tape for extra security.
Absolutely! Using colored or patterned paper is a great way to customize your claws. Just make sure the paper is sturdy enough to handle multiple folds without tearing, as thinner papers might not hold up as well.
If the claws feel flimsy, check that you’ve creased each fold firmly. You can also use slightly thicker paper for more durable claws. Firm creases will give the claws a stronger structure and make them last longer.
The time required depends on your experience with origami. If you’re new to folding, it may take 20-30 minutes for your first claw, but as you get more comfortable with the steps, you’ll be able to complete each claw faster. Expect around an hour to finish all 10 claws.
Don't worry! Simply unfold the paper and retry the step where you encountered the issue. Make sure the edges are aligned correctly and re-crease the fold. Origami often involves retrying steps to perfect the final result.


