Discover the imaginative and sustainable craft of paper mache, a technique with a rich history and wide applications for art and design. Originating in ancient China, this art form has traveled the world, evolving with each culture it touched. Today, its relevance continues as a creative and eco-friendly means of expression. From seasoned artists to those seeking fun, eco-conscious projects for kids and families, paper mache offers a broad canvas for creativity.
Embarking on your paper mache journey can be as simple as gathering a few basic materials. This guide will walk you through the essentials of making your paste, preparing your work area, and bringing your ideas to life. Whether intrigued by the historical significance of paper mache, looking to tackle troubleshooting common issues, or eager to try one of the 25 Easy Paper Mache Ideas and Art Projects, this content promises to be your go-to resource. Prepare to explore the next section for an enriching dive into paper mache.
The Historical Significance of Paper Mache
Paper Mache, often called Papier-mâché, is a craft that stands out for its simplicity and historical richness. The term, which means ‘chewed paper' in French, belies the art's intricate and storied past.
Origins in Ancient China
The journey of the Paper Mache begins in Imperial China around 200 CE. Not long after they invented paper, the Chinese were pioneers in utilizing this material. They crafted items like warrior helmets, mirror cases, and ceremonial masks, showcasing the material's versatility and strength.
Spread to the Middle East and Europe
From China, the technique traveled to Japan and Persia, where it was embraced and adapted to local customs. It wasn't until the 17th century that Paper Mache made its way to Europe, where it found a new audience eager to explore its potential.
Flourishing in France
In France, during the early 18th century, Paper Mache began to be recognized for its artistic value. Artisans created beautifully decorated items with Oriental motifs and lacquered finishes, turning everyday objects into works of art.
The Craft's Evolution
Over the centuries, Paper Mache has been used for various purposes, from functional items like trays and furniture panels to decorative pieces such as masks and figurines. Its adaptability and ease of use have made it a favorite among hobbyists and professional artists.
Today's Relevance
Today, Paper Mache remains a popular medium for creative expression. Its eco-friendly nature and the ability to recycle materials align with contemporary sustainability and environmental consciousness values.
By studying the history of Paper Mache, we appreciate its importance and legacy in the world, honoring the tradition of making beauty from basic materials.
How to Get Started with Paper Mache
Embarking on a paper mache project can be a delightful and creative experience. Whether you're a seasoned artist or a curious beginner, the world of paper mache offers endless possibilities for crafting unique and personalized items. Here's a step-by-step guide to help you get started on your paper mache journey.
Understanding Paper Mache
Paper mache, or papier-mâché, is a composite material consisting of paper pieces or pulp, bound with an adhesive, such as glue, starch, or wallpaper paste. It's a versatile crafting technique for making sculptures, decorative items, masks, and more. The beauty of paper mache lies in its simplicity and the use of recycled materials.
Gathering Materials
Before diving into your project, it's essential to all necessary materials. Here's what you'll need:
- Paper: Newspaper is the most commonly used paper because it's readily available. However, you can also use tissue paper, paper towels, or any waste paper.
- Adhesive: White glue diluted with water creates a strong paper mache paste. For an eco-friendly option, you can make a paste with flour and water.
- Base Form: Balloons, cardboard, or wire mesh can serve as forms to give your project shape.
- Paint and Decorations: Acrylic paint, fabric, and other decorative materials will bring your creation to life.
Making Your Paste
The paste is a crucial component of paper mache. Here are two simple recipes:
- Glue-based Paste: Mix one part white glue with one part water until you achieve a smooth consistency.
- Flour-based Paste: Mix one part flour with one part water, stirring until smooth. You can add a pinch of salt to prevent mold.
Preparing Your Work Area
Paper mache can get messy, so it's essential to prepare your workspace:
- Cover your work surface with a plastic sheet or newspaper.
- Wear old clothes or an apron.
- Keep a bowl of water and a cloth nearby to clean sticky fingers.
Making Your Project
- Tear the Paper: Rip the paper into strips or small pieces. Smaller pieces work well for detailed projects, while larger strips are great for bigger items.
- Dip and Apply: Dip the paper strips into the paste, ensuring they're fully coated. Run the strip between your fingers to remove the excess paste.
- Build Your Base: Apply the wet strips over your base form. Overlap strips for strength. Continue adding layers until the form is covered. Three to four layers are usually sufficient for most projects.
- Drying: Allow your project to dry completely. Depending on its size and thickness, this can take anywhere from 24 hours to a few days.
- Decorating: Once dry, you can paint and decorate your creation as desired. Let your imagination guide you!
Tips for Success
- Be patient and let each layer dry thoroughly before adding the next.
- Experiment with different base forms and textures.
- Practice makes perfect. Don't be afraid to start with small projects to hone your skills.
Start paper mache for art, fun, and for all ages. Craft great projects quickly.
Creative Project Ideas for Paper Mache
Paper Mache is a versatile medium that offers endless possibilities for creativity. Whether you're a seasoned artist or a beginner, there's a Paper Mache project that's perfect for you. Here are some creative ideas to inspire your next Paper Mache creation:
For the Home Decor Enthusiast
- Chic Bowls and Vases: Make custom bowls and vases with a personal touch. Paint them to match your home decor, or leave them raw for a rustic look.
- Faux Plants: Craft lifelike cacti or succulents that require no maintenance. These can add a pop of green to any room without worrying about watering.
For the Artistic Soul
- Sculptures: Let your imagination run wild and sculpt anything from abstract art pieces to realistic animal figures.
- Wall Art: Design unique wall hangings or relief panels to add character to your living space.
For Kids and Families
- Piñatas: Make any celebration special with a handmade piñata. It's a fun activity for the whole family, and a party hit.
- Masks and Costumes: Make masks for a play or costumes for dress-up. It's a great way to encourage imaginative play.
For the Eco-Conscious
- Recycled Decor: Use old newspapers and magazines to make eco-friendly decor pieces. It's a great way to upcycle and reduce waste.
- Seedling Pots: Start your garden with biodegradable paper mache seedling pots. These pots can be planted directly into the soil.
For the Gift Giver
- Personalized Gifts: Make custom photo frames, jewelry boxes, or coasters as thoughtful gifts for friends and family.
- Holiday Ornaments: Make ornaments for festive seasons. They're fun to make and add a personal touch to holiday decor.
Patience and creativity are crucial for a successful Paper Mache project. Don't hesitate to try different shapes, textures, and colors. Just have fun making something by hand.
Troubleshooting Common Paper Mache Issues
Working with Paper Mache can be a rewarding experience, but sometimes, you might encounter issues that can hinder your progress. Here's a helpful guide to troubleshoot some common Paper Mache problems:
Problem: Paper Mache Not Sticking
- Solution: Ensure your paste has the right consistency; it should be similar to thick glue. If it's too runny, add more flour or glue to thicken it. Also, make sure the surface you're working on is clean and not too smooth.
Problem: Bubbles and Lumps
- Solution: Bubbles can form if air gets trapped between layers. Smooth out each layer as you apply it. For lumps, make sure to tear the paper into strips instead of cutting, as torn edges blend more smoothly.
Problem: Drying Issues
- Solution: Paper Mache should dry evenly. Avoid thick layers and ensure each layer is dry before adding another. Use a fan or place your project in a well-ventilated area to speed up drying.
Problem: Mold Growth
- Solution: Mold can occur in humid environments. Add a few drops of clove oil to your paste as a natural preservative to prevent this. Always let your project dry completely in a dry, warm area.
Addressing these common issues can ensure that your Paper Mache projects turn out beautifully and last a long time.
The Environmental Impact of Paper Mache
Paper Mache is often celebrated for its use of recycled materials, but it's important to consider its environmental impact:
Positive Impacts
- Recycling: Paper Mache promotes paper recycling, which can help reduce waste and save trees.
- Low Energy Consumption: Making Paper Mache requires less energy than crafting materials like ceramics.
Negative Impacts
- Deforestation: If new paper is used, it can contribute to deforestation, as paper manufacturing uses a significant portion of global wood.
- Pollution: Paper production releases harmful gases like nitrogen dioxide, sulfur dioxide, and carbon dioxide, contributing to pollution.
Mitigating Negative Impacts
- Use Recycled Paper: Opt for recycled paper to minimize the demand for new paper.
- Natural Adhesives: Use natural adhesives like flour and water instead of synthetic glue to reduce chemical use.
FAQs About Paper Mache
Paper Mache has been loved by artists for ages. Common questions answered.
What is Paper Mache?
Paper Mache is a composite material of paper pieces or pulp bound with an adhesive such as glue, starch, or wallpaper paste. It creates various objects, from simple models and masks to more complex sculptures and decorative items.
Can Paper Mache be used outdoors?
While Paper Mache is primarily an indoor craft, you can use it outdoors by sealing it with a waterproof varnish. However, it's not as durable as materials designed for outdoor use, so it's best for temporary displays or weather-protected areas.
How long does Paper Mache take to dry?
The drying time for Paper Mache can vary greatly depending on the thickness of the layers, the humidity, and the temperature. Thin layers may dry overnight, while thicker layers can take several days. Always allow each layer to dry completely before adding the next.
Is Paper Mache eco-friendly?
Paper Mache can be very eco-friendly, especially using recycled paper and natural adhesives. It's a great way to repurpose paper that would otherwise go to waste.
Can I paint on Paper Mache?
Absolutely! Once your Paper Mache project is dry, you can paint it with acrylics, tempera, or any other type of paint you prefer. For best results, apply a base coat of white paint or gesso to make a smooth surface for your colors.
Paper Mache requires patience and creativity. Have fun experimenting!
25 Easy Paper Mache Ideas and Art Projects
Discover 25 Easy Paper Mache Ideas and Art Projects to unleash your creativity! From animals to masks, find inspiration for your next masterpiece.
1. Making an Anthropologie Paper Mache Rabbit Head
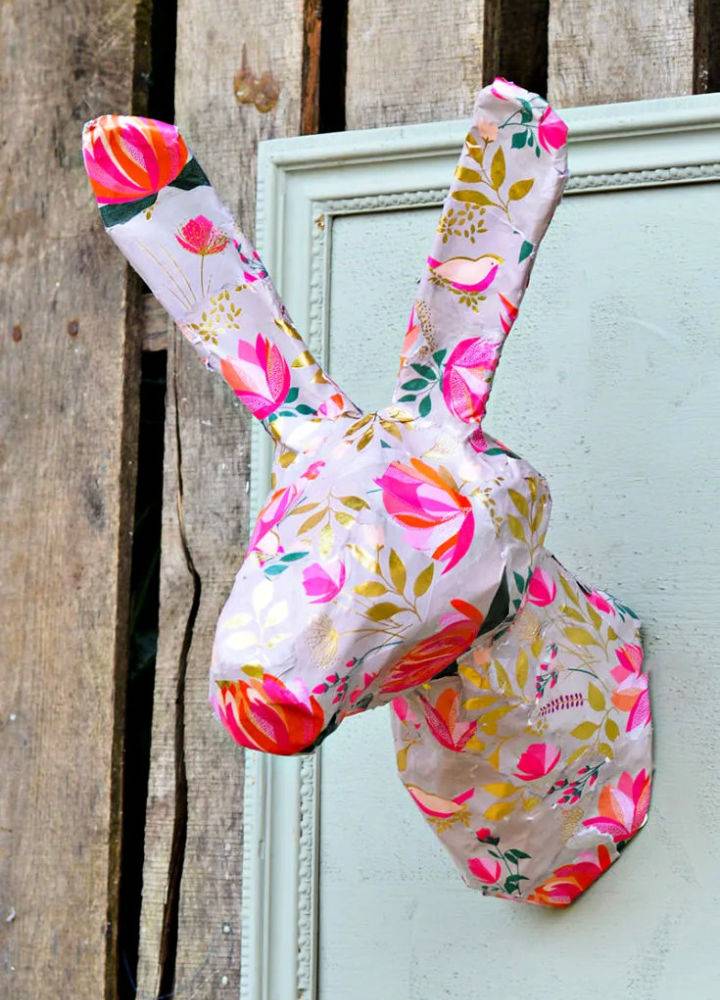
Explore the fascinating world of paper mache art, utilizing recycled materials to make stunning sculptures and intricate designs.
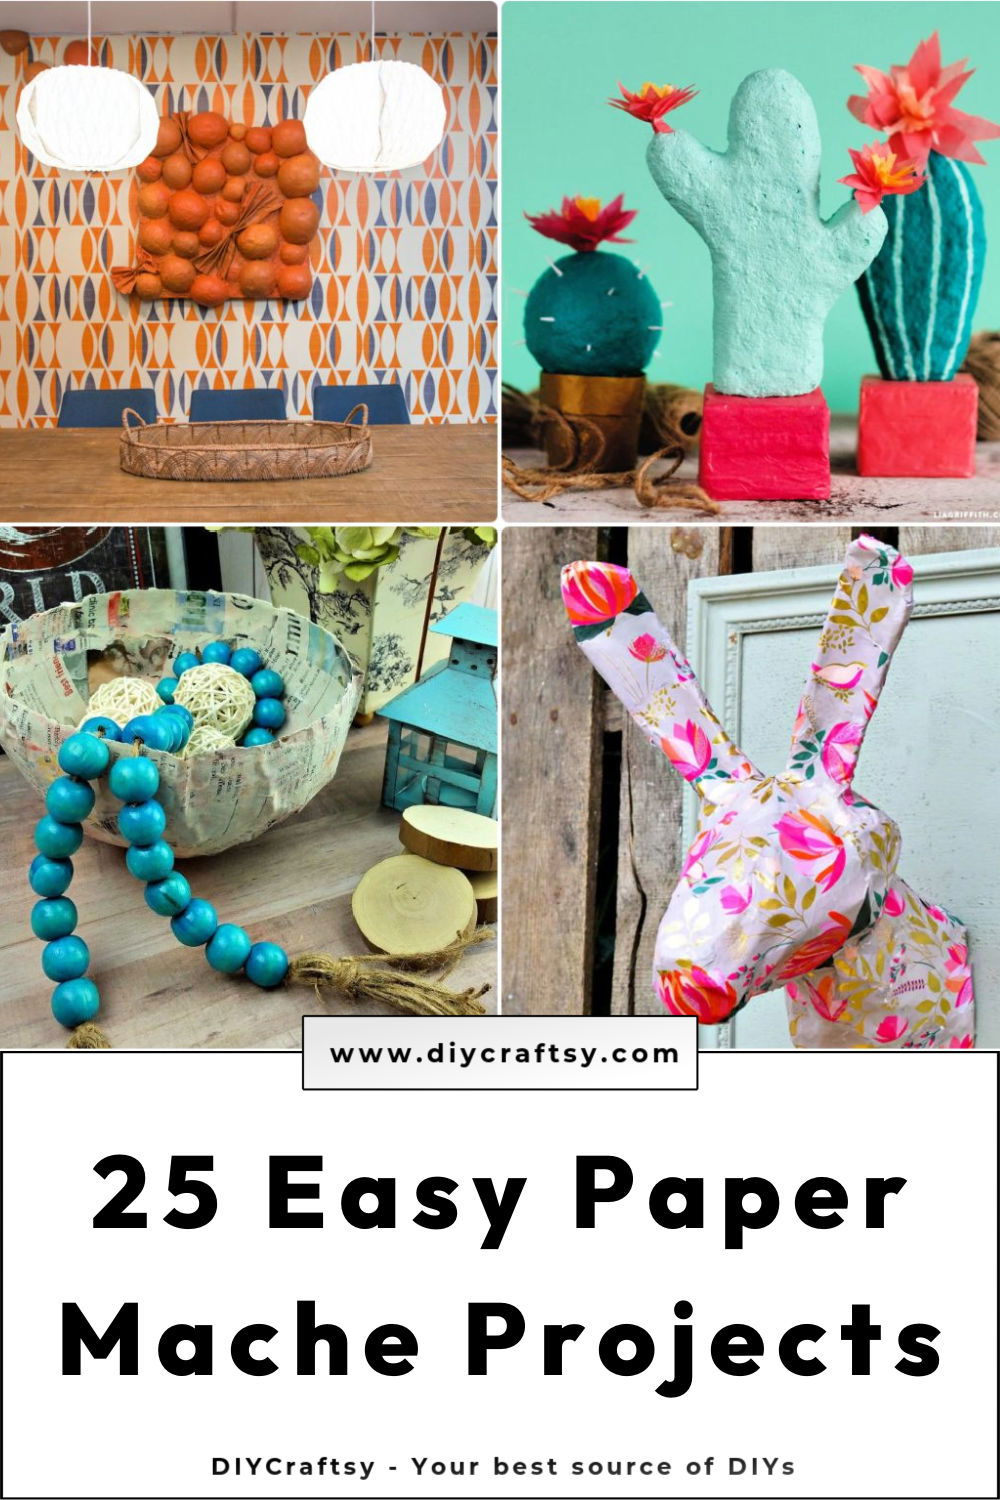
Marvelous and unique, make your own anthropologie-inspired paper mache rabbit head with this simple DIY tutorial. Save money and customize the design to match your decor using different paper patterns. Gather craft aluminum wire mesh, old newspapers, white school glue or pva glue, mod podge, glue brushes, gesso (optional), and a sheet of pretty floral wrapping paper.
Begin by making a wireframe for the neck, head, and ears, then shape it accordingly before securing parts with tape or a hot glue gun. Layer strips of newspaper soaked in white school glue onto the frame to build up the texture of paper mache. Allow it time to dry before applying mod podge and attaching a beautiful floral wrapping paper! pillarboxblue
2. Adorable Papier Mache Cacti for Home Decor
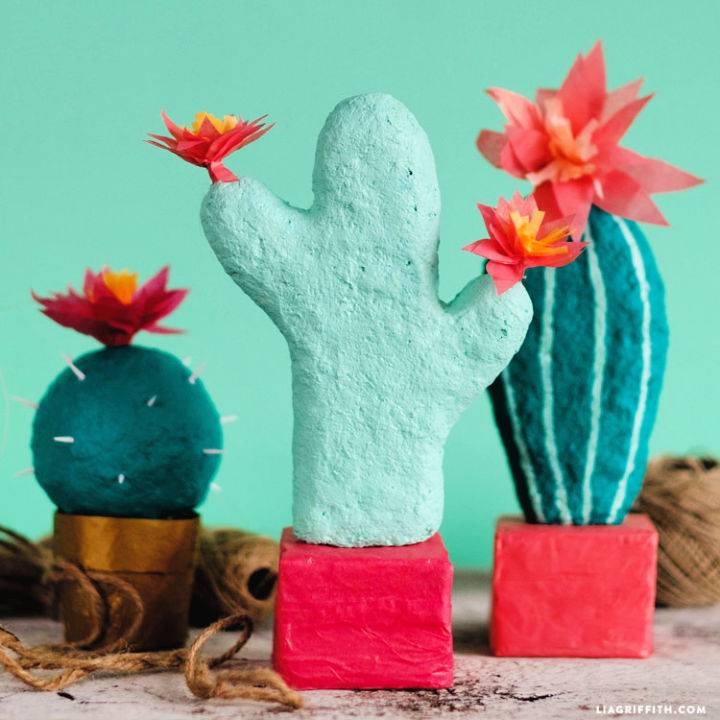
Transform your home with this fun DIY project to craft adorable papier mache cacti decorations! Gather the tools such as a low-temp hot glue gun, mod podge glue, wire cutters, paintbrushes, and a craft knife.
Assemble the materials, including papier mache, foam blocks, 18-gauge floral wire, tissue paper popsicle sticks, and acrylic craft paint. Follow the easy step-by-step instructions to shape the foam into cactus forms, then cover them in papier mache and add custom colors and designs of your choice. Top it off with some tissue paper flowers for an irresistible charm! Suitable for all ages - start crafting now! liagriffith
3. Make Your Own Paper Mache Bowl
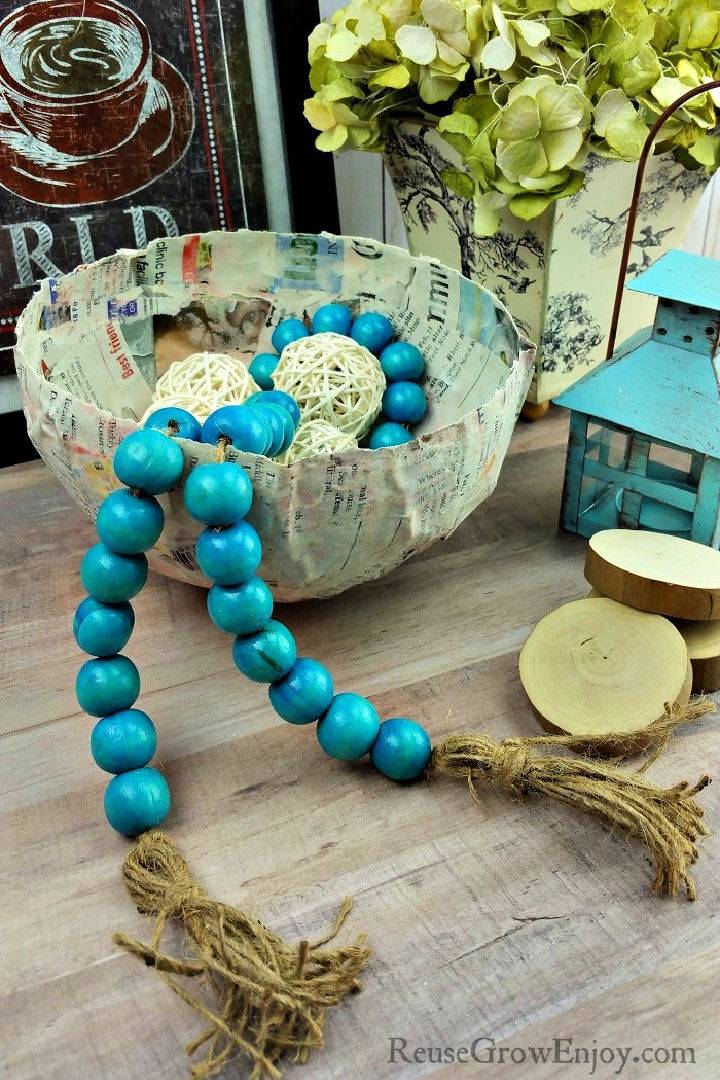
Unleash the eco-friendly artist within by upcycling newspapers into stunning paper mache projects for a sustainable crafting experience.
Gustatory upcycling! Make your DIY paper mache bowl using simple materials like balloons, newspaper, flour, and water. Revel in the creative benefits of this versatile project; choose your desired shape and size to make it yours. Mix the flour and water for a fuss-free paste at home, then cover the work area with newspaper or plastic bag to prevent messes. Remember: glossy paper doesn't work well with the paste. Enjoy your new decorative bowl while reducing waste - an inventive way to enhance home decor! reusegrowenjoy
4. Homemade Paper Mache Bubble Art
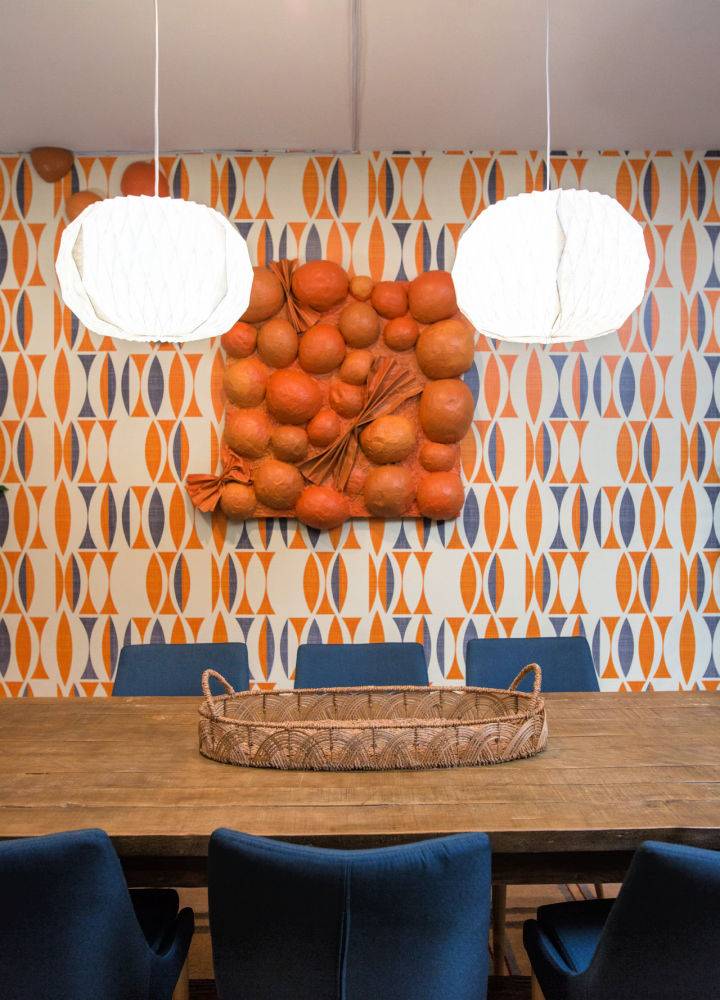
Fantastic! Get ready to unleash your creative side with this DIY paper mache bubble art. Add a 70s-inspired maximalist touch to your decor with this unique art form. You can make something truly special for your walls with balloons, newspaper, white glue, water, paintbrushes, and three shades of orange paint.
Make the paper mache mixture by mixing white glue and water and coat each balloon with paper mache strips. Then let it dry before trimming the edges for a neat finish. Attach these paper mache bubbles to a canvas with hot glue while adding other shapes like stars or circles for an even better look. Unleash your imagination and start making today! mrkate
5. Cool Paper Mache Globe for Decorations
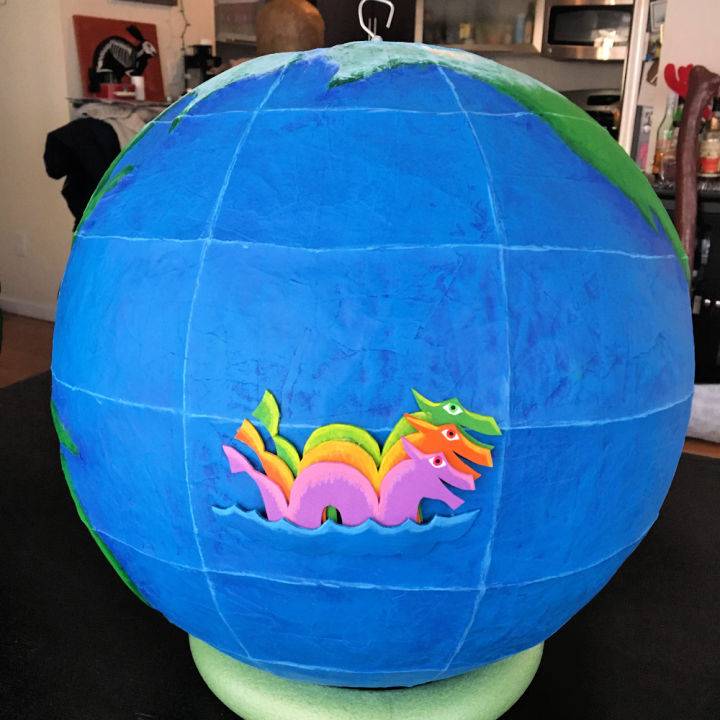
Fabricate inviting paper mache globe decorations with this comprehensive tutorial! Commence with a 16" inflatable ball as the foundation and cover it with aluminum foil secured by masking tape. Layer six layers of papier-mache, utilizing roman pro-543 universal wallpaper adhesive and swapping between newspaper and brown wrapping paper.
To acquire an even surface, utilize blank newspaper for the concluding layer. When dry, adorn the globe with latitude and longitude lines. Carefully cut into paper mache to remove the base, then cut out a round hole for the south pole – attach craft foam continents using adhesive; reattach the circular area with masking tape. Get creative & make striking globe ornaments today! manningkrull
6. How to Make a Paper Mache Fireplace
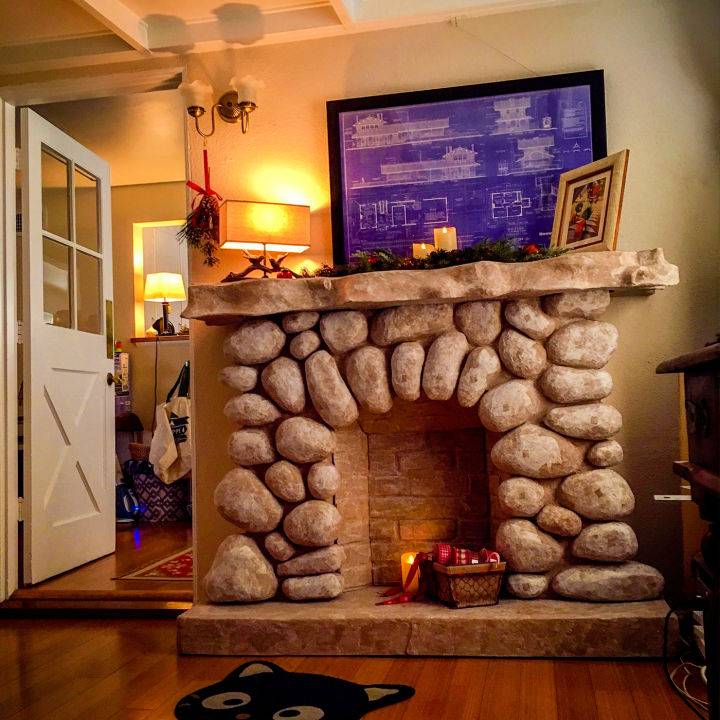
Unequivocally craft your DIY paper mache fireplace with these phenomenal suggestions! Utilize a flour-and-water paste for an astonishingly strong adhesive, and oscillate between various paper types for each layer to accurately monitor progress. Incorporate flat surfaces into your rock forms and wrap them with cling wrap for uncomplicated removal. Meticulously measure and consider using ball foam for enhanced strength.
Refrain from papier mâchéing over real rocks or on top of rocks. Enable each layer to dry partially before continuing onward, making gaps between stones slightly larger than required. Remember to use a sharp utility knife and expect the project to last longer than presumed. pizzabytheslice
7. Quick and Easy DIY Paper Mache Pinata
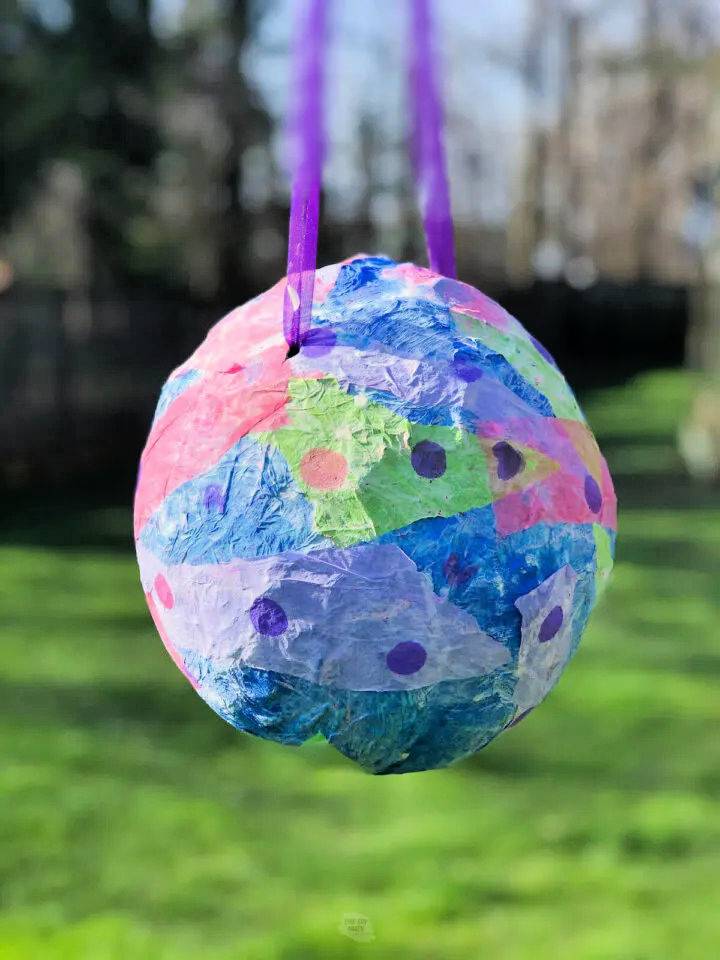
Enticing everyone to join the fun and learn how to craft a DIY piñata from simple found-at-home ingredients. Economically make a customized piñata for your next festivity with great base options like cereal boxes, paper bags, or old cardboard boxes. Use classic paper mache paste and crepe paper for decoration, then hang your homemade piñata. Discover the joy of breaking it open as surprises come forth! Follow stepwise instructions for constructing the base and crafting the paper mache paste to get started on this exciting project today! thediynuts
8. Handmade Paper Mache Planters Using Plastic Bottle
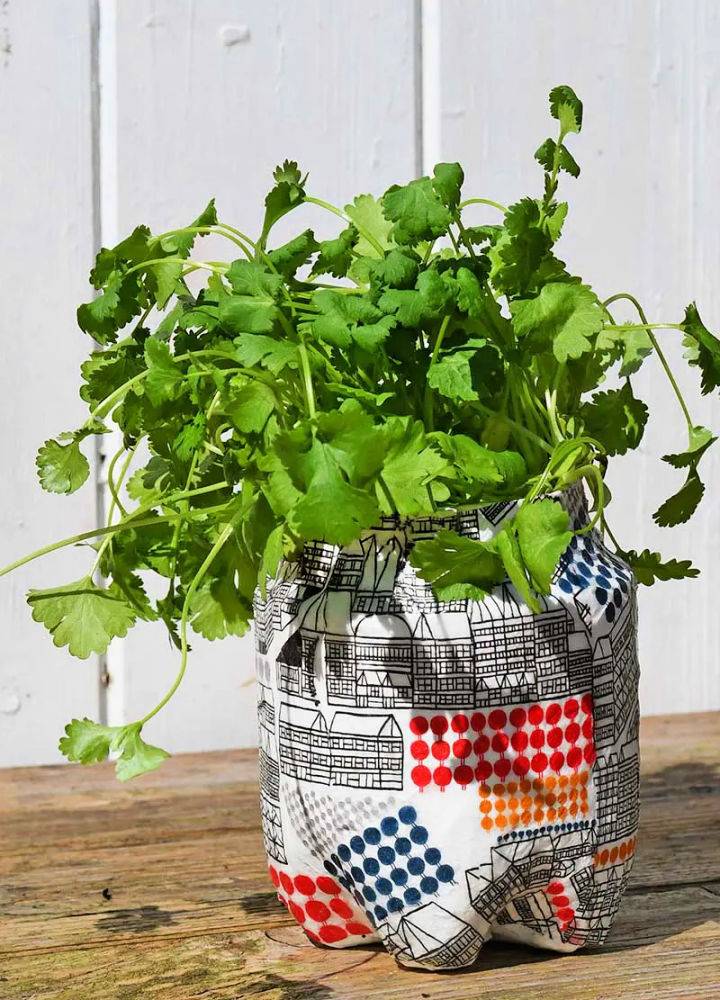
Discover the rich history behind paper mache art, stemming from ancient China to modern-day artists pushing the boundaries of imagination.
Transform mundane plastic bottles into stylish and self-draining planters with unique marimekko designs. An inspiring eco-friendly craft project for plant lovers, the task requires simple materials such as empty soda bottles, newspaper, white paint, flour or glue for paper mache, mod podge decoupage glue, and marimekko paper napkins.
Follow step-by-step instructions to make an exquisite planter suitable for various plants - herbs gardens or flowering plants like succulents. With this budget-friendly activity, you will enhance your gardening experience by adding chic decorations to your indoor space! pillarboxblue
9. DIY Paper Mache Animal Heads
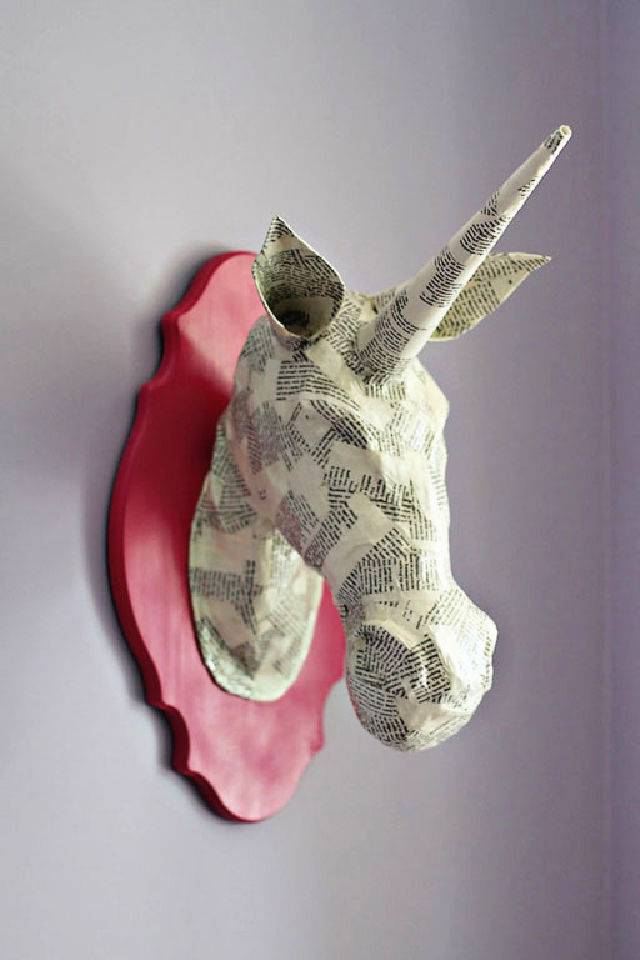
Transform simple newspaper strips into stunning masterpieces by experimenting with diverse paper mache ideas, techniques, and mixed-media elements.
Make whimsical and three-dimensional artwork with DIY paper mache animal heads for a child's room! Begin by crumpling newspaper into balls and securing them with masking tape to form the head. Merge multiple newspaper balls and contour them with tape, then make a neck using newspaper and attach it to a sturdy cardboard backing. Next, concoct boiled paper mache paste from flour and water before dipping torn paper towels into the paste and cover the entire head while sculpting and shaping as you go. A fun-filled creative project that will surely add a vibrant touch of playfulness to any space! lilblueboo
10. Making a Paper Mache Dinosaur Cave
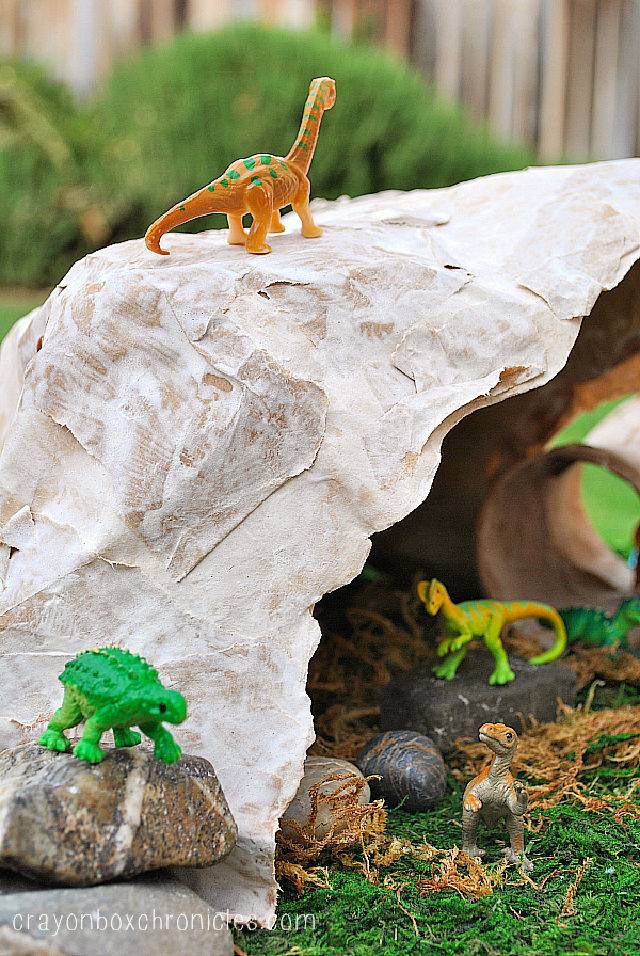
Enthralling your imagination, embark on a prehistoric journey with a DIY paper mache dinosaur cave! Gather all the necessary materials, including no-cook paper mache glue recipe, bowl/tray, paintbrush set, paper strips (packing paper or newspaper), recycled containers/balloons for structure, and cardboard/wood/plastic base. Make rock-like caves and tunnels to explore the world of dinosaurs in this exciting craft project. Enjoy an awe-inspiring sensory play experience and uncover dino-mite discoveries with this creative activity! crayonboxchronicles
11. DIY Paper Mache Bowl for Preschooler's
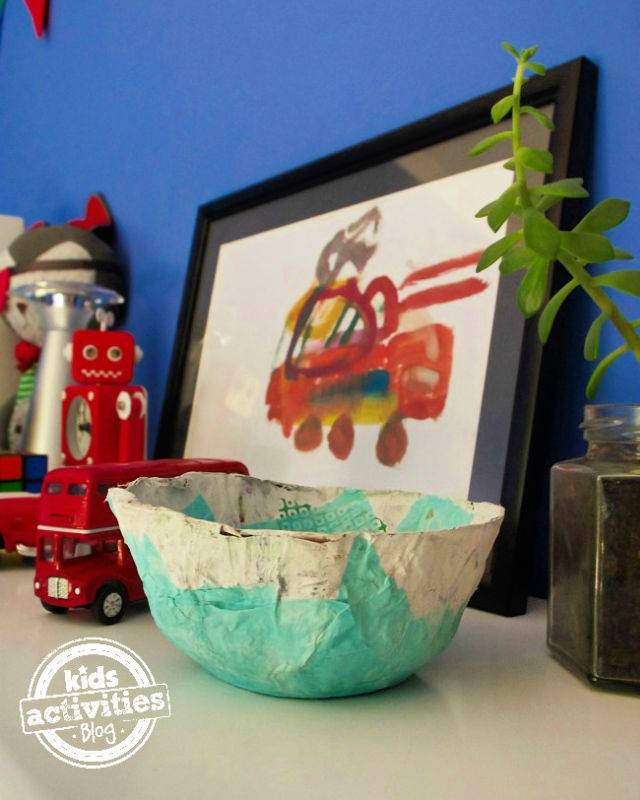
Unleash your creativity with paper mache art, a versatile medium that transforms newspapers and glue into inspiring masterpieces.
Revel in the creative possibilities of paper mache with this easy-to-follow recipe! Gather old newspaper strips to cover a bowling template and make a sturdy base. Make your simple paste using equal parts water and flour, then dip the newspaper strips into it. Remove excess paste, layer on multiple strips to build sturdiness, and let dry overnight. After removing the bowl template, paint and decorate your kid-made craft for a unique touch of fun! kidsactivitiesblog
12. Paper Mache Mobile for Kids
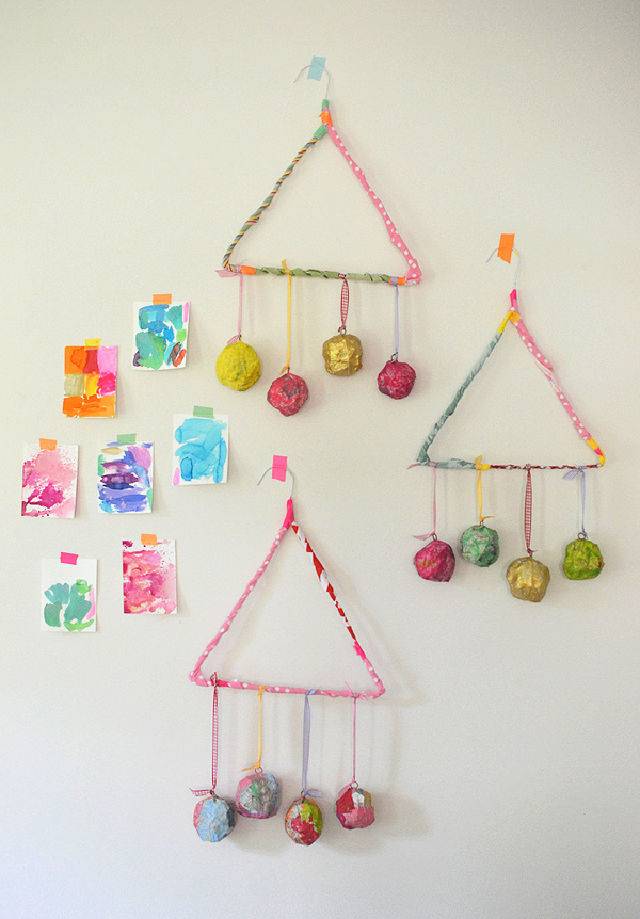
Also, engage in family bonding by making memorable paper mache projects that foster teamwork, enhance fine motor skills, and spark artistic expression.
Put together a prodigious paper mâché mobile with kids using ordinary supplies! Gather your wire hangers, fabric/ribbon strips, colored tape, white school glue, tin foil, and newspaper strips, and mix flour and water for the paste.
Make shapes by wrapping wire hangers in fabric/ribbon and shape tinfoil into base forms. Then begin to layer on newspaper strips with the flour-water paste. Once dry, paint your mobile balls with tempera paints, then attach them to the wire hanger framework using twine & jump rings. Hang it up with a ribbon for an enticingly eye-catching display! artbarblog
13. DIY Papier-mâché Balloon Bowl
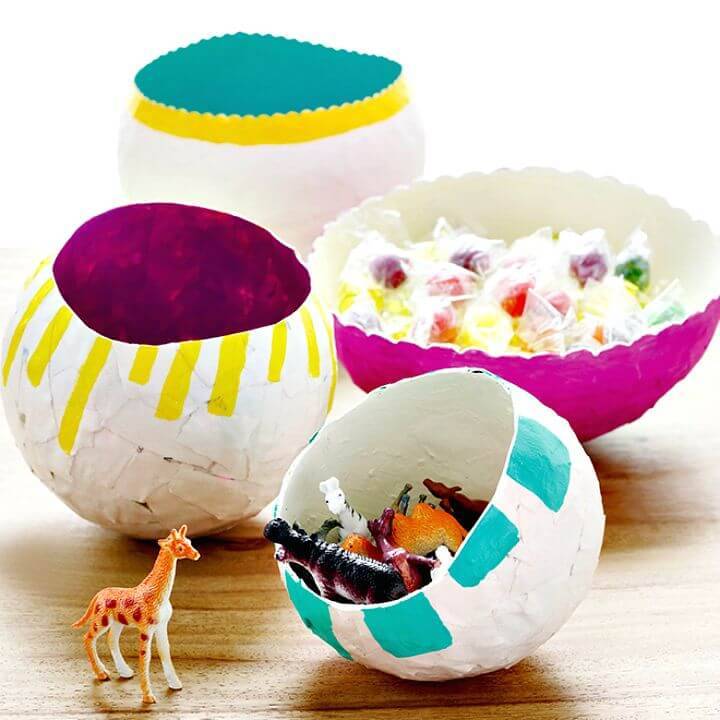
Stimulating your creative senses, this DIY papier-mâché balloon bowl provides an attractive storage solution! You can make a one-of-a-kind bowl for storing small items with a few simple materials—balloons, decoupage glue, foam brush, torn newspaper and plain newsprint squares, paint, and paintbrushes. Inflate the balloon and cover it with decoupage glue and overlapping layers of paper. Once it's dry, pop the balloon to remove it before decorating it with paint. Now you have a charming bowl that is both unique and functional! todaysparent
14. Easy Faux Wood Love Letters
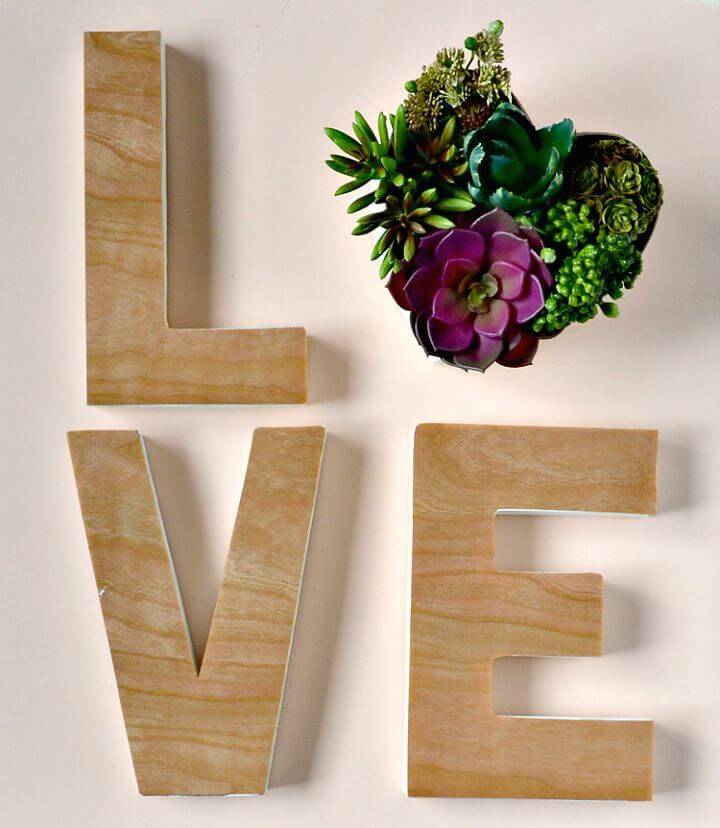
Customize your valentine's day decor with these elegant DIY faux wood love letters! Using cardboard or paper mache letters as the base, you can paint them in any hue you desire. Trace the original shape of each letter onto adhesive wood veneer sheets and cut it out accordingly - remember to reverse the l and e when tracing! Then stick them onto the letters for a sophisticated craft that will add an exquisite touch to your home interior. This holiday season, it's time to show extra love with these chic faux wood love letters! sisterswhat
15. Ikea Vase Hacks With Step by Step Instructions
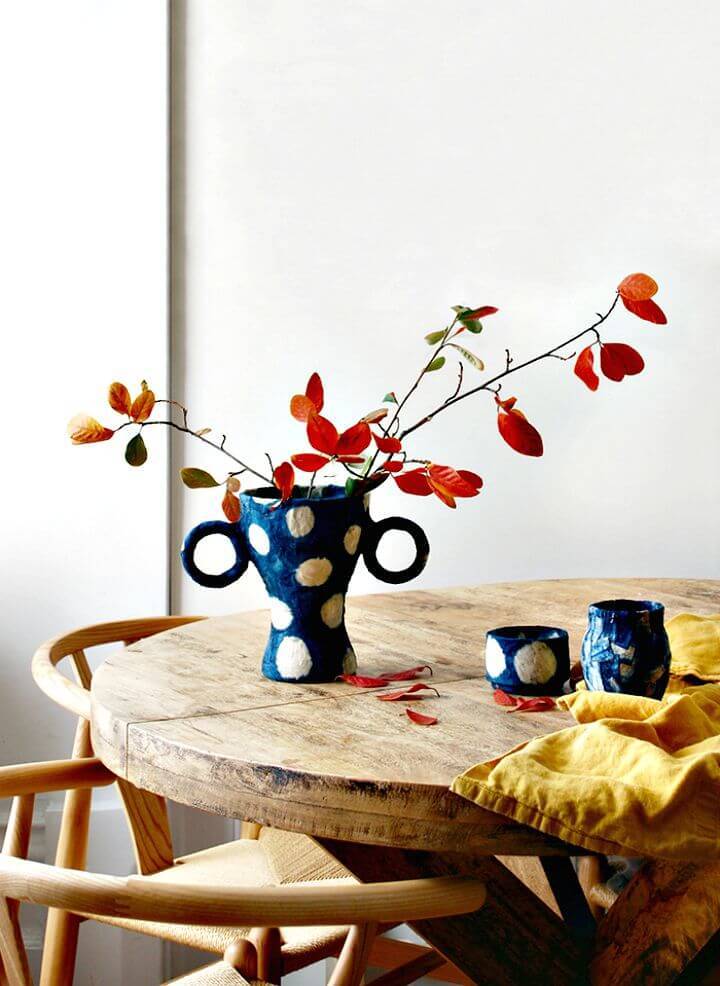
Aestheticize your $1.99 IKEA vasen glass vase with this creative, budget-friendly hack! Gather the following materials for this fun DIY project: wooden curtain rings, shibori print fabric scraps, decoupage glue or modge podge, a small paintbrush, and some scissors. Layer the fabric and wooden rings to make an awe-inspiring Japanese wabi-sabi effect—all for under $6! You can craft unique indigo vessels with just a few simple steps to make a stunning statement piece in any space. we-are-scout
16. DIY Paper Mache Hot Air Balloons
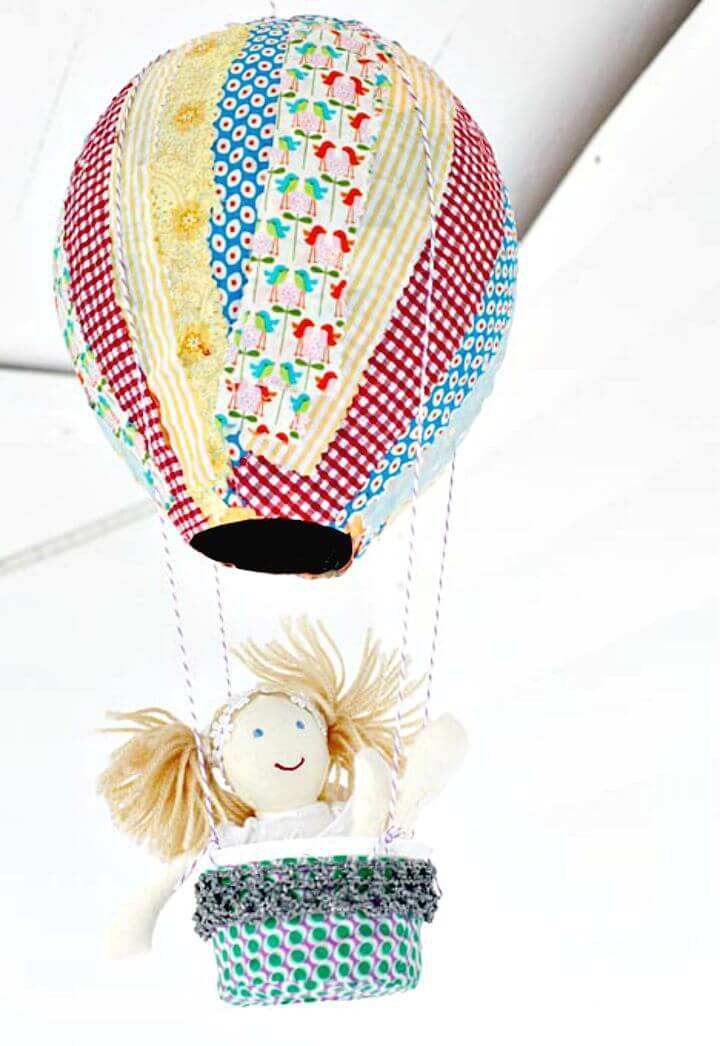
Enhance your artistic skills by delving into the world of paper mache crafts, a versatile medium for both beginners and experts.
Unlock your inner creativity this Easter with paper mache hot air balloons! Tear up sheets of newspaper and bind them to inflated balloons using a 50/50 mix of pva glue and water. Then, cover the balloons in fabric strips soaked in the same mixture for a brilliantly unique effect. Add an extra layer of the pva blends for reinforcement before snipping off the balloon ends. Hang your charming creations proudly by attaching twine to yogurt pot baskets - a fun and engaging craft kids will love! lululoves
17. Amazing Paper Mache Disco Ball Costume

Gleam and glimmer in this glamorous DIY disco ball costume! Make your dazzling attire with simple supplies: a 36" balloon, newspaper, flour, water, holographic bird/ribbon, scotch tape, sequin trim or silver ribbon, and a stapler. Follow the straightforward paper mache method to transform the balloon into an entrancing disco ball. Finish off the look with a shimmery top paired with shorts (or jeans) and disco heels. Get ready to dance up a storm with this eye-catching costume! studiodiy
18. Upcycled Paper Mache Bird Sculpture
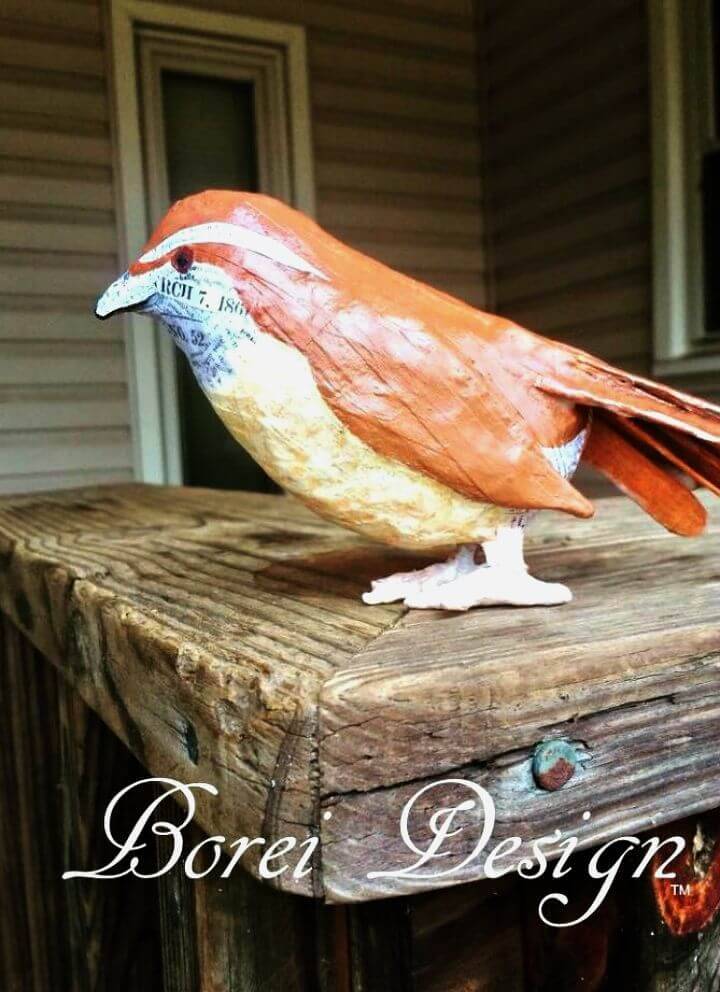
Explore your creativity with versatile paper mache projects, from masks and sculptures to piñatas and home decor items. Marvel at the beauty of your own upcycled paper mache bird sculpture! This DIY tutorial makes making a Carolina wren or any other bird right in your home easy.
Above all, you can make an adorable ornament for your living space with just some old cardboard, crumpled newspaper, masking tape, and lightweight cardboard.
Use wire and toothpick legs for structure, then wrap in floral tape before coating with activa fastmache. Finally, complete with a decoupage using historical newspapers and acrylic paint for a one-of-a-kind design. Get the full instructions plus a free printable pattern today! hometalk
19. DIY Paper Mache Faux Stained Glass House
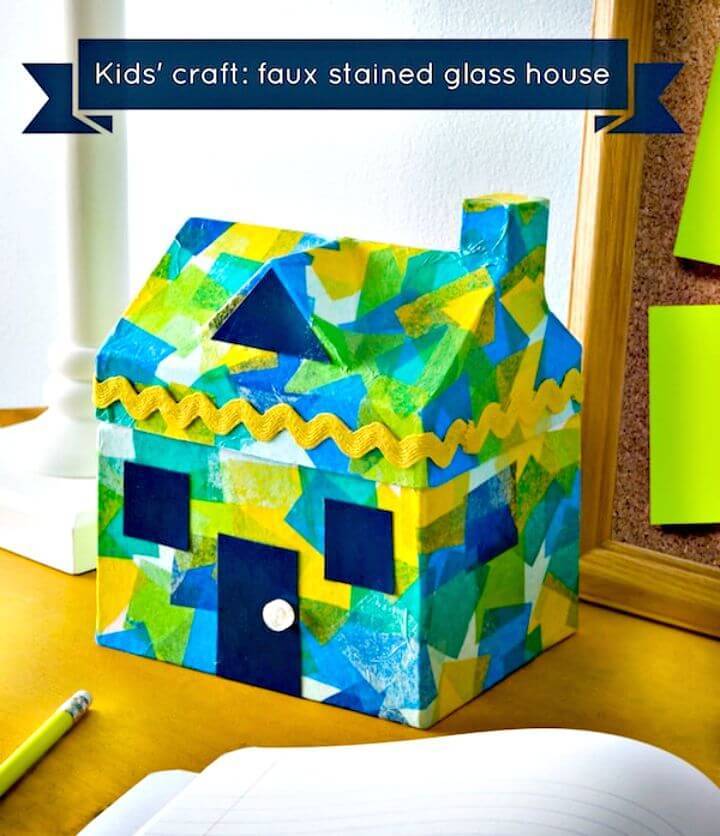
Inspire your child's creativity with this whimsical kids' craft - designing a faux stained glass house! Gather up mod podge wash out for kids (or regular mod podge), white craft paint, tissue paper in various colors, coordinating cardstock, craft glue, a small white button, and ric rac trim.
Start off by adding a base coat of white craft paint to the paper mache house, accordingly making an ideal surface for the stained glass effect. Then let their imaginations roam free as they add color and detail to make a one-of-a-kind masterpiece that will surely be cherished for years to come! Get ready for hours of fun crafting filled with beautiful artistry. modpodgerocksblog
20. Paper Mache Wood Hexagon Storage Boxes
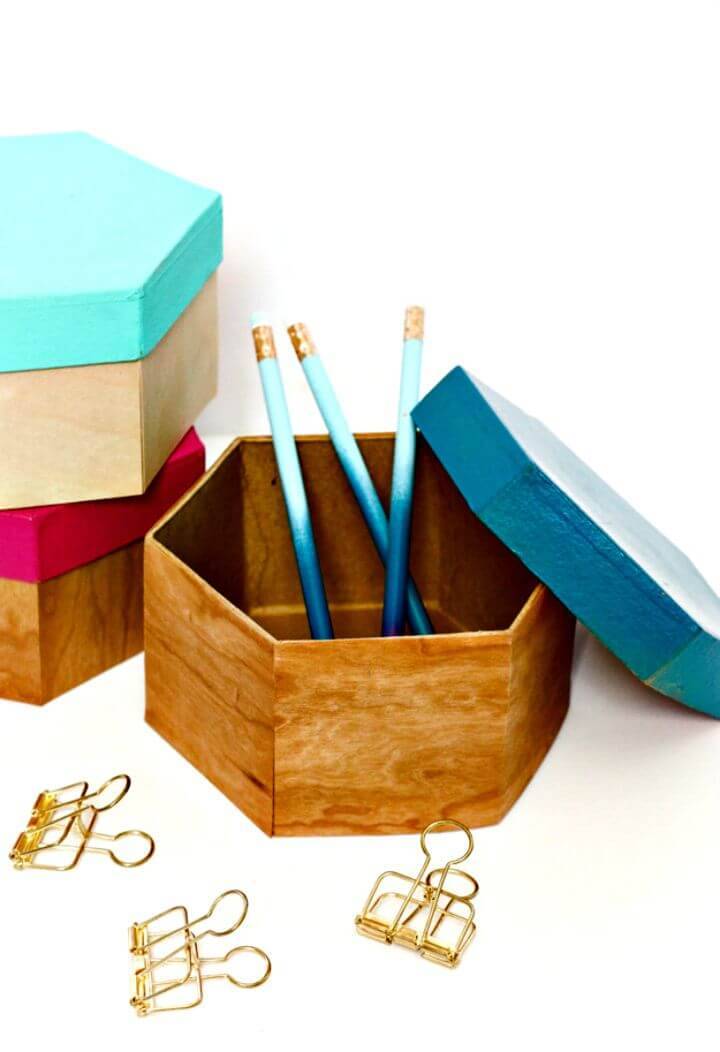
Paper mache ideas offer endless crafts for kids and adults alike, from stunning masks to intricate sculptures and festive ornaments. Unlock craft storage possibilities with these darling faux wood hexagon boxes! Perfectly suited for organizing your space, these DIY boxes can be easily assembled in minutes and look stunning on shelves.
All you need is paper mache boxes of any shape or size, adhesive-backed wood grain veneer sheets, acrylic paint, and a paintbrush. Adhere the wood grain veneer to the boxes, then enhance it with a splash of color from the acrylic paint and enjoy an orderly craft storage solution that's sure to impress! akailochiclife
21. How to Make a Paper Mache Flower Vase
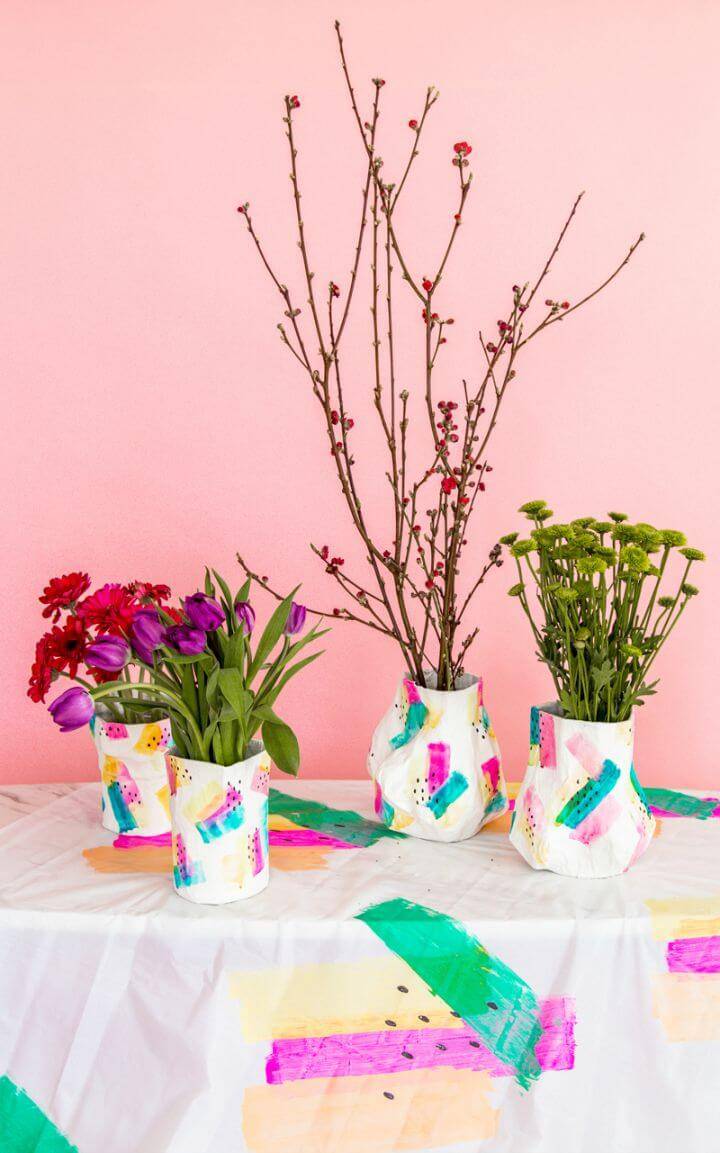
Unleash your creativity with innovative paper mache ideas, using recycled materials to fashion eco-friendly home decor and gifts. This delightful DIY paper mache flower vase creates a cheerful atmosphere this spring! This easy paper mache art makes crafting these organic-shaped vases effortless.
Perfect for holiday brunch, Mother's Day gifts, or also adding lively accents to any corner of your house, you only need newspaper strips, fabric stiffener, mason jars, and some colorful paint to get started on this fun project. Get the kids involved, too - it's an enjoyable activity everyone can enjoy together. Bring the beauty of spring into your home today - try making these vibrant handmade vases! asubtlerevelry
22. DIY Papier Mache Cake Stand
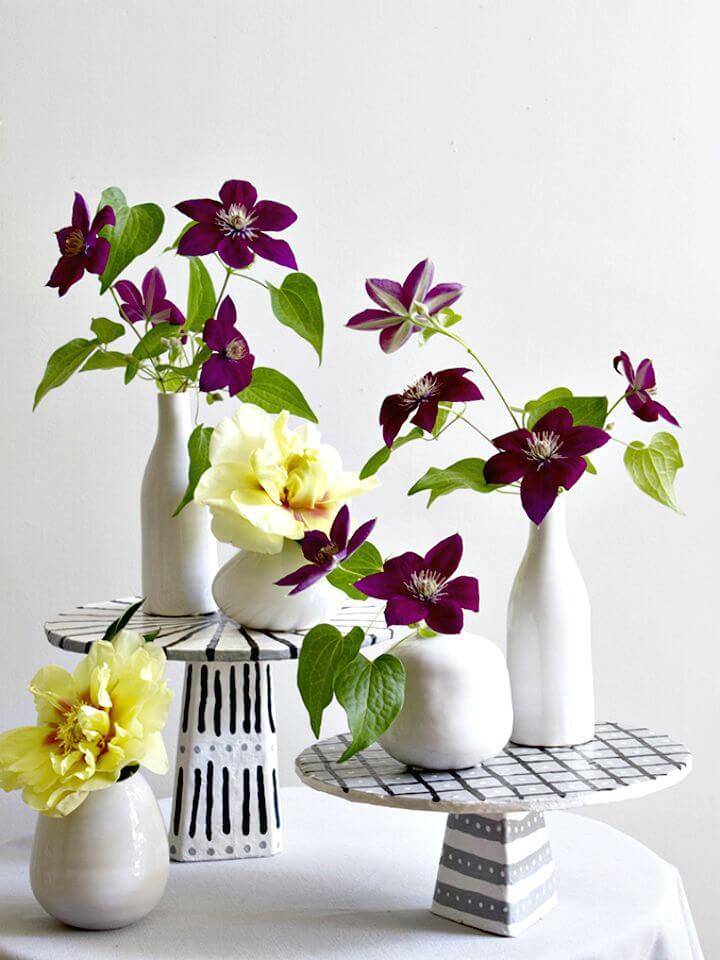
Marvelously elevate your cake presentation with this DIY papier mâché cake stand! Uncover the boundless versatility of paper mâché as a decorative technique that can be utilized to make both functional and ornamental objects for your home. This easy project allows you to upcycle everyday materials from the recycle bin, utilizing your existing tools and supplies - no need for special equipment or extra purchases. Get creative and craft your one-of-a-kind cake stands that are both eco-friendly and eye-catching! thehousethatlarsbuilt
23. How to Make Paper Mache Pots
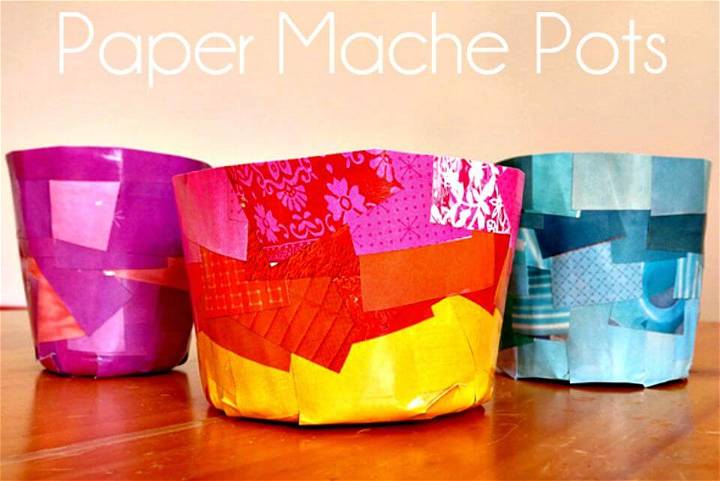
Fascinate your kids with sustainable paper mache art! Using recycled magazine pages, white pva craft glue, and other child-friendly materials, this creative project is perfect for children ages 5 and up in primary/elementary school. Discover plastic containers with smooth sides, magazines, water, a plastic glue tray, and masking tape to make wonderful paper mache pots that are eco-friendly! Let your kid's imaginations blossom as they make unique crafts that will last. childhood101
24. Simple Paper Mache Bowls
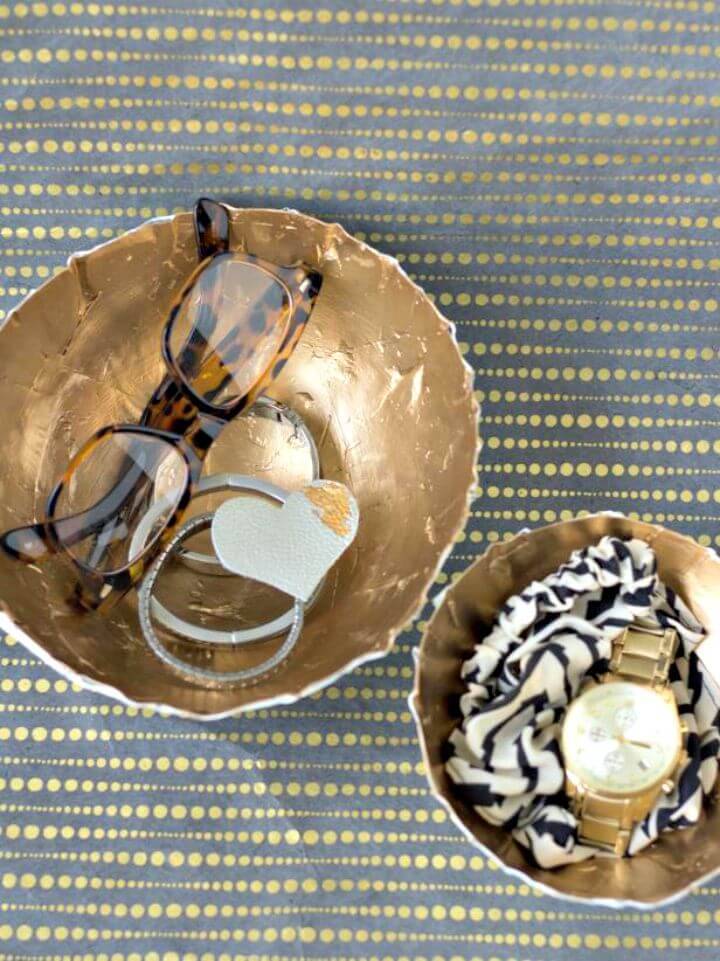
Explore endless paper mache ideas, like making decorative bowls, animal sculptures, and festive piñatas for all occasions. See these Marvelous paper mache bowls with gold accents that make a stylish and practical addition to any room! Transform newspaper, modpodge, balloons, cups for drying, craft paint, and liquid gilding into beautiful creations that can store all your favorite items.
Also, Layer the strips onto the balloon shape and let it dry thoroughly. Trim off the edges, apply craft paint on the exterior, and an elegant finish of liquid gilding on the inside. Make sure to cure your bowl before using it – one of the best DIY paper mache projects ever! hgtv
25. Beautiful DIY Paper Mache Vase

Discover your artistic talents and make something unique with DIY paper mâché vases. Show off your creative side by producing a one-of-a-kind, ceramically-inspired item!
This DIY project will guide you through the step-by-step process and gathering materials such as cardboard, newspaper, flour, water, a hot glue gun, and more. Unleash your imaginative prowess to craft distinctive designs that make beautiful home decor or heartfelt gifts. Let the pencils draw, rulers, measure, and knives cut to make something special that will stand out in any space. thehousethatlars
Related DIY Crafts and Projects to Try:
- DIY Paper Garland Ideas: Explore unique, easy-to-make paper garland ideas to transform your home decor and celebrations.
- DIY Stencils and Stencil Craft Ideas: Discover creative stencil designs and crafts to make beautiful, personalized artworks for your home.
- Easy DIY Mother's Day Cards: Craft heartfelt, handmade Mother's Day cards with these simple yet thoughtful DIY ideas.
- Recycling Old Books: Learn resourceful ways to repurpose old books, transforming them into unique art pieces or functional items.
- Hot Glue Gun Crafts: Unleash your creativity with exciting DIY hot glue gun crafts that are both engaging and simple to make.
- Bottle Cap Crafts and Art Ideas: Delve into clever bottle cap crafts that turn ordinary caps into stunning artworks and practical items.
- Fun Crafts to Do When Bored: Discover endless creativity with these fun crafts to do when boredom strikes, include activities and artistic hobbies for all ages.
- DIY Mason Jar Gift Ideas: Make charming, personalized Mason jar gifts perfect for any occasion, from holidays to birthdays.
- Affordable DIY Wall Art: Beautify your home with inexpensive DIY wall art ideas that add character and charm without breaking the bank.
- Easy DIY Craft Ideas: Explore a world of simple, engaging DIY craft ideas designed to spark joy and creativity for all ages.
Conclusion:
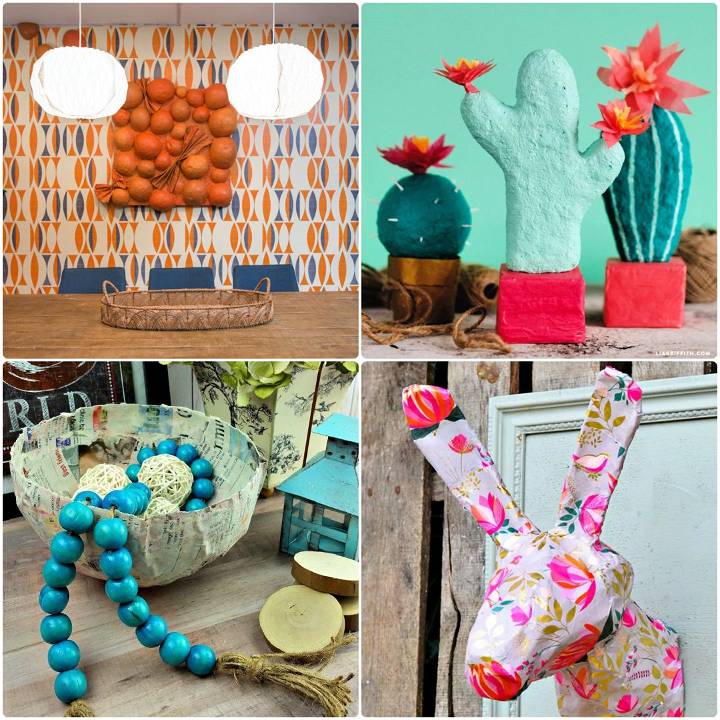
In conclusion, exploring 25 easy paper mache ideas and art projects can be a rewarding journey into creativity, history, and environmental consciousness. From its ancient origins in China to its significance in art and decor today, paper mache offers a versatile and eco-friendly medium for artists, home decor enthusiasts, and families alike.
By understanding the basics, addressing common issues, and engaging in creative projects, you can contribute to the sustainable art movement while adding a personal touch to your surroundings. Remember, the world of paper mache is vast and inviting, ripe with opportunities for artistic expression and innovation. So, grab your materials and let your imagination lead the way to making memorable and impactful art pieces.


