Paracord bracelets are more than just stylish accessories—they serve a functional purpose for outdoor enthusiasts, adventurers, and survivalists. Often referred to as "survival bracelets," paracord bracelets carry an incredible amount of utility in a compact and wearable form. This tutorial will guide you through everything you need to know about paracord bracelets, including how to make them, their practical uses, and how they can be lifesavers in certain situations. Whether you're a beginner or an experienced crafter, this guide will provide you with detailed instructions to make your very own paracord bracelet.
What is Paracord?
Paracord, short for parachute cord, is a lightweight nylon rope originally used in the suspension lines of parachutes during World War II. Today, it has evolved into a multi-purpose tool for both military and civilian use, popularized due to its strength, versatility, and durability.
Key Features of Paracord
- Strength: 550 paracord, the most commonly used type, can hold up to 550 pounds of static weight.
- Flexibility: Made from nylon, paracord is highly flexible and can be easily tied, untied, and used in various applications.
- Durability: Paracord is resistant to rotting, mildew, and abrasion, making it ideal for outdoor use.
Each strand of paracord contains several smaller internal strands, which can be pulled out and used individually for tasks like sewing, fishing, or making snares.
Practical Uses of Paracord
Paracord is incredibly versatile, and here are some common ways it can be used in survival and daily situations:
- Rigging up a shelter: Use it to make a makeshift shelter or tie up a tarp.
- Tourniquet or splint: In emergencies, paracord can be used to stop bleeding or stabilize a broken limb.
- Securing gear: It can replace broken shoelaces, secure camping equipment, or tie down items.
- Fishing line or sewing thread: By removing the inner strands, you can make strong and lightweight thread for emergency repairs or fishing.
- Animal trap or snare: In survival situations, you can use paracord to set traps for small animals.
What is a Paracord Bracelet?
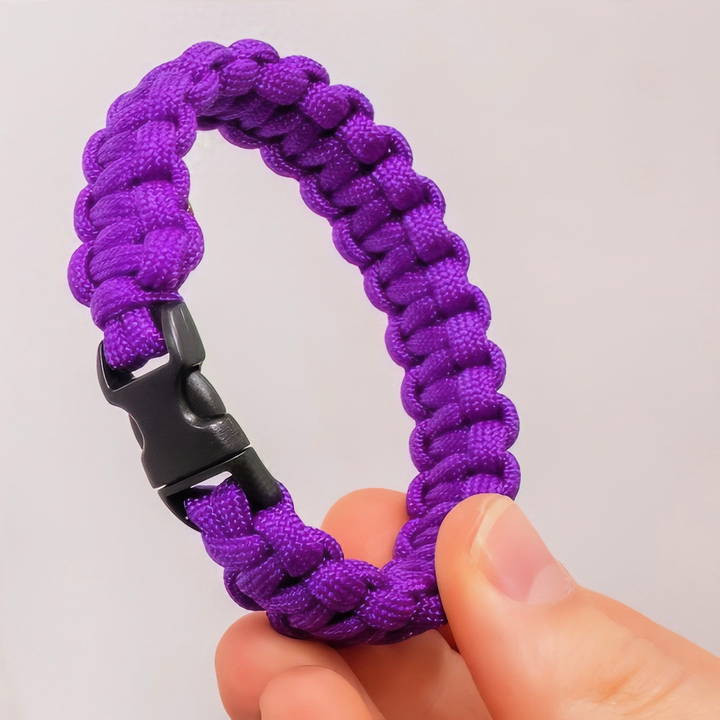
A paracord bracelet is a woven wristband made out of a length of paracord. Also known as a survival bracelet, it provides wearers with immediate access to several feet of paracord in emergency situations. The bracelet itself is usually secured with a buckle or a knot and can be unraveled quickly to access the rope when needed.
The Cobra Weave: The Most Popular Design
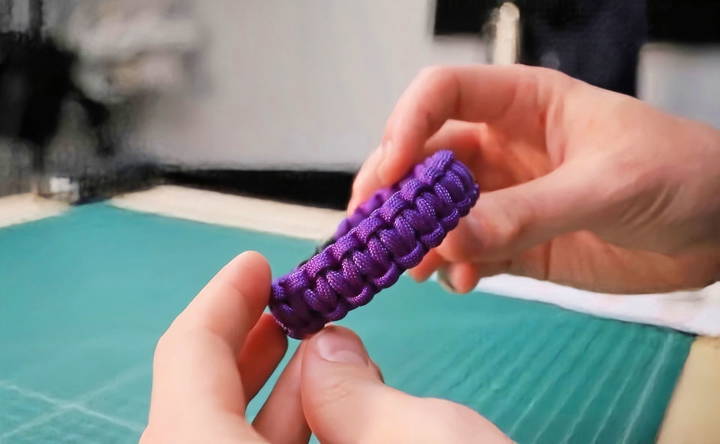
The cobra weave is the most common technique used to make paracord bracelets. It's a knotting method that makes a durable, textured bracelet. This knotting method is also known as the square knot and has been used for centuries in various forms of knotwork.
Step by Step Instructions
Learn how to make a paracord bracelet with our step-by-step guide. From measuring to weaving, make your own stylish accessory easily!
Materials You Will Need:
- Paracord: 8–10 feet of 550 paracord (the exact amount depends on the size of the bracelet).
- Buckle: A 3/8 inch plastic buckle or a metal alternative.
- Scissors: For trimming excess cord.
- Lighter: To melt and secure the ends of the paracord.
Step 1: Measure Your Paracord
Start by cutting a length of paracord. You will need approximately 8 to 10 feet of cord for a standard bracelet. The amount of cord will vary depending on wrist size and the tightness of the knots.
Step 2: Attach the Paracord to the Buckle
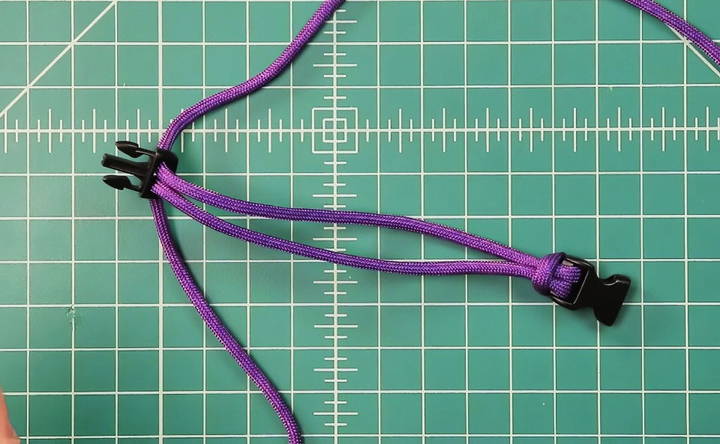
Fold your paracord in half to find the middle. Take the folded end and thread it through one side of the buckle. Pull the loop through and pass the ends of the cord through the loop, making a cow hitch. Tighten the loop securely.
Next, separate the buckle by detaching the two ends. Pass the loose ends of the paracord through the other side of the buckle. Slide the buckle back until you have maked a loop that roughly matches the circumference of your wrist.
Step 3: Adjust for Wrist Size
To ensure the bracelet fits comfortably, wrap the paracord around your wrist and measure it. A good rule of thumb is to make the bracelet about 1 inch longer than your wrist measurement. For example, if your wrist is 7 inches around, aim for an 8-inch bracelet.
Once you've measured your bracelet, secure the cord in place and ensure it does not twist.
Step 4: Start the Cobra Weave
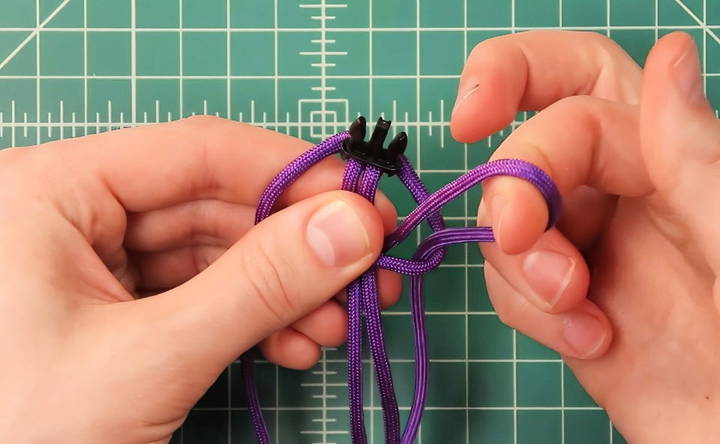
The cobra weave is the fundamental knot for making paracord bracelets. Here's how to get started:
- Take the right cord and pass it over the middle strands.
- Now, take the left cord and pass it over the right cord, then under the middle strands and up through the loop on the right side.
- Pull the cords tight to secure the knot.
To continue the weave:
- For the next knot, begin from the opposite side (left over right).
- Repeat the process by alternating sides until the bracelet is complete.
Step 5: Finish the Bracelet
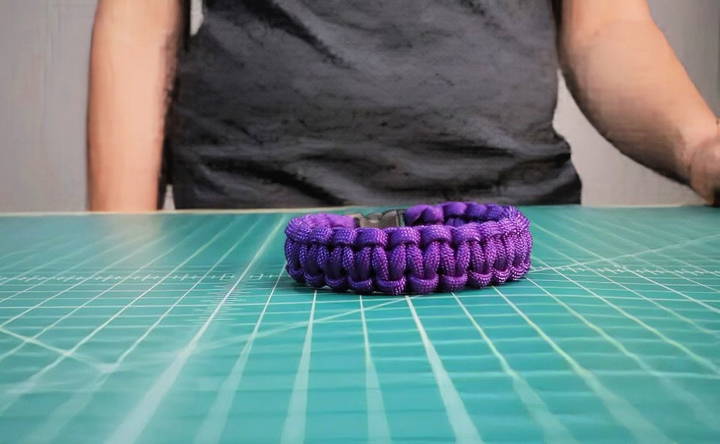
Once you reach the desired length, double-check the bracelet against your wrist or a ruler to ensure it fits. Make one final knot to secure the weave.
To finish off the bracelet, you have two options:
- Trim and melt: Cut the excess paracord close to the bracelet and use a lighter to melt the ends. This will seal the nylon fibers, preventing the paracord from fraying.
- Tuck and hide: If you prefer a cleaner finish, loosen the last two knots and tuck the loose ends into the knots. Pull the knots tight again to hide the ends securely.
Step 6: Test the Bracelet
Before wearing your bracelet, test it by pulling on the knots to ensure they are tight and secure. The paracord should be firmly woven, and the buckle should close and open without difficulty.
Advanced Paracord Bracelet Techniques
Once you're comfortable with the basic cobra weave, there are many other designs and variations you can try, including:
- King Cobra Weave: A bulkier version of the cobra weave that uses extra cord.
- Fishtail Weave: A flatter and thinner bracelet design.
- Two-Color Cobra: Using two different colors of paracord to make a contrasting pattern.
Each variation offers a unique look and can be customized to suit your preferences.
Why Should You Wear a Paracord Bracelet?
Aside from its rugged appearance, a paracord bracelet is an incredibly practical accessory. Here's why it's worth having one:
- Instant Access to Paracord: In an emergency, you can unravel the bracelet to access several feet of strong, durable cord.
- Versatility: The uses of paracord are virtually limitless, from fixing gear to building shelters.
- Durability: Paracord bracelets are designed to withstand the elements, making them ideal for outdoor activities like hiking, camping, and survival situations.
- Personalization: Paracord comes in hundreds of colors and patterns, allowing you to make a bracelet that reflects your style.
Additional Paracord Crafting Ideas
Once you've mastered the art of making paracord bracelets, you can expand your paracord crafting skills. Some fun projects include:
- Keychains: Small but useful, a paracord keychain can hold extra cord in case of emergencies.
- Dog Collars and Leashes: Strong and durable, paracord is a great material for making pet accessories.
- Belts: Make a sturdy and fashionable belt with several feet of paracord.
- Lanyards: Keep your keys or tools secure by crafting a paracord lanyard.
The possibilities are endless when it comes to paracord projects.
Conclusion
Making a paracord bracelet is a simple yet rewarding project that anyone can try. Whether you're making one for yourself or as a gift, these survival bracelets offer a unique combination of fashion and function. With just a few materials and some basic knotting techniques, you can make a bracelet that not only looks great but also provides invaluable utility in emergency situations. So, grab your paracord, buckle, and lighter, and start crafting your own paracord bracelet today!
FAQs About Paracord Bracelets
Discover essential answers to frequently asked questions about paracord bracelets. Learn about their uses, styles, and benefits today!
To prevent twisting, ensure you're alternating the knots between the right and left sides with each step. Consistently use the same cord to start each new knot to maintain an even pattern. If you notice twisting, you may have repeated a knot on the same side, so undo it and try again.
A 3/8-inch buckle is standard for most paracord bracelets, but you can use different sizes depending on your preference. Just ensure the paracord fits through the buckle openings.
If your bracelet is too large or small, you might not have measured your wrist accurately. Measure your wrist, then add 1 inch to get the correct bracelet size. Ensure your knots are tight and consistent to avoid changing the size during the process.
Yes, you can experiment with other materials, such as bailing twine or thinner cords, but paracord is preferred due to its strength and durability. Different materials may affect the bracelet's look and function.
Yes, you can add beads or charms by threading them onto the paracord before you begin knotting. Pony beads are commonly used and can give the bracelet a personalized touch.
If you prefer not to melt the ends with a lighter, you can tuck the loose ends into the last few knots of the bracelet. Pull the knots tight to secure the ends, or use a small amount of glue for additional security.
Bundle the excess paracord with small rubber bands to keep it organized. This will make it easier to handle and prevent tangling as you work through the knots.
Yes, you can tie the ends of the bracelet in a knot instead of using a buckle. The cobra weave works well with simple knot closures, but make sure the bracelet fits comfortably around your wrist before finishing.


