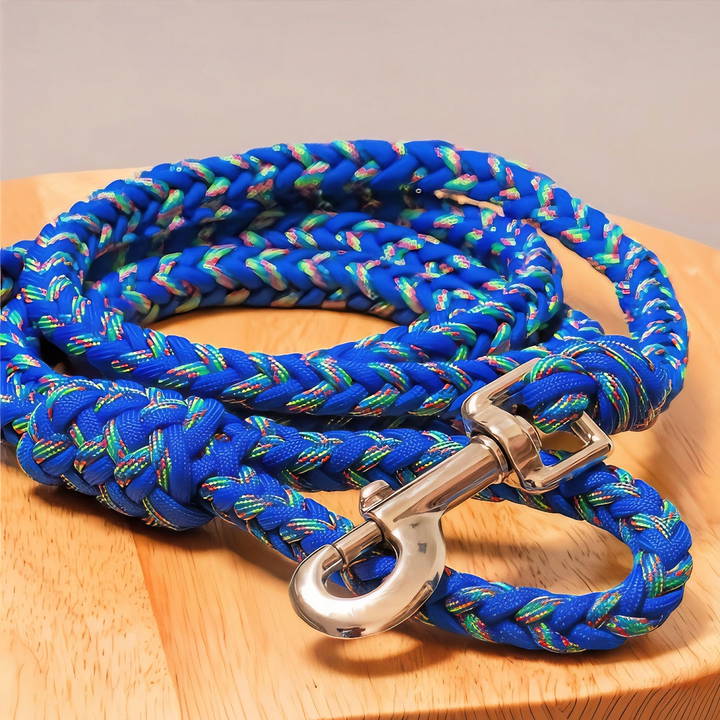
If you own a big, strong dog, you know the importance of a sturdy leash that can handle their power. A paracord leash is not only strong and durable but also customizable to fit your style and your dog's needs. In this comprehensive guide, we will walk you through how to make a heavy-duty paracord dog leash using an 8-strand braid. With step-by-step instructions, you'll be able to craft a leash that holds up against even the biggest dogs. Let's dive into the project and make a leash that is both functional and visually striking.
Why Choose Paracord for Your Dog Leash?
Paracord, also known as 550 cord, is a lightweight nylon rope originally used in parachutes. Its high tensile strength makes it ideal for outdoor gear and pet accessories. Here are some reasons why paracord is a great choice for your dog leash:
- Strength: Paracord has a breaking strength of 550 pounds, making it more than capable of withstanding the force of a large dog.
- Durability: It is resistant to rot, mildew, and UV damage, which means it can hold up to outdoor elements for a long time.
- Customizability: Paracord comes in many colors, allowing you to make a leash that fits your aesthetic preferences.
With these benefits in mind, a paracord dog leash is both a practical and stylish choice for dog owners.
Supplies Needed for Your Paracord Leash
Before starting, gather all the necessary materials. For a six-foot leash with an 8-strand braid, you'll need:
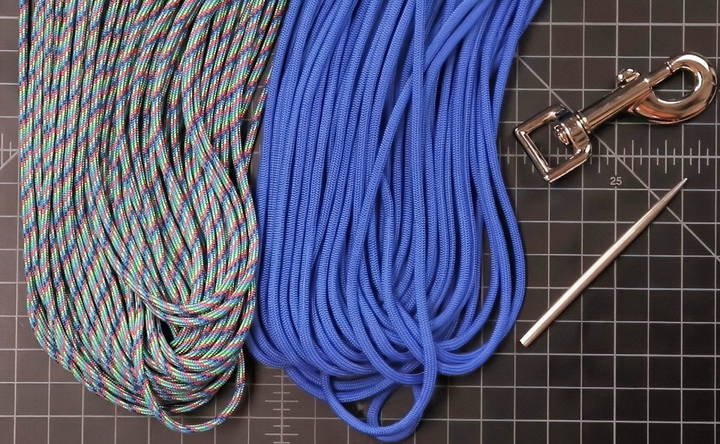
- 80 feet of 550 paracord: This will give you plenty of cord for the braid and handle. You can choose up to four different colors for a more intricate design, but two colors work just as well.
- Heavy-duty snap hook: This is the metal clasp that attaches the leash to your dog's collar. Opt for a sturdy one that can withstand your dog's pulling.
- Type 3 Fid: This is a special tool used to help weave the ends of the paracord into the braid.
- Scissors and a lighter: These will help you trim and melt the ends of the paracord for a clean finish.
With all your materials in hand, you're ready to start braiding!
Step by Step Instructions
Learn how to make a paracord dog leash with easy step-by-step instructions, from measuring and cutting to finishing and customizing your leash.
Step 1: Measure and Cut the Paracord
For a six-foot leash, you'll need around 80 feet of paracord. If you're using two colors, cut 40 feet of each color. If you're using four colors, cut 20 feet of each color. Once cut, fold each piece in half, so you have four cords in total, each 20 feet long.
Step 2: Attach the Paracord to the Snap Hook
To start your leash, locate the middle point of each of the paracord strands. Thread these through the bottom loop of the heavy-duty snap hook. Ensure the lengths are even on both sides, and then pull the cords through so that you have eight strands total hanging from the hook. These eight strands will form the foundation of your braid.
Step 3: Tying the Matthew Walker Knot
The first knot you'll tie is the Matthew Walker Knot, which provides a strong and decorative base to the braid.
Here's how to tie the knot:
- Start with one cord. Make a loop and wrap the end of the cord around the bundle of cords. Pull the end through the loop to make a simple overhand knot.
- Move to the next cord, making sure to alternate colors (if you're using multiple colors). Wrap it around and pull it through both loops maked so far.
- Continue with the remaining cords, making sure each new loop goes through the previous ones. Keep alternating colors as you go.
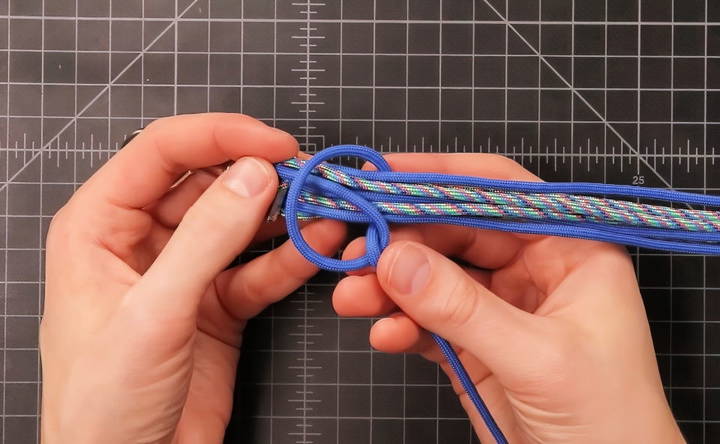
Once all cords are tied, carefully tighten the knot by pulling each strand individually. You want the knot to sit snugly against the snap hook. Take your time here to ensure the knot looks clean and even.
Step 4: Making the 8-Strand Round Braid
With the Matthew Walker knot in place, you can now move on to the 8-strand round braid. This braid is what gives the leash its strength and durability.
To start the braid:
- Separate the cords into two groups of four. Each group should have alternating colors to make a visually appealing pattern.
- Take the top cord from one side and bring it across to the middle of the other group. Place it between the two middle cords of the opposite group.
- Wrap it around and bring it to the bottom of that group. Pull tight.
- Now, take the top cord from the opposite group and repeat the process, bringing it across to the other side, through the middle, and down to the bottom.
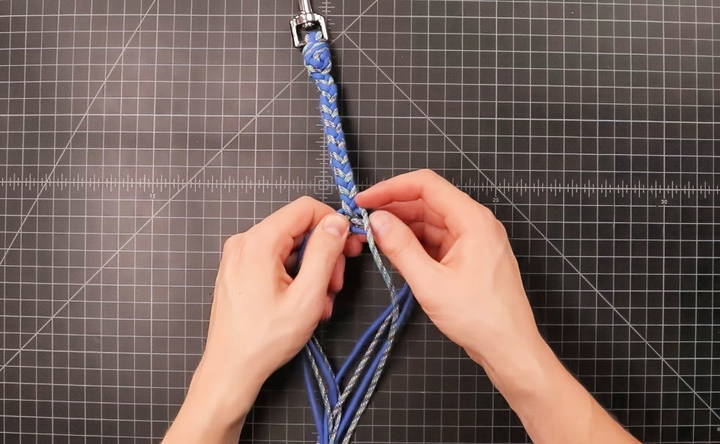
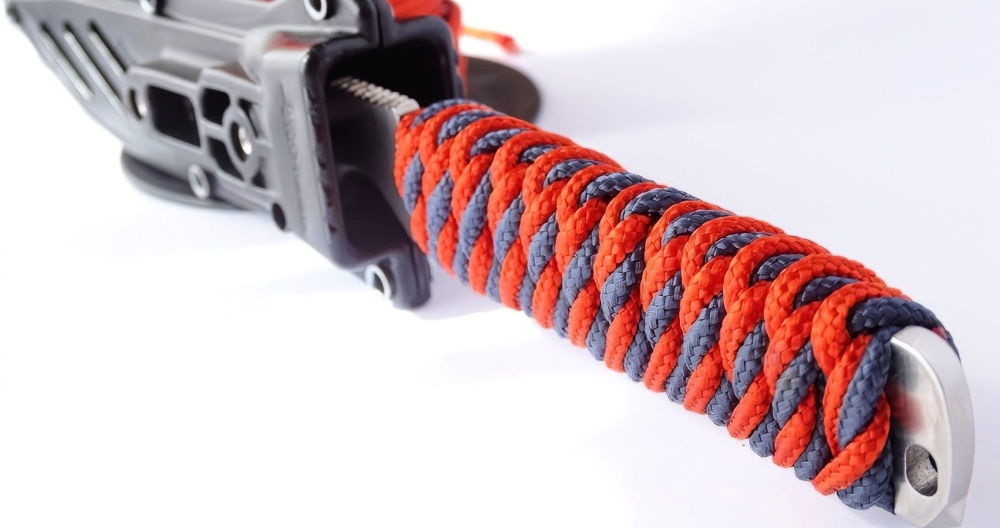
Continue this process, alternating sides. You'll notice a beautiful herringbone pattern starting to develop as the braid progresses. Keep the tension even as you braid, and pull the cords tight after each pass.
Step 5: Weaving the Handle
Once you've braided about six feet, it's time to make the handle. To do this, fold the last section of your braid back on itself to form a loop of your desired handle size. Around 6 inches is usually a comfortable length for most hands.
Here's how to weave the handle:
- Take one of the cords and use a fid to weave it back into the existing braid, following the pattern of one of the strands already in place.
- Pull it tight and repeat with the remaining cords, weaving each one back through the braid to secure the loop.
- Make sure to alternate colors as you go to maintain the pattern.
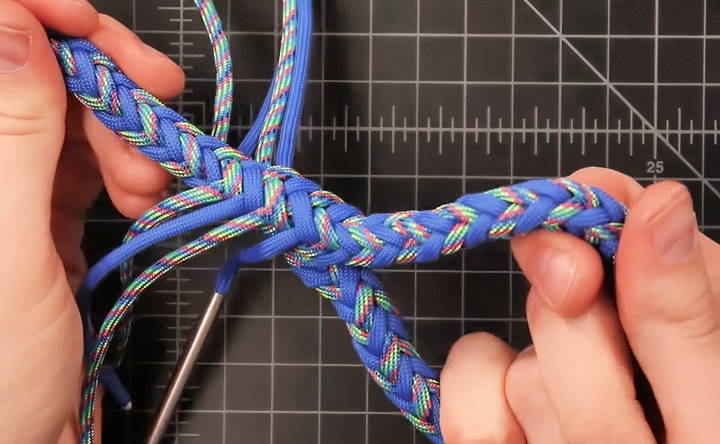
This method will ensure that the handle is securely attached and won't unravel under tension.
Step 6: Finishing the Ends
After you've woven all the cords into the braid, you'll be left with some loose ends. Use scissors to trim the excess cord, leaving a small nub at the end of each strand. Use a lighter to melt the ends to prevent fraying, pressing them down gently with the back of the lighter to make a smooth finish.
If you want to cover the melted ends for a cleaner look, you can tie a decorative Turk's head knot around the handle. This adds a polished touch and hides the melted paracord.
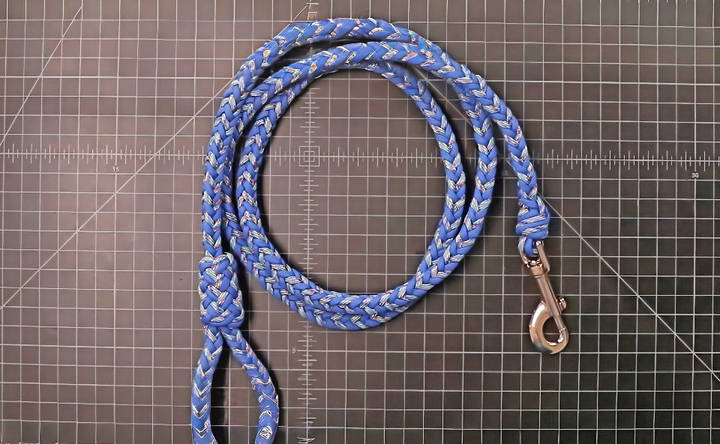
Customizing Your Leash
One of the best parts of making your own paracord leash is the ability to customize it. Here are some ways you can personalize your project:
- Choose different color patterns: Experiment with various color combinations to match your dog's collar or your own style. The herringbone pattern can be made more pronounced by alternating contrasting colors.
- Add decorative knots: Beyond the Turk's head knot, you can add other decorative knots to different parts of the leash for a more intricate design.
- Adjust the length: While this tutorial is for a six-foot leash, you can make yours shorter or longer depending on your dog's needs.
Tips for Success
Here are a few tips to keep in mind as you work on your paracord leash:
- Take your time with the knots: The Matthew Walker knot and the braid require precision and patience. Take your time to ensure the cords are evenly spaced and tightened.
- Keep the tension even: As you braid, keeping the tension consistent will prevent gaps in the pattern and make the leash stronger.
- Tug test the handle: Once you've finished the handle, give it a few strong pulls to make sure it's secure. You don't want it coming loose when your dog pulls!
Conclusion
Making your own heavy-duty paracord dog leash is a rewarding project that results in a highly functional and durable leash. The 8-strand braid is perfect for large dogs, ensuring that the leash will hold up under pressure while looking stylish. By following this step-by-step guide, you'll make a leash that's custom-made for your dog and durable enough for many walks to come.
Not only will you save money by crafting it yourself, but you'll also gain the satisfaction of knowing your dog's leash was handmade with care. So, gather your supplies, follow these instructions, and enjoy your time making a leash that both you and your dog will love!
FAQs About Making a Paracord Dog Leash
Discover answers to common questions about making a paracord dog leash, including tips and techniques for a durable, stylish leash.
One of the common challenges when working with multiple cords is keeping them organized. A good solution is to roll up and bundle each strand individually, which helps prevent tangling. You can also use bobbin holders or make a center-pull ball to minimize the mess as you braid.
Yes, you can make an adjustable handle by making a larger loop and using a D-ring or carabiner at the end instead of a standard handle. This allows you to wear the leash around your waist for hands-free walking.
The Matthew Walker knot can be tricky, especially with eight strands. If it feels too complex, you can try using a simpler overhand knot to secure the cords at the snap hook. While it may not look as decorative, it will still provide strength.
Yes! The rule of thumb is to use 13 feet of cord for every 1 foot of leash. So, for a 12-foot leash, you would need around 156 feet of paracord. This is helpful if you need a longer leash for training or off-leash walking.
If you prefer not to make the standard handle, an alternative is to end the leash with a carabiner or another type of snap. You can also splice the paracord back into the braid to finish it securely without a loop.
You can use as many colors as you'd like, but the braid will look more uniform with an even number of strands. If using three colors, one color will appear more frequently. If you plan to use more than eight strands, the braiding process remains the same.
Yes, you can use 750 paracord if that’s what you have on hand. However, it is thicker and might be harder to work with, especially when weaving the strands together. You may also need slightly more cord to complete the same length.
It’s easy to lose track of which strand to use next, especially when working with multiple colors. To avoid confusion, try color coding your strands or tying bundles on each side. This way, you can quickly identify the left and right sides of the braid.
The Turk's head knot stays in place through friction. If tied tightly enough, it will grip the leash and won't slide. Both the paracord and the knot have enough texture to keep them secure without additional fastening.


