Whether you're a seasoned weaver or a beginner looking to tackle your first paracord project, making a paracord koozie, or "cozy," is a rewarding and practical endeavor. Not only does it keep your drink cool and your hands warm, but it also gives you the opportunity to show off your paracord crafting skills. In this guide, we'll walk through everything you need to know to make a paracord koozie using a vertical hitching technique, also known as rib cage hitching.
We'll cover the materials you need, step-by-step instructions, and tips for making a paracord koozie that looks as good as it performs. Whether you're an avid outdoors enthusiast or just someone who enjoys a cold beverage in style, this project will be a fun and useful way to put your paracord skills to the test.
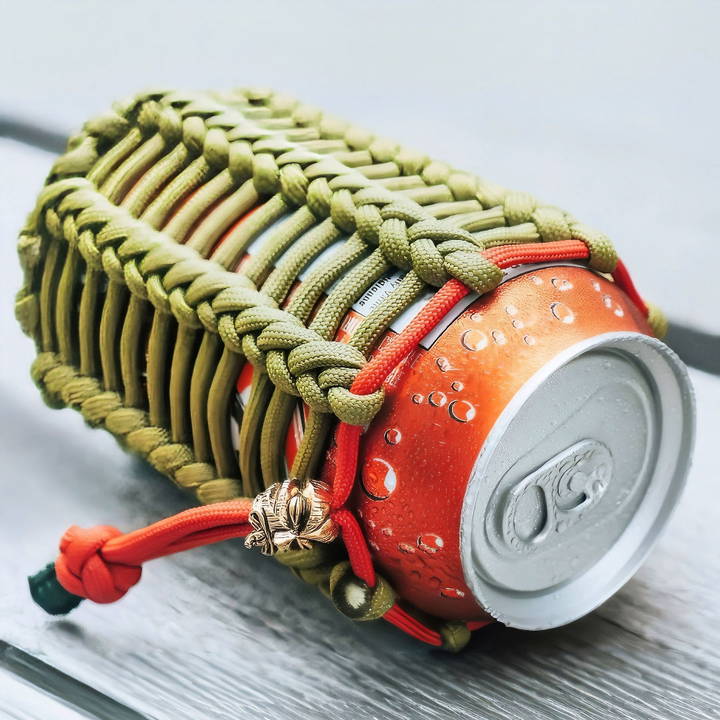
What Is a Paracord Koozie?
A paracord koozie is essentially a sleeve or holder made of woven paracord that wraps around a can or bottle. Its primary purpose is to insulate your drink, keeping it cool for longer while preventing condensation from making your hands wet. But beyond practicality, paracord koozies also serve as a great way to customize your drinkware and experiment with different paracord techniques.
The vertical hitching or rib cage hitching technique, which we'll focus on in this guide, makes a unique and visually appealing pattern that wraps tightly around the can.
Benefits of A Paracord Koozie:
- Keeps Drinks Cold: Paracord's slightly insulating properties help maintain the temperature of your drink.
- Customizable: Use different colors and beads to make your koozie unique.
- Durable and Functional: Made from 550 paracord, these koozies can endure wear and tear.
- Practical for Outdoors: Great for hiking, camping, or outdoor events where you want your beverage to stay cooler for longer.
Materials You'll Need
Before you begin, gather the following materials:
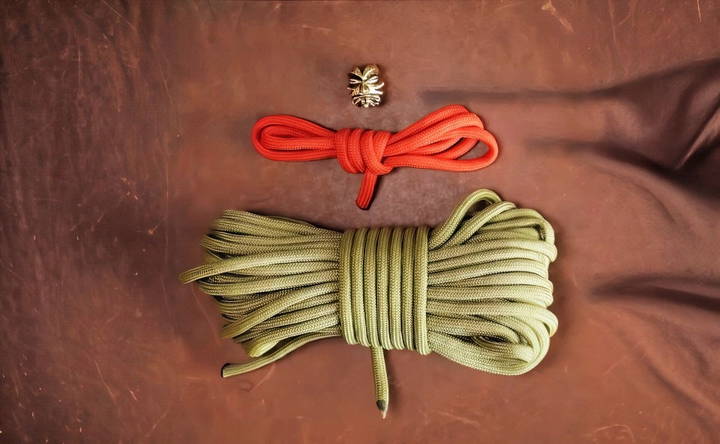
- Paracord: You'll need around 10-15 feet of 550 paracord, depending on the size of your can and the length of the koozie. For this tutorial, two different colors of paracord were used: a shorter orange piece for the anchor and moss green for the main body.
- Bead (Optional): A decorative bead can be used as a fastener or accent at the top of the koozie. In this tutorial, a Schmuckatelli Kiko Tiki bead was used.
- Scissors: To cut the paracord.
- Lighter: For melting the ends of the paracord to prevent fraying.
- Micro Cord (Optional): Helpful for pulling paracord through beads or for decorative accents.
- Can or Bottle: The object you're making the koozie for—this guide focuses on a standard soda or beer can.
Optional Extras:
- Cord Lock: If you don't want to use a bead, you can use a cord lock to secure the top of your koozie.
- Cord Lock Bead: This can be substituted if you prefer a different style of closure.
Step by Step Instructions
Discover how to make paracord koozies with our step-by-step guide. From preparing paracord to final touches, make your perfect koozie easily.
Step 1: Prepare the Paracord
The first step is to get your paracord ready. For this project, you'll need two lengths of paracord: one short piece (around 1-2 feet) for the anchor, and the longer piece (about 10 feet) for the body of the koozie. You can use a single color or two colors, depending on the style you want to achieve.
- Tip: Melting the ends of your paracord with a lighter will make it easier to work with and prevent fraying. Be careful not to burn the cord, though—a light melt is all you need.
Step 2: Attach the Bead and Tie a Diamond Knot
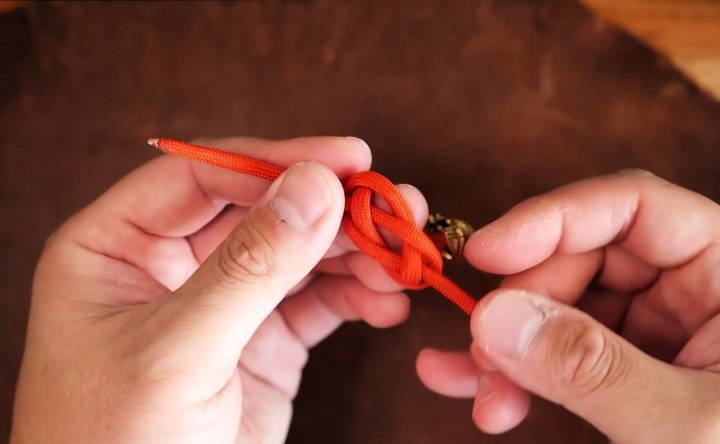
To begin, feed the ends of your shorter cord through the decorative bead. If you're using a micro cord to help, loop it around the ends of the paracord, thread it through the bead, and pull it through. Once the bead is secured, tie a diamond knot with the two ends of the cord.
Here's how to tie a diamond knot:
- Make a counterclockwise loop with the right strand and lay it over the left.
- Bring the left strand around the right and go under the section, making a small Carrick's bend.
- Bring the right strand counterclockwise past the base strand and through the middle.
- Do the same with the left strand.
- Gather both strands and tighten the knot.
The bead and diamond knot will serve as the adjustable closure at the top of the koozie.
Step 3: Anchor the Paracord to the Can
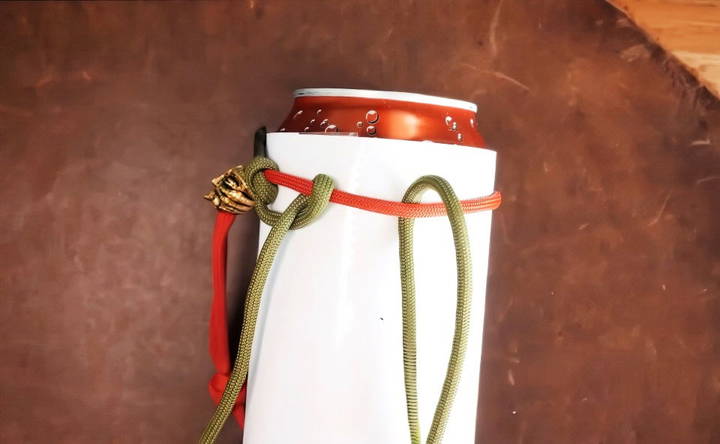
Next, wrap the orange anchor cord around the top of the can and use the bead to cinch it up. This will hold the cord in place while you work. You can skip the bead and just tie a knot if you prefer, but the bead adds a nice touch and makes it easier to adjust the fit of the koozie later on.
Step 4: Start the Vertical Hitching
Now that the anchor is in place, it's time to start the vertical hitching. Attach the long moss green cord to the anchor cord using a simple knot to secure it.
- Take the long piece of paracord and go under the anchor cord.
- Bring it back to the front and under the standing end, then pull it through the loop.
- Pull tight to secure the knot.
This begins your first half-hitch knot. From here, you'll continue tying half-hitches around the anchor cord, spacing them about an inch apart. You'll make your way around the can in this manner, making a series of evenly spaced hitches.
Step 5: Make the Rib Cage Pattern
Once you've completed the first row of half-hitches, it's time to start the second row. The key to the rib cage pattern is to continue tying half-hitches but now around the previous row of knots. This layering of knots makes the distinctive ribbed look that wraps around the can.
To keep the pattern even, make sure to maintain consistent tension and spacing between the knots. If things look uneven at first, don't worry. It may take a few tries to get the tension just right. You can always undo and redo the hitches if needed.
- Tip: Use your thumb to hold the previous knot in place while you tie the next one. This will help keep the spacing consistent and prevent the hitches from shifting.
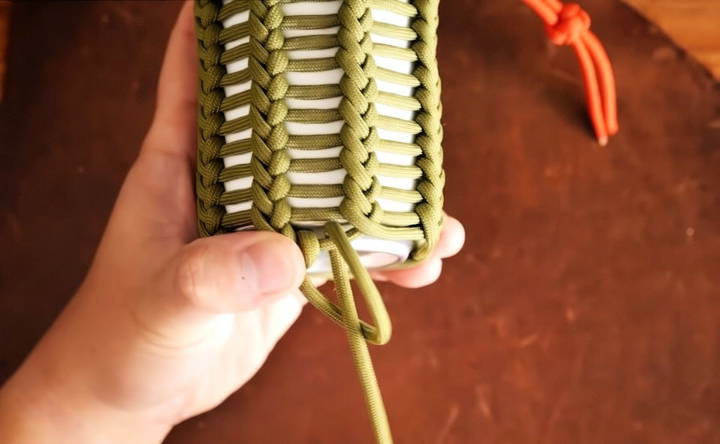
Step 6: Finishing the Bottom
Once you've worked your way down the can to the bottom edge, you'll need to transition the hitching to the underside of the can. To do this, tie two half-hitches between the previous row's hitches and start spiraling inward toward the center of the can.
If you want the bottom of the koozie to be completely covered, continue hitching until the entire bottom is woven. Otherwise, you can stop when you reach the desired coverage.
Step 7: Final Touches
After completing the last hitch at the bottom, clip the excess cord and melt the ends with your lighter to seal them. Don't forget to trim any extra cord at the top where you started.
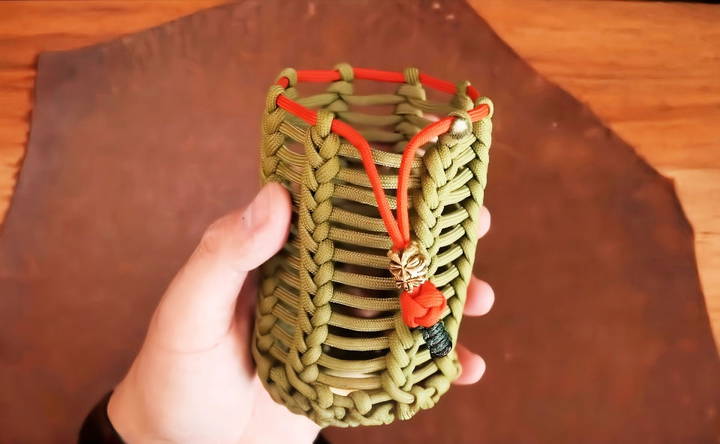
Optionally, you can add a decorative tab or cobra knot under the diamond knot at the top for an extra bit of flair. Using a foot of micro cord, you can weave a small cobra stitch to hang under the knot as an accent.
Additional Tips and Variations
- Closed Bottom: If you want your koozie to cover the bottom of the can completely, add about five extra feet of paracord to your original length.
- Adjusting the Fit: If your koozie feels too loose or too tight, you can adjust the size by tightening or loosening the half-hitches as you go.
- Customization: Play with different colors of paracord or add beads, charms, or other decorative elements to make your koozie truly unique.
- Alternative Techniques: While this guide focuses on the vertical hitching or rib cage hitching technique, there are other paracord weaving patterns you can experiment with, like the cobra weave or netting styles, which can also be adapted to make koozies.
Conclusion
Making your own paracord koozie is a fun, creative project that yields a practical and personalized item. Whether you're enjoying a soda, beer, or even a root beer (as demonstrated in this tutorial), your drink will stay cooler longer, and your hands will thank you.
The rib cage hitching technique offers a stylish, rugged look and a durable structure that ensures your koozie can withstand outdoor adventures, camping trips, or casual backyard barbecues. Plus, as with any paracord project, you'll gain more confidence in your knotting and hitching skills as you go.
With a little practice and creativity, you can make a variety of paracord koozies for all your favorite beverages. So, grab your paracord and get started on your next great project!
FAQs About Paracord Koozies
Discover answers to common questions about paracord koozies. Learn uses, crafting tips, and benefits to elevate your beverage experience!
Yes! You can adapt the same vertical hitching technique to fit larger items like water bottles, mugs, or even gallon jugs. Simply increase the amount of paracord—usually adding about 15-20% more cord for larger items—and follow the same steps to ensure a snug fit.
To minimize twisting, regularly untangle the cord as you work. A good practice is to stop every few half-hitches and straighten the cord. Additionally, avoid over-tightening the paracord, which can cause it to twist more easily.
If you run out of cord mid-project, you can splice in additional cord by either knotting or sewing the ends together. A knot like a square or fisherman’s knot works well, though it may slightly affect the aesthetics. Be sure to secure it tightly.
For a standard soda can, about 10-15 feet of 550 paracord is sufficient. If you're making a koozie for larger objects, like a tall bottle or water jug, add 15-20% more cord to ensure you have enough to cover the entire surface.
Yes, while the technique is optimized for round surfaces like cans and bottles, with some adjustments, you can apply it to square or irregularly shaped items. You may need to adjust the spacing between hitches to accommodate the different dimensions.
If you don’t have a bead, you can use a simple cord lock, a ranger bead, or even tie a decorative knot to secure the top of the koozie. Anything that cinches the paracord tightly will work well.
Paracord can shrink slightly after weaving, especially if tightly hitched. If the koozie is too tight after removing the can, try loosening the tension while weaving. If it's too loose, you can tighten the top and bottom rows to secure the shape better.
To help your koozie maintain its shape, you can keep a can or a similarly sized object inside it when not in use. Alternatively, avoid excessive stretching or squishing while handling the koozie without a can inside.
Yes, paracord koozies are washable. You can hand-wash them in cold water with mild soap, and then let them air dry. Avoid putting them in the dryer, as the heat can damage the paracord.
The time required depends on your experience level. For beginners, it might take a couple of hours to complete. As you get more comfortable with the technique, you can expect to finish one in about an hour or less.


