If you enjoy outdoor adventures or always carry a water bottle, you know how inconvenient it can be to carry a bulky bottle without an easy way to hold it. A paracord water bottle holder is a stylish and practical solution. It makes carrying your bottle more convenient and can also be useful in emergencies.
In this guide, you'll learn how to make your own paracord water bottle holder. We'll go over everything you need—from materials to step-by-step instructions—and even give you some alternatives if you don't have all the supplies. Whether you're new to paracord projects or already have some experience, this guide is great for all skill levels.
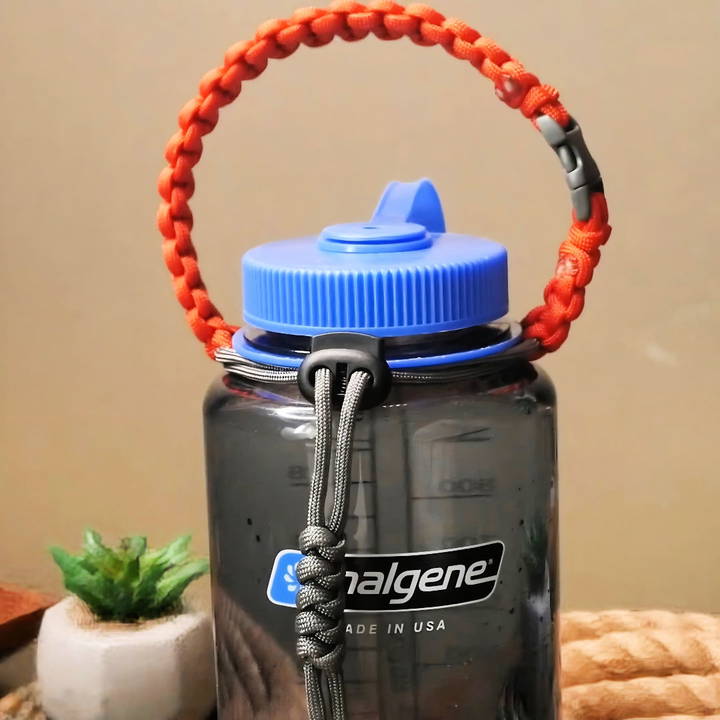
What You'll Need
Before getting started, make sure you have the following materials on hand:
- Paracord: The main material for your water bottle handle. You can choose the color and length depending on your preference.
- Buckle: A side-release buckle to secure the handle to the bottle. A plastic buckle around 15 mm wide works well.
- Cord Lock: This helps secure the paracord around the neck of the bottle. If you don't have one, we'll discuss a paracord-only alternative later in this guide.
- Water Bottle: The method works best for bottles with a lip around the neck, such as Nalgene or other similarly designed bottles.
- Scissors or Knife: To cut the paracord to size.
- Lighter: To melt the ends of the paracord, preventing fraying.
Paracord Lengths
The amount of paracord you'll need depends on the size of your water bottle and the length of the handle. For reference:
- Handle Length: Around 10 inches (including the buckle).
- Cord for Weaving: You'll need a longer cord for weaving the actual handle. About 7-8 feet should suffice, depending on how many knots you want.
Optional Materials
- Measuring Tape or Ruler: To measure the exact length of the handle and loops.
- Thinner Paracord: For those who want a smaller or lighter cord lock alternative.
Step by Step Instructions
Learn to craft a paracord water bottle holder with easy step-by-step instructions. Perfect DIY for outdoor enthusiasts. Start your project today!
Step 1: Wrapping the Neck of the Bottle
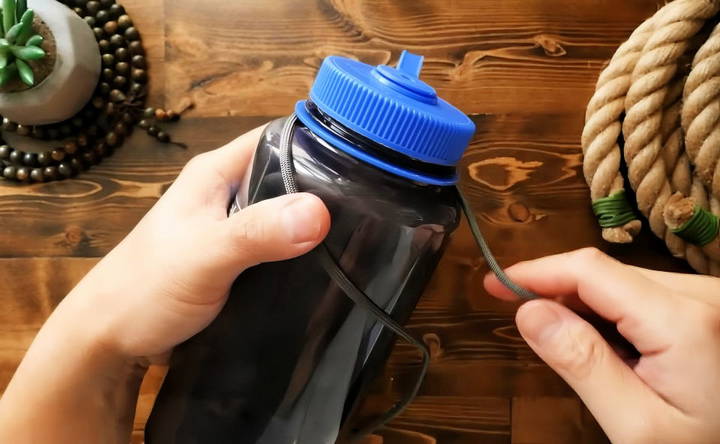
Start by taking your first length of paracord. This will serve as the “collar” for the water bottle handle, which attaches the holder securely to the bottle. Here's how you do it:
- Wrap the paracord around the neck of your water bottle, where the lip allows the cord to catch.
- Take note of the size of the loop you've made. You want the loops to be large enough to fit around the neck but snug enough to stay in place once the bottle is lifted.
- Remove the paracord from the bottle, ensuring you keep the size of the loops.
Step 2: Adding the Cord Lock
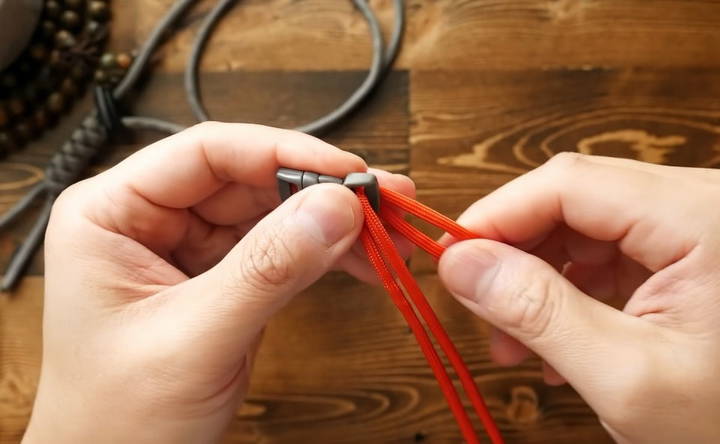
Next, you'll want to add a cord lock to the ends of the collar paracord. If you don't have a cord lock, you can scroll down to find out how to make a paracord lock alternative.
- Thread both ends of the paracord through the cord lock.
- Once threaded, slide the cord lock close to the loops of the collar.
- Secure the ends of the paracord by tying a series of snake knots. These will serve as a stopper to ensure the cord lock stays in place.
Step 3: Tying the Snake Knot
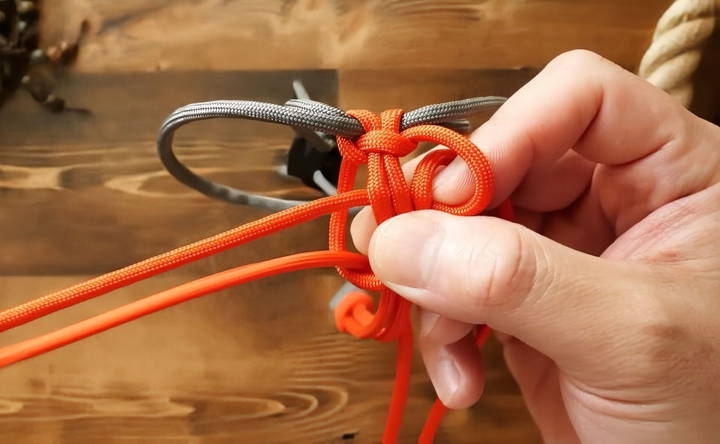
The snake knot is simple yet effective, providing a decorative and functional knot to secure your cord lock. Here's how to tie it:
- Hold both ends of the paracord in one hand.
- With the top cord, wrap it around the bottom cord to make a loop.
- Take the bottom cord and pass it through the loop you've just made.
- Pull it tight to form the knot.
- Repeat this process 4-5 more times to ensure the cord lock is securely positioned.
After tying the snake knots, double-check the size of the loops on your bottle neck and adjust if necessary.
Step 4: Making the Handle
Now it's time to make the handle of the water bottle holder. This part involves attaching your buckle and weaving cobra knots to form the handle's structure.
Attaching the Buckle
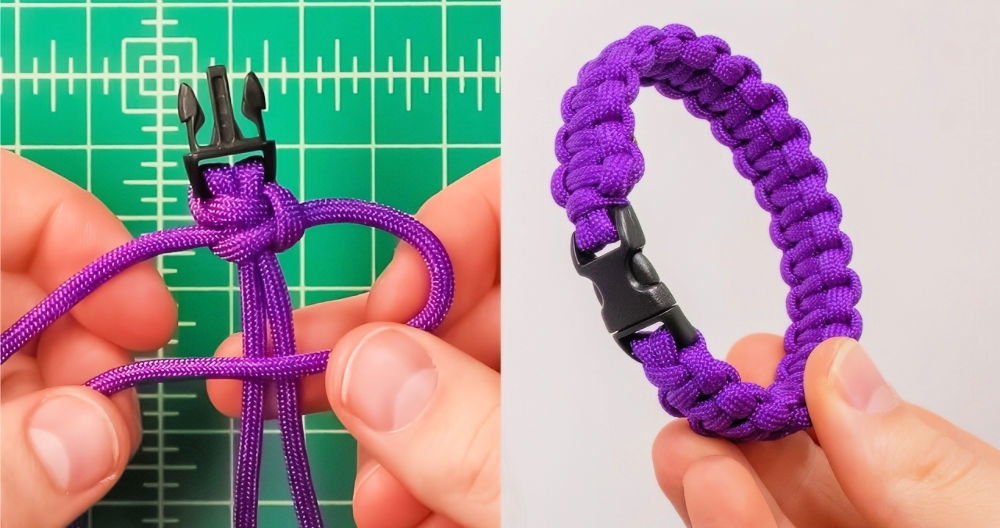
Take a new length of paracord (this will be your handle), fold it in half, and attach it to the buckle:
- Pass the midpoint of the paracord through one side of the buckle.
- Pull a loop through and pass the ends behind the loop, making a Lark's Head knot.
- Tighten it to secure the paracord to the buckle.
Weaving the Cobra Knot
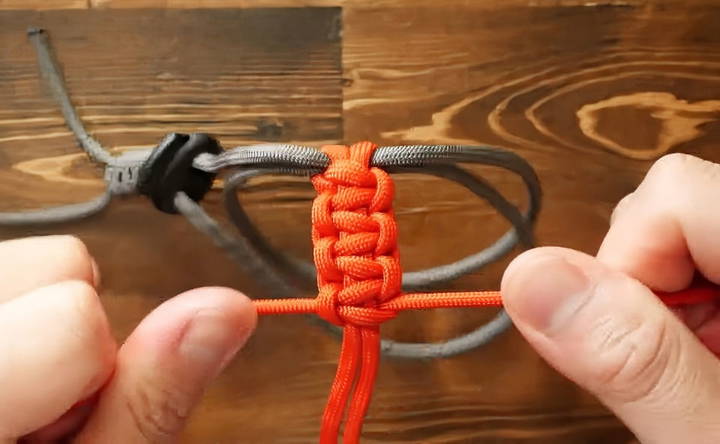
With the paracord secured to the buckle, it's time to start weaving cobra knots. This will form the actual handle of your holder.
- Pass the right cord over the two central strands and under the left cord.
- Take the left cord and pass it behind the central strands and through the loop on the right side.
- Pull tight to form your first cobra knot.
- Repeat this process, alternating sides after each knot, to form a chain of cobra knots.
Measuring the Handle
As you work, measure the length of the handle. A typical length is around 7.5 inches, but you can adjust this depending on your preferences or bottle size. Remember to keep the knots consistent and tight for a sturdy handle.
Step 5: Finishing the Handle
Once you've reached the desired length, it's time to attach the other end of the handle to the buckle:
- Pass the paracord through the second part of the buckle.
- Secure it in place using a hitch knot or the same Lark's Head knot as before.
- To ensure a clean finish, tuck any excess paracord into the final cobra knots.
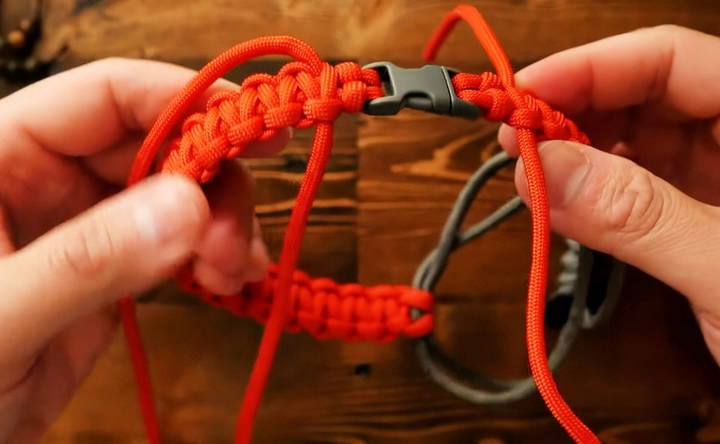
If you'd like an even neater look, you can opt to melt the ends of the paracord with a lighter to prevent fraying. This will also lock the knots in place.
Step 6: Adding the Final Touches
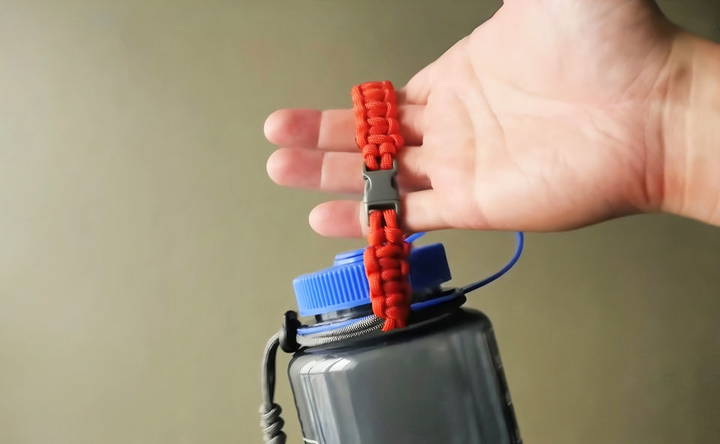
Now that you've finished weaving both sides of the handle, check that the loops and knots are secure. Adjust the position of the cobra knots so that the handle sits evenly across the water bottle.
You can also trim any excess cord from the stopper knots if they're too long, and melt the ends to keep everything tidy.
Alternative Cord Lock
If you don't have a cord lock on hand, you can make one using just paracord:
- Gather the two ends of your collar paracord.
- Using a small section of paracord, tie a short cobra knot around the ends of the collar, leaving enough slack for it to slide.
- Don't tie the knots too tightly, so the section can move up and down to act as a lock.
This simple alternative works just as well and gives your holder a more rugged, all-paracord design.
Why a Paracord Water Bottle Holder?
There are many reasons why a paracord water bottle holder is a great DIY project, especially for outdoor enthusiasts:
- Convenience: A paracord handle makes it easy to carry your bottle, especially if it's large and heavy.
- Durability: Paracord is known for its strength, capable of holding substantial weight. Your holder will stand up to rough conditions, whether you're hiking, camping, or just commuting.
- Multi-Purpose Gear: In an emergency, paracord can be unraveled and used for various purposes, such as setting up a shelter, making a tourniquet, or repairing gear.
- Customization: You can personalize your holder with different colors, buckle styles, and knot patterns.
Conclusion
A paracord water bottle holder is more than just a practical tool—it's a versatile, stylish accessory that you can customize to your needs. Whether you're preparing for your next outdoor adventure or simply want a convenient way to carry your water bottle, this DIY project is perfect for you.
By following the steps in this guide, you'll have a sturdy, durable holder that makes carrying your water bottle easier than ever. Plus, you'll gain the satisfaction of crafting something functional with your own hands.
With just a few supplies and some basic knot-tying skills, you can make your own paracord water bottle holder in no time. Now, grab your materials and start crafting!
FAQs About Paracord Water Bottle Holder
Discover everything you need to know about paracord water bottle holders with our faqs. Durable, versatile, and perfect for outdoor adventures.
For a typical Nalgene bottle, use approximately 8 feet (243 cm) of paracord for the main handle, 3 feet (92 cm) for the collar, and 2 feet (61 cm) for the shorter side of the buckle. These measurements may vary depending on your bottle size.
You can make a simple cord lock using paracord. Tie a small section of cobra knots around the collar cords. Make sure the knot section is loose enough to slide up and down the cords, acting as a makeshift cord lock.
After cutting the paracord, use a lighter to melt the ends. This seals the fibers and prevents fraying. Be careful not to burn the paracord or your hands while doing this.
The cobra knot, often used in paracord projects, is also known as a sennit in other contexts. Both terms refer to the same basic knotting technique, commonly used in weaving and macramé.
Yes! You can modify the design to suit your needs. For example, you can add a buckle to both ends or use different knot styles like the shark tooth or French sennit, depending on your preference.
To keep cords even, you can use a small clip (e.g., a binder clip or chip clip) to hold the cords in place as you tie the cobra knots. This helps maintain consistent tension and alignment.
If your bottle lacks a neck lip, the holder may not grip securely. In this case, consider alternative attachment methods like using a more secure knot or attaching directly to the bottle with adhesive.
Yes, you can use this technique for other items, such as Bluetooth speakers, by adjusting the knot tightness and handle length to fit the shape and size of the object.


