Pipe cleaner flowers are a delightful, accessible craft project that anyone can enjoy, from children to adults. They offer a simple, creative outlet that results in vibrant, unique blooms perfect for decorating any space or gifting as a charming handmade bouquet. Learn how to make pipe cleaner flowers, from materials and basic techniques to advanced tips and ideas for custom designs. Let's dive in and bring some whimsical, everlasting flowers into your life!
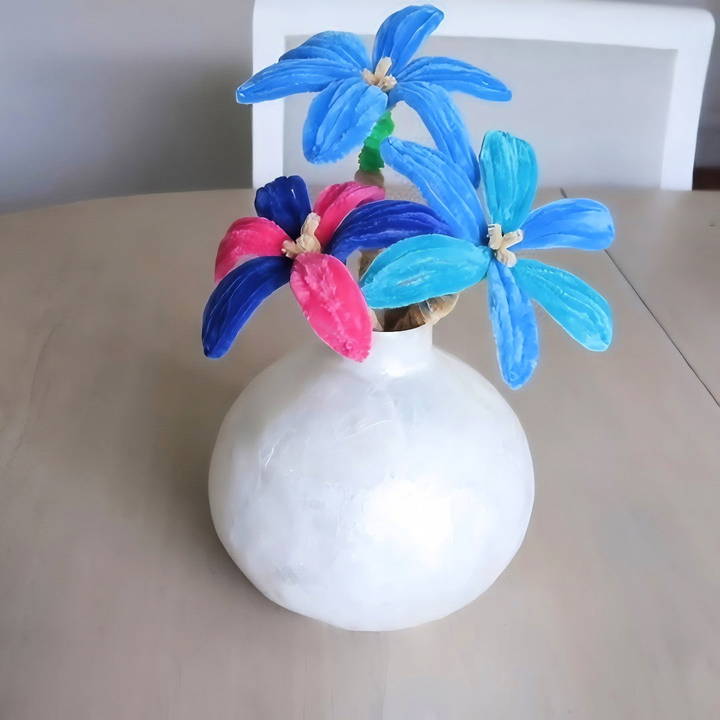
Why Make Pipe Cleaner Flowers?
Pipe cleaner flowers are inexpensive, easy to make, and provide endless possibilities for color combinations and flower shapes. They're also a wonderful activity for young crafters as the materials are safe and non-toxic. Adults find them equally enjoyable for stress-relieving crafts, and they make great DIY home decor or party decorations.
Materials Needed for Pipe Cleaner Flowers
One of the best aspects of this craft is that it requires very few materials:
- Pipe cleaners in a variety of colors (for petals, stems, and centers)
- Scissors (optional, to trim the pipe cleaners)
- Vase or container to display your flowers
- Pencils or similar objects (if you want to add stability to the stems)
Feel free to get creative with your colors—bright, bold hues or soft pastels can bring your flowers to life, and metallic pipe cleaners can add an extra sparkle.
Step by Step Instructions
Learn how to make pipe cleaner flowers with our step-by-step guide. Perfect for crafts with kids, decor ideas, and fun variations for all occasions!
1. Make the Petals
Begin by forming the basic structure of your petals. Here's how:
- Step 1: Take a pipe cleaner and fold it in half.
- Step 2: Fold it in half once more, making a compact shape.
- Step 3: To form a single petal, fold another pipe cleaner in the same color in half, then twist it around the first folded piece about three times to secure it. You should now have a “petal” shape.
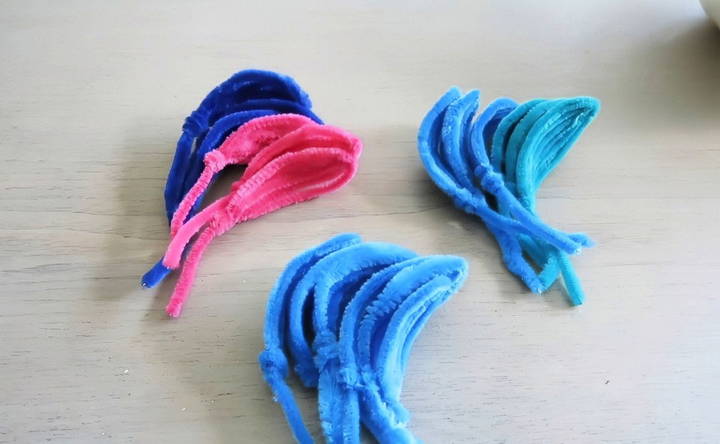
Repeat this process to make multiple petals. For a fuller flower, aim for five or six petals per flower.
2. Attach Petals to Make the Flower Shape
With your petals ready, it's time to attach them to form a complete flower:
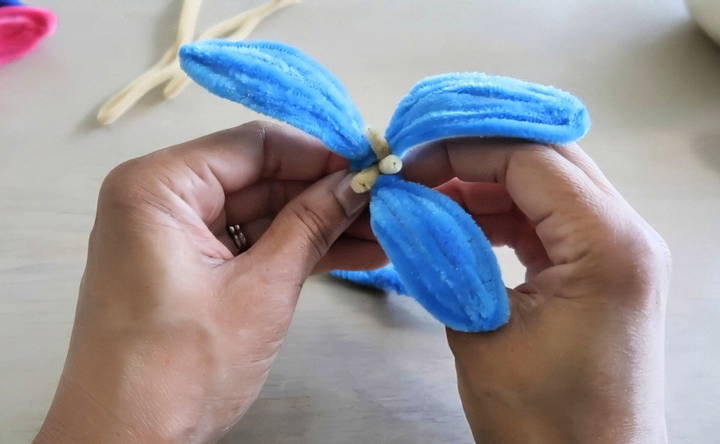
- Step 1: Arrange three or more petals around a central point. You can either hold them together by hand or use an extra pipe cleaner to wrap around the base of each petal cluster to secure them.
- Step 2: Twist the ends of the pipe cleaner stems together to reinforce the structure.
At this stage, you can adjust the petals by gently bending and spreading them to achieve a natural look. Feel free to fan out the pipe cleaner pieces slightly for a softer, more open petal appearance.
3. Add the Flower Center
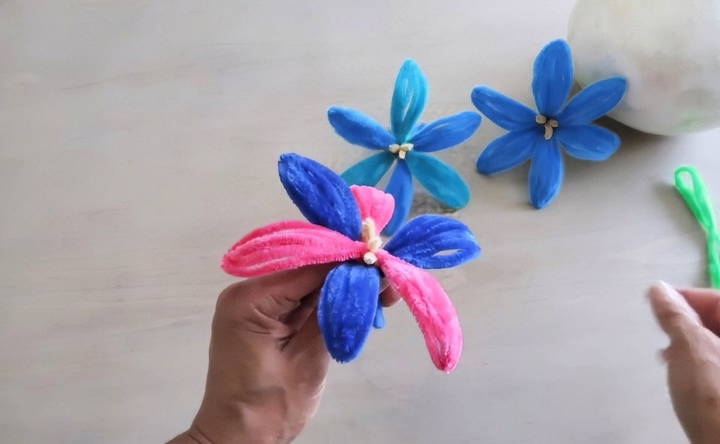
For the flower's center, select a contrasting color of pipe cleaner and follow these steps:
- Step 1: Take a pipe cleaner, fold it into a short, tight bundle, and twist to form a small “ball” shape.
- Step 2: Position this ball at the center of your flower, between the petals.
- Step 3: Use an extra length of pipe cleaner or twist the ends of the center tightly with the petal stems to hold it in place.
This added detail brings your flower to life and makes it look more realistic.
4. Crafting the Stem
You'll need green or stem-colored pipe cleaners to make a lifelike flower stalk:
- Step 1: Attach a green pipe cleaner to the base of your flower and wrap it around the twisted petal ends to form the main stem.
- Step 2: Wrap additional pipe cleaners around the stem to achieve the desired thickness, securing them by twisting at the bottom.
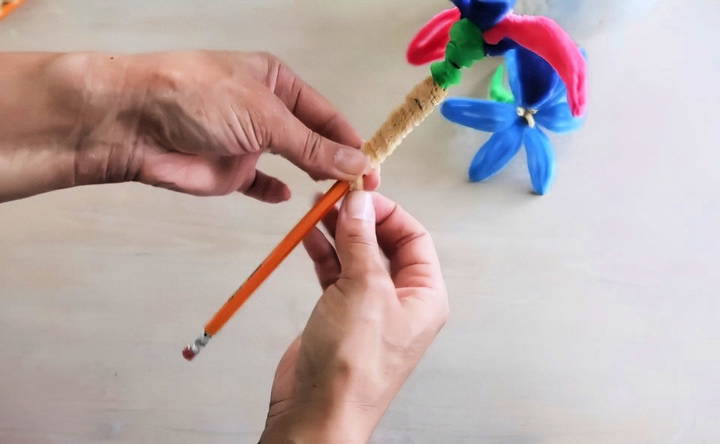
- Step 3: For longer stems, you can attach the pipe cleaner to a pencil or similar object by wrapping the green pipe cleaner around both the flower's base and the pencil. This adds stability and allows for varying heights in your flower arrangement.
5. Adding Leaves (Optional)
If you'd like to give your flowers some added detail, adding leaves can enhance the look:
- Step 1: Take a green pipe cleaner and fold it in half, then twist it to form a small leaf shape.
- Step 2: Attach the leaves by twisting them around the main stem.
- Step 3: Repeat this process for as many leaves as you'd like, spacing them evenly along the stem.
Displaying Your Pipe Cleaner Flowers
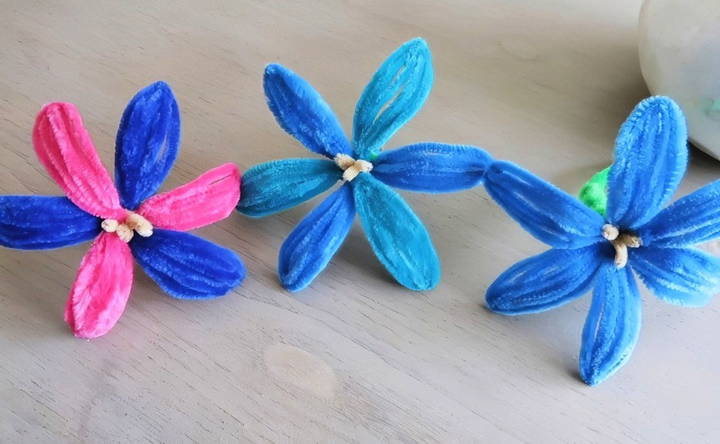
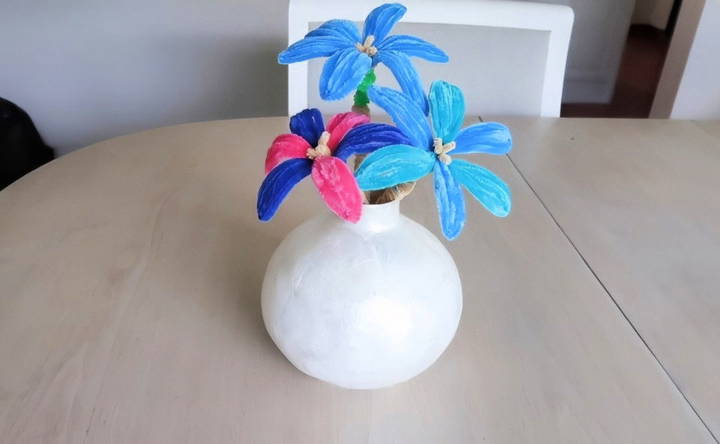
Once your flowers are assembled, consider displaying them in a small vase or container. The flexible nature of pipe cleaners means you can easily bend and adjust the height and angle of each flower for a fuller, more organic arrangement. If you want to give your flowers some added height, consider wrapping pipe cleaners around pencils to use as extended stems.
Advanced Tips and Tricks
While the basic pipe cleaner flower is beautiful on its own, here are some extra techniques to elevate your creations:
- Experiment with Petal Shapes: Try bending the petals into different shapes, such as pointed or rounded edges, to make unique flower styles.
- Layering Colors: Use two different colored pipe cleaners twisted together for a multi-colored petal effect.
- Adding Texture: Use chenille pipe cleaners for a soft, fluffy look or mix in metallic colors for a sparkle.
- Creative Centers: Instead of a pipe cleaner center, use small beads or pompoms to add a special touch to each flower.
- Mini Bouquets: Make several smaller flowers and combine them for a cute mini bouquet or even add them to gift packaging for a personalized touch.
Final Thoughts: Enjoying Your Pipe Cleaner Flower Creation
Crafting pipe cleaner flowers is a rewarding activity that requires minimal supplies and allows for unlimited creativity. The best part is, each flower can be unique, and the process is so simple that anyone can do it. Whether you're decorating your home, giving a handmade gift, or simply enjoying a creative hobby, pipe cleaner flowers offer a fun and fulfilling way to add beauty and color to your surroundings. Give it a try and enjoy the delightful experience of crafting your own everlasting blooms!
FAQs About Pipe Cleaner Flowers
Discover answers to common questions about pipe cleaner flowers, including tips, materials, techniques, and creative project ideas.
To make petals appear fuller, twist two pipe cleaners together before shaping them into petals. This adds volume and allows for more detailed shaping. You can also layer smaller petals in front of larger ones for a fuller, multi-layered flower look.
Wrap the end of each petal's pipe cleaner tightly around the stem until it's secure. For added stability, use an additional pipe cleaner to wrap around all petal bases, binding them to the stem.
If your stem is too short, extend it by attaching a pencil or similar object to the base and wrapping it with a green pipe cleaner. You can also twist two pipe cleaners together to make a longer, more flexible stem.
For realistic flowers, choose shades close to actual flower colors—like red, pink, yellow, and white for petals, with green for stems and leaves. For creative designs, mix and match bold or pastel colors as desired.
Yes! You can add beads, small pompoms, or buttons as flower centers to add texture and color contrast. Simply twist or glue the material into the center for a secure fit.
Add weight to the stems by wrapping them around pencils or small sticks. Alternatively, pack the vase with decorative stones or marbles, which support and hold the flowers in place.
Yes. Pre-fold pipe cleaners and prepare petal shapes for younger children, and provide blunt-ended scissors. Allow kids to choose their own colors to encourage creativity and simplify the twisting steps for ease.


