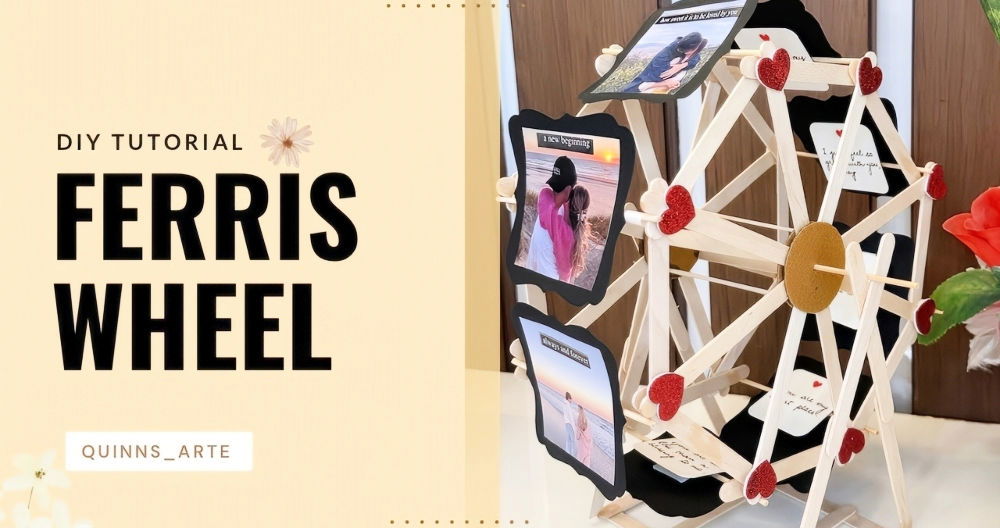
Making a DIY popsicle stick Ferris wheel is a fantastic and engaging project that kids and adults alike can enjoy. It's an ideal weekend project, combining creativity with hands-on building skills. This guide covers everything you need to build a Ferris wheel model that spins just like the real thing!
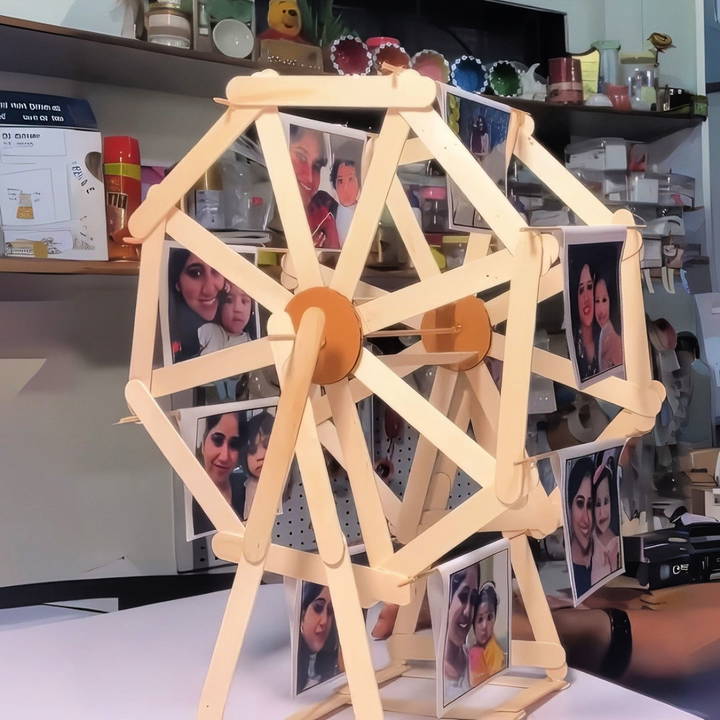
What You'll Need
Here's a list of materials required to bring your Ferris wheel to life:
- 50 Popsicle Sticks: The main component of the Ferris wheel structure.
- Skewer Sticks: Used for support and to attach the wheels.
- Cardboard: Forms the base and helps reinforce stability.
- Hot Glue Gun: Essential for assembling the structure.
- Cardstock or Small Photos (8x8 cm): Decorative elements for the Ferris wheel cabins.
- Scissors or Craft Knife: For cutting the popsicle sticks to the correct size.
Let's dive into the steps to build this eye-catching DIY project.
Step by Step Instructions
Learn how to build a popsicle stick Ferris wheel with step-by-step instructions, from making frames to adding final touches. Perfect for DIY enthusiasts!
Step 1: Make the Ferris Wheel Frames
Begin by constructing two circular frames which will form the main structure of the Ferris wheel. Here's how to make them:
- Lay Out Your Popsicle Sticks: Use about 25 popsicle sticks for each frame. Lay them out in a circular pattern, adjusting the placement to form a balanced wheel shape.
- Glue the Sticks Together: Use the hot glue gun to carefully attach each popsicle stick where they overlap. Apply glue sparingly to avoid mess and ensure strong connections.
- Reinforce the Frame: Once the circle is completed, reinforce the connections by adding a second layer of popsicle sticks on top of the first layer. This will increase the frame's strength and help it hold its shape better.
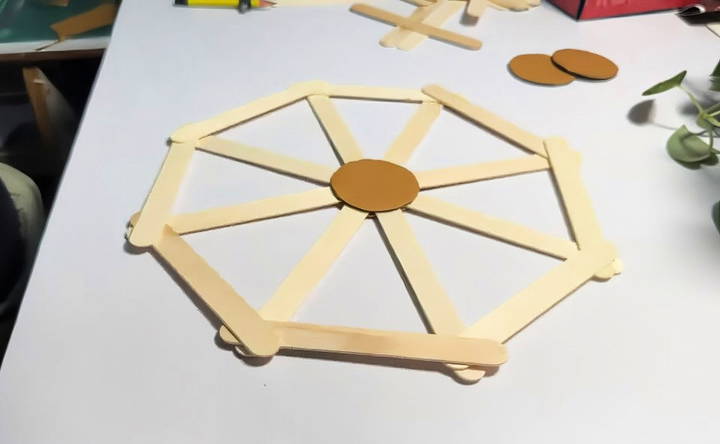
Repeat this process to build a second identical wheel frame.
Step 2: Prepare the Axle and Attach the Wheels
After constructing the wheel frames, it's time to connect them with an axle, allowing the Ferris wheel to rotate.
- Measure and Cut Skewer Sticks: Cut two skewer sticks to a length of approximately 11 cm. These will serve as the supports for the axle.
- Attach the Axle to the Wheel: Place a drop of hot glue on one end of each skewer stick and attach them to opposite sides of one of the wheel frames. Ensure that the skewers are positioned securely and are straight.
- Add the Second Wheel Frame: Apply hot glue to the opposite ends of the skewers, and carefully press the second wheel frame onto them, aligning it with the first frame. Hold it in place until the glue dries completely.
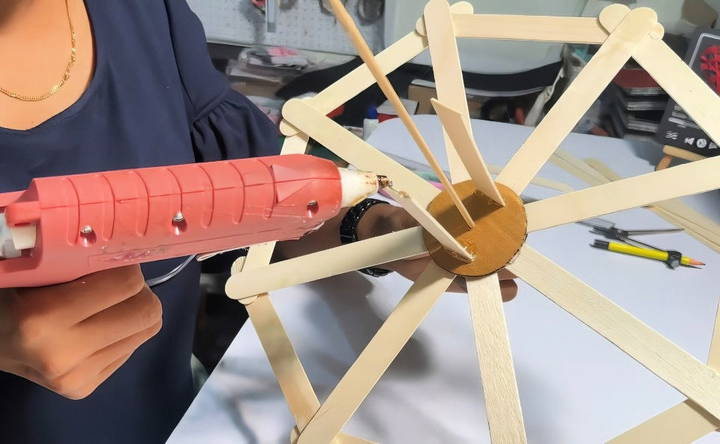
This completes the basic structure of the Ferris wheel. The skewers should hold the frames together while allowing the wheels to spin freely.
Step 3: Add Support Skewers for Stability
To further stabilize the Ferris wheel, add more skewer sticks around the edges of the wheels.
- Cut Additional Skewers: Measure and cut eight skewer sticks to a length of around 14 cm. These skewers will act as spokes to reinforce the structure.
- Attach the Skewers to the Wheel: Evenly space the skewers around the edges of the wheel frames. Attach one end to the first wheel frame and the other end to the second frame, using hot glue. This will help distribute weight and provide additional stability to the structure.
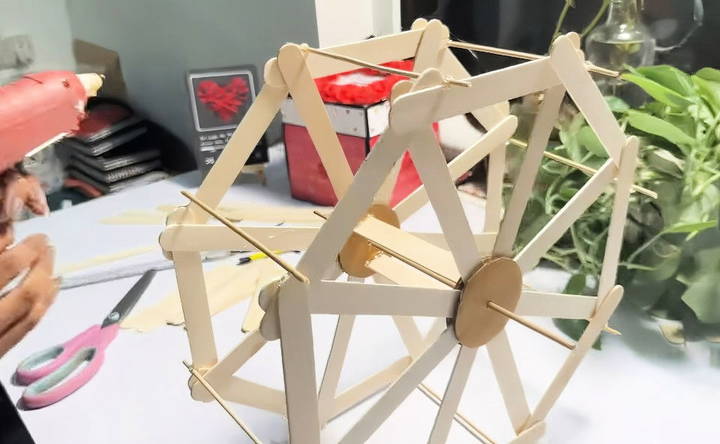
Once all eight skewers are attached, the Ferris wheel should be able to hold its shape firmly.
Step 4: Build the Stand
With the main structure completed, the next step is to build a stand for the Ferris wheel to ensure it stands upright.
- Make a Base Using Popsicle Sticks: Arrange several popsicle sticks horizontally and glue them together to form a sturdy rectangular base. Reinforce it by adding an additional layer of sticks.
- Construct Vertical Supports: Cut two more popsicle sticks to an equal length (around 11 cm) and attach them vertically on both ends of the base. These will act as the Ferris wheel's stand.
- Attach the Wheel to the Stand: Position the Ferris wheel between the vertical supports and attach it with hot glue. Hold it in place until the glue dries completely. Make sure the wheel can spin freely between the supports.
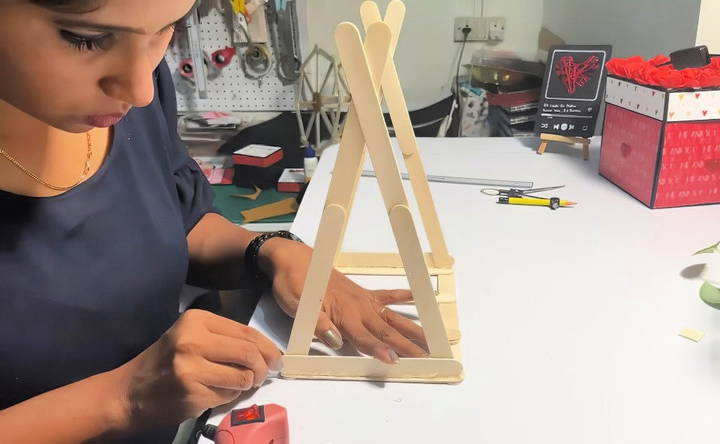
This stand provides stability and enables the Ferris wheel to spin without tipping over.
Step 5: Make and Attach the Ferris Wheel Cabins
For the final touch, add small cabins to your Ferris wheel. These can be made from cardstock or printed photos to give your project a personalized touch.
- Prepare the Cabins: Cut eight small pieces of cardstock or images measuring approximately 8x8 cm. Fold each piece in half to build a pocket.
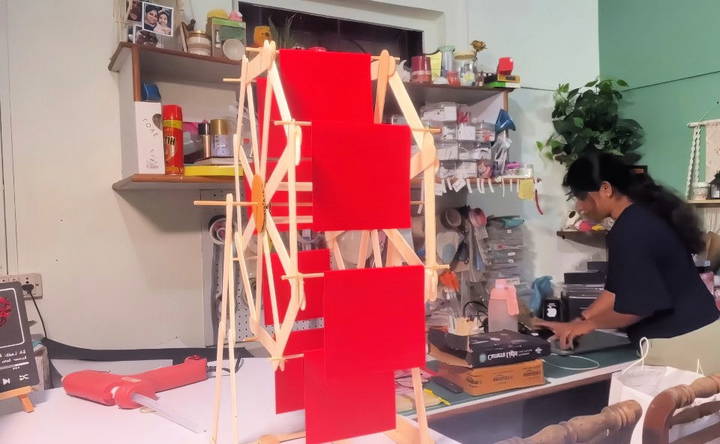
- Attach the Cabins to the Skewers: Glue the folded cardstock or photos onto the ends of each skewer stick on the wheel. Be sure to align them evenly around the Ferris wheel for a balanced look.
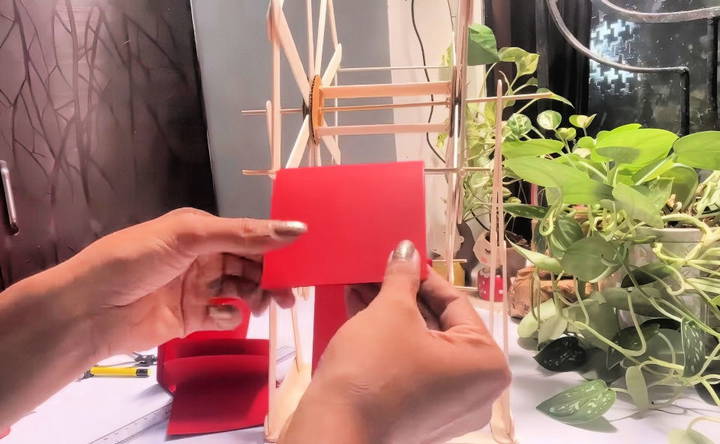
This adds a decorative element and completes the aesthetic of a real Ferris wheel.
Step 6: Add Final Touches and Test
Your Ferris wheel is now almost complete! Here are the final steps to get it ready for display:
- Secure All Connections: Go over the entire structure and ensure that all connections are firm. Add additional glue if needed.
- Test the Spin: Give the Ferris wheel a gentle push to make sure it spins smoothly. Adjust any skewers if necessary to eliminate wobbling.
- Decorate (Optional): If you want to take it a step further, consider painting the popsicle sticks or adding small decorative elements like stickers or glitter.
Tips and Troubleshooting
Building a popsicle stick Ferris wheel can be a bit tricky, so here are some tips to help you troubleshoot common issues:
- If the Ferris Wheel Doesn't Spin Properly: Make sure the skewer sticks (axle) are perfectly aligned. Any tilt or misalignment can cause friction, preventing smooth rotation.
- For a More Durable Structure: Use craft wood glue in addition to hot glue for connections that need to bear more weight.
- Achieving Balance: If the Ferris wheel leans to one side, adjust the skewer supports and make sure all components are evenly spaced. Sometimes, adding a few small weights to the base can help stabilize it.
Final Thoughts
This DIY popsicle stick Ferris wheel is an enjoyable project for anyone looking to try their hand at creative building. With a few materials and some patience, you can build a miniature Ferris wheel that spins just like the real thing.
Whether you're making it as a fun craft project, a unique gift, or a display piece, this Ferris wheel is sure to impress.
FAQs About DIY Popsicle Stick Ferris Wheel
Discover answers to common questions about building a DIY popsicle stick Ferris wheel, from materials needed to step-by-step construction tips.
Photos or decorations used in this project are typically 8x8 cm. However, if you’d like larger or smaller cabins, adjust the size to suit your design.
Yes, alternatives like Fevicol, Fevikwik, or Fevi Bond work, but be cautious as they might not dry as quickly or hold as firmly as a hot glue gun. Allow extra drying time for regular glue to ensure stability.
You will need around 50 popsicle sticks for the entire structure. Make sure to have a few extra on hand in case of breakage or mistakes.
If skewers are unavailable, you can substitute them with sturdy bamboo sticks or small dowels of similar length. These alternatives will work well for the Ferris wheel’s axle and support structure.
To improve rotation, ensure the axle is aligned straight and the skewers are secured evenly between the wheels. Avoid using too much glue on moving parts, as excess can restrict movement.
Yes, you could use ice cream sticks from cup-style ice creams, but make sure they're sturdy and smooth for better stability.


