Looking to give your kitchen a fresh look without the hefty price tag of replacing countertops? Transforming your countertops on a budget is easier than you might think. With the right materials and some DIY effort, you can build a stunning, marble-like finish that completely changes the look of your kitchen. Here's a step-by-step guide to help you redo your countertops without replacing them, based on practical methods and affordable solutions.

Why Consider Refinishing Countertops?
Refinishing your countertops instead of replacing them can save you thousands of dollars. Brand-new countertops, especially in premium materials like marble, quartz, or granite, can be expensive and involve labor costs for removal and installation. Refinishing, on the other hand, is cost-effective, and with the right materials, you can achieve a high-quality finish that rivals the look of more expensive surfaces. Plus, DIY refinishing projects allow you to customize the appearance of your countertops to match your personal style.
Tools and Materials You'll Need
To refinish your countertops, gather the following essential tools and supplies:
- Countertop Refinishing Kit: Look for kits under $200, typically including paint, epoxy, rollers, and brushes.
- Sandpaper or Scratch Pad: For scuffing up the countertop surface to prepare it for painting.
- Microfiber Cloth and Water: For thorough cleaning.
- Painters Tape and Drop Cloths: To protect cabinets and surrounding areas.
- Foam Roller, Fabric Roller, and Small Brushes: These will help with applying paint and building detailed veining.
- Water Spray Bottle: Essential for the marble veining technique.
- Protective Gear: Gloves, masks, and goggles to keep you safe from fumes and dust.
Step by Step Instructions
Learn how to redo countertops without replacing them. Follow step-by-step instructions for a marble effect using paint and epoxy for a fresh look.
Step 1: Preparation is Key
Properly preparing your countertop surface will ensure a smooth, long-lasting finish. Here's how to get started:
- Remove Silicone Caulk: Start by removing any silicone caulking along the edges of your countertops. This allows for seamless application of paint and epoxy.
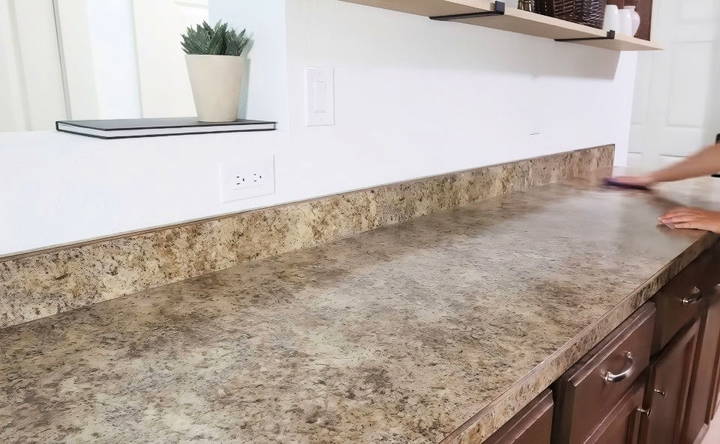
- Scuff the Surface: Use a Brillo pad, scratch pad, or sandpaper to lightly roughen the countertop. This step helps the primer and paint adhere better to the surface.
- Clean Thoroughly: Wipe down the surface with a microfiber cloth and water, ensuring all dust and debris are removed. Cleaning twice is ideal to remove any lingering dirt. Let the countertop dry completely before moving to the next step.
Step 2: Protect the Surrounding Area
Before applying any paint or primer, protect your cabinetry and walls.
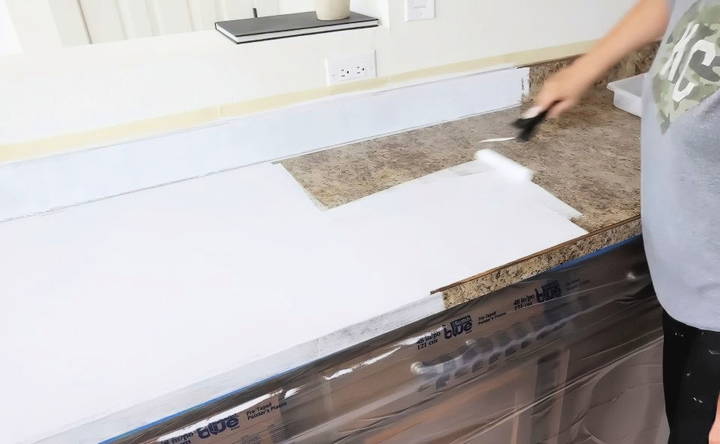
- Tape and Cover: Place painters tape along the backsplash and edges where the countertop meets the cabinets to avoid accidental paint smears.
- Drop Cloths: Place these over cabinets and floors near the countertop to catch any spills or drips, saving you cleanup time and preventing accidental damage.
Step 3: Apply the Primer
The primer layer is essential to achieving an even, bright base for the marble effect.
- Choose the Right Tools: For corners and edges, use a foam roller, which provides precision and control. Use a fabric roller for larger, flat areas.
- Apply Multiple Coats: Most countertops, especially those with darker tones, will require multiple coats of primer. Aim for full coverage, allowing each layer to dry for at least an hour before applying the next.
- Let it Dry Thoroughly: Once all coats are applied, let the primer dry completely to prevent peeling or bubbling during the later stages.
Step 4: Make the Marble Vein Effect
Building a realistic marble look can be the most exciting part of this project. Here's a breakdown of the technique:
- Plan Your Veins: Before applying the paint, look up pictures of marble online to identify a pattern you like. Sketch out the main vein placements on a piece of paper for guidance.
- Practice on a Scrap Board: Before committing to the countertop, practice the technique on a scrap board to perfect your strokes and understand the process.
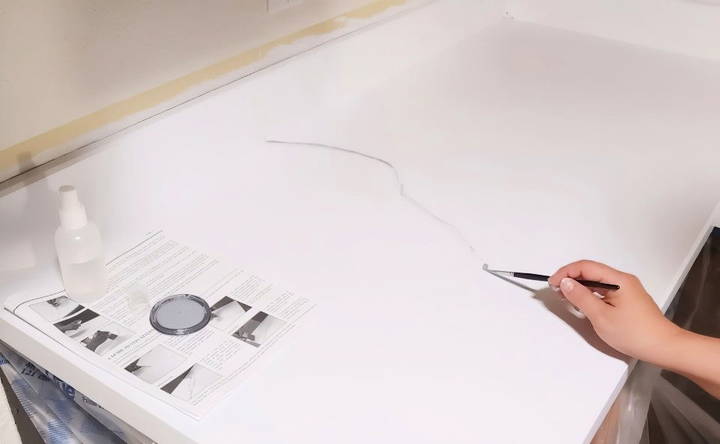
- Apply the Veins with Gray Paint: Use a Small Brush: Lightly drag the brush in the direction you want the vein to flow. Twist the brush as you go to build natural-looking breaks in the line.
- Use a Water Spray Bottle: Spray water on the veins to help them spread and soften. This builds a more natural look, similar to actual marble.
- Dab to Soften: Use a two-inch brush to dab along the vein, building texture. Dab more if you want softer, lighter veins; dab less if you prefer more distinct lines.
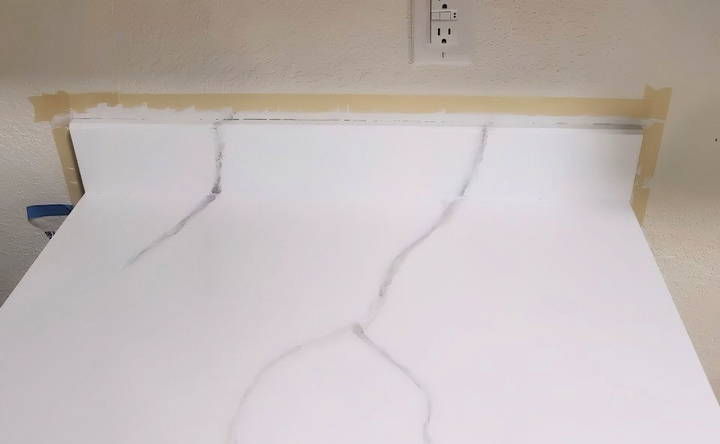
- Extend the Veins: Once the main veins are in place, extend them over the edges and along the backsplash for a continuous look.
Step 5: Fine-Tune the Veins for Realism
To make the veins appear as realistic as possible, use different vein styles, such as:
- Extended Veins: Long, continuous lines that span across the countertop.
- Crescent Veins: Curved veins that mimic the natural flow of marble.
- Y Veins: Branching veins that add dimension.
- Ripple Veins: Parallel lines close to each other for a subtle, layered effect.
If any veins look too intense or dark, add a bit of water and dab them to lighten. Some kits include white highlighter paint; use this to break up or accentuate certain veins for added depth.
Step 6: Seal with Epoxy for a Durable Finish
Once your paint has fully dried, it's time to add a protective epoxy layer to seal your work and give the countertop a glossy, durable finish.
- Mix the Epoxy: Follow the kit instructions to combine the resin and activator. Stir the mixture for at least three and a half minutes to ensure it's fully activated.
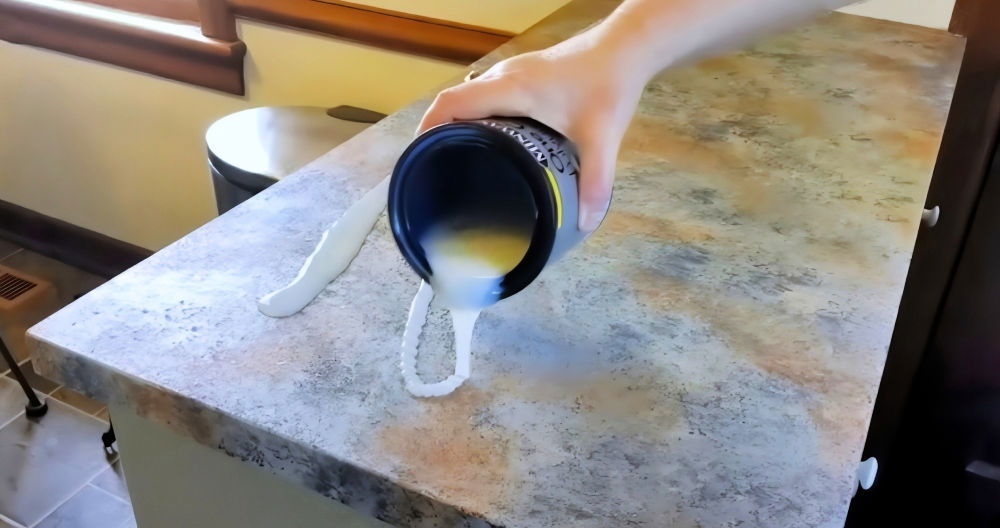
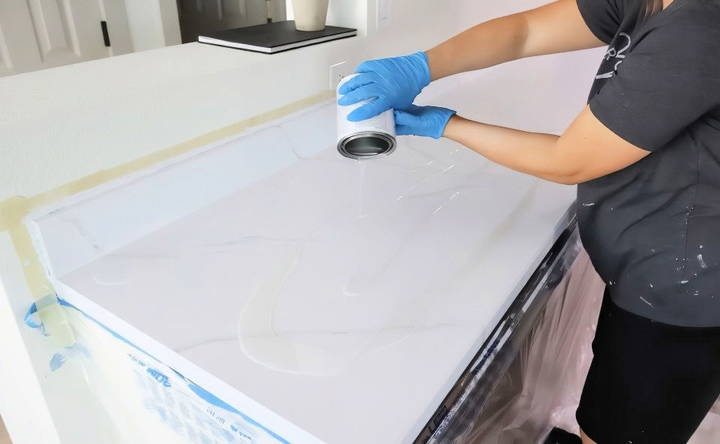
- Apply in Sections: Work in small, three-foot sections to ensure even coverage. Pour the epoxy onto the countertop and spread it with a foam roller. Be careful not to apply too much, as it can drip over the edges.
- Smooth the Surface: Use a foam roller to lightly spread the epoxy, moving it over the countertop surface and onto the front edges. Epoxy is self-leveling, so it will naturally smooth out if applied evenly.
- Monitor for Drips: As the epoxy sets, check the bottom edges for drips, wiping them with a paint stir stick or small brush if needed.
Curing and Final Steps
After applying epoxy, give the countertops time to cure:
- Remove the Tape: Within 1-2 hours, remove the painters tape from the backsplash and cabinets to prevent it from sticking permanently.
- Avoid Heavy Use: Light items can be placed on the countertop after about 24 hours, but avoid heavy use for a full week to allow complete curing.
Quick Tips for Success
- Ventilation is Key: Epoxy fumes can be strong, so ensure your workspace is well-ventilated, ideally with open windows or a fan.
- Take Your Time with Veining: If this is your first time painting marble veins, don't rush. Practicing on a separate surface can make a big difference.
- Keep a Clean Work Surface: Dust and debris can ruin the smooth finish of your epoxy. Make sure the countertop and surrounding area are clean before applying it.
Maintenance Tips for Your New Countertop Finish
After investing time and effort into transforming your countertops, proper maintenance will help keep them looking pristine for years to come. Although epoxy is durable, it requires specific care to preserve the finish and prevent scratching or dulling.
- Avoid Abrasive Cleaners: Use gentle, non-abrasive cleaners to maintain the glossy look of your epoxy-coated countertop. Abrasive cleaners or scouring pads can scratch the surface, reducing the shine.
- Opt for a microfiber cloth or soft sponge with mild dish soap for daily cleaning.
- Handle Spills Quickly: While epoxy is water-resistant, it's best to wipe up any spills promptly, especially acidic substances like vinegar or citrus juice. This reduces the chance of stains and keeps the countertop looking fresh.
- Avoid Excessive Heat: Epoxy is not as heat-resistant as materials like granite or quartz. Avoid placing hot pans or pots directly on the countertop, as it can damage the finish. Use trivets or heat-resistant pads to protect the surface from heat exposure.
- Use Cutting Boards: Although epoxy is tough, it can still scratch under sharp objects. Always use a cutting board to prevent scratches, which could mar the glossy finish of your countertop.
- Routine Polishing: Consider using a countertop polish occasionally to restore shine. Ensure the polish is safe for epoxy and follow the product instructions for best results. This extra step can enhance the longevity of the finish.
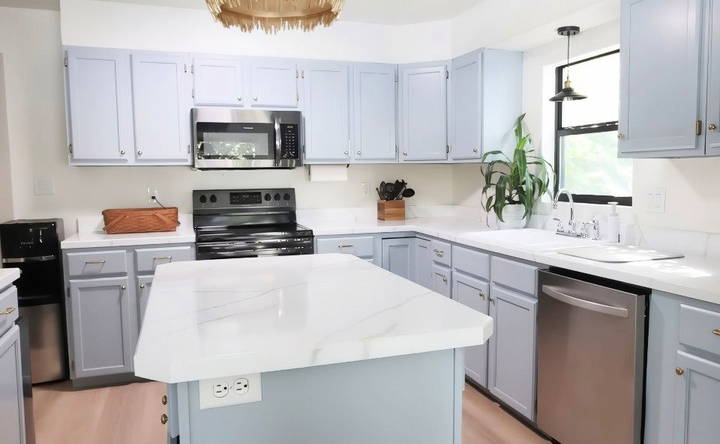
By following these care tips, your countertop will maintain its freshly refinished appearance, staying beautiful and functional.
Additional Customization Ideas for Your Countertops
If you want to make your countertops even more unique, consider the following customization ideas. These options allow you to further personalize the look and feel of your countertop surface, making it a true reflection of your style.
1. Tinting the Veins with Color
- While gray is a popular choice for marble-like veins, you can experiment with different colors to match your kitchen's decor. Subtle gold, navy, or green tints can add a touch of elegance and uniqueness.
- When using colored paint, follow the same veining technique with the water spray bottle and dabbing. Colors should be used sparingly for a sophisticated look.
2. Adding Metallic Highlights
- Some countertop kits include metallic paint, which can build beautiful highlights and add depth to your design. For a more luxurious effect, dab a small amount of metallic paint along the veins or accent areas.
- Metallic accents are ideal for modern or glam-style kitchens, bringing a bit of sparkle that catches the light.
3. Using a Matte or Satin Finish
- Although a glossy finish is popular, a matte or satin topcoat can give your countertop a different texture and appearance. Matte finishes are trending, offering a soft, muted look that hides minor scratches and fingerprints.
- Satin finishes provide a subtle sheen, building a smooth yet understated effect. Ensure that any additional finish you apply is compatible with epoxy.
4. Building a Faux Granite Effect
- If you prefer the look of granite over marble, build a similar effect by using sponges and multiple paint colors. Blotting various shades onto the primer layer with a sponge can mimic granite's speckled appearance.
- For best results, choose two or three shades that complement each other and practice the technique on a scrap piece to find the right balance.
5. Enhancing the Backsplash to Match
- A coordinated backsplash can complete the look of your countertop makeover. Use leftover paint and veining techniques on a small backsplash area for continuity.
- If you don't want to commit to painting, consider peel-and-stick backsplash tiles that mimic marble or granite, adding an easy and cost-effective finishing touch.
Pros and Cons of Redoing Countertops with Paint and Epoxy
While a DIY countertop refinishing project has many advantages, it's essential to consider both the benefits and limitations before diving in. Here's a balanced view to help you decide if this project is right for you.
Pros
- Cost Savings: Refinish your countertops for a fraction of the cost of new marble or granite, often spending under $200.
- Customization: With DIY refinishing, you can fully customize the look, from vein patterns to colors and finishes.
- Quick Transformation: A countertop refinishing project can usually be completed within a weekend, providing a fast way to revitalize your kitchen.
- Satisfaction and Pride: The DIY process can be incredibly satisfying, and you'll have a beautiful countertop that you buildd with your own hands.
Cons
- Durability: While epoxy is relatively durable, it doesn't have the same longevity as natural stone or quartz. Proper maintenance is essential.
- Heat Sensitivity: Epoxy isn't as heat-resistant as natural stones, meaning you'll need to be mindful of placing hot items on the surface.
- Time-Intensive Process: Multiple coats of primer and paint, as well as the curing time for epoxy, mean that the project requires patience.
- Precision Needed: Building a realistic marble effect takes a bit of practice. Achieving a professional look may be challenging for beginners.
Alternatives to DIY Countertop Refinishing
If you're interested in countertop refinishing but aren't comfortable with a full DIY project, here are some alternatives:
- Hire a Professional: Professional refinishing services can give you high-quality results with less effort. Although it costs more than a DIY kit, it's still typically cheaper than replacing countertops entirely.
- Countertop Overlays: Overlay companies offer a thin stone or epoxy layer that can be applied directly over existing countertops. This option provides the durability of a solid surface with the simplicity of a cover-up and can be less invasive than a full replacement.
- Laminate Refacing: For laminate countertops, you might consider laminate refacing, which involves applying a new laminate layer over the old surface. This method is affordable and offers a wide range of patterns, from stone looks to solid colors.
- Peel-and-Stick Films: Peel-and-stick countertop films are easy to apply, affordable, and come in a range of designs like marble, granite, or wood. This option is ideal for renters or those looking for a temporary solution, as the film can be removed without damage.
Final Thoughts
Redoing countertops without replacing them is an accessible, affordable, and customizable way to refresh your kitchen. With some planning, patience, and creativity, a countertop refinishing project can transform an outdated kitchen into a space that looks modern and high-end. Whether you aim for a marble-inspired finish, granite look, or unique custom touches, refinishing is a rewarding project that saves money and lets you add your own personal style to the heart of your home.
While it's not a one-size-fits-all solution, countertop refinishing offers a wide range of options to meet different tastes, budgets, and skill levels. By following these steps and maintaining your new surface properly, you can enjoy a beautiful, functional, and impressive kitchen upgrade without the expense and hassle of a full replacement.
Let me know if you have any more questions or if you'd like additional tips for specific countertop finishes!
FAQs About Countertop Refinishing Without Replacement
Discover everything about countertop refinishing without replacement. Get answers to faqs on cost, process, and benefits in this comprehensive guide.
Epoxy refinishing works best on laminate, Formica, and wood countertops. It may also be possible on surfaces like granite, but thorough sanding is crucial for proper adhesion. Always check the kit’s guidelines to ensure compatibility.
Once fully cured, epoxy is generally food-safe. However, avoid cutting directly on the surface, as it can scratch, potentially exposing layers beneath and affecting food safety.
One kit is often enough for standard countertop space, covering around 20-25 square feet. Larger kitchens or areas with thicker applications may require additional kits.
No, epoxy isn't as heat-resistant as stone. Always use trivets or heat pads to prevent heat damage, which could cause discoloration or softening.
Epoxy may yellow if exposed to UV light. Opt for UV-resistant epoxy kits for kitchen countertops, or avoid direct sunlight where possible to slow this process.
Epoxy generally cures in seven days. Light use may be possible after 48 hours, but full curing ensures maximum durability. Plan ahead if you need to avoid using the kitchen for this period.
Use non-abrasive cleaners and a soft cloth. Avoid harsh chemicals that can dull the finish, and keep acidic substances from lingering on the surface to prevent damage.
Remove any contact paper and sand away old paint or finishes to create a smooth base. The epoxy will adhere better to a properly prepped, bare surface.
Yes! While marble veining is popular, you can build faux granite by sponging multiple colors. Some kits also include metallic additives for custom looks. Practice techniques on a sample board before applying to your countertop.
Use remote-controlled puck lights to avoid manually turning them on and off. If attached with adhesive, be prepared to reapply if battery changes require removal.


