Learn resin art for beginners with easy-to-follow tips, materials, and techniques to create stunning, unique resin art projects. Resin art is a captivating and versatile medium that allows artists to create stunning, durable pieces with a glossy, glass-like finish. It has become a popular craft for hobbyists and professionals alike, offering endless possibilities for creativity. Whether you're looking to make functional items like coasters or decorative pieces like wall art, resin can transform your ideas into reality. This guide will take you through the process of creating resin coasters, focusing on key techniques, safety measures, and tips for successful projects.
What is Resin Art?
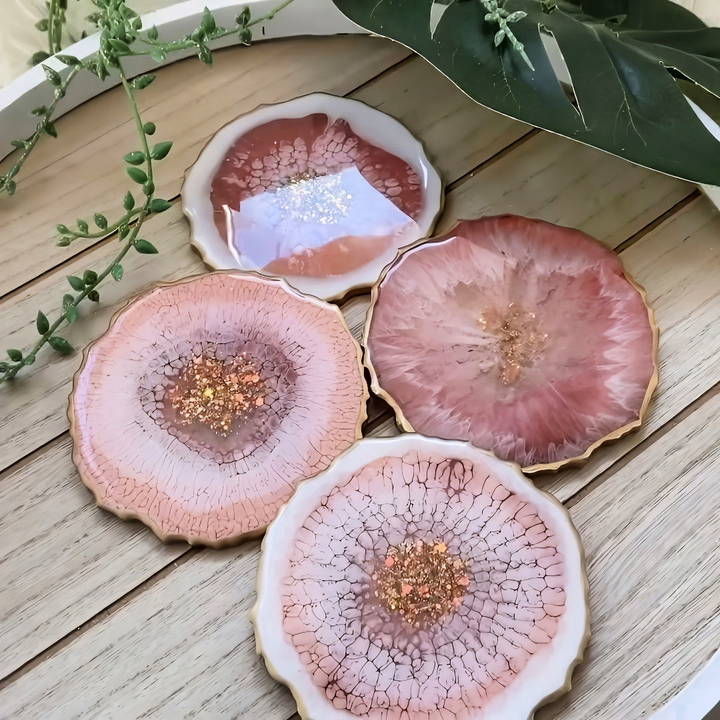
Resin art involves mixing liquid epoxy resin with a hardener, pouring it onto a surface or into molds, and then allowing it to cure. The curing process results in a solid, glass-like material that can be clear or pigmented, depending on the artist's choice. Pigments, dyes, and other materials like glitter or gold leaf can be added to create vibrant, dynamic effects. Resin art is prized for its smooth, glossy surface, which enhances the depth and brilliance of the colors and inclusions.
Benefits of Resin Art
- Versatility: Resin can be used on a variety of surfaces, including wood, canvas, and silicone molds.
- Durability: Once cured, resin is highly durable and resistant to damage, making it ideal for functional pieces like coasters, trays, and jewelry.
- Aesthetic Appeal: The glossy, glass-like finish of resin pieces adds a professional touch to any project.
- Creative Freedom: With various pigments, additives, and techniques, resin art allows artists to explore endless design possibilities.
Common Resin Art Projects
- Coasters: A popular beginner project due to the simplicity of the process and the ability to create sets with unique designs.
- Jewelry: Resin can be poured into small molds to create earrings, necklaces, and bracelets.
- Wall Art: Large resin pours on canvas or wood panels create eye-catching abstract art.
- Trinket Dishes: Using silicone molds, artists can craft beautiful, functional dishes for holding small items.
Getting Started: Essential Materials and Safety Measures
Before diving into your first resin project, it's important to gather the necessary materials and understand how to work safely with resin. Resin contains chemicals that, if not handled properly, can be harmful. Additionally, the curing process can be messy, so preparation is key.
Materials You Will Need
- Epoxy Resin: This comes in two parts: resin (Part A) and hardener (Part B). Always check the mixing ratio on the packaging; many resins use a 2:1 ratio.
- Silicone Molds: These flexible molds are perfect for resin casting because the cured resin can be easily removed.
- Pigments and Dyes: Use mica powders, alcohol inks, or resin-specific pigment pastes to add color to your resin.
- Mixing Tools: You'll need mixing sticks and cups to properly blend the resin and hardener.
- Heat Gun or Torch: These tools help to eliminate bubbles from your resin after pouring.
- Gloves: Nitrile gloves are essential for protecting your skin from resin.
- Face Mask: A respirator mask protects you from fumes and airborne particles.
- Protective Clothing: Wear old clothes or an apron to protect yourself from spills.
- Level Workspace: Ensure your workspace is flat, as resin is self-leveling and will flow toward any low points.
- Plastic Sheeting or Baking Paper: Lay this down to protect your workspace, as resin can be difficult to clean once it cures.
Safety Considerations
Safety should always be a priority when working with resin, as improper handling can lead to skin irritation, respiratory issues, or worse. Here are some key safety tips to follow:
- Use Nitrile Gloves: Unlike latex gloves, nitrile gloves provide better protection against resin.
- Work in a Well-Ventilated Area: Ensure there is proper airflow in your workspace to avoid inhaling fumes.
- Wear a Respirator: If you're working with large amounts of resin, especially in a closed space, a respirator is crucial.
- Protective Clothing: Resin can be difficult to remove from clothing, so it's best to wear old clothes or a protective apron.
- Avoid Contact with Skin: If resin does come into contact with your skin, wash it off immediately with soap and water.
Step by Step Instructions
Now that you're equipped with the necessary materials and safety precautions, let's dive into the process of creating beautiful resin coasters. This project is perfect for beginners because it covers the basics of mixing, pouring, and demolding resin.
1. Preparation and Setting Up Your Workspace
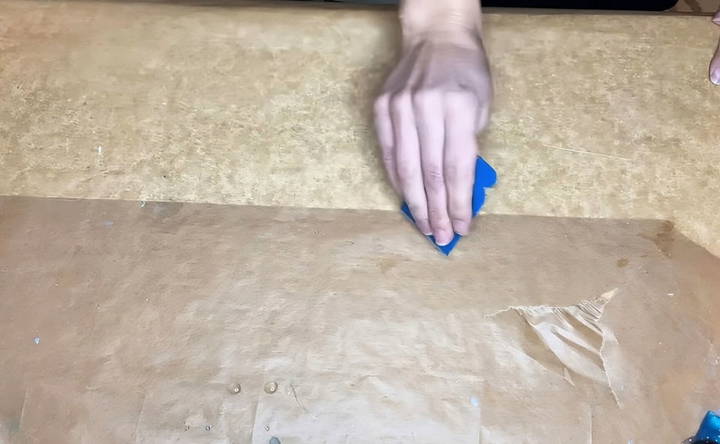
The first step in any resin project is preparation. Ensuring that your workspace is clean, leveled, and protected from spills will make the process smoother and reduce the risk of mishaps.
- Clean and Protect: Cover your workspace with baking paper or plastic sheeting. This will protect your table or countertop and allow for easy cleanup, as resin can be peeled off after it cures.
- Level Your Workspace: Use a level tool to ensure that your workspace is flat. Resin is self-leveling, so an uneven surface could result in lopsided coasters.
- Gather Materials: Lay out all of your materials, including resin, pigments, molds, and mixing tools, within easy reach to avoid interruptions once you start working.
2. Mixing Resin: The Key to Success
The next step is to mix your resin properly. Most epoxy resins require a specific ratio of resin (Part A) to hardener (Part B). In this tutorial, we're using a 2:1 ratio, which means two parts resin to one part hardener.
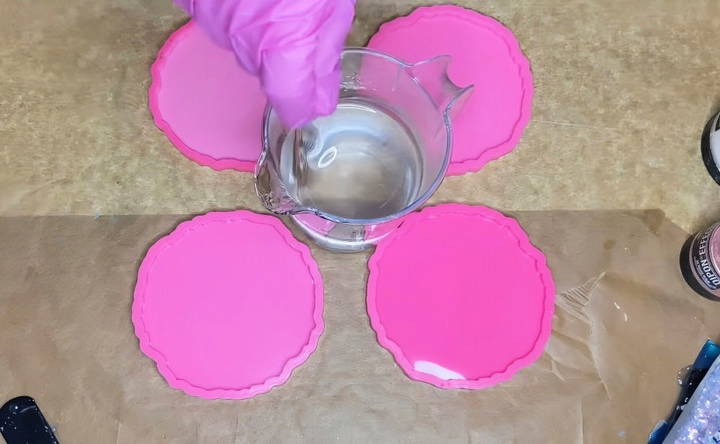
- Measure Carefully: Use a kitchen scale to measure the correct amounts of Part A and Part B. In this tutorial, 150 milliliters of Part A and 75 milliliters of Part B were used for a total of 225 milliliters of resin, which is enough for four coasters.
- Mix Thoroughly: Pour both parts into a mixing cup and stir slowly for several minutes. Stirring too quickly can introduce air bubbles, so take your time. Mix until the resin is clear and free of streaks.
3. Adding Pigments and Inclusions
Once your resin is fully mixed, it's time to add pigments or other inclusions like glitter or gold leaf.
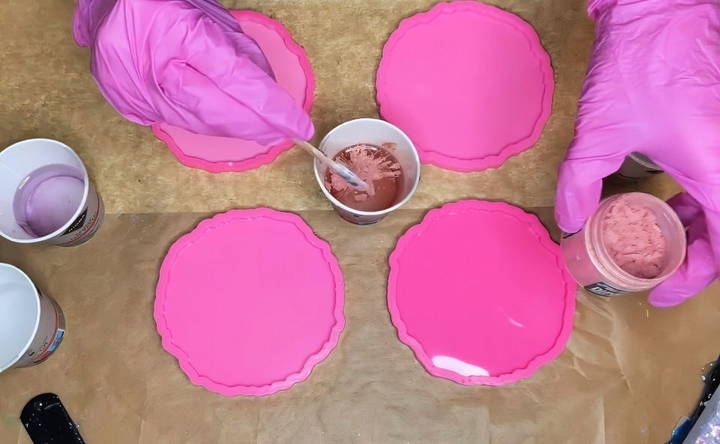
- Separate into Smaller Cups: If you're using multiple pigments, divide your resin into separate cups before adding the pigments.
- Mix Pigments: Use a small amount of pigment powder, paste, or alcohol ink and stir it into the resin. For a pearlescent effect, a color-shifting pigment like 24 karat rose color shift pearl can be used.
- Add Inclusions: For added texture or shine, you can mix in gold leaf flakes, glitter, or even small crystals.
4. Pouring the Resin
With your resin mixed and colored, it's time to pour it into your molds. This is where your creativity can shine, as you can experiment with different pouring techniques to create unique designs.
- Pour Slowly: Start by pouring a thin layer of clear resin into the bottom of the mold. This will help create depth in your design.
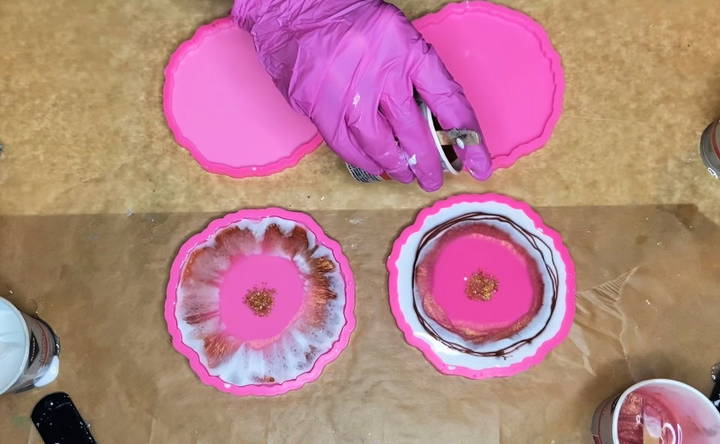
- Add Colored Resin: Pour your pigmented resin into the mold, either in layers or swirls, depending on the effect you want to achieve. Use different colors in different parts of the mold for a marbled or gradient effect.
- Eliminate Bubbles: After pouring, use a heat gun or torch to remove any air bubbles that rise to the surface. Be careful not to hold the torch too close to the resin, as it can scorch the surface or damage the mold.
5. Demolding Your Resin Coasters
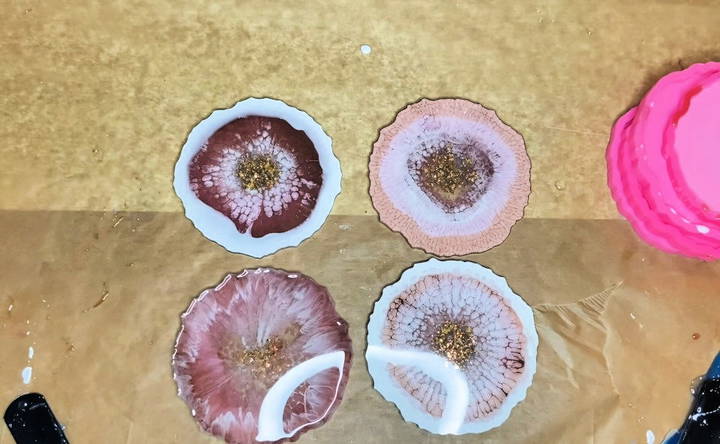
Once your resin has been poured into the molds and has had time to cure, it's time to demold your coasters. Depending on the type of resin used, the curing time can range from 12 to 24 hours. However, always refer to the instructions on your resin packaging to ensure proper curing time.
- Check the Cure: Before demolding, make sure the resin is completely solid. If you try to remove the coasters too early, they could bend or lose their shape.
- Gently Remove: Begin by carefully peeling the mold away from the edges of the coaster. Silicone molds are flexible, so this should be an easy process. If you feel any resistance, give it more time to cure.
- Inspect for Imperfections: After demolding, check your coasters for any imperfections such as rough edges or air bubbles. If there are any, don't worry – you can fix these with a little bit of extra work.
6. Finishing Touches: Smoothing Edges and Adding a Top Coat
After demolding, some coasters may have sharp or uneven edges, which can detract from their aesthetic and functional appeal. Additionally, adding a top coat will enhance the shine and durability of the coasters, giving them a professional finish.
Smoothing the Edges
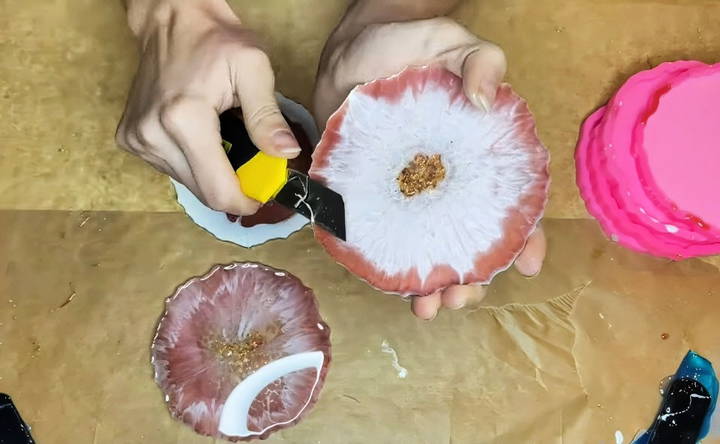
- Scrape with an X-Acto Knife: If you notice any raised edges or sharp areas, carefully use an X-Acto knife to trim them away. This works especially well for resin coasters with uneven, organic shapes, such as geode-style designs.
- Use a Deburring Tool: For straight-edged coasters, a deburring tool can provide a cleaner and faster way to smooth out edges. Simply run the tool along the perimeter of the coaster to remove any excess resin.
Applying a Top Coat
A top coat not only adds extra gloss to your coasters but also protects them from scratches and damage over time. Here's how to apply the perfect top coat:
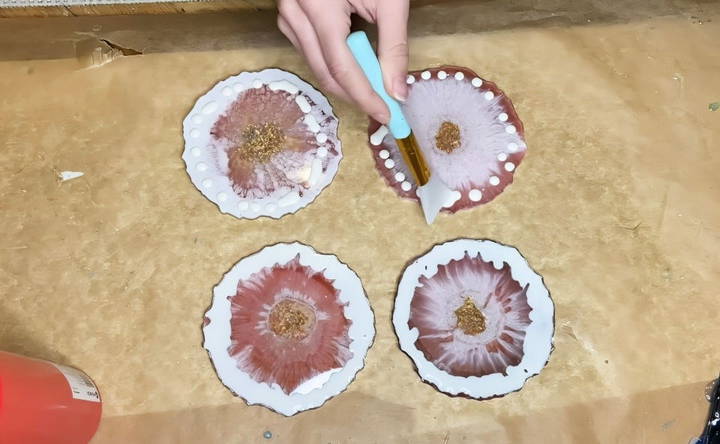
- Protect the Underside: Since you'll be applying the top coat after demolding, it's essential to protect the bottom of the coasters. Use liquid latex to coat the underside, which will prevent any resin from dripping over and sticking.
- Pro Tip: A silicone makeup brush is great for spreading the liquid latex evenly across the surface.
- Elevate the Coasters: Once the liquid latex has dried, prop your coasters up on small cups or stands. This ensures that the resin can flow evenly across the surface without pooling at the edges.
- Mix and Re-pot the Resin: For the top coat, use a fresh batch of resin (Part A and Part B) and mix it as you did before. However, after mixing, transfer the resin into a new cup and stir again to ensure it's thoroughly mixed.
- Pour and Spread: Pour a small amount of resin onto each coaster, then use a silicone makeup brush to carefully spread it to the edges. Make sure to cover the entire surface evenly, but be cautious not to let resin drip off the sides.
- Eliminate Bubbles: Use your heat gun or torch to eliminate any bubbles that may have formed during the top coating process. Be quick with the torch to avoid overheating the resin.
7. Demolding After Top Coating
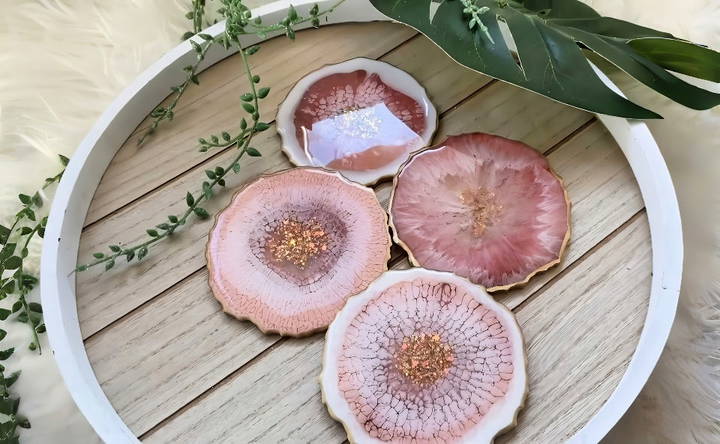
Once your top coat has cured (again, following the recommended time on your resin packaging), it's time to remove the liquid latex from the bottom of the coasters. This will reveal a clean underside, free from any resin drips.
- Peel Off the Latex: The liquid latex should come off easily. If there are any stubborn spots, gently scrape them with your fingers or a small tool.
- Final Polishing: After removing the latex, inspect your coasters for any remaining rough spots. You can use a fine-grit sandpaper to lightly smooth out any remaining imperfections.
Advanced Techniques and Tips for Resin Art
Once you've mastered the basics of creating resin coasters, you can explore more advanced techniques to enhance your projects and make your work truly unique.
1. Layering for Depth
One of the most striking effects in resin art is creating a sense of depth by working in layers. By allowing each layer of resin to partially cure before adding the next, you can create intricate, multi-dimensional designs.
- Plan Your Layers: Before you begin, decide on the number of layers and what each one will contribute to the final piece. For example, you might pour a base layer of clear resin, then add a layer of colored resin with inclusions like gold leaf or glitter.
- Wait Between Layers: Give each layer enough time to set so that it won't blend too much with the next layer. This will prevent colors from bleeding into each other and preserve the clarity of the layers.
2. Using Alcohol Inks for Dynamic Color Effects
Alcohol inks are a popular addition to resin art because they create vibrant, fluid color patterns. When dropped into resin, alcohol inks tend to spread and create mesmerizing ripple or marble effects.
- Create “Petris”: By combining alcohol inks with a white base pigment, you can create a “petrified” look in your resin coasters. The inks spread out and push the white pigment to the bottom, resulting in a dynamic, organic pattern.
- Experiment with Techniques: Try different methods of applying the ink, such as dropping it directly into the resin, swirling it with a stick, or even blowing it with a straw for different effects.
3. Embedding Objects in Resin
Resin is also ideal for embedding small objects into your coasters or other art pieces. Dried flowers, leaves, crystals, and even photos can be preserved in resin to add a personal touch to your projects.
- Prepare the Objects: Make sure any objects you want to embed are completely dry. Moisture can interfere with the curing process and cause bubbles or cloudiness.
- Anchor the Objects: Pour a small layer of clear resin into your mold and place the object gently on top. Use a toothpick or stick to adjust the position if necessary, then pour more resin over the top to seal it in.
4. Achieving a High-Gloss Finish
If you want your resin pieces to have an ultra-glossy, glass-like finish, consider the following tips:
- Polishing: After your top coat has cured, you can polish the surface using a fine grit sandpaper or a polishing compound specifically designed for resin. This will remove any minor scratches and enhance the shine.
- UV Protection: To prevent your resin from yellowing over time, especially if it's exposed to sunlight, use a UV-resistant resin or apply a UV-protective spray once your piece is fully cured.
Troubleshooting Common Resin Art Issues
Even experienced resin artists encounter challenges from time to time. Here are some common problems and how to fix them.
1. Air Bubbles
Air bubbles can form when mixing the resin or pouring it into the mold. To prevent or fix bubbles:
- Mix Slowly: Stir the resin slowly to avoid introducing air bubbles.
- Use a Heat Gun or Torch: Apply heat after pouring to release trapped air.
2. Sticky or Soft Resin
If your resin remains sticky or doesn't harden properly, it's usually due to incorrect measuring or insufficient mixing.
- Ensure Proper Ratio: Always follow the manufacturer's instructions for the resin-to-hardener ratio.
- Mix Thoroughly: Stir the resin for the recommended time to ensure the parts are fully combined.
3. Cloudy Resin
Cloudiness in resin is often caused by moisture or contamination.
- Avoid Moisture: Ensure your workspace and tools are dry, and avoid adding wet materials to the resin.
Final Thoughts
Resin art is a rewarding craft that allows artists to create stunning, durable pieces with endless design possibilities. Whether you're making coasters, jewelry, or wall art, the key to success is in preparation, patience, and creativity. By following the steps outlined in this guide, you can confidently start your resin art journey and produce beautiful, professional-quality pieces. As you gain more experience, don't hesitate to experiment with different techniques, pigments, and inclusions to develop your own unique style.
FAQs About Resin Art
Discover everything about resin art with our comprehensive FAQs. Learn techniques, materials, and tips to create stunning resin artwork today!
Air bubbles often occur during the mixing process. To minimize them, stir the resin slowly and thoroughly. After pouring, use a heat gun or torch to pop any surface bubbles. Avoid holding the torch too close to prevent scorching the resin.
While a hairdryer can be used to pop small bubbles, it’s not as effective as a heat gun or torch, which provide more targeted heat. Additionally, a hairdryer might blow dust into your resin.
Liquid latex is applied to the underside of the coaster to prevent resin from dripping and sticking to the bottom during the top-coating process. Once cured, the latex peels off easily, leaving the underside clean.
A top coat enhances the shine and durability of resin coasters, making them heat-resistant and adding a professional, glossy finish. If you skip this step, your coasters may not withstand high heat or heavy use.
Improper curing can result from incorrect mixing ratios or insufficient mixing time. Always measure resin and hardener accurately and mix for the recommended time to ensure thorough blending.
Yes, you can use acrylic paint to color resin, but it may not produce the same depth and vibrancy as pigment pastes. Acrylic paint can also affect the resin’s curing process, so use it sparingly.
Allow the resin to harden in the mixing cups, then peel or scrape it out. Washing the tools with soap and water afterward can help remove any remaining residue.
A 2:1 ratio requires two parts resin to one part hardener, while a 1:1 ratio means equal parts of both. Always follow the specific instructions on your resin packaging to ensure proper curing.
No, resin releases fumes that can be harmful if inhaled. Always use a respirator mask, especially in poorly ventilated areas, to protect yourself from harmful chemicals.
Most resins can handle temperatures up to 70°C. However, if you want coasters that can endure higher heat (like from a hot coffee cup), you'll need to apply a heat-resistant top coat.


