Rug tufting is an increasingly popular craft, allowing people to make beautiful, customized rugs from scratch. Whether you are a beginner or someone with a bit of experience, this tutorial will walk you through everything you need to know, from setting up your workspace to the final touches on your rug. By the end, you'll be ready to start tufting your own masterpieces.
What Is Rug Tufting?
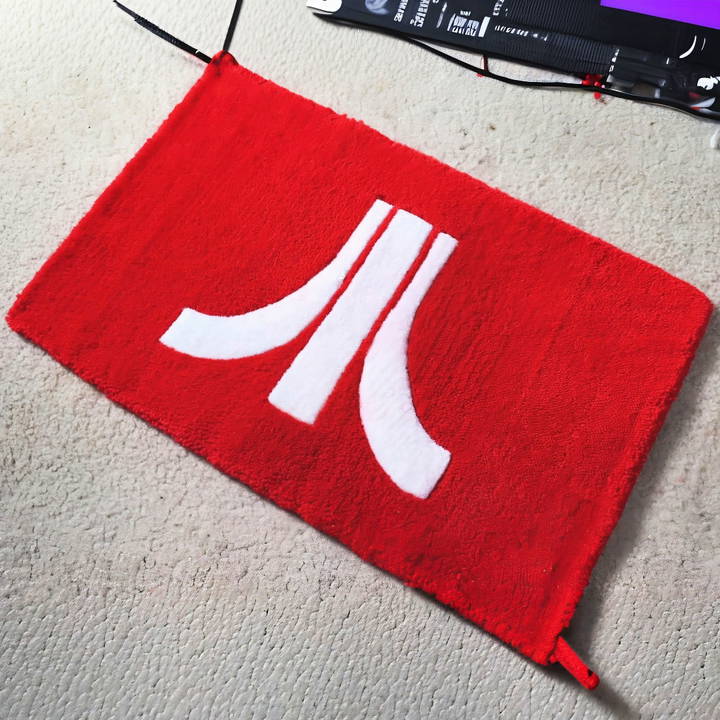
Rug tufting involves pushing yarn through a fabric backing to make a dense, fluffy pile, forming the soft surface of a rug. It's a rewarding process, offering a blend of art and craftsmanship, and can be done with basic tools like a tufting gun, yarn, and a frame. The beauty of tufting is that it allows you to make custom designs and textures that match your personal style.
Let's break down the key steps to help you get started.
Step by Step Instructions
Learn how to tuft a rug from start to finish with our step-by-step guide. From setting up the frame to turning your hobby into a business, we've got you covered.
1. Setting Up the Tufting Frame
The tufting frame is your workspace where the rug comes to life. It holds the fabric tightly, allowing you to easily work with the tufting gun.
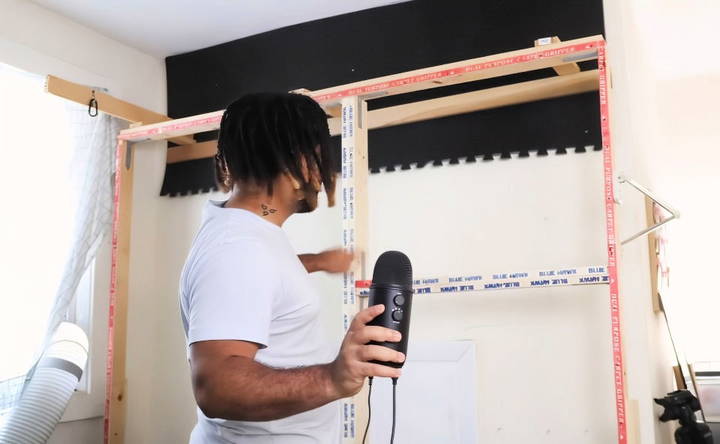
- Choosing a Frame: You can either build your own tufting frame or purchase one online. A DIY frame can be made using 2-inch thick wood to prevent bending over time. Make sure your frame is sturdy, and consider using L-brackets in the corners for added stability.
- Adding Carpet Holding Strips: Carpet holding strips, also known as tack strips, are essential as they grip the fabric tightly. Be careful, as these strips have sharp points, which help hold the fabric in place but can also be a hazard when handling.
2. Choosing and Attaching the Fabric
The type of fabric you use is critical to the success of your rug tufting project. The fabric acts as the foundation for your rug.
- Fabric Choices: Many beginners use Monk's cloth, a widely available fabric that works well for tufting. However, more experienced tufters may prefer other materials. One excellent option is a polyester fabric from Tough Stuff, which is durable and offers a sturdy base for more intricate designs.
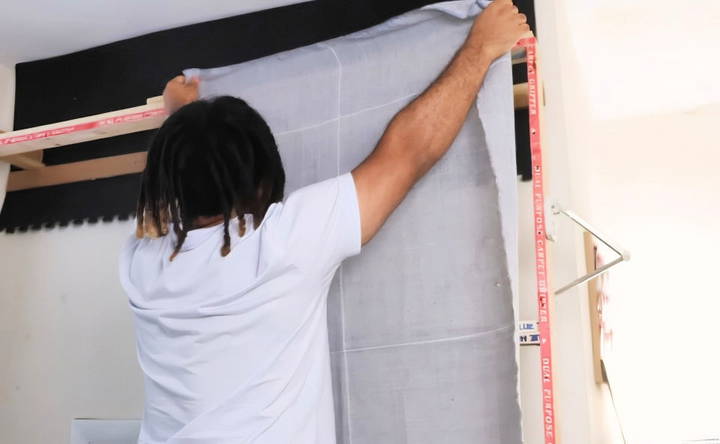
- Attaching the Fabric to the Frame: When attaching the fabric, make sure it is stretched tightly over the frame. This is crucial to ensure a smooth tufting process. You should have at least 2 inches of excess fabric on each side to make it easier to pull and secure the fabric to the tack strips. The fabric should feel taut when pressed, and when you tap it, it should bounce back slightly.
3. Projecting Your Design
Once the fabric is in place, it's time to project your design onto the fabric. This step is essential for ensuring accuracy in your rug pattern.
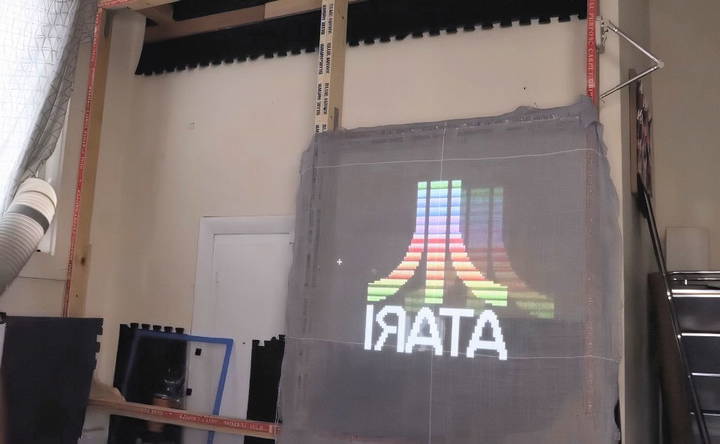
- Using a Projector: Set up a projector to cast your design onto the fabric. Position the projector about 4-5 feet from the frame, ensuring the design is clearly visible and properly aligned. It's also important to flip the image horizontally before tracing it onto the fabric. You can do this easily with most photo viewing apps.
- Tracing the Design: Use a marker to outline the design onto the fabric, ensuring you have enough space for the entire pattern. If you're making a square rug, measure and mark out the exact dimensions you want. Be sure to label the different areas of the design to keep track of your color scheme, especially if you're working with multiple shades.
4. Choosing Yarn for Tufting
The type of yarn you use will define the texture and look of your rug. Selecting the right yarn is essential for both aesthetics and durability.
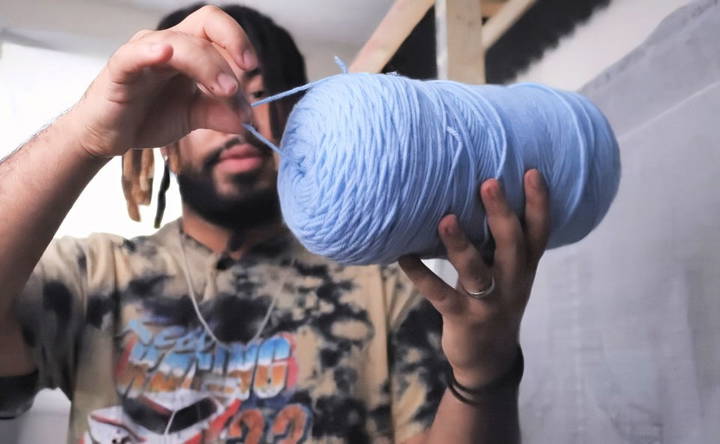
- Yarn Materials: Acrylic yarn, like Red Heart yarn, is a popular choice among tufters. It is affordable, comes in various colors, and is soft yet durable enough for rug-making. Wool is another option, though it tends to be pricier.
- Yarn Colors and Quantities: Depending on the complexity of your design, you'll need multiple colors of yarn. It's always a good idea to buy extra, especially if you're using double strands, as you don't want to run out halfway through your project. Additionally, using two strands of yarn at once can give your rug a fuller and denser texture.
5. Understanding the Tufting Gun
The tufting gun is the tool that pushes the yarn through the fabric, making the pile of the rug. There are two main types of tufting guns: cut pile and loop pile.
- Cut Pile vs. Loop Pile: The cut pile gun cuts the yarn after it's pushed through the fabric, giving the rug a more traditional, fluffy appearance. In contrast, the loop pile gun leaves the yarn in continuous loops, making a more textured surface.
- Using the Tufting Gun: Start by threading the yarn through the gun. You can use one or more strands depending on the thickness you want for your rug. When working with the tufting gun, it's crucial to find the right balance between speed and control. For beginners, keeping the speed setting on the lower side helps maintain accuracy and avoids missed sections on the fabric.
6. Tufting Techniques and Best Practices
Now that your fabric is ready and your yarn is set up, it's time to start tufting!
- Proper Handling of the Tufting Gun: Hold the tufting gun steady, making sure the needle is pressed firmly against the fabric. The key to successful tufting is maintaining consistent pressure and allowing the gun to glide smoothly across the fabric. Avoid pushing the gun too forcefully, as this can lead to uneven yarn placement.
- Maintaining Consistent Pile Height: If you're going for a uniform look, make sure the tufting gun's speed and pressure remain constant throughout the process. When moving in curves or tight spaces, slow down the gun to prevent it from skipping areas. If the yarn skips sections, the rug will appear less dense and the underlying fabric may show through.
- Correcting Mistakes: It's easy to make small errors when tufting, especially as a beginner. If the yarn skips or you notice uneven sections, don't panic. You can always go back and re-tuft the area to fix gaps in the pile.

7. Caring for Your Tufting Gun
To ensure your tufting gun remains in good working condition, regular maintenance is essential.
- Cleaning the Gun: After every tufting session, clean off any yarn particles and dust that may have accumulated. The tufting gun should also be lubricated periodically to prevent wear and tear.
- Speed Adjustments: Depending on the design complexity, adjust the tufting gun's speed. For detailed work like curves, a slower speed allows for greater control. On larger sections, you can increase the speed to cover more area quickly.
8. Applying Glue to the Rug Backing
Once you've finished tufting the rug, the next important step is to secure the yarn in place with glue. This prevents the yarn from pulling out and gives the rug added durability.
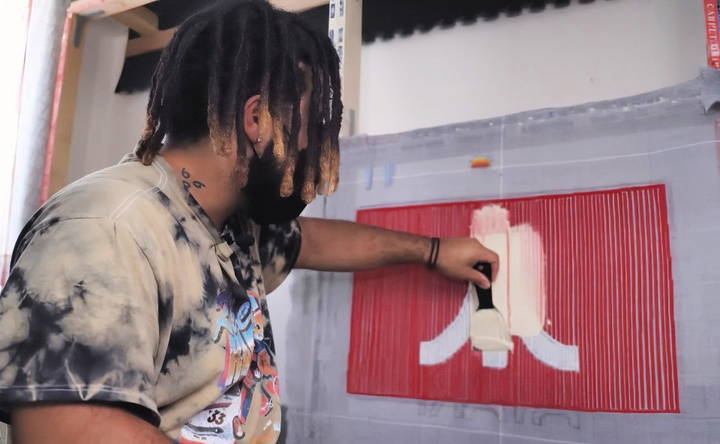
- Choosing the Right Glue: You will need a strong adhesive specifically designed for carpets. A highly recommended option is Roberts 3000 Carpet Adhesive, available at most hardware stores like Home Depot or Lowe's. This glue is tacky when it dries, allowing you to fold the edges of the rug neatly without needing additional adhesive.
- Applying the Glue: Use a spatula or your hand (with gloves on) to spread the glue evenly across the back of the rug. Ensure the glue gets between the layers of yarn to hold them securely. Avoid letting the glue glob up in any one area, as this can affect the rug's flexibility.
- Drying Time: After applying the glue, allow it to dry for 12 to 48 hours, depending on the size of the rug and the type of glue used. The rug should feel tacky but not wet once the glue is fully dry.
9. Cutting and Preparing the Edges
Once the glue has dried, it's time to cut out the rug from the excess fabric attached to the frame. This step will give your rug a clean and professional finish.
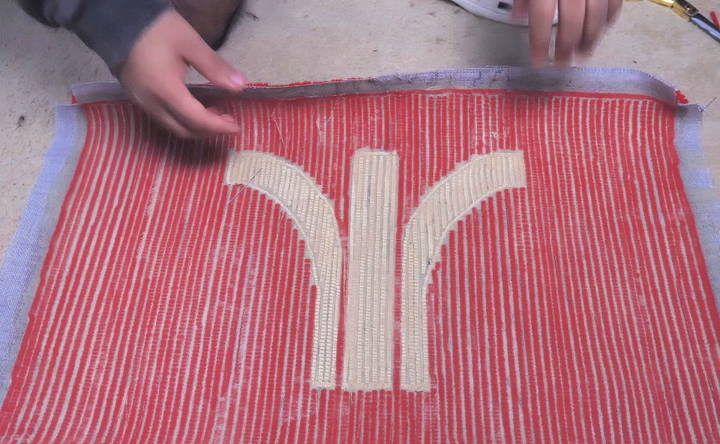
- Cutting the Excess Fabric: Use sharp scissors to cut around the edge of the rug, leaving about an inch of fabric around the perimeter. This extra fabric will be folded over and glued to the back, helping to make a smooth, finished edge.
- Folding the Edges: After cutting, fold the excess fabric over the glued yarn backing. Because the glue remains tacky after drying, the fabric should stick in place without the need for additional adhesive. Make sure to press the fabric down firmly to avoid any lifting over time.
10. Attaching the Backing Fabric
To give your rug a professional and non-slip finish, you'll want to attach a backing fabric. This will also help protect the yarn and extend the life of your rug.
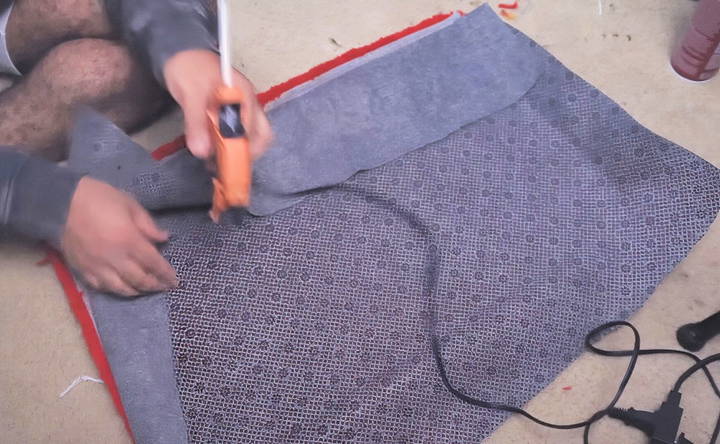
- Choosing a Backing Fabric: A non-slip backing is ideal for rugs, especially if they will be placed on hardwood or tile floors. Many tufters recommend a nonslip fabric, which can be purchased online or at fabric stores. This type of fabric will prevent the rug from sliding around, making it safer for use in high-traffic areas.
- Attaching the Backing: First, lay the backing fabric over the rug and trim it to size, leaving about an inch of overhang on all sides. Once you have the fabric positioned, use a hot glue gun to attach it securely. Apply the glue slowly along the edges, making sure to avoid getting it on the yarn itself.
- Using Spray Adhesive: After securing the edges with hot glue, you can further adhere the backing to the rug by using a spray adhesive like 3M Super 77 Spray Adhesive. This provides an additional layer of adhesion and ensures the backing stays in place long-term. Be sure to apply the spray adhesive in a well-ventilated area, wearing a mask to avoid inhaling fumes.
11. Trimming and Detailing the Rug
Now that your rug is securely backed, it's time to focus on the final details. Trimming and shaping the pile of your rug is crucial for achieving a polished, professional look.
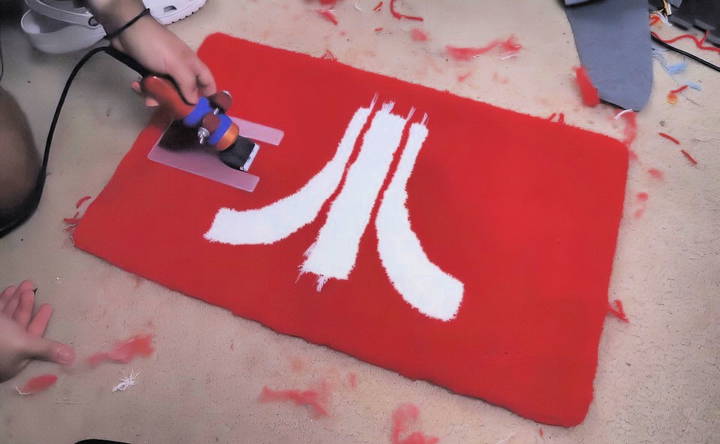
- Shaving the Rug: The pile of your rug will likely be uneven after tufting, so shaving it down is necessary. For smaller rugs, a handheld shaver or clipper can be used. Many tufters recommend the Beetro Sheers for larger rugs, as they are more efficient for covering wide areas.
- Using a Guide for Precision: When shaving the rug, use a guide to ensure consistent pile height. This can be a pre-made guide or one you make yourself from materials like plexiglass. The guide will help prevent you from accidentally shaving off too much yarn, which could ruin your design.
- Starting from the Center: It's best to start shaving in the center of the rug and work your way outward. This ensures you don't accidentally miss any areas, and it allows for better control as you move along the edges.
- Using Scissors for Detailing: After shaving the rug, you'll want to go over the finer details with scissors. Duckbill scissors are ideal for this task, as they allow you to trim around curves and corners with precision. When detailing, push the yarn in one direction and snip away any uneven or stray fibers. Work slowly to avoid cutting too much at once.
12. Final Touches and Labeling
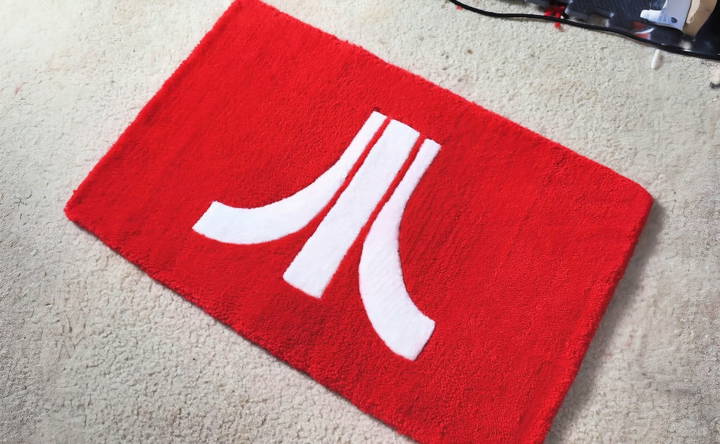
To truly finish your rug, consider adding a personal touch, such as a custom label, and ensure the rug looks clean and polished.
- Adding a Label: If you plan to sell your rugs or just want to add a personal flair, you can attach a custom label to the back of the rug. These labels can be ordered online, and they give your rug a professional, finished look. To attach the label, simply peel off the backing and press it onto the rug.
- Vacuuming and Cleaning: After all the shaving and trimming, your rug will likely have loose fibers scattered across its surface. Use a handheld vacuum to clean the rug, ensuring all stray pieces are removed. This will also help fluff up the pile, making your rug look fuller and more polished.
13. Turning Your Hobby Into a Business
Once you've mastered the art of rug tufting, you might be interested in turning it into a business. Custom rugs are highly sought after, and with the right marketing and craftsmanship, you can turn your hobby into a profitable venture.
- Pricing Your Rugs: When pricing your rugs, consider the cost of materials, time spent, and the complexity of the design. Many tufters also take into account the cost of shipping if they plan to sell their rugs online. Offering custom designs can also allow you to charge more for bespoke work.
- Marketing Your Work: Social media is an excellent platform for showcasing your work. Instagram, Etsy, and Pinterest are popular channels where tufters share their creations and attract customers. Posting behind-the-scenes content, showing the tufting process, or offering tutorials can help you engage with your audience and build a following.
Final Thoughts
Rug tufting is a fun and creative way to make custom home decor. With the right tools, materials, and techniques, you can make beautiful, one-of-a-kind rugs that are not only practical but also a form of art. Whether you're tufting for fun or looking to sell your creations, following this guide will ensure you get great results every time.
By carefully following the steps for setting up your frame, tufting with precision, and finishing your rug with attention to detail, you'll have a finished product that you're proud of. So grab your tools, start practicing, and enjoy the process of making your very own tufted rug!
FAQs About Rug Tufting
Discover answers to all your questions about rug tufting, including tools, techniques, and tips for making beautiful hand-tufted rugs.
Ensure the fabric is tightly stretched over the frame. If the gun is tearing the fabric, avoid pushing it too hard—let the gun glide naturally through the fabric. Testing on a small section first can help you get a feel for the right pressure.
Always work in a well-ventilated space and wear a proper vapor mask, not just a dust mask. Adhesive fumes require a mask with a carbon filter to prevent inhaling harmful chemicals.
Most tufters recommend using a 4-ply acrylic yarn like Red Heart yarn for a balance of texture and durability. If you want a thicker rug without using multiple strands, opt for a thicker yarn.
Your yarn may be too tightly wound or not properly aligned with the gun. Try adjusting the tension or using a yarn winder to reduce tangling. Ensuring the yarn is fed smoothly into the gun will prevent it from jamming.
If you shave a section too short, try trimming the surrounding areas to match, making the error less noticeable. For significant mistakes, you may need to re-tuft the area to even it out.
It's rare, but if you're pulling so tightly that the fabric starts to rip, it's too tight. The fabric should feel taut without showing signs of stress or tearing.
Visible holes typically appear if the fabric isn't stretched tight enough or if you're tufting too loosely. Make sure the fabric is secure and that the tufting gun is moving at a consistent speed to fill in gaps.
Applying glue properly after tufting is crucial. Make sure the glue reaches between the yarn fibers and allow adequate drying time to secure the yarn. Avoid pulling on the yarn before the glue has set.


