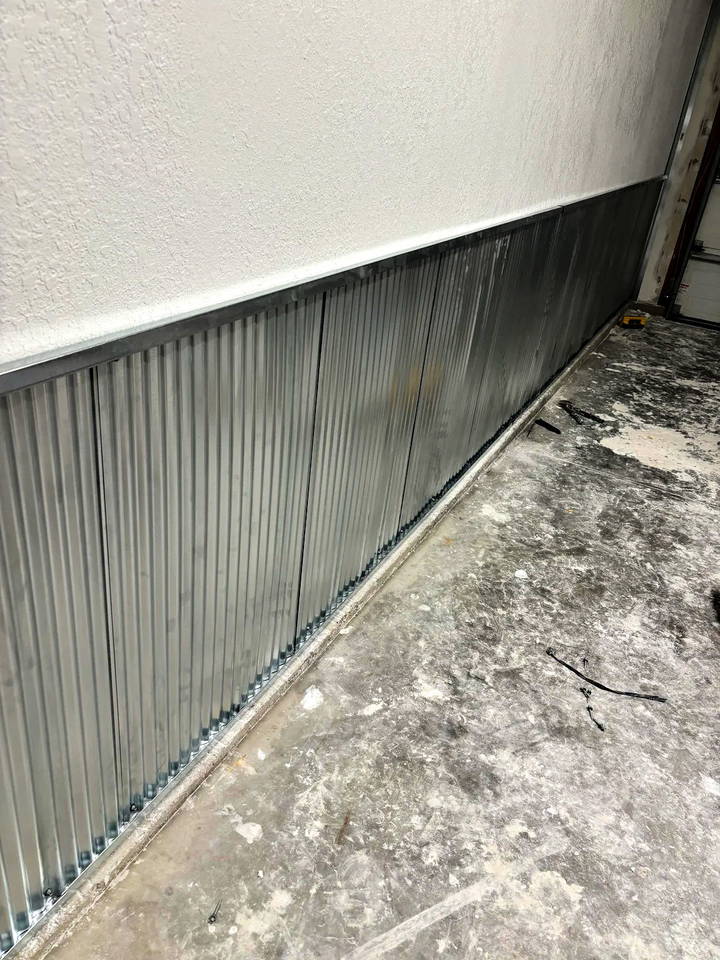
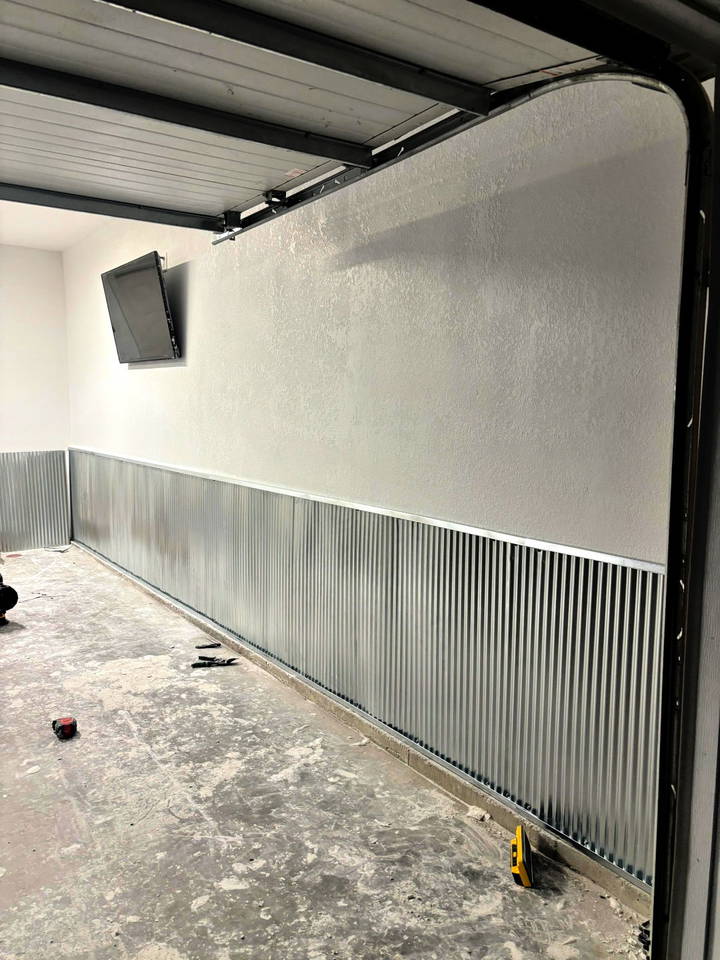
When working with corrugated metal wall panels, sealing gaps between the sheets can be a challenge. These gaps are often a common concern among homeowners who use corrugated metal for interior or exterior projects. The gaps can be particularly noticeable when the metal overlaps are not perfectly aligned or tightly secured. If you're facing this problem, don’t worry! I’ve been there too, and through trial and error, I’ve gathered some effective methods to seal those gaps and improve the overall appearance of your corrugated metal walls.
Why Sealing Gaps in Corrugated Metal Panels is Important
Before diving into the methods, let’s quickly go over why sealing these gaps is crucial:
- Aesthetic Improvement: Unsightly gaps can make a finished space look unfinished or sloppy. Sealing these gaps enhances the look, making the panels appear seamless and professionally installed.
- Preventing Dust and Debris Accumulation: Open gaps can trap dust, dirt, and even pests over time, especially in areas like garages or workshops where these elements are prevalent.
- Moisture and Weather Protection: In outdoor settings, gaps can let in rain, leading to potential rusting and deterioration of the panels.
With that in mind, let’s explore some methods to effectively seal these gaps.
Methods to Seal Gaps in Corrugated Metal Wall Panels
There are several ways to address gaps in corrugated metal wall panels, depending on the tools and materials you have available and your specific needs for durability and aesthetics.
1. Using Caulk or Sealant
Caulk or sealant is one of the easiest and most versatile options for sealing gaps in corrugated metal panels. Here’s how to do it effectively:
- Choose the Right Caulk: For metal panels, a silicone-based caulk like Dow Corning 832 or a sealant specifically designed for galvanized metal is ideal. These products are weather-resistant and adhere well to metal surfaces.
- Apply the Caulk Neatly: Use painter's tape on either side of the seam to create a clean line. Apply a bead of caulk along the gap, and smooth it out with a caulking tool or your finger. Remove the tape while the caulk is still wet to prevent any uneven edges.
- Allow to Cure: Follow the manufacturer's instructions for drying time. This is crucial for ensuring the caulk adheres properly and provides a long-lasting seal.
- Paint Over if Needed: If the caulk doesn’t match the metal, you can paint over it to blend in with the rest of the panels.
Pro Tip: Always test the caulk on a small section to ensure it cures properly without discoloring or damaging the metal.
2. Using Rivets to Tighten Seams
Rivets can be an excellent solution for those who want a more industrial look while effectively sealing gaps.
- Select Appropriate Rivets: Use small rivets and a rivet gun to secure the seams. Rivets pull the panels tightly together, minimizing the gaps.
- Drill Holes Carefully: Drill holes evenly along the seam where you want to place the rivets. The spacing can be about 1 to 2 inches apart, depending on how tight you want the panels to be.
- Install the Rivets: Insert the rivets into the holes and secure them using a rivet gun. This not only closes the gaps but also reinforces the structure.
- Finish and Paint: If the rivets stand out too much against the metal, you can spray paint them to match the panels for a seamless look.
Pro Tip: Consider using contrasting rivet colors for a unique aesthetic that turns the seams into a design feature rather than a flaw.
3. Applying Metal Strips or Trim
For a more polished and traditional finish, you can use metal strips or trim to cover the seams between panels.
- Choose Metal Strips: Opt for strips that match or complement your metal panels. You can find these at most hardware stores.
- Measure and Cut: Measure the length of the gaps and cut the metal strips to size.
- Attach the Strips: Secure the strips using small screws, construction adhesive, or double-sided heavy-duty tape like 3M VHB tape. Make sure the strips are aligned properly for a professional look.
- Finishing Touches: For added protection and a cleaner appearance, paint or seal the trim to match the surrounding panels.
Pro Tip: Installing trim can also hide any imperfections in the alignment of the panels, making it a great option for those who want a cleaner look without the hassle of readjusting the panels.
4. Using Foam Backer Rod and Adhesive
Foam backer rod and adhesive is a lesser-known but highly effective method to seal gaps in corrugated metal panels.
- Select the Right Size Foam Rod: Choose a foam backer rod that fits snugly in the gap. The rod should be slightly larger than the gap to stay in place.
- Insert the Foam Rod: Push the foam rod into the gap, ensuring it fills the space evenly.
- Apply Construction Adhesive: Use a strong construction adhesive to secure the foam rod in place. This will help hold the panels together and reduce movement that could cause gaps to reopen.
- Seal the Edges: Apply a bead of caulk or sealant over the foam rod for added durability and to create a finished look.
Pro Tip: This method works well for larger gaps and provides excellent insulation, making it a good option for both aesthetic and functional purposes.
5. Overlapping the Panels Correctly
Sometimes, the problem with gaps is due to improper panel installation. If possible, repositioning and overlapping the panels can eliminate gaps.
- Check the Overlap Direction: Corrugated panels should overlap so that the exposed edge is less visible from the most common viewing angle.
- Reinstall Panels: If the gaps are too noticeable, consider removing the panels and reinstalling them with a greater overlap. This might involve trimming the panels slightly to create a better fit.
- Secure Properly: Ensure each panel is tightly secured with screws at the overlaps and on the studs to prevent gaps from forming.
- Finishing Touches: For additional security, you can use adhesive or sealant on the overlaps to keep them in place.
Pro Tip: Overlapping panels correctly from the start saves a lot of time and effort in fixing gaps later.
Final Thoughts
Sealing gaps in corrugated metal wall panels doesn’t have to be a daunting task. Whether you prefer using caulk, rivets, metal strips, foam backer rods, or simply reinstalling the panels, there’s a method that suits your needs and aesthetic preferences. The key is to choose the right technique based on the size of the gaps and the overall look you’re going for.
Remember, every DIY project involves a bit of trial and error. Don’t be afraid to try different methods to find the one that works best for you. With the right approach, you can turn those pesky gaps into a seamless finish that enhances the beauty and functionality of your corrugated metal wall panels.
Frequently Asked Questions About Sealing Gaps in Corrugated Metal Wall Panels
When dealing with corrugated metal wall panels, there are often specific questions that arise about how to handle gaps, the best methods to use, and what to do in unique scenarios. Below is a concise FAQ section that addresses these common concerns and provides additional details to enhance your project.
1. What if I don’t want to use rivets or screws to close the gaps?
If you prefer not to use rivets or screws, there are other effective options to consider:
- Construction Adhesive: You can use a strong construction adhesive like Loctite Power Grab. Apply it along the seams and use weights or clamps to hold the panels together while the adhesive cures. This method avoids drilling holes and keeps the metal surface intact.
- Double-Sided Tape: Heavy-duty double-sided tape, such as 3M VHB tape, can be a good alternative. It’s strong, durable, and provides a clean look without visible fasteners. Ensure the surface is clean and dry before applying the tape for maximum adhesion.
2. How can I prevent dust and debris from accumulating in the gaps?
To keep gaps clean and free from dust or debris, you can:
- Use Foam Inserts: Place foam inserts (like backer rods) in the gaps before sealing them with caulk or adhesive. The foam fills the space and helps block dust, dirt, and even insects from getting inside.
- Seal with Caulk: Applying a neat bead of caulk over the gaps after inserting foam or backing material will create a more airtight seal, reducing the chances of debris accumulation.
3. Can I paint over the sealed seams to make them less noticeable?
Yes, painting over the seams can be an effective way to blend them with the rest of the panels:
- Choose the Right Paint: Use a paint that matches the color and finish of your metal panels. Metallic or enamel paints often work well for corrugated metal surfaces.
- Apply After Sealing: Once you’ve sealed the gaps with caulk, rivets, or other methods, and they are fully cured, you can paint over them. This will help the seams look more integrated and less noticeable.
4. What should I do if the gaps are uneven or too wide?
If the gaps between your corrugated panels are uneven or too wide, you have a few options:
- Reposition the Panels: If possible, uninstall the panels and reinstall them with more overlap to close the gaps. This might require trimming some panels or adjusting the installation method.
- Use a Backing Strip: For wider gaps, you can use a strip of metal or wood to back the seam. This strip can then be painted to match the metal, providing a seamless look.
- Fill with Expanding Foam: In some cases, using low-expanding foam can help fill larger gaps before applying a finishing layer of caulk or trim.
5. Is it necessary to seal every seam on the corrugated metal panels?
Not necessarily. Sealing every seam depends on the purpose of the metal panels and the desired aesthetic:
- Aesthetic Choice: If the gaps are not visually bothersome and the panels are indoors where moisture isn’t an issue, you might choose to leave some gaps as part of an industrial or rustic aesthetic.
- Functional Requirement: In outdoor settings or areas prone to moisture or pests, sealing every seam can provide better protection against water leakage, rust, and insect intrusion.
6. How can I avoid creating a noticeable shadow line at the seams?
Shadow lines occur when light hits the seams from certain angles, making the gaps more noticeable:
- Adjust Lighting: Consider changing the direction of lighting or adding softer, diffused lighting to reduce harsh shadows on the metal.
- Overlap Correctly: Ensure the panels overlap in a way that directs shadows away from the most common viewing angles.
- Install Trim Pieces: Adding trim pieces over the seams can not only hide gaps but also create a more uniform appearance that reduces visible shadow lines.
7. Can I use LED lighting to improve the look of the seams?
Yes, adding LED lighting can be a creative way to enhance the look of corrugated metal panels:
- Install LED Strips in Seams: Running LED light strips along the seams can create a unique design feature, drawing attention away from the gaps.
- Diffuse the Light: Use a diffusing cover to soften the light and avoid casting strong shadows that might emphasize the seams.
8. What should I consider if using corrugated metal panels for an entertainment space?
When using corrugated metal panels in an area that doubles as an entertainment space, consider these tips:
- Add Decorative Elements: Cover the seams with decorative metal strips or trim that complement the design of the room.
- Balance with Other Materials: Introduce wood, fabric, or softer materials to offset the industrial look of metal and create a warmer atmosphere.
- Focus on Functionality: Ensure that the panels are securely fastened and that any gaps are sealed to avoid any safety concerns, especially if the space will be frequently used.
9. How do I know if my corrugated panels are installed correctly to avoid gaps?
Proper installation is key to minimizing gaps:
- Follow Overlap Guidelines: Ensure that panels are overlapped correctly with at least one ridge, and that the seams are aligned properly.
- Secure with Appropriate Fasteners: Use screws or rivets at appropriate intervals along the seams to pull panels tightly together.
- Check Alignment Regularly: As you install each panel, check that it is level and aligned with the adjacent panel to avoid cumulative errors that can result in uneven gaps.
10. Can using caulk or adhesive affect the metal panels in the long run?
Yes, improper use of caulk or adhesive can affect metal panels over time:
- Select Compatible Products: Use caulk or adhesive specifically designed for metal surfaces to prevent chemical reactions that could cause discoloration or damage.
- Test Before Full Application: Always test a small, inconspicuous area to see how the metal reacts to the adhesive or caulk over time.
- Monitor for Maintenance: Periodically check the sealed seams for any signs of degradation, especially in outdoor settings where weather can take a toll.


