Building a DIY solar panel pergola is a practical and eco-friendly way to generate renewable energy while adding functionality and beauty to your outdoor space. This guide provides a step-by-step approach, covering planning, materials, construction, and assembly, all drawn from a budget-friendly DIY build.
What Is a Solar Panel Pergola?
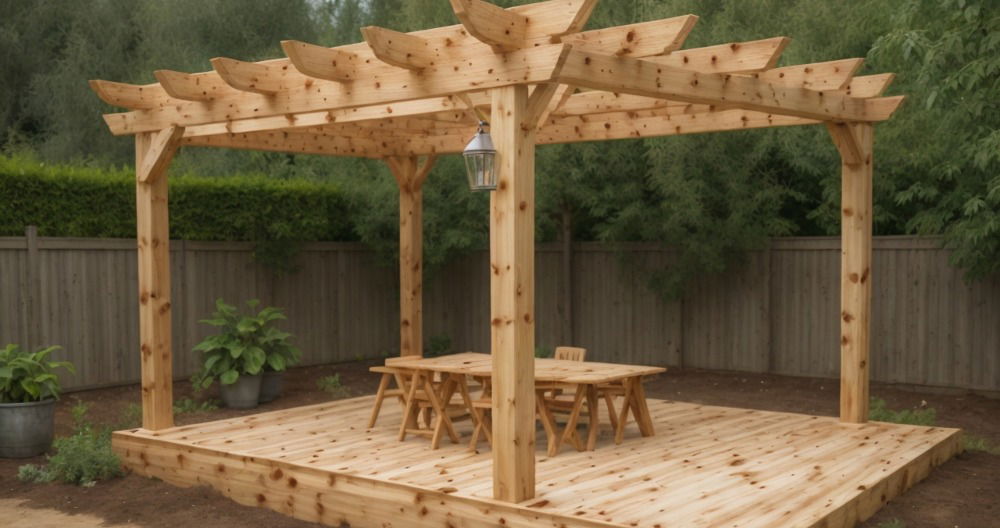
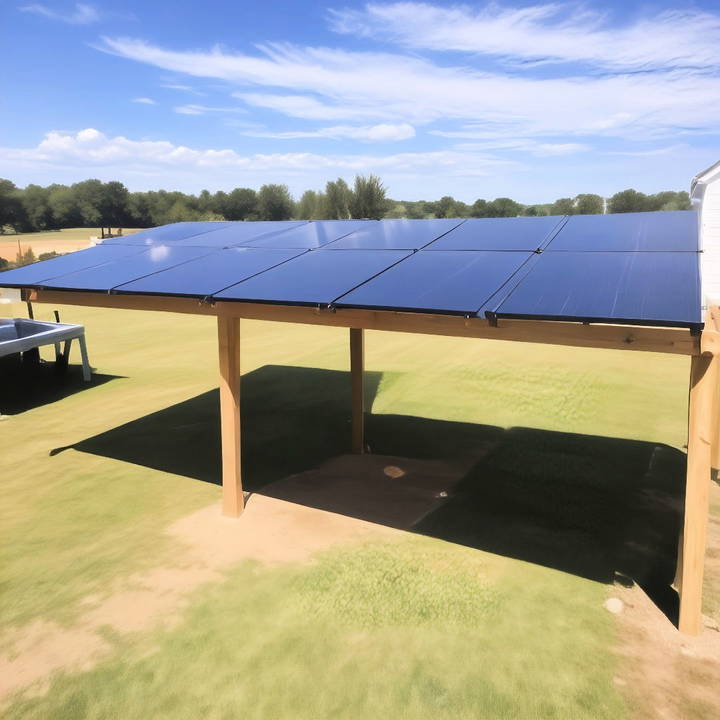
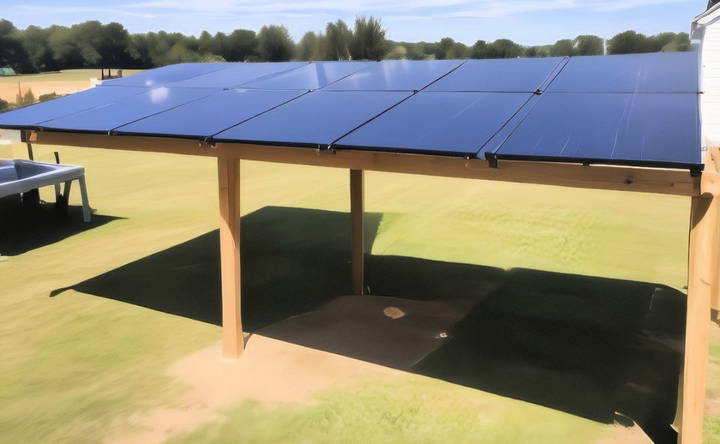
A solar panel pergola is a structure combining the utility of a pergola with the benefits of solar energy. Instead of traditional roofing, solar panels act as the pergola's roof, providing shade and generating electricity simultaneously. This dual-purpose design makes it a favorite among sustainability enthusiasts.
Planning Your Solar Panel Pergola
Plan your solar panel pergola with expert tips on purpose, location, budgeting, and the right tools and materials for success.
Determine the Purpose
- Will it act as a shelter, outdoor dining space, or carport?
- Consider factors like shade, energy needs, and aesthetics.
Evaluate Location
- Choose a sunny spot with minimal obstructions like trees or buildings.
- Ensure easy access for installation and maintenance.
Budgeting
- Aim for a cost-effective build, as demonstrated by this project costing approximately $400.
- Decide on the quality and type of materials depending on your budget.
Tools and Materials
Key tools and materials for this project include:
- Lumber: 4x4s, 4x6s, and 2x6s for framing.
- Fasteners: Screws, bolts, and Simpson Strong-Tie connectors.
- Solar panels: Choose bifacial panels like the Sirius 415-Watt panels.
- Foundation: Concrete for stability.
- Rivet nut tools for panel assembly.
Gathering Supplies
Gather essential supplies for your solar panel pergola, including lumber, fasteners, mounting kits, and concrete for a solid foundation.
Lumber and Structural Parts
- Quantities: 2x 4x4x10s
- 2x 4x4x12s
- 1x 4x6x10
- 1x 4x6x12
- 7x 2x6x10s
- 4x 2x6x12s
- Purpose: To build the pergola's framework.
Fasteners
- Carriage bolts, flat washers, and hex nuts for structural integrity.
- Exterior screws and Simpson Strong-Tie brackets for secure assembly.
Solar Panel Mounting
- Panels connected using rivet nuts and screws, ensuring durability against elements.
Concrete
- Purpose: Securing posts in the ground.
- Quantity: 6 bags, enough for six posts.
Step by Step Instructions
Discover how to build, install, and optimize a solar panel pergola for energy efficiency, low maintenance, and lasting benefits with step-by-step tips.
1. Building Your Solar Pergola Framework
Build your solar pergola framework with steps for installing posts and adding crossbeams to build a sturdy structure.
Digging and Installing Posts
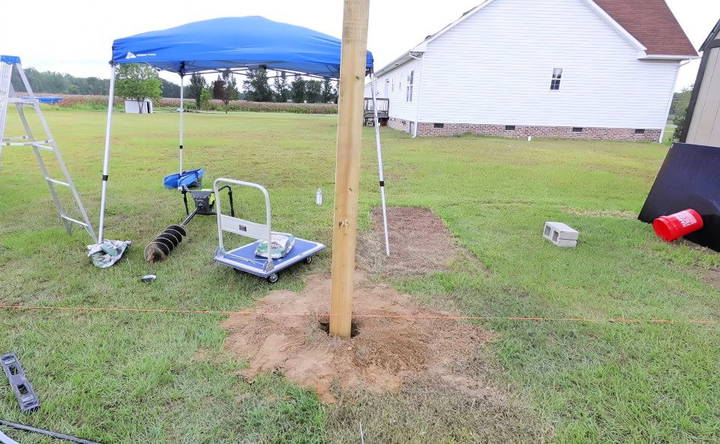
- Preparation: Dig holes approximately 3–3.5 feet deep.
- Installation: Place 4x4 and 4x6 posts in holes.
- Use a level and string line to ensure alignment.
- Fill holes with concrete and let it cure.
Adding Crossbeams
- Attach 2x6x12s across the front and back posts.
- Use Simpson Strong-Tie brackets for support.
- Ensure beams are level and properly secured with bolts.
2. Solar Panel Assembly
Assemble your solar panels with tips on framing, testing rivet nut strength, and adjusting for stability to ensure a secure setup.
Understanding Panel Framing
- Panels like Sirius 415-Watt models often have dual-layer metal frames, making direct connection challenging without additional reinforcement.
Testing Rivet Nut Strength
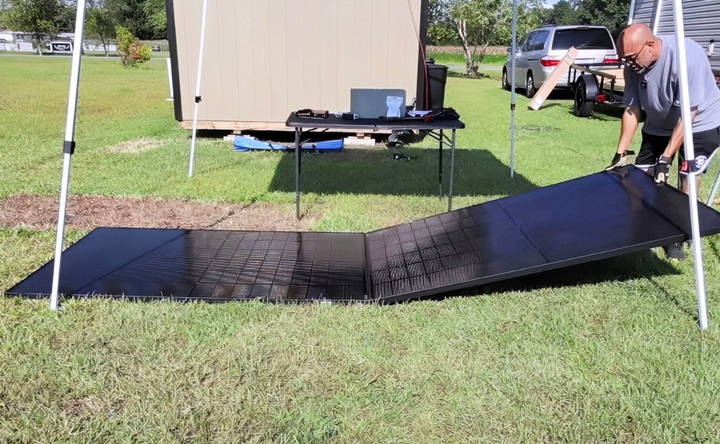
- Drill holes into panel frames.
- Use rivet nuts to attach panels together.
- Conduct flex tests to ensure structural stability.
Adjusting for Stability
- Add additional 2x6 beams between the front and back posts to reduce flexing.
- Reinforce connections with extra bolts for added durability.
3. Installing Solar Panels
Install solar panels with step-by-step guidance on mounting and wiring to ensure a secure and efficient setup.
Mounting Panels
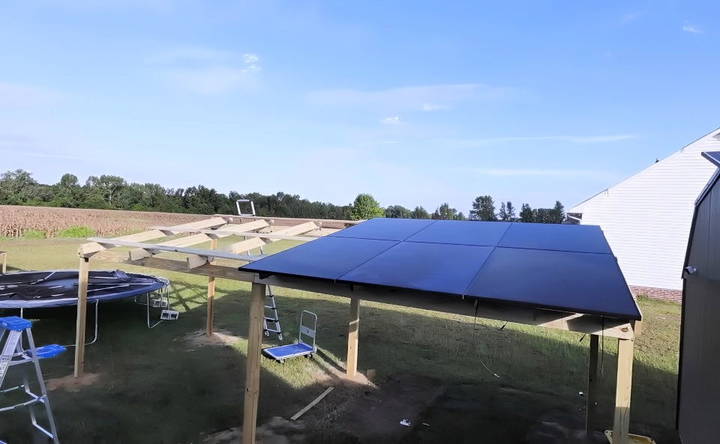
- Place panels on crossbeams.
- Secure with screws through the frames into the beams.
- Maintain proper spacing to maximize sunlight exposure on bifacial panels.
Wiring
- Connect panels in series for efficient power generation.
- Use MC4 connectors for secure wiring.
- Test voltage and ensure connections are correct before powering your system.
4. Budget Breakdown
This DIY pergola cost approximately $400, including:
- Lumber: ~$200
- Fasteners: ~$50
- Solar panels and mounting materials: ~$150
- Concrete: ~$20
The build demonstrates a cost-effective approach while maintaining functionality and durability.
5. Optimizing Solar Panel Performance
To maximize the efficiency of your solar panel pergola, it's essential to consider the setup and environmental factors. Here's how:
Proper Panel Orientation
- Direction: Align the panels to face the sun's path. For most locations in the Northern Hemisphere, this means a south-facing orientation.
- Tilt Angle: Adjust the tilt angle based on your location's latitude to capture maximum sunlight year-round.
Spacing and Ventilation
- Gap Between Panels and Beam: Maintain a small gap between the panels and support beams to allow airflow. This reduces heat buildup, which can decrease panel efficiency.
- Avoid Shading: Ensure that no trees or other structures cast shadows over the panels, especially during peak sunlight hours.
Reflective Surface for Bifacial Panels
- To enhance the output of bifacial panels like the Sirius 415-Watt models:
- Use reflective surfaces beneath the pergola, such as white gravel or light-colored decking.
- This increases the light reflected onto the underside of the panels, improving energy generation.
Wiring Configuration
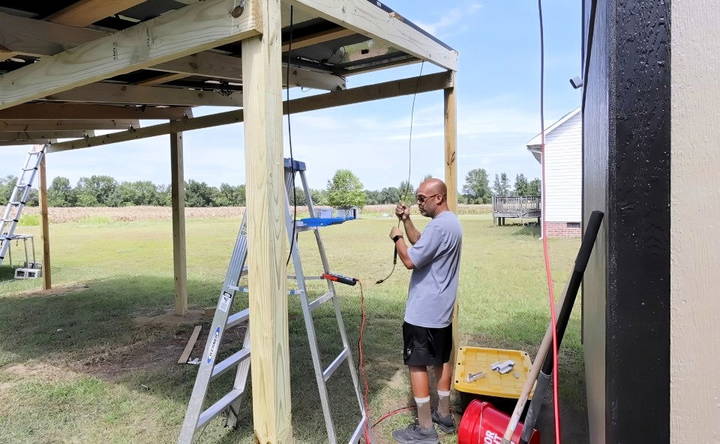
- Connect panels in a series to maintain consistent voltage across the system.
- Use proper wire management techniques to prevent damage and maintain neatness.
6. Energy Output and Efficiency
Once the panels are installed, testing and monitoring are key to ensuring optimal performance.
Testing the System
- Voltage Check: Use a multimeter to confirm the total voltage output of the panels before connecting them to the inverter.
- Initial Power Output: Track the wattage generated under different weather conditions. For this project:
- Peak output reached 4,158 watts across 12 panels (approximately 346 watts per panel).
- Cloud cover and ambient temperature impacted performance, demonstrating real-world variability.
Improving Efficiency
- Reflective Enhancements: Installing reflective material beneath the pergola can potentially boost output by 10–15%.
- Seasonal Adjustments: Revisit the tilt angle during different seasons to match the sun's changing trajectory.
7. Maintenance Tips for Longevity
Solar panel pergolas are low-maintenance structures, but regular care can ensure long-term efficiency and durability.
Solar Panel Maintenance
- Cleaning: Dust and debris can block sunlight. Clean panels with a soft brush and soapy water every few months.
- Inspection: Check for cracks or loose connections periodically.
Structural Maintenance
- Wood Treatment: Apply weather-resistant sealant to protect the wooden structure from moisture and rot.
- Fasteners: Tighten screws and bolts as needed, especially after storms or high winds.
Electrical System
- Ensure that wiring and connectors are securely fastened and not exposed to the elements.
8. Benefits of a Solar Panel Pergola
This project not only provides renewable energy but also offers additional perks:
Cost Savings
- The DIY approach brought the total cost to approximately $400, significantly lower than professionally built pergolas.
- Generates free electricity, reducing utility bills over time.
Environmental Impact
- Harnesses solar energy, reducing reliance on fossil fuels.
- Promotes sustainable living practices.
Versatility
- Serves as a functional outdoor space for dining, relaxation, or working on projects.
- Can double as a carport or shelter for outdoor equipment.
Aesthetic Appeal
- Adds a modern and eco-friendly design element to your property.
- Enhances the value of your home or workspace.
9. Lessons Learned and Tips
- Adaptability Is Key: The initial design attempted to use the solar panel frames as the primary support, but this was not feasible due to structural limitations. Reinforcing the design with additional lumber ensured stability without a significant cost increase.
- Testing Before Finalizing: Conducting flex tests on panel connections revealed weaknesses early, allowing for adjustments.
- Budget Creativity: By using affordable materials like 2x6s and basic fasteners, the project remained cost-effective while achieving a durable build.
10. Potential Enhancements for Future Builds
- Smart Solar Technology: Integrate microinverters or power optimizers for each panel to monitor individual performance and increase efficiency.
- Weatherproofing: Install a transparent waterproof layer above the panels to make the pergola rainproof while maintaining sunlight exposure.
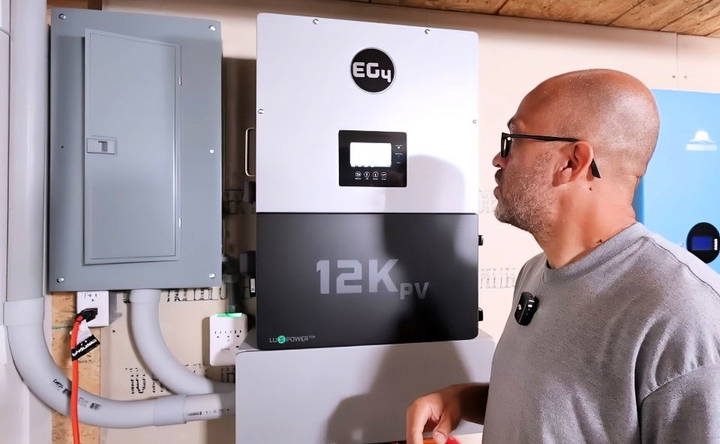
- Battery Storage: Pair the system with batteries like the EG4 12KPV or Lifepower 4 for energy storage, allowing you to use solar power even at night.
- Expandable Design: Build modular sections for easy expansion in the future, accommodating more solar panels or larger outdoor spaces.
Final Thoughts
A solar panel pergola is a cost-effective and innovative way to combine functionality with sustainability. The process described here demonstrates that even with minimal resources, it's possible to build a durable and efficient structure.
By following these steps and tips, you can embark on your own DIY solar panel pergola project, tailored to your specific needs and budget. Whether for energy savings, outdoor comfort, or environmental impact, this project is a rewarding venture.
So, are you ready to transform your outdoor space into a sustainable energy powerhouse? Start planning, gather your materials, and let your creativity lead the way!
FAQs About Building a Solar Panel Pergola
Get answers to common questions about building a solar panel pergola, from planning to installation and maintenance tips.
You’ll need basic construction tools, including a drill, rivet nut tool, level, tape measure, saw, and safety equipment. Specialized tools, such as MC4 connectors for wiring and a multimeter for testing, are crucial for solar panel setup.
Incorporate diagonal bracing for horizontal stability and secure posts with reinforced concrete footings at least 3 feet deep. Consider adding earth anchors or embedding metal mounting plates to enhance durability.
Yes, but it's not ideal. Pressure-treated wood can corrode aluminum frames over time. Use plastic spacers or galvanized brackets to separate materials and reduce long-term damage.
Allow a 6.5 mm (0.25 in) gap between panels to accommodate thermal expansion. This prevents frame warping or cracking during temperature fluctuations.
Install reflective surfaces, such as white gravel or radiant barriers, beneath the panels to boost the underside's energy capture. Avoid obstructions that cast shadows.
Yes, especially in areas prone to high winds. Add 45° braces between posts and beams to prevent racking and reinforce the structure.
To handle snow loads, increase the thickness of crossbeams (e.g., 2x10s) and add more support posts. A steeper tilt angle helps shed snow, but structural reinforcements are key for heavy snow areas.
Install a grounding rod and connect it to the panel frames using proper wiring. This ensures safety and compliance with electrical codes.
Permit requirements vary by location. Check with local city or county authorities to confirm regulations for solar installations and construction.
Pressure-treated lumber works well but requires sealing to prevent rot. Alternatively, metal options like steel or aluminum offer greater longevity and strength for larger setups.
Seal gaps between panels with caulk or waterproof strips. This makes the structure more suitable for rain-prone areas.
Yes! The pergola can double as a carport or provide shade for gardening. Raised garden beds under the structure can even improve bifacial panel efficiency by reflecting light and cooling the panels through plant transpiration.


