Starting seeds in egg cartons is a budget-friendly and eco-conscious way to begin your garden indoors. This simple technique not only allows you to reuse materials but also provides an easy way to organize, label, and manage your young plants until they're ready for transplanting. Here's an in-depth, step-by-step guide to starting seeds in egg cartons, covering everything you need to know to get started.
Why Use Egg Cartons for Seed Starting?
Egg cartons are ideal for starting seeds due to their compact design and biodegradable nature. Here are a few reasons why they work so well:
- Cost-Effective: Using egg cartons saves money that would otherwise be spent on seed-starting trays or pots.
- Eco-Friendly: Repurposing egg cartons reduces waste and can ultimately decompose in soil if you transplant directly.
- Easy Labeling and Organization: The compartments in egg cartons make it easy to keep seeds organized by type, while labeling sections allows for a clear record of each seed's location.
With these benefits in mind, let's dive into the materials and steps required to grow healthy seedlings in egg cartons.
Materials Needed
Before starting, gather the following materials:
- Egg Cartons: One or more egg cartons, either cardboard or plastic, will work. If using cardboard, it's easy to plant directly into the soil.
- Seed Starting Mix: Choose a light, well-draining mix designed specifically for starting seeds.
- Seeds: Any seeds of your choice will work for this method. Some popular choices include vegetables like broccoli, tomatoes, and cucumbers.
- Water Spray Bottle: Used for moistening the soil and seedlings without over-watering.
- Grow Light or Natural Sunlight: To support germination, especially if natural light is limited.
- Marker and Labels: For labeling the sections in your egg carton to avoid confusion about which seeds are in each compartment.
Step by Step Instructions
Learn how to start seeds in egg cartons with step-by-step instructions. From preparation to transplantation, nurture seeds to successful growth.
Step 1: Prepare the Egg Cartons
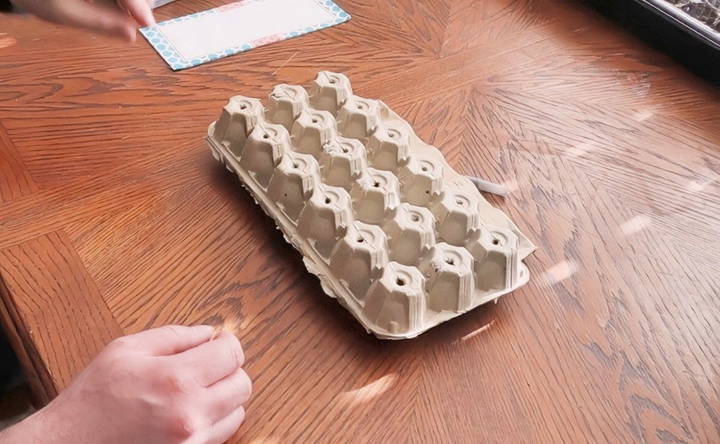
To prepare your egg carton, remove the lid if it has one. Some gardeners choose to keep the lid attached and use it as a base for stability, while others remove it altogether.
- Add Drainage Holes: Use a pen or sharp object to make small holes in each compartment's base to allow excess water to drain. This prevents root rot and ensures proper aeration for the young plants.
- Positioning for Stability: If the egg carton seems wobbly, you can place it on a tray or a piece of cardboard to keep it level and catch any excess water.
Step 2: Add Seed Starting Mix
Using the right type of soil is essential to promote healthy seedling growth. Regular garden soil is often too dense for young seedlings and can lead to poor drainage or compaction issues.
- Pre-moisten the Soil: Before filling the egg carton compartments, dampen the seed starting mix by adding water to it in a separate container. The soil should feel moist but not soaked.
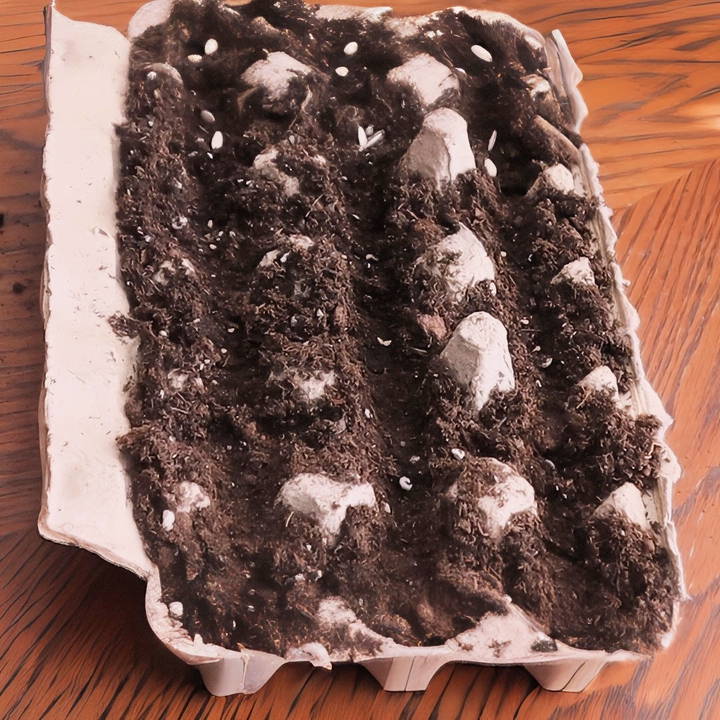
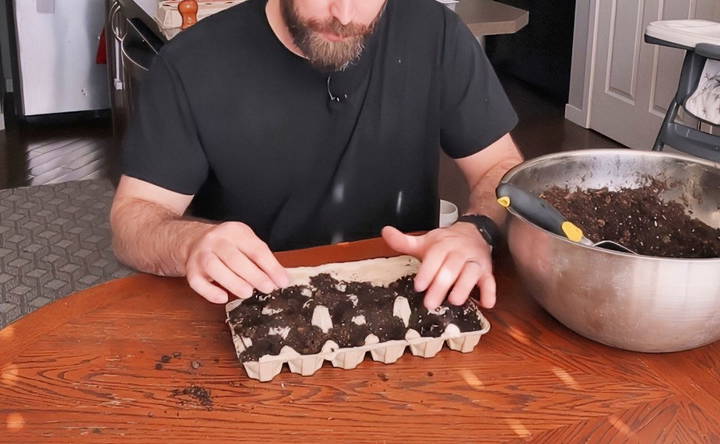
- Fill the Compartments: Scoop the seed-starting mix into each compartment of the egg carton, gently pressing down to eliminate air pockets but not so much that it becomes compacted. A good practice is to fill each compartment about three-quarters full, allowing space for the seeds.
Step 3: Plant the Seeds
This is the fun part, where you can start envisioning your future garden! Follow these guidelines for planting seeds in each compartment:
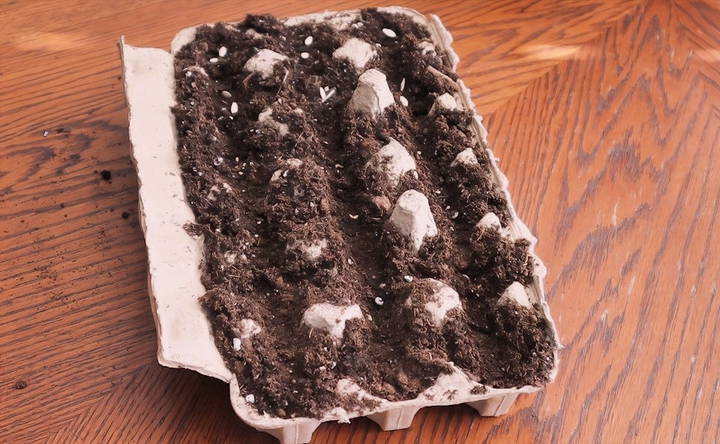
- Spacing and Depth: Follow the instructions on your seed packets to ensure that seeds are planted at the correct depth. A general rule of thumb is to plant seeds at a depth about twice their size.
- Covering the Seeds: Once placed in the soil, cover the seeds lightly with an additional thin layer of the seed-starting mix. Avoid burying them too deeply, as this can slow down germination.
Step 4: Label Each Section
To keep track of which seeds are in which compartments, labeling is essential.
- Use Markers and Labels: Write the name of each plant type on the egg carton itself or place a small stick or marker in each section.
- Digital Record: For more organized tracking, consider keeping a record in a digital document or garden journal. This way, you can monitor growth progress and track any specific notes on germination time or plant health.
Step 5: Water the Seeds
Seedlings require moisture to germinate, so keeping the soil consistently damp (but not wet) is important.
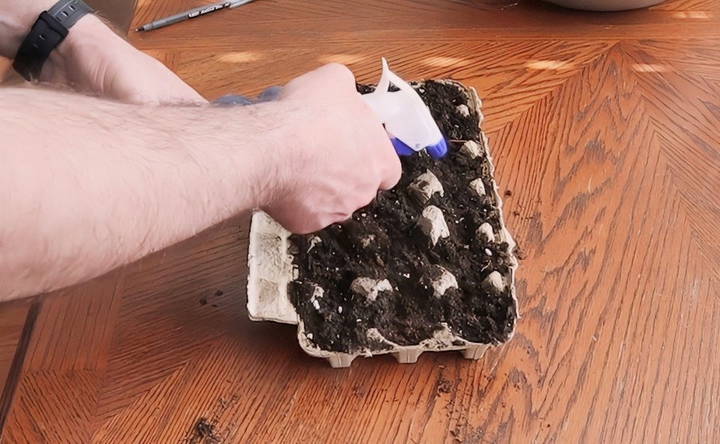
- Watering Techniques: Use a spray bottle to lightly mist the soil in each compartment. Over-watering can lead to issues like mold or mildew, especially in smaller containers like egg cartons.
- Check Daily: Maintain moisture by misting regularly, especially if the air indoors is dry.
Making the Right Conditions for Seed Germination
Learn how to make perfect conditions for seed germination by optimizing light, temperature, and humidity to boost plant growth.
Light Requirements
Seeds need adequate light to grow into healthy seedlings. Natural sunlight or grow lights are both suitable, but their effectiveness depends on your climate and the season.
- Natural Light: If using natural sunlight, place the egg cartons near a south-facing window to receive several hours of sunlight daily.
- Grow Lights: If sunlight is insufficient, invest in a basic grow light, such as a 600-watt LED, placed about 24 inches above the seedlings for around 12-16 hours per day.
Temperature and Humidity
Ideal germination temperature varies based on the type of plant, but most seeds germinate well in a warm environment (around 70-75°F).
- Make a Humid Environment: Covering the egg carton with plastic wrap or a clear lid can help retain moisture and humidity, speeding up germination. Remove the cover once sprouts appear to prevent mold growth.
Monitoring Seed Growth and Maintenance
Once your seeds have sprouted, ongoing care will help them develop strong roots and stems.
- Thinning the Seedlings: Once the seedlings grow two sets of true leaves, thin them out by removing the weaker sprouts. This gives each plant more space and resources.
- Continue Watering with Care: Be mindful of watering as seedlings grow. Instead of soaking, maintain consistent moisture by misting or lightly watering the soil.
- Adjust Lighting: Keep the light source close enough to avoid legginess (where plants stretch towards the light), which results in weak, spindly stems.
Transplanting Seedlings from Egg Cartons
When your seedlings have grown strong and have a few sets of leaves, it's time to transplant them.
- Preparation: To ease the transition, harden off the seedlings by gradually exposing them to outdoor conditions for a few hours each day over a week.
- Transplanting Cardboard Egg Cartons: Cardboard cartons can be planted directly into the soil, breaking apart each compartment and placing it in the garden. This way, the carton decomposes naturally, allowing roots to spread.
- Plastic Egg Cartons: For plastic cartons, gently remove each seedling along with the soil around its roots and transplant it into a larger pot or directly into the garden.
Post-Transplanting Care
After transplanting, water the seedlings thoroughly and keep an eye on them to ensure they adapt to their new environment. Continue to monitor moisture levels and sunlight exposure to support growth in the new location.
Tips for Success When Starting Seeds in Egg Cartons
To improve your results, consider these helpful tips:
- Choose High-Quality Seeds: Seed quality can make a big difference in germination success rates. Experimenting with both high-grade seeds and regular options can give you insights into quality differences.
- Monitor Seedlings Daily: Pay close attention to moisture levels, light exposure, and general plant health. Daily care can prevent issues like drying out or mold growth.
- Optimize for Each Plant Type: Not all plants require the same conditions. Research specific care requirements for each type of seed for the best growth outcomes.
- Label Everything: Proper labeling avoids mix-ups and confusion as the plants grow, especially if you're starting multiple varieties at once.
Experimenting and Expanding: Advanced Seed Starting Ideas
For those looking to experiment further, consider side-by-side trials with different seed sources. You might test seeds from a local store against high-grade seeds to see if there are noticeable differences in germination time, growth strength, or plant yield. This can help you choose the best options for future planting.
Another interesting approach is experimenting with soil mixtures, such as adding perlite or vermiculite for additional aeration, or using compost-enhanced mixes. Small-scale trials in egg cartons allow you to explore what works best before expanding to your main garden beds.
Starting seeds in egg cartons is a rewarding and educational process that's accessible to both beginners and seasoned gardeners alike. With just a few household items, you can cultivate a variety of plants indoors and enjoy the early growth stages. By the time spring arrives, your young plants will be strong, healthy, and ready to transplant outdoors, bringing life to your garden or backyard.
FAQs About Starting Seeds in Egg Cartons
Discover simple tips and answers to FAQs about starting seeds in egg cartons for an eco-friendly and effective gardening method.
A general guideline is to plant seeds at a depth of twice the seed’s size. For very small seeds, a light covering of soil is sufficient, while larger seeds can be gently pressed down into the soil mix before covering.
Yes, both cardboard and plastic egg cartons work. Cardboard is biodegradable, so it can be planted directly into soil, whereas plastic provides a sturdy container but will need to be removed during transplanting.
Either method works. You can moisten the seed-starting mix before placing it in the compartments, or add dry mix and use a spray bottle to lightly dampen it afterward. Pre-moistening helps achieve consistent moisture levels.
While a grow light can boost germination, especially during winter or low-light conditions, it’s optional. Placing the egg cartons on a south-facing windowsill will also work if adequate natural light is available.
It’s essential to check the soil daily, especially in smaller containers like egg cartons. Keep the soil consistently moist but not waterlogged to prevent mold and support healthy seedling growth.
Yes, you can write directly on the egg carton, use small sticks as markers, or keep a digital record in a spreadsheet. Labeling each compartment or grouping can help you remember each seed type's placement.
Lightly compacting the soil helps make a firm base for roots. Use your fingers to press down gently but avoid making the soil too dense, which could impact drainage and root growth.
Place a grow light around 24 inches above the seedlings, adjusting as they grow to prevent leggy growth. Keeping lights on for 12–16 hours a day will support strong, healthy seedlings.
If using a cardboard carton, you can plant each compartment directly into the soil. Break apart individual sections to give each seedling space to root and grow without disturbing the roots too much.
Yes, high-quality seeds often have higher germination rates and may result in more vigorous plants. Testing both budget and premium seeds can help determine which offers better results for your gardening needs.


