Embarking on a DIY tile roof installation can be both an exciting and daunting experience, especially for those without any prior roofing knowledge. However, with the right preparation, tools, and safety measures, it's entirely possible to replace or install a new tile roof on your own. This guide is designed to help beginners through every step of the process, sharing practical tips, safety considerations, and personal experiences to ensure a successful project.
Understanding Tile Roof Installation
Tile roofs are a popular choice for their durability, aesthetic appeal, and energy efficiency. Whether made of clay, concrete, or other materials, tile roofs can last for decades if installed correctly. However, the task of installing a tile roof requires meticulous planning, a good understanding of the materials, and adherence to local building regulations.
Planning and Preparation
Before diving into the installation process, proper planning and preparation are crucial. Here are some steps to get started:
1. Assess Your Roofing Project
The first step is to assess the current condition of your roof and decide whether you need a full replacement or just repairs. If you have an old or damaged roof, replacing it entirely can be a more cost-effective and long-term solution.
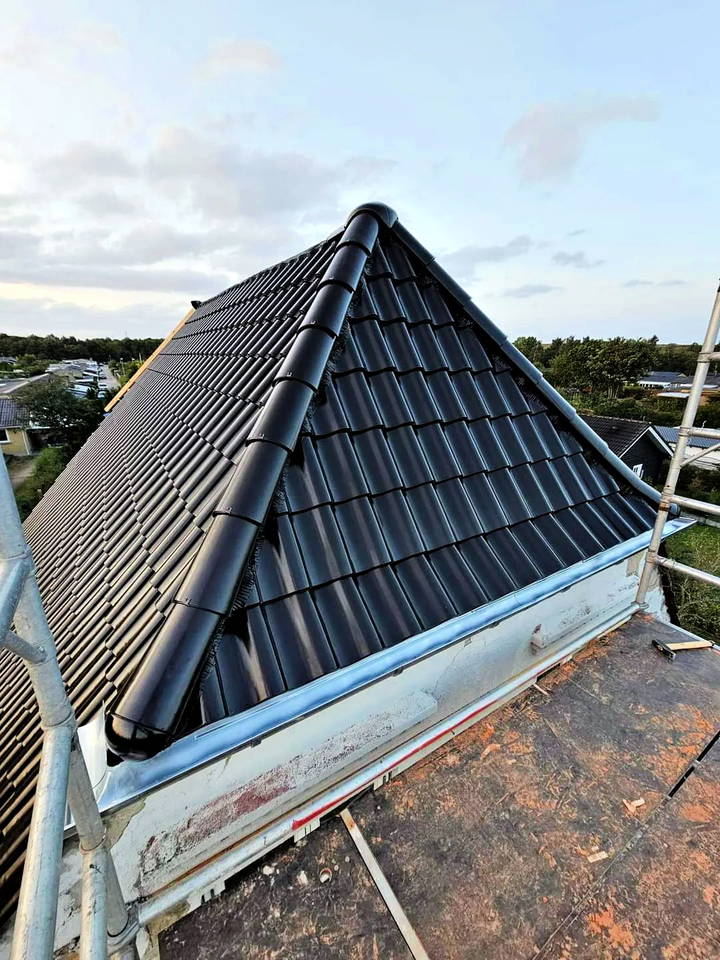
In our DIY experience, we were renovating a 1924 villa and decided to replace the old cement tiles with new clay tiles. We also replaced the underlayment, which is a vital component for waterproofing and protecting the structure beneath the tiles.
2. Research and Obtain Necessary Permits
Depending on your location, you may need permits for roofing work. Research your local building codes and regulations. For instance, in Denmark, where we undertook our project, most renovations could be done by homeowners, but there were specific exceptions like electrical and plumbing work. Always check with your local authorities to ensure compliance and avoid future legal issues.
3. Calculate the Materials Needed
Accurate measurements are key to calculating the number of tiles and other materials required. You'll need to consider the dimensions of your roof, the pitch, and the type of tiles you're using. It's also wise to order extra tiles to account for breakages during installation.
In our case, we spent time calculating rafter and batten dimensions and ordering all the materials needed, from tiles to roofing nails. This planning stage can help prevent unexpected costs and delays later in the project.
4. Prepare Your Budget
Roofing materials can be costly, and so can hiring professional help. We received quotes for our project that were far beyond our budget, prompting us to take on the task ourselves. Our expenses included around 100,000 DKK (about $14,000) for materials and 25,000 DKK (about $3,500) for used scaffolding, which we planned to sell again afterward.
Gathering Tools and Materials
Having the right tools and materials is critical for a successful roof installation. Here is a list of essential items:
- Roofing Tiles: Clay, concrete, or other types based on your choice.
- Underlayment: Waterproof layer that goes underneath the tiles to protect the roof deck.
- Rafters and Battens: Support structures that the tiles rest on.
- Roofing Nails and Cement: To secure tiles in place.
- Pry Bar and Roofing Hammer: For removing old materials and installing new ones.
- Personal Protective Equipment (PPE): Gloves, safety glasses, non-slip shoes, and a harness.
Step-by-Step Tile Roof Installation Process
Now, let's break down the process of installing a tile roof step by step:
1. Set Up Scaffolding

Safety comes first. Start by setting up a sturdy scaffolding around your home to provide a safe working platform. In our project, the scaffolding cost was a significant investment, but it ensured safety throughout the installation.
2. Remove Old Roofing Materials
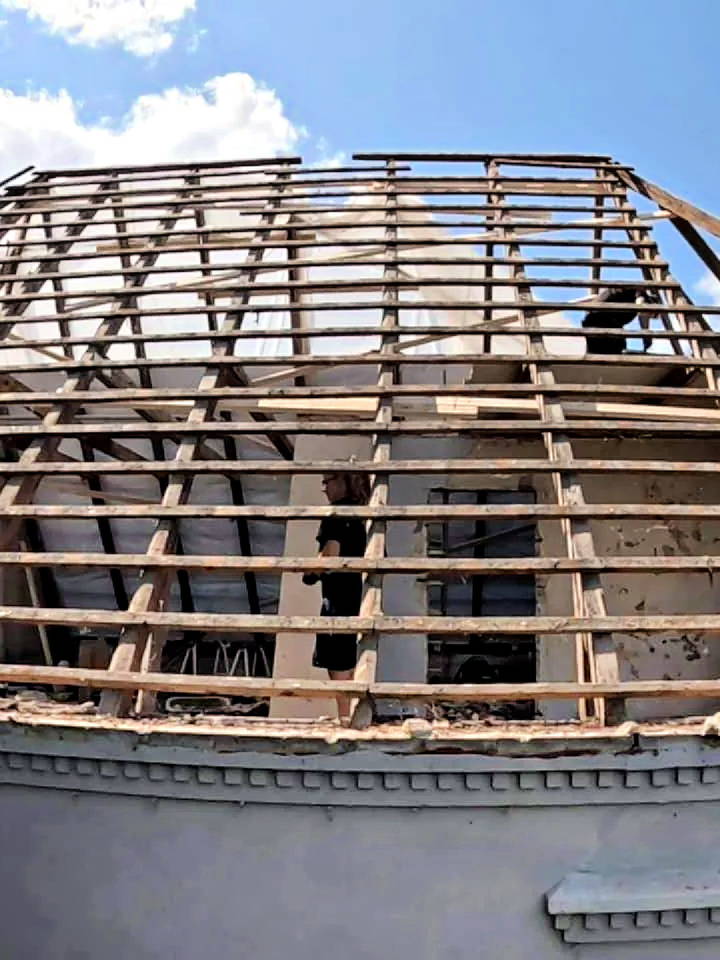
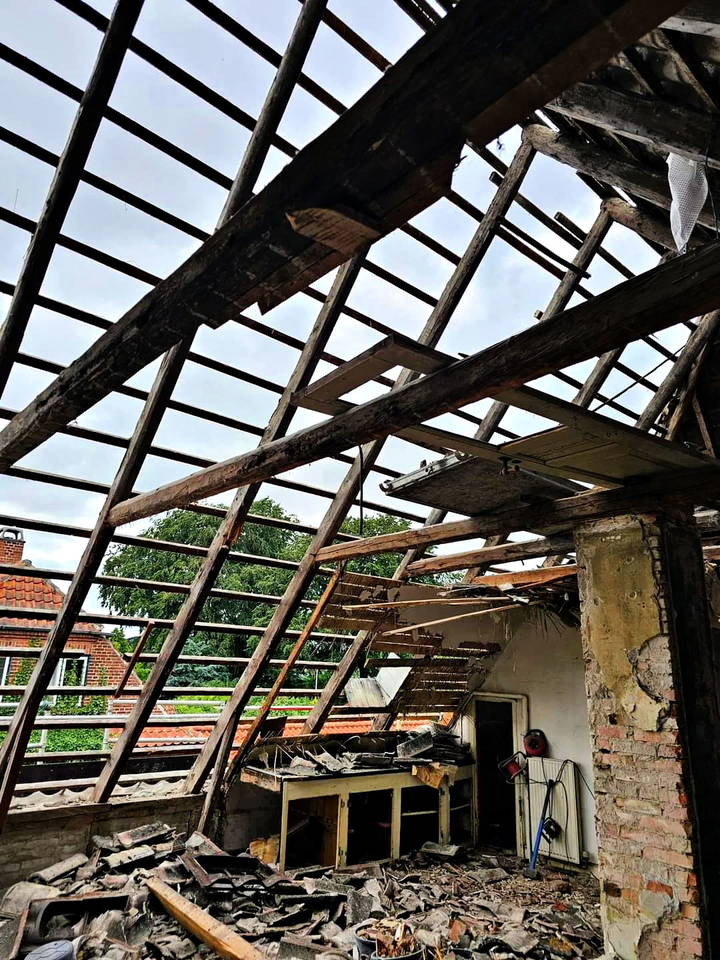
Carefully remove the old tiles, underlayment, and any other materials down to the bare roof deck. Use a pry bar and roofing hammer to lift and remove tiles without damaging the underlying structure. Make sure to clean the surface thoroughly to prepare it for the new underlayment.
3. Install the Underlayment
The underlayment is a critical component that helps prevent water from seeping into your home. Roll out the underlayment across the roof deck, overlapping each row to build a waterproof barrier. Secure it with roofing nails, and be meticulous to avoid any wrinkles or gaps.

During our installation, we double-checked every layer and ensured there were no scratches or tears, as this could compromise the roof's integrity.
4. Install Battens
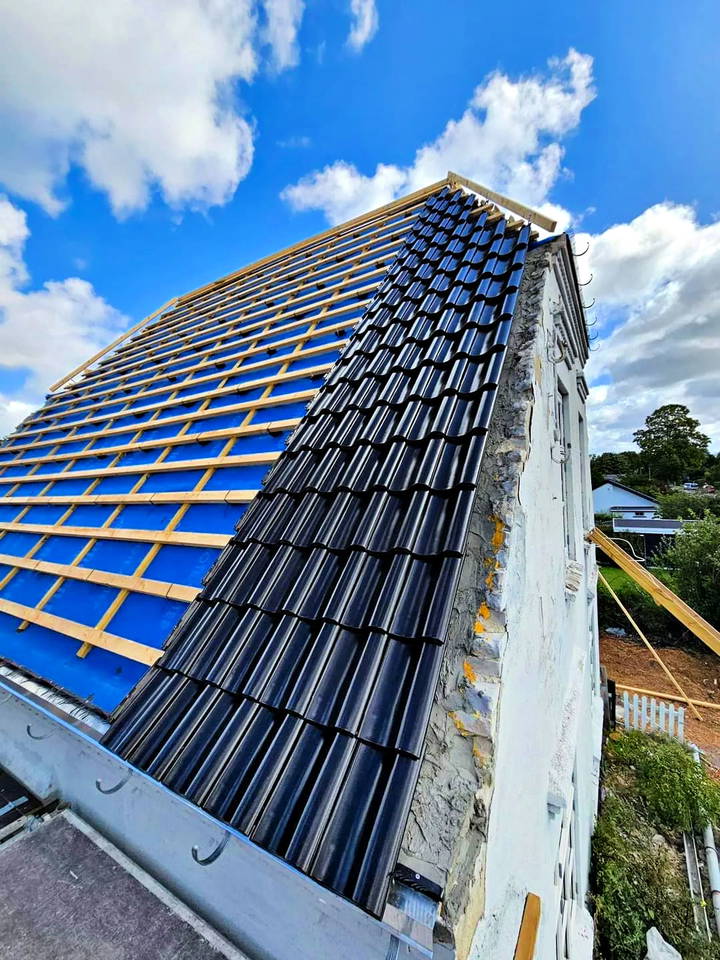
Battens provide a framework for attaching the tiles and ensure proper water drainage. Install them horizontally across the roof, spaced according to the size of the tiles you're using. Make sure they are securely fastened to the rafters.
5. Lay Down the Tiles
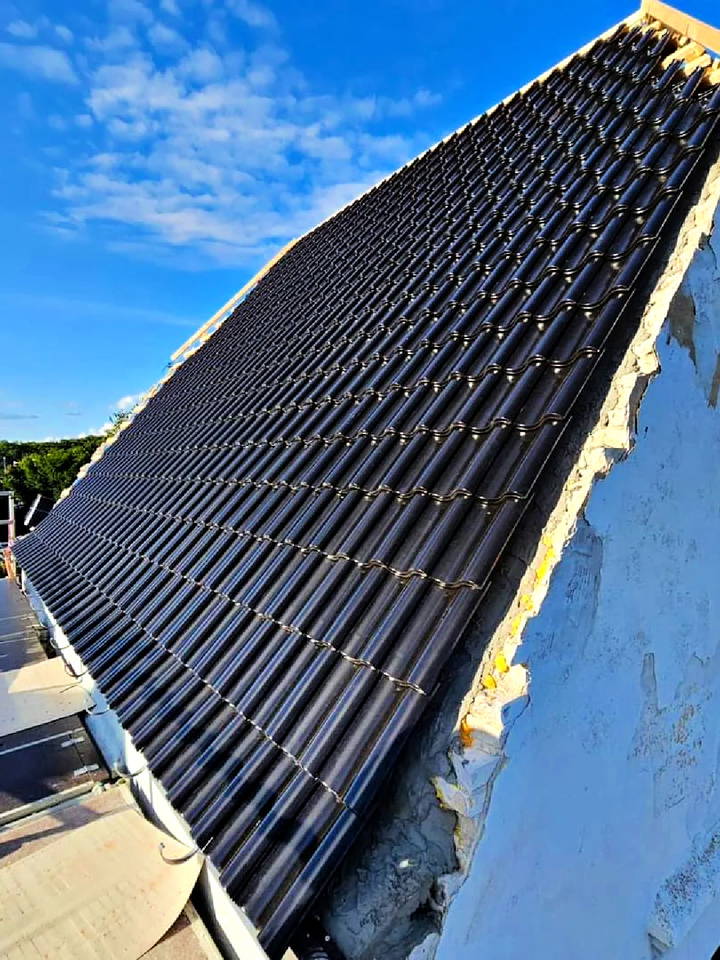
Start laying the tiles from the bottom edge of the roof and work your way up. Place each tile carefully on the battens, ensuring proper overlap to prevent water infiltration. Use roofing nails or plastic roofing cement to secure each tile, depending on your choice of materials.
For us, one of the biggest challenges was working with the steep pitch of our roof, which was 48 degrees. It required careful planning and a lot of patience, especially when carrying heavy tiles up to the roof.
6. Address Valleys, Ridges, and Edges
Special attention is needed for valleys, ridges, and edges of the roof, where tiles must be cut and fitted precisely. Improper installation in these areas can lead to leaks and other issues. Use a tile cutter or saw to shape tiles to fit snugly along these areas.
7. Inspect and Finalize

Once all tiles are laid, conduct a thorough inspection of the entire roof to check for any gaps, improperly aligned tiles, or loose fastenings. Ensure that all ridge tiles are properly cemented and that the roof is secure.


Safety Tips for DIY Roof Installation
Working on a roof is inherently dangerous, and taking safety precautions is essential:
- Wear PPE: Gloves, safety glasses, non-slip footwear, and a harness can prevent injuries.
- Use Proper Ladders and Scaffolding: Ensure your ladders and scaffolding are stable and correctly positioned.
- Be Mindful of Weather Conditions: Avoid working on the roof during wet or windy conditions.
- Stay Aware of Your Surroundings: Be cautious of power lines, and keep tools secure to avoid accidents.
Troubleshooting and Maintenance
Even after installing a new tile roof, regular maintenance is key to its longevity. Here are some common issues to look out for and how to address them:
1. Cracked or Broken Tiles
Tiles can crack due to impact or severe weather. Replace broken tiles promptly to prevent leaks. Remove the damaged tile carefully, and slide in a new one, securing it with nails or roofing cement.
2. Leaks Under Tiles
Leaks often occur due to improper underlayment or flashing installation. Inspect your roof periodically for signs of leaks, such as water stains or mold growth. Repair any damaged membranes immediately to prevent further damage.
3. Gutter and Downspout Issues
Ensure gutters and downspouts are clean and functioning correctly. Blockages can cause water to overflow and damage the roof and walls.
Conclusion: Is DIY Tile Roof Installation Right for You?
Installing a tile roof yourself can be a rewarding experience, both in terms of cost savings and the satisfaction of completing a major home improvement project. However, it requires careful planning, the right tools, and a commitment to safety. If you're willing to invest time and effort and have the determination to learn, a DIY tile roof installation is a feasible and gratifying undertaking.
For us, while the process was challenging—especially given the 100-year-old structure with no straight lines to follow—the outcome was well worth the effort. Not only did we save a significant amount of money, but we also gained invaluable skills and confidence.
If you're considering this project and have any questions, remember that no obstacle is too big when approached with patience and determination. Good luck with your DIY roofing journey!
FAQ for DIY Tile Roof Installation
To help you tackle any remaining questions about DIY tile roof installation, we've compiled a list of frequently asked questions based on common concerns and scenarios. This FAQ aims to address additional details, alternative methods, and troubleshooting tips for your roofing project.
What types of tiles should I consider for my roof?
When selecting tiles for your roof, consider materials like clay, concrete, and fiber cement. Each type has its advantages:
- Clay Tiles: Durable, fire-resistant, and offer a classic look. They are lighter than cement tiles but can be more expensive.
- Concrete Tiles: Cost-effective and durable, but heavier than clay tiles, requiring a stronger roof structure.
- Fiber Cement Tiles: Lightweight and resistant to rot and insects, but they may require more maintenance over time due to potential weathering.
How do I handle uneven or old roof structures?
Older houses often have uneven or non-standard roof structures. If your roof isn't perfectly straight or has a steep pitch, you may need to customize the installation:
- Use a laser level to mark straight lines for batten placement.
- For steep roofs, consider using additional safety equipment like roof harnesses and install extra scaffolding.
- If there are significant structural issues, consult an engineer to ensure your modifications comply with safety standards.
What should I do if I find leaks after installing the roof?
Leaks can occur due to improper underlayment installation or damaged tiles. Here's how to address leaks:
- Inspect the Area: Check for cracks in tiles or gaps in the underlayment. Water stains or damp spots inside the attic can help locate the source.
- Repair the Underlayment: If the underlayment is torn or punctured, it needs to be patched or replaced. Use high-quality roofing cement or underlayment material.
- Replace Damaged Tiles: Carefully remove broken tiles and replace them with new ones, ensuring they are properly sealed and aligned.
Is it necessary to use professional-grade tools, or can I use regular tools?
While professional-grade tools like roofing hammers, pry bars, and specialized cutting tools are ideal, you can still manage with regular tools, provided they are robust and suitable for roofing work:
- Pry Bar: For lifting old tiles and nails.
- Hammer: A claw hammer can suffice for most tasks, but a roofing hammer makes nailing faster and more precise.
- Tile Cutter: If cutting tiles is necessary, a manual tile cutter or an angle grinder with a diamond blade can be used for small projects.
What safety measures should I take when working on a steep roof?
Safety is paramount, especially when working on steep or high roofs. Here are essential safety precautions:
- Use a Harness and Rope System: Always secure yourself with a harness connected to a fixed anchor point.
- Ensure Stable Scaffolding: Set up scaffolding around the entire work area to provide a safe platform for movement.
- Avoid Working in Bad Weather: Wet or windy conditions can make the roof slippery and dangerous.
Can I install a tile roof during rainy weather?
It is not recommended to install a tile roof during rainy weather due to the risk of water damage and safety hazards:
- Cover Exposed Areas: If rain is expected, cover any exposed sections of the roof with tarpaulins.
- Check Weather Forecasts: Plan your installation for a period of stable, dry weather to ensure the materials have time to settle and seal properly.
What can I do if my roof tiles don't align perfectly?
Minor misalignments can occur, especially on older or non-standard roofs. To correct this:
- Adjust Batten Placement: Realign the battens to build a level base for the tiles.
- Trim Tiles as Needed: Use a tile cutter to adjust tile sizes for better alignment at the edges and valleys.
- Double-Check Measurements: Frequently check for alignment as you work to avoid significant errors.
Do I need to reinforce the roof structure for heavy tiles?
If switching from a lighter roofing material (like shingles) to heavier tiles (such as concrete), reinforcing the roof structure may be necessary:
- Consult an Engineer: Have a structural engineer assess the roof's load-bearing capacity.
- Add Extra Support: Install additional rafters or bracing if the current structure isn't strong enough to support the added weight.
How often should I perform maintenance on my tile roof?
Regular maintenance helps prolong the life of your tile roof:
- Inspect Annually: Check for broken tiles, leaks, or signs of wear at least once a year.
- Clean Gutters and Downspouts: Ensure gutters and downspouts are free of debris to prevent water backup.
- Address Minor Issues Promptly: Fix small problems before they turn into major repairs, such as replacing a few cracked tiles or reapplying roofing cement.
Are there warranty considerations if I install the roof myself?
In some areas, DIY installations may affect the warranty of the roofing materials:
- Check Manufacturer's Guidelines: Some warranties are void if a professional does not install the roof. However, others may still be valid if installed according to the manufacturer's instructions.
- Consider Future Resale Value: If you plan to sell your home, having a roof inspection to certify that the installation meets local codes can be helpful.


