Starting a project like tiling a backsplash in my kitchen was daunting at first. I had no prior experience with tiling or any home improvement tasks of that nature. I spent a lot of time researching, trying to find helpful guides that broke down the process into simple steps. The idea was to refresh my kitchen without spending too much money or hiring professionals.
I decided to share my own experience and the lessons I learned along the way. From choosing the right tiles to mixing grout, I made a list of tips that I wish someone had given me before I started. My journey was filled with trial and error, but eventually, I triumphed, and my kitchen looked better than ever.
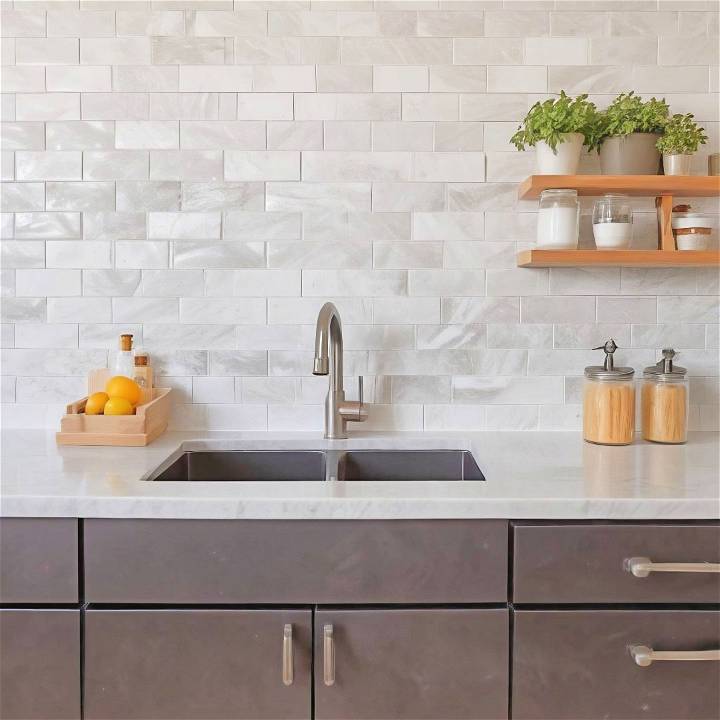
I hope that by sharing what I learned, I can make your start with tiling a backsplash a bit easier.
Choosing and Acquiring Materials
Learn how to choose and acquire materials for tiling a backsplash as a beginner. Discover tips on tile selection, adhesive, and grout to get started.
Tile Selection
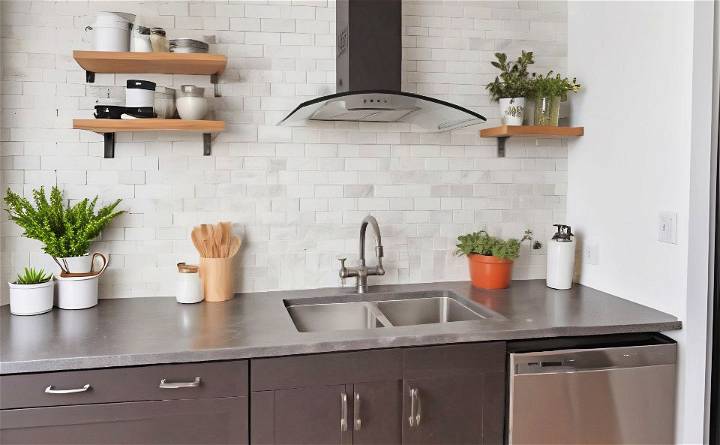
My choice was a bright white, 3x6 beveled subway tile. Its classic look promised to light up the kitchen while offering a clean, sleek aesthetic. For my mid-sized kitchen, four boxes of these tiles sufficed, costing me around $100 in total.
Adhesive
The backbone of any tile installation is the adhesive. I opted for a pre-mixed tile adhesive suitable for ceramic wall tiles, priced at about $13 for a gallon, which adequately served my kitchen's needs. It's vital to identify the correct adhesive for your tile type to ensure a lasting bond.
Grout
Grouting can define the final look of your backsplash. I chose a pre-mixed white grout for its simplicity and ease of application. Despite its $33 price tag for a sizeable container, the convenience it promised made it a worthwhile investment.
Essential Tools for the Job
- Notched Trowel: This tool helped spread the adhesive evenly. It's important to select the right size based on your tile and adhesive type.
- Spacers: Spacers are non-negotiable for uniform grout lines. I used 1/16-inch spacers that cost around $13 for a pack sufficient for the entire kitchen.
- Tile Cutter: A wet saw rental, at approximately $30 a day, was indispensable for precise cuts around fixtures and edges.
- Grout Float: To smoothly apply and work in the grout, I used a standard grout float. Its rubber base was perfect for pushing grout into the gaps without damaging the tiles.
Prepping Your Space
Covering countertops and ensuring a clean, debris-free surface is crucial before embarking on your tiling adventure. I laid down the protective paper and taped it securely, building a workspace that was easy to clean post-project.
Installation Process
Learn the basics of installing a backsplash with this beginner's guide. From applying adhesive to cutting tiles, master the tiling installation process.
Getting Started
Measure your space carefully to determine the amount of tile and adhesive needed. Then, prepare your wall ensuring it's clean and smooth.
Applying Adhesive
Using the notched trowel, I applied the adhesive in small, manageable sections. It's key to apply enough for the tiles to adhere but not so much that it oozes excessively when the tile is pressed down.
Laying Tiles
Carefully place your tiles onto the adhesive-coated wall, using spacers to ensure even gaps for grouting later on. Start from the bottom and work your way up, ensuring each tile is level with its neighbors.
Cutting Tiles
When you encounter an obstacle such as an outlet, mock-place the tile to mark the necessary cuts, then use the wet saw to precisely tailor the tile to fit. It's a process that requires patience and a steady hand.
Grouting
Once the adhesive has dried (usually after 24 hours), remove the spacers and begin grouting. Apply the grout diagonally across tiles to fill the gaps thoroughly, then use a damp sponge to wipe away the excess grout. Timing is critical; you'll want to clean up excess grout before it hardens completely but after it's set enough not to disturb the integrity of your lines.
Afterthoughts and Tips
- Patience is Key: The rush to see the finished product must not overtake the need for meticulous work at each stage. Savor the process.
- Tool Quality Matters: Investing in good quality tools significantly eases the process and contributes to a professional-looking finish.
- Detailed Planning: Pre-visualize your tile layout, especially around focal points like windows or appliances, to ensure a balanced and aesthetically pleasing result.
- Safety First: Always wear protective gear, especially when operating the wet saw.
Common Mistakes and How to Avoid Them
When tiling a backsplash, especially for beginners, it's easy to run into a few common issues. Here's how to sidestep these pitfalls to ensure a smooth tiling experience:
1. Not Preparing the Surface Properly: Tiles need a clean, smooth surface to adhere properly. Make sure to clean the wall of any grease, dust, or old adhesive and repair any cracks or uneven areas before starting.
2. Incorrect Adhesive Application: Using too much adhesive can cause tiles to slip, and too little may lead to poor adhesion. Apply a consistent layer of adhesive using a notched trowel, holding it at a 45-degree angle to build even ridges.
3. Misaligned Tiles: It's crucial to keep tiles level and evenly spaced. Use spacers to maintain consistent gaps between tiles and check alignment with a level regularly as you work.
4. Rushing the Grouting Process: Allow the adhesive to fully cure before grouting, typically 24 hours. When ready, apply grout diagonally across tiles to fill spaces thoroughly, and wipe away excess grout with a damp sponge.
5. Skipping Sealing: In areas prone to moisture, like a kitchen, sealing your grout is a must to prevent mold and staining. After the grout has dried, apply a grout sealer to protect your work.
By avoiding these common errors, you'll be on your way to a beautifully tiled backsplash that will last for years.
Design Tips for Different Kitchen Styles
Choosing the right tiles for your kitchen backsplash can significantly enhance the room's overall look and feel. Here are some design tips tailored to various kitchen styles:
For Modern Kitchens:
- Sleek and Simple: Opt for large, rectangular tiles with minimal grout lines to build a smooth, contemporary surface.
- Bold Contrast: Use high-gloss tiles in dark colors against light cabinetry, or vice versa, for a striking visual impact.
- Metallic Accents: Incorporate metallic tiles as an accent to add a touch of luxury and sophistication.
For Traditional Kitchens:
- Classic Subway Tiles: These timeless pieces add a historical touch while keeping the space bright and open.
- Natural Stone: Consider using natural stone tiles for a warm, rustic feel that adds character.
- Mosaic Patterns: Small mosaic tiles with intricate patterns can introduce an artisanal element to your kitchen.
For Farmhouse Kitchens:
- Wood-Look Tiles: Ceramic tiles that mimic wood bring a cozy, country vibe without sacrificing durability.
- Hand-Painted Tiles: Tiles with hand-painted designs can add a personal, homey touch to your backsplash.
- Checkerboard Patterns: A black and white checkerboard pattern can offer a classic, yet casual look.
For Coastal Kitchens:
- Glass Tiles: Reflective glass tiles can mimic the shimmer of water, perfect for a beach-inspired kitchen.
- Soft Blues and Greens: Use tiles in these colors to evoke the serenity of the sea.
- Pebble Tiles: These can build a natural, beachy texture that's both unique and tactile.
For Industrial Kitchens:
- Brick-Look Tiles: Achieve an urban loft feel with brick-look tiles, which can be both rugged and chic.
- Concrete-Look Tiles: For a minimalist, edgy aesthetic, consider tiles that resemble concrete.
- Metal Tiles: Stainless steel or copper tiles can add a raw, industrial edge to your space.
Consider style and practicality when choosing tiles. Easy to clean, heat and moisture resistant, durable in a kitchen. Make a beautiful, functional backsplash with these tips.
FAQs About Tiling a Backsplash for Beginners
Get answers to all your questions about tiling a backsplash for beginners in this comprehensive FAQ guide. Learn tips, tricks, and mistakes to avoid.
What is the best type of tile for a kitchen backsplash?
The best type of tile for a kitchen backsplash is usually ceramic or porcelain. These materials are durable, easy to clean, and come in a variety of colors and styles. Glass tiles are also a popular choice for a sleek, modern look and are easy to maintain.
How do I prepare the wall for tiling?
Before tiling, ensure the wall is clean, dry, and smooth. Remove any wallpaper or loose paint, and repair holes or cracks. Sand the surface lightly if it's glossy to help the adhesive bond better. Wipe the wall with a damp cloth to remove dust.
Do I need to use spacers between the tiles?
Yes, spacers are important to ensure even gaps between tiles for a uniform look. They help in keeping the tiles aligned and make the application of grout easier. The size of the spacers depends on the size of the tile and the desired width of the grout lines.
Can I tile over existing tiles?
Tiling over existing tiles is possible if the old tiles are firmly attached and in good condition. Clean the old tiles thoroughly and scuff the surface to help the new adhesive bond. However, this may raise the level of the backsplash, so check clearances with cabinets and counters.
How long does it take for the adhesive to dry before I can grout?
It typically takes 24 hours for the adhesive to dry completely, but this can vary based on the type of adhesive and environmental conditions. Always follow the manufacturer's instructions for drying times to ensure the best results.
What is the best way to cut tiles for a backsplash?
The best way to cut tiles is with a wet tile saw, which can make straight and angled cuts. For simple, straight cuts, a manual tile cutter may suffice. Always measure and mark your tiles before cutting, and wear safety gear to protect your eyes and hands.
Conclusion
In conclusion, tiling a backsplash for beginners is a manageable and rewarding DIY project that can elevate the look of your kitchen or bathroom. With the right tools, materials, and techniques, you can achieve a professional finish that enhances the overall aesthetic of your space. Happy tiling!


