Keeping our goats and chickens safely inside our yard has always been important to me. That's why I decided to install a vinyl fence around the backyard. The goal was to build a barrier that none of our animals could easily navigate, ensuring they stayed within our property and away from potential hazards outside.
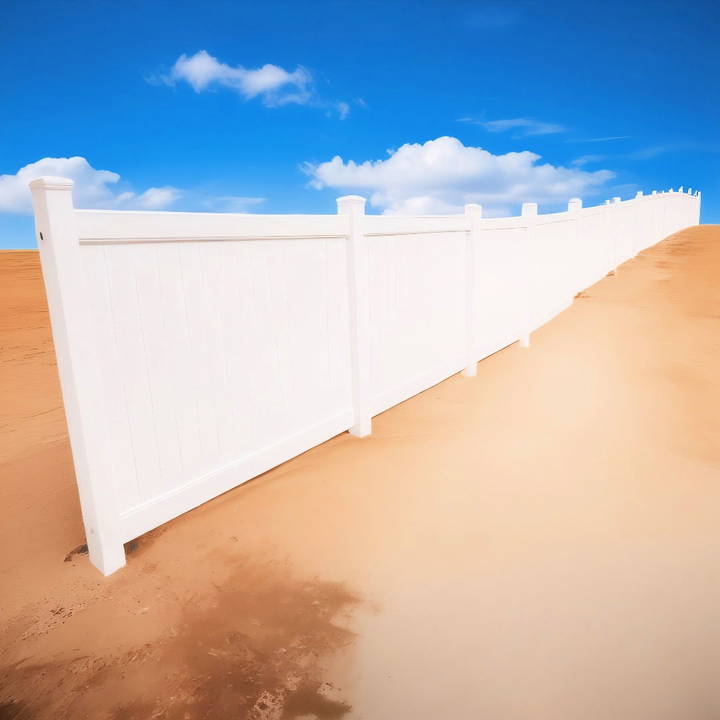
Through this experience, I learned a lot about the installation process, and I'm excited to share my insights with you in this step-by-step guide.
Getting Started: Preparing Your Space
Before jumping into the installation, preparation is key. Here's what you need to do first:
Gather Your Materials
- Vinyl Fence Panels: Make sure you get the right style. Line posts have holes on both sides, while end posts have holes on one side.
- Orange or Pink String: Found in the cement section at a hardware store, this helps keep your posts aligned.
- Tape Measure: A decent one is crucial for accurate measurement.
- Post Hole Digger or Auger: An auger can save you a lot of time, especially if you're dealing with tough dirt.
- Level: Ensures your fence is straight.
- Red Bag Cement: For additional stability, especially in windy areas.
Why Each Material is Important
- Vinyl Fence Panels: These are the main components of your fence. Choose the right posts to ensure they fit together seamlessly.
- String and Tape Measure: Your best friends for making straight lines and ensuring consistent spacing between posts.
- Post Hole Digger or Auger: You'll need these to build deep enough holes; an auger is a good investment if you're tackling a large project.
- Level: Prevents your fence from leaning or looking uneven.
- Cement: Offers added security for your fence posts, which is useful in areas with extreme weather.
Step by Step Instructions
Learn how to install a vinyl fence step-by-step, from marking to leveling, for a secure and stable installation.
Marking Your Territory
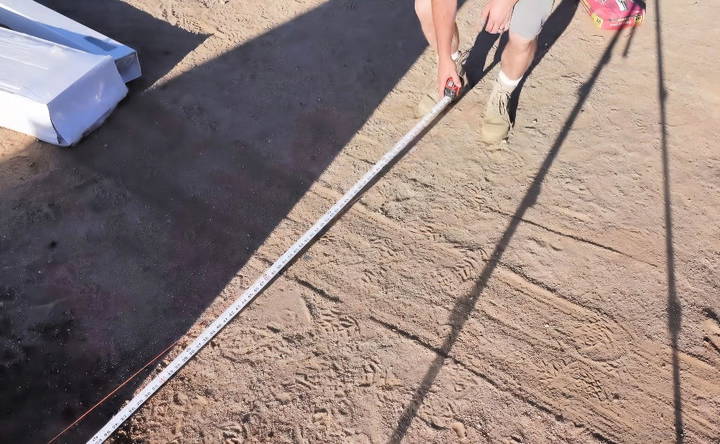
The first step is to plan where your fence will go. I tied a bright string to one of the posts at the end of the line and ran it to where I wanted to finish. This was a simple, yet effective way to mark a straight path.
Now grab your tape measure. Measure where each post needs to go, marking the ground accordingly. For my project, the distance from one post to the next was 93 inches. Marking these spots is critical; it ensures uniformity and saves time during installation.
Digging The Holes: Auger to the Rescue
With the measuring and marking complete, it's time to dig the post holes. If you only have a few holes or want a quick workout, a manual post hole digger will suffice. But for larger projects or harder ground, invest in an auger.
Using an Auger
- Position the auger over your marked spot.
- Turn it on and let it dig down to the required depth, usually about two feet for sturdiness.
- Once the hole is dug, clear out any leftover dirt with a post hole digger for a tidy cavity.
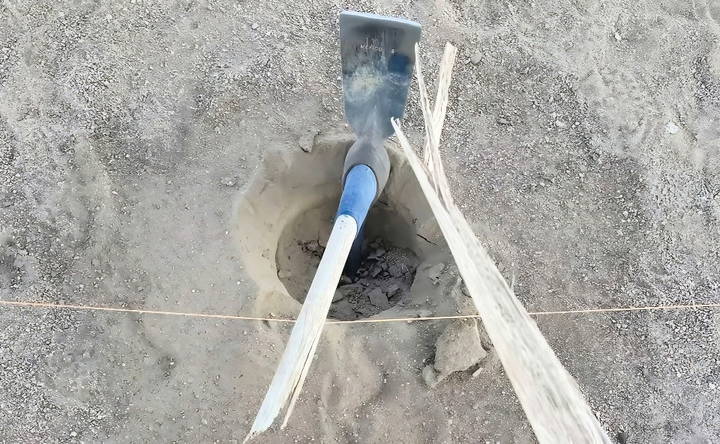
Setting the Fence Posts
With the holes ready, it's time to set the line posts. Remember, you have different posts for different parts of your fence.
- Place the Line Post: Insert the line post into the hole, ensuring the holes are facing your previous panel.
- Check the Height: Use a level to make sure your post is vertically straight and matches the height of the previous post.
Attaching the Fence Panels: Let's Begin
It's finally time to attach your panels, which can be a little tricky but rewarding.
Bottom Rail First
- Prepare: Identify the bottom rail by its tabs on both ends. These secure the rail within the post.
- Insert Gently: Slide the rail into place. Once inside, give it a slight pull to make sure the tabs lock into the vinyl post.
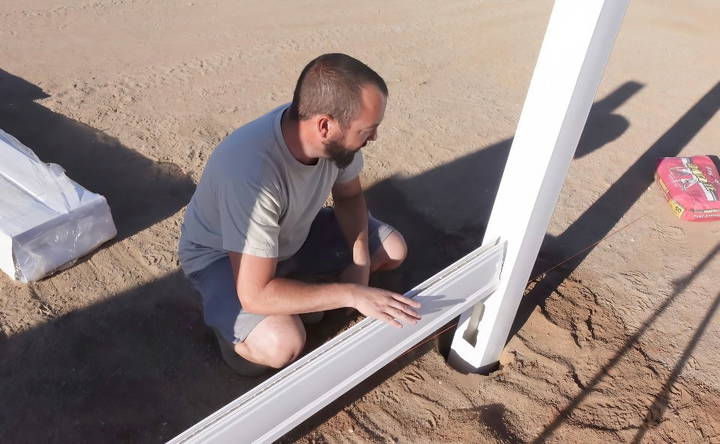
Adding the Panels
With the bottom rail in place, you can start adding the panels.
- Panel Placement: Place the panel into the groove formed by the bottom rail at an angle.
- Slide and Secure: Carefully align the panel with the rail beneath it and slide it fully into place. Tap it gently at both the top and bottom to secure it.
Top Rail Installation
Finally, insert the top rail.
- Position and Lock: Gently set the top rail into the post slots. If it's windy, fit it without engaging the clasps until all panels are in place.
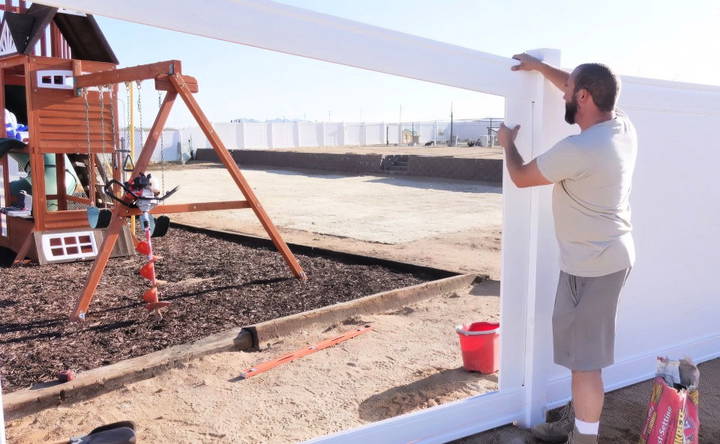
Final Adjustments: Checking for Stability
After inserting all the panels, go back and check your work.
Engaging the Clasps
- Pull and Engage: Panels might pull slightly during installation. Ensure that they are pulled back to engage the clasps securely.
- Check Space: There shouldn't be any visible gaps between panels and rails. Adjust as necessary.
Securing with Cement: Wind-Proof Your Fence
Although manufacturers might say cement isn't necessary, I choose to use it for added peace of mind, especially with strong winds common in my area.
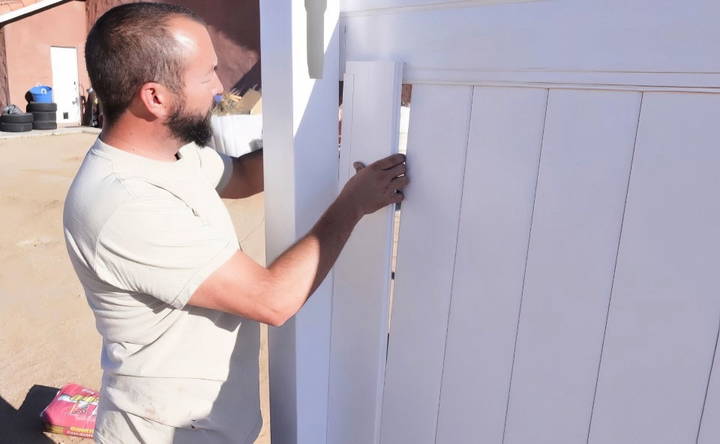
Cementing the Posts
- Pour Dry Cement: Fill each post hole with dry cement mix.
- Add Water and Mix: Using a garden hose or bucket, add water directly to the hole. The cement will settle and solidify around the post.
Final Leveling
Re-check each post with the level to make sure it's perfectly vertical.
Takeaways and Tips
Installing a vinyl fence is possible to do on your own with careful planning and the right tools:
- Start Right: Proper measuring and marking save time and frustration.
- Invest in Tools: An auger might be a worthwhile investment for extensive projects.
- Check Frequently: Always ensure that the height and alignment of each element are consistent and level.
Customization Options
Customization options are plentiful for vinyl fences. This allows you to build a fence that not only serves its purpose but also complements your home's aesthetic. Here are some key customization options to consider:
Color Choices
Vinyl fences come in a variety of colors. While white is the most popular, you can choose from shades like tan, gray, and even wood-like finishes. Selecting the right color can enhance your property's curb appeal and match your home's exterior.
Fence Styles
There are several styles of vinyl fences to choose from:
- Privacy Fences: These are solid panels that provide complete privacy. They are ideal for backyards and areas where you want to block the view.
- Picket Fences: These have evenly spaced vertical boards. They are perfect for front yards and add a classic, charming look.
- Ranch Rail Fences: These are often used for larger properties and have horizontal rails. They are great for defining boundaries without obstructing the view.
Decorative Tops
Adding a decorative top to your vinyl fence can give it a unique look. Options include:
- Lattice Tops: These are crisscross patterns that add a decorative touch while maintaining privacy.
- Spindle Tops: These have vertical spindles that add elegance and a bit of openness to the fence.
- Gothic Tops: These feature pointed arches that give a more traditional and ornate appearance.
Gate Styles
Gates are an essential part of any fence. Vinyl gates come in various styles to match your fence:
- Single Gates: Ideal for walkways and smaller openings.
- Double Gates: Perfect for driveways and larger entrances.
- Arched Gates: Add a decorative curve to the top of the gate for a more elegant look.
Post Caps
Post caps are the finishing touch for your fence posts. They come in different styles, such as:
- Flat Caps: Simple and modern.
- Gothic Caps: Traditional and ornate.
- Solar Caps: Equipped with solar lights to illuminate your yard at night.
Textured Finishes
Some vinyl fences offer textured finishes that mimic the look of wood or stone. These finishes provide the durability of vinyl with the aesthetic appeal of natural materials.
Custom Heights
Vinyl fences can be customized to different heights to suit your needs. Whether you need a tall fence for privacy or a shorter one for decorative purposes, you can find the right height for your project.
Accent Lighting
Incorporating lighting into your vinyl fence can enhance its appearance and improve safety. Solar-powered lights are a popular choice as they are energy-efficient and easy to install.
Customize your vinyl fence to match your style and needs. Opt for a classic picket or a modern privacy fence—vinyl offers flexible design for your home.
Common Mistakes to Avoid
Installing a vinyl fence can be a rewarding DIY project, but there are several common mistakes that can lead to problems down the line. Here are some key pitfalls to avoid:
Incorrect Post Spacing
One of the most frequent mistakes is not spacing the posts correctly. Posts that are too far apart can cause the fence to sag or become unstable. Always follow the manufacturer's guidelines for post spacing, typically around 6 to 8 feet apart.
Not Checking for Utility Lines
Before you start digging, it's crucial to check for underground utility lines. Hitting a gas or water line can be dangerous and costly. Contact your local utility companies to mark any underground lines before you begin.
Skipping the Permit Process
Many areas require permits for fence installation. Skipping this step can result in fines or having to remove the fence. Check with your local zoning office to ensure you have all the necessary permits before starting your project.
Ignoring Ground Slope
If your yard has a slope, you need to account for it in your fence design. Failing to do so can result in uneven panels and gaps at the bottom of the fence. Use a level and adjust the height of each post to accommodate the slope.
Using Incorrect Tools
Using the wrong tools can make the installation process more difficult and result in a poorly constructed fence. Make sure you have all the necessary tools, such as a post hole digger, level, and power drill, before you start.
Not Allowing Concrete to Set
When setting the posts in concrete, it's important to allow enough time for the concrete to fully cure. Rushing this step can lead to unstable posts. Follow the manufacturer's instructions for curing time, usually at least 24 hours.
Improper Panel Attachment
Attaching the panels incorrectly can cause them to warp or come loose. Make sure to use the correct screws and brackets, and follow the manufacturer's instructions for attaching the panels to the posts.
Overlooking Maintenance
While vinyl fences are low-maintenance, they still require some upkeep. Neglecting to clean the fence or check for damage can shorten its lifespan. Regularly inspect your fence and clean it with a mild detergent and water to keep it looking its best.
Not Considering Weather Conditions
Weather conditions can affect the installation process. Installing a fence in extreme temperatures or during heavy rain can lead to problems with the concrete setting and the overall stability of the fence. Choose a day with mild weather for the best results.
Failing to Plan for Gates
Gates require additional support and planning. Failing to properly install gate posts can result in sagging or misaligned gates. Make sure to use heavier posts for gates and follow the manufacturer's instructions for installation.
Avoiding common mistakes ensures your vinyl fence is durable, appealing, and long-lasting, saving you time and money.
FAQs About How to Install a Vinyl Fence
Learn the essentials of installing a vinyl fence. Find answers to common questions and get tips for a successful installation.
First, clear the area where the fence will be installed. Remove any bushes, plants, or debris. Mark the fence line with stakes and string. Check for underground utilities by calling your local utility company.
Vinyl fences are low-maintenance. Clean them with a garden hose and mild detergent to remove dirt and stains. Inspect the fence regularly for any loose or damaged parts and repair them promptly.
When installing a vinyl fence on sloped ground, you have two main options:
Step Method: Install the fence in a series of steps, with each section level but at a different height.
Rack Method: Use fence panels designed to rack, or adjust, to the slope of the ground. This method provides a more seamless look.
You can install a vinyl fence by yourself if you have basic DIY skills and the right tools. However, if you're not comfortable with tasks like digging post holes or mixing concrete, you might want to hire a professional. Professional installation ensures the fence is installed correctly and can save you time and effort.
If your vinyl fence gets damaged, you can usually repair it yourself. For minor damage, use vinyl adhesive to fix cracks or holes. For more significant damage, you might need to replace the affected panels or posts. Always follow the manufacturer's instructions for repairs.
Wrapping Up
This fence project took me about 15 to 20 minutes per panel. For anyone installing a vinyl fence themselves, patience and attention to detail go a long way. With this guide, I hope I've provided you with a pathway to successfully constructing a durable and stylish vinyl fence. Remember, each step builds on the previous one, and steady progress and meticulous execution lead to a job well done.
If you have any questions or run into any roadblocks while building your fence, comment, and I'll do my best to help!


