If you've ever been captivated by a card that moves or interacts in a unique way, then you'll love the Waterfall Card. This delightful project is more than just a simple greeting card – it's a creative, movable card that unfolds in a magical waterfall effect. The design may look complex at first glance, but with the right steps, it's quite straightforward to make.
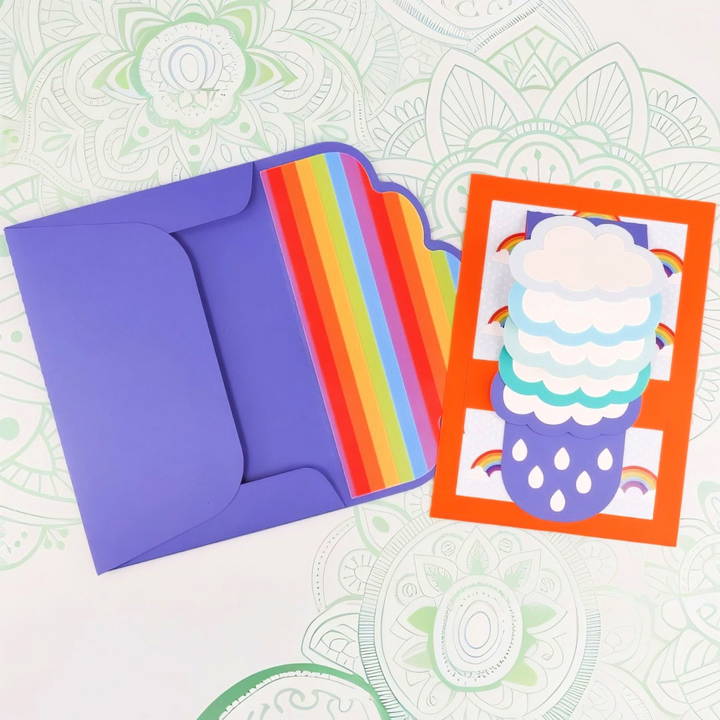
In this guide, you'll learn how to make a waterfall card from scratch, perfect for all levels of crafters. Whether you're using a cutting machine like a Cricut or crafting by hand, this easy DIY tutorial will walk you through each step. We'll also explore customization options, so you can make the card your own!
What is a Waterfall Card?
A waterfall card is a type of interactive card where parts of the design (such as clouds or other shapes) flip over each other when a tab is pulled. It's called a waterfall card because the motion mimics the way water cascades over the edge of a waterfall.
The concept behind it is simple: different sections of the card are layered, and when a slider tab is pulled, each section flips over to reveal another underneath. It's a card that not only conveys a heartfelt message but also offers a delightful, kinetic experience.
Why Make a Waterfall Card?
Waterfall cards are perfect for special occasions like birthdays, and anniversaries, or just as a surprise to brighten someone's day. Because of their interactive nature, these cards offer a unique way to send a message or a design. They're especially great for:
- Birthdays: Write a fun message on each layer.
- Holidays: Make themed cards with a waterfall of Christmas trees, pumpkins, or Easter eggs.
- Weddings: Make a cascade of hearts or wedding bells.
Supplies Needed to Make a Waterfall Card
Before we dive into the step-by-step process of making a waterfall card, let's go over the materials and tools you'll need. Here's a comprehensive list:
Cardstock:
- Solid core cardstock in various colors (red, orange, yellow, green, and white are common).
- Cardstock for clouds or decorative pieces (for this tutorial, blue ombre cardstock is used).
Tools:
- Cutting Machine: A Cricut Maker or Explorer series is ideal, but you can also use other cutting machines. You can cut the pieces by hand, but it may take longer.
- Green Standard Grip Machine Mat: For use with a cutting machine.
- Brayer: To ensure the paper sticks well to the mat.
- Spatula and Scraper: To remove paper from the cutting mat and ensure it's not damaged.
- Scoring Tool or Stylus: If you're cutting manually, you'll need this to make the folds.
Adhesives:
- Craft Glue: Use precision glue, such as Bearly Art glue, for attaching small pieces of cardstock.
Optional:
- Patterned Paper: For lining the card or the envelope.
- Scissors or Paper Trimmer: For any hand-cutting adjustments.
Printable or Digital Files:
- Waterfall Card Design Template: This can be found online. For example, Jennifer Maker offers a free design template for her rainbow-themed card. You'll need to download the SVG file or a printable PDF if you're cutting manually.
Once you have all your supplies ready, you're all set to make your own waterfall card. Now, let's move on to the process.
Step by Step Instructions
Make your own stunning DIY waterfall card with our step-by-step instructions. From design to assembly, make the perfect personalized card today!
Step 1: Download the Waterfall Card Design
You can either make your own design or download one for free. Many tutorials, like the one from Jennifer Maker, provide a free waterfall card design that's easy to follow.
To get the design, follow these steps:
- Go to a crafting resource website like Jennifer Maker's blog.
- Search for Waterfall Card Design. You may find it under “library number 478.”
- Download the design, which will come in different formats: SVG files for cutting machines and PDF files for hand-cutting.
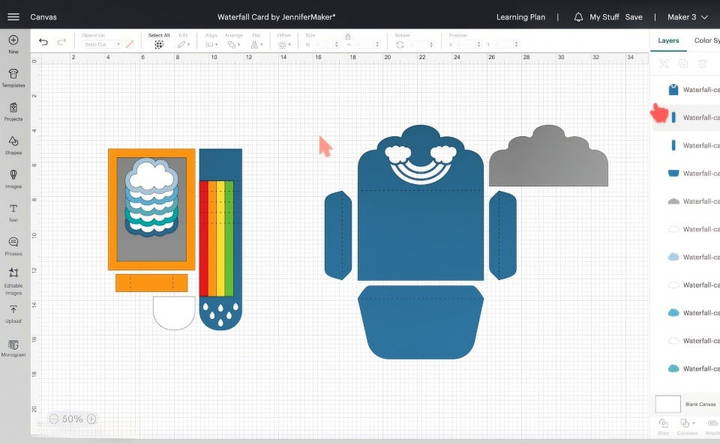
- If using a cutting machine, upload the SVG file into your software (e.g., Cricut Design Space).
You'll also find different versions of the design, some with score lines and others with dash cut lines. The dashed cut line version is generally recommended for beginners since it's easier to work with.
Step 2: Prepare Your Cardstock and Cutting Machine
Once your design is ready, it's time to prepare the materials.
A. Select and Prepare the Cardstock
You'll be using cardstock to make the base of your card, the slider mechanism, and the decorative pieces (such as clouds or rainbow shapes). Here's a breakdown of how to select and prepare the cardstock:
- Base Pieces: Use a thicker cardstock in neutral colors (white or a soft pastel). These will form the structure of your card.
- Decorative Pieces: Choose vibrant colors for the decorations. For example, in Jennifer Maker's rainbow-themed card, red, orange, yellow, and green cardstock is used to form rainbow stripes.
B. Load the Design into Cricut Design Space (or Your Cutting Machine Software)
If you're using a cutting machine:
- Upload the waterfall card SVG file into Cricut Design Space.
- Select the right machine setting and make sure it's set for cardstock cutting.
- Arrange the pieces on the canvas to ensure they are spread out properly for cutting.

If you're cutting by hand, print out the PDF file and carefully cut out the template shapes using scissors or a precision knife.
C. Cutting the Pieces
- For a smooth cutting experience, make sure your cardstock is well-adhered to the mat using a brayer.
- Set your cutting material settings to “medium cardstock.”
- Once the pieces are cut, carefully remove them using a spatula to avoid tearing.
Step 3: Assemble the Waterfall Card
Now comes the fun part – putting it all together!
A. Prepare the Card Base
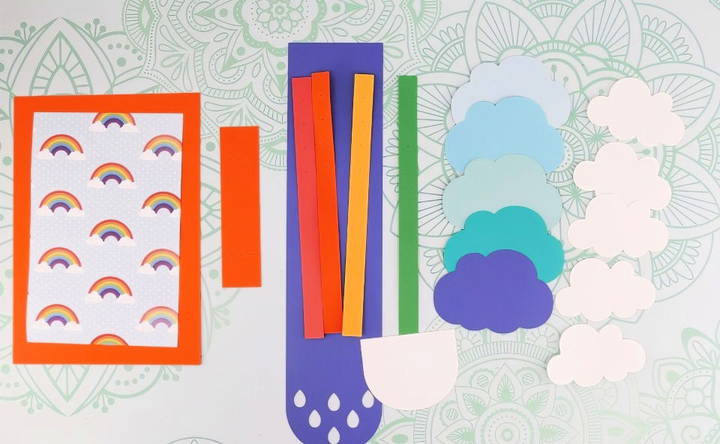
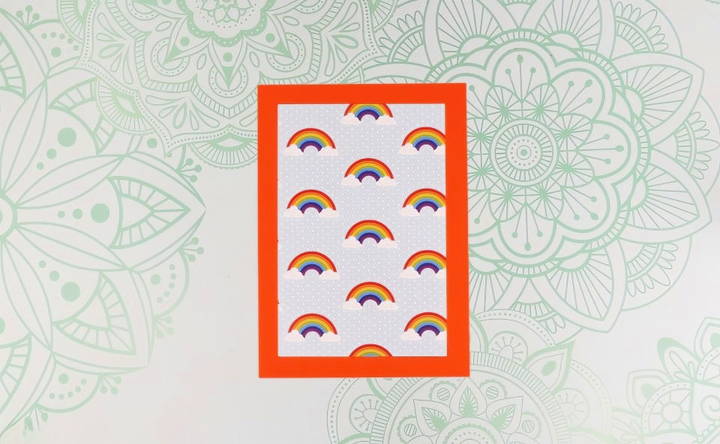
The base of your waterfall card consists of two large rectangular pieces that form the card's foundation. Follow these steps:
- Apply glue to the back of the smaller rectangle.
- Center it on the larger rectangle and press down.
B. Make the Waterfall Mechanism
The waterfall mechanism is what gives the card its unique motion. It involves several parts:
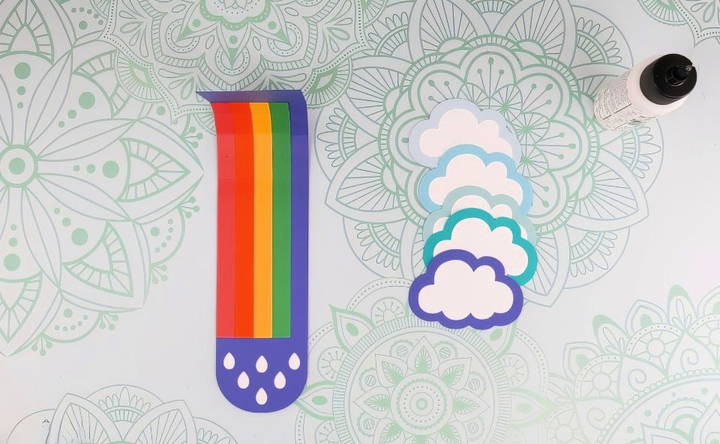
- The slider piece has sections that will fold over.
- The decorative pieces, such as the rainbow stripes or clouds.
- Fold the Slider Piece:
Along the dashed lines, fold the slider piece to make sharp creases. This allows the card to move smoothly. - Attach the Rainbow Stripes (or Other Decorative Shapes):
Start from the bottom of the slider. Apply glue to the first section of the slider, then place the red stripe on top. Repeat this process for the orange, yellow, and green stripes.
C. Add the Cloud Pieces
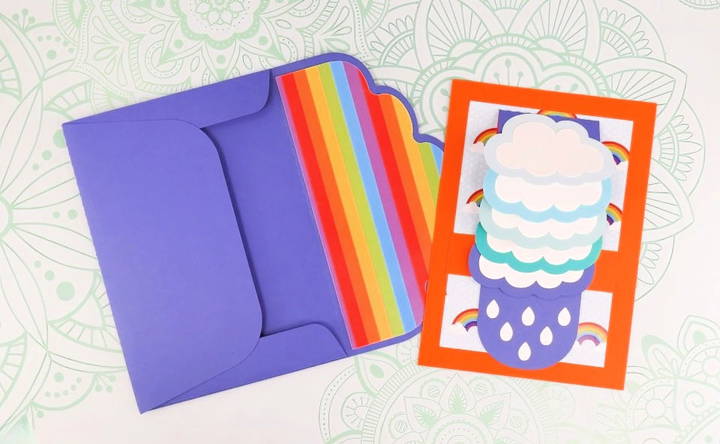
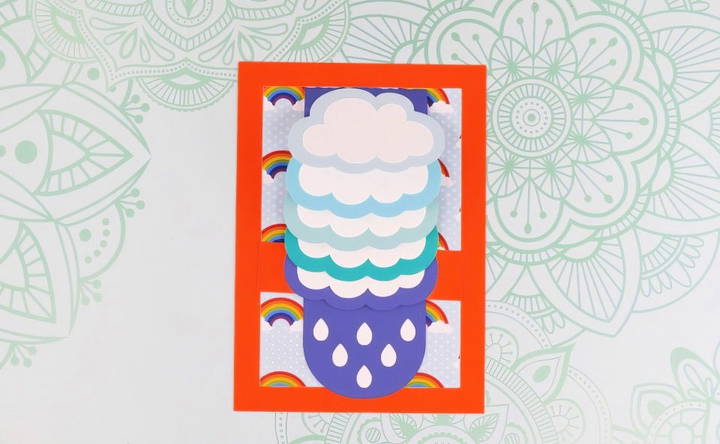
For a rainbow-themed waterfall card, the cloud pieces are attached to the slider to make a fun, playful design. You'll have 10 cloud pieces, 5 white and 5 in shades of blue:
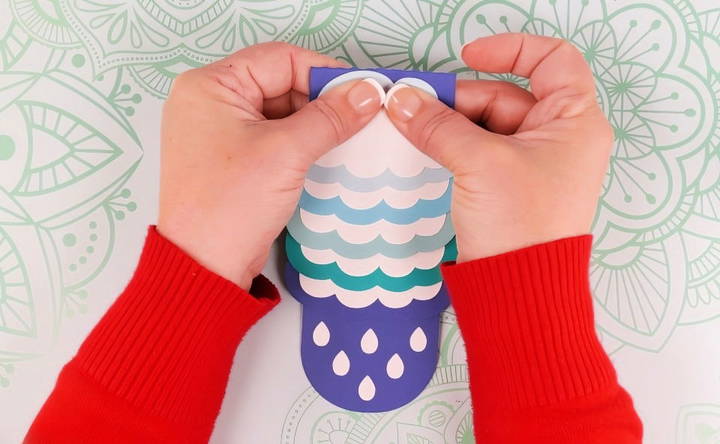
- Apply glue to the back of the white cloud and place it over the blue cloud, making a layered look.
- Begin attaching the clouds to the slider piece. The bottom cloud should go on the largest section of the slider.
- For the rest of the clouds, only glue the top of each cloud so that the bottom remains free to move when the slider is pulled.
D. Test the Waterfall Effect
Once all your clouds and rainbow stripes are attached, test the waterfall effect by pulling the slider tab. The clouds should flip up one by one, revealing the rainbow underneath.
Step 4: Assemble the Matching Envelope
Now that your waterfall card is complete, it's time to make a matching envelope. The envelope not only provides protection but also adds to the charm of the card, especially if you make a design that complements your card's theme.
A. Cut the Envelope Pieces
If you're using a Cricut or another cutting machine, you can cut out the envelope pieces by following these steps:
- Upload the Envelope Design: Similar to how you uploaded the card design, upload the envelope SVG file into Cricut Design Space (or your preferred cutting machine software).
- Separate the Elements: The envelope design usually includes multiple pieces such as the main envelope base, side flaps, and decorative liners.
- Prepare for Cutting: Ensure the right machine settings are applied based on the type of cardstock or patterned paper you're using for the envelope.
- Cut: Load the materials onto your cutting mat and start the cutting process.
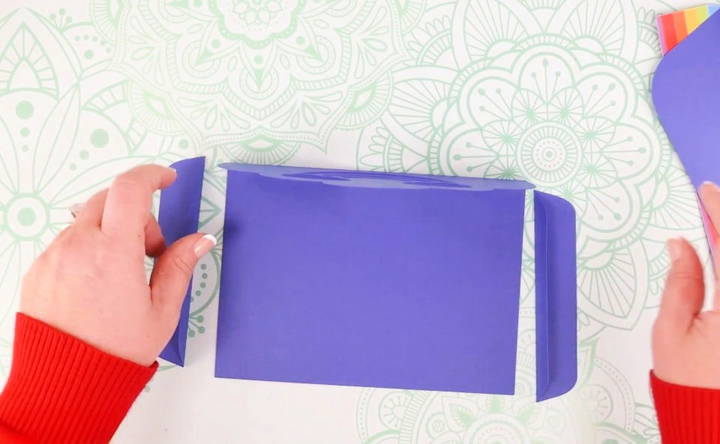
For hand-cutters, print out the PDF template and carefully cut along the lines using scissors.
B. Assemble the Envelope
After you've cut out the envelope components, it's time to put everything together. Here's how to assemble the envelope:
- Fold the Flaps: If your envelope design has flaps, fold along the score lines to form the edges of the envelope. Use a scraper tool or bone folder to make crisp creases.
- Glue the Side Flaps: Apply a thin line of glue along the tabs of the side flaps. Make sure to align the edges carefully and press down to secure them. Avoid using too much glue, as you don't want it to seep into areas where it might prevent the card from fitting inside.
- Attach the Bottom Flap: The bottom flap is the larger piece of the envelope. Add glue to the tabs and press them against the side flaps.
- Insert the Liner (Optional): If you've cut a decorative liner for the inside of the envelope, now is the time to attach it. Apply glue to the top of the envelope and center the liner so that it sits evenly. The liner adds a professional, polished touch to your envelope.
C. Seal the Envelope
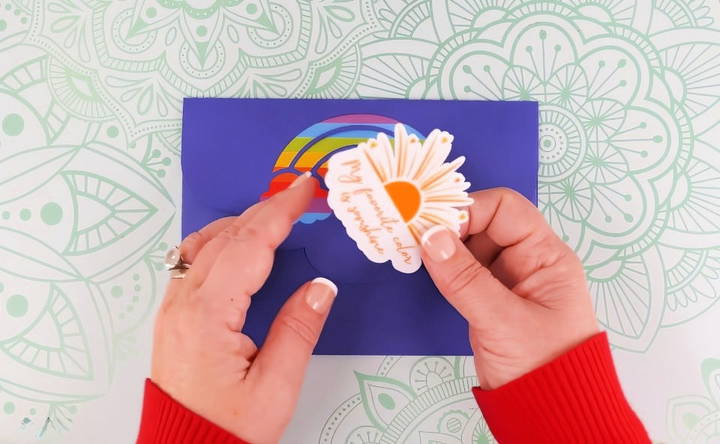
Once your envelope is assembled, fold the top flap over and use a sticker, piece of tape, or craft glue to seal it. You can make custom stickers to seal your envelope, which adds a personal touch. You can even make these stickers using your Cricut machine!
For example, you could make a small cloud-shaped sticker to match the cloud elements of the card, or a rainbow sticker that ties in with the theme.
Step 5: Customize and Personalize Your Waterfall Card
One of the best things about DIY waterfall cards is how customizable they are. While this tutorial focuses on a rainbow and cloud design, you can easily adjust the card to fit any occasion or personal style.
A. Personal Messages
Since waterfall cards have multiple layers, you can use each layer to reveal a personal message. Here are some ideas for adding custom messages:
- Each cloud can feature a different word: For example, the top cloud might say “Happy,” the next one “Birthday,” and so on.
- Hidden messages under the layers: As the clouds flip over, consider writing a fun message or drawing a small illustration under each layer.
- Use handwritten notes: For a personal touch, write the message by hand with a fine-point pen or marker.
B. Change the Theme
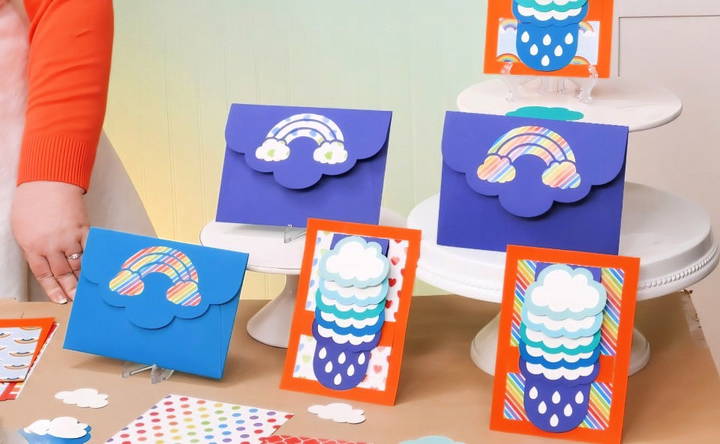
You're not limited to rainbows and clouds! Here are a few other themes you can explore:
- Nature Theme: Replace the rainbow and clouds with flowers, leaves, or animals. This could work well for a nature-themed birthday or a special note for an outdoor enthusiast.
- Holiday Theme: For Christmas, make a card where small ornaments or snowflakes are revealed as you pull the tab. For Halloween, use pumpkins or bats.
- Photo Waterfall: Instead of decorative pieces, consider using small photos in each section. This would make a beautiful anniversary card, where each flip reveals a different memory or photo.
- Geometric Shapes: If you prefer a modern and clean aesthetic, you can use simple geometric shapes like squares, triangles, or hexagons. Each flip could reveal a different colored shape.
C. Add Decorative Elements
To further enhance your card, consider adding some embellishments:
- Glitter or Foil Accents: Apply a small amount of glitter glue or use foil sheets to give your card some sparkle.
- Stickers or Stamps: Add themed stickers or stamped images around the card base to complement the main design.
- 3D Elements: You can make the card even more dynamic by adding small 3D elements, like foam tape behind certain pieces to make them pop out.
D. Advanced Techniques: Light-Up Waterfall Card
For those who want to take the waterfall card to the next level, consider adding a light-up feature. You can incorporate small LED lights into the design using a Chibitronics LED circuit kit. The lights can be activated as the slider moves, adding a whole new dimension of fun to the card.
Step 6: Test the Card and Enjoy the Waterfall Effect
Now that your card is fully assembled and customized, it's time for the final test! Gently pull down on the slider tab and watch as the clouds, rainbow, or other decorative pieces cascade in the waterfall motion. If the pieces flip smoothly and reveal the hidden designs or messages, you've done it right!
If you notice any issues with the card getting stuck, check the following:
- Ensure that the glue is completely dry: Wet glue can cause the parts to stick together, preventing smooth movement.
- Check the alignment: If the folds or layers are misaligned, this can affect the waterfall effect. Make sure each piece is aligned properly with the others.
The waterfall effect is not only mesmerizing but also adds an interactive, tactile experience to your card, making it much more memorable than a standard greeting card.
Step 7: Mailing Your Waterfall Card
Due to the unique construction and size of a waterfall card, it's important to consider a few things when mailing it.
A. Postage Considerations
Because of the size, thickness, and interactive nature of the waterfall card, it may require extra postage to mail. In general, waterfall cards are thicker than standard cards, which means they might not fit through the automated mail-sorting machines at the post office.
To avoid delays or damage, here's what you can do:
- Check the thickness: If your card is over a certain thickness (usually 1/4 inch), you may need to pay for additional postage.
- Use two stamps: As a general rule of thumb, adding a second stamp can ensure your card has enough postage. You can also ask your local post office to measure the card and determine the exact postage needed.
B. Protecting the Card
To protect the delicate elements of the card (such as the slider or 3D decorations), you may want to add some extra padding when mailing it:
- Use bubble mailers: A small bubble mailer provides extra protection without adding too much bulk.
- Add a cardboard insert: You can also place a piece of cardstock or cardboard inside the envelope to prevent the card from bending.
By taking these precautions, you can ensure that your beautiful, handmade card arrives safely at its destination, ready to bring joy to the recipient.
FAQs About DIY Waterfall Card Tutorial
Discover answers to common questions about DIY waterfall card tutorial, perfect for crafting personalized, interactive cards easily.
You can create a waterfall card by hand using a printed template. Download a PDF version of the design and cut out the pieces manually using scissors or a craft knife. Though it’s more time-consuming, the process follows the same steps as with a cutting machine.
To prevent cardstock from curling, flip the cutting mat over and peel it away from the paper instead of the other way around. Use a brayer to ensure the cardstock adheres well to the cutting mat before starting the cut.
Yes, the waterfall card can be made using a Cricut Joy, though you'll need to manually cut the larger 5x7-inch base piece with a paper trimmer since the Joy has size limitations. Adjust the design accordingly in Cricut Design Space.
Ensure the folds are sharp by using a scraper tool or bone folder on all creases. Also, avoid applying glue too close to the edges of the moving parts, as this can prevent the slider from functioning properly.
Solid core cardstock is ideal because it’s sturdy and won't show a white edge when cut. Recollections, Cricut’s cardstock, and American Crafts are all good options. Choose different colors or patterns for a vibrant look, especially for the slider and decorative elements.
Waterfall cards are thicker than standard greeting cards due to their layered design and interactive elements. This thickness often exceeds standard mailing limits, requiring extra postage. It’s a good idea to check at the post office to avoid delays.
Absolutely! While this tutorial uses a rainbow theme, you can swap the decorative pieces for anything you like—such as flowers, animals, or holiday motifs. You can even include personal photos or messages hidden beneath each layer for added surprise.
If the slider isn’t moving smoothly, double-check the alignment of the folds and ensure no glue has seeped into areas that should remain free. Also, make sure that none of the decorative elements extends beyond the fold lines, which could interfere with the motion.
Yes! Each layer of the waterfall effect offers space to add a custom message. You can either write directly on the cardstock with a fine-point pen or use stickers to create a clean, professional look.
To secure the envelope, use a small sticker or tape, or you can even make your own custom stickers using a Cricut machine. Be careful not to apply too much glue, as it could stick to the card and prevent it from sliding in and out smoothly.
Conclusion: Crafting a Life You Love with Waterfall Cards
Making a DIY waterfall card is not only a rewarding creative project but also a unique way to bring joy to someone's day. Whether you're crafting for a loved one or making something just for fun, the process of designing, assembling, and customizing a waterfall card can be incredibly satisfying.
In this guide, you've learned the full process:
- Gathering your supplies and preparing your materials.
- Cutting and assembling the card and envelope.
- Customizing and adding personal touches to make your card one of a kind.
- Testing the waterfall effect and preparing your card for mailing.
With endless design possibilities, you can use these same principles to make waterfall cards for any occasion, from birthdays to holidays, weddings, and beyond. So, get started on your next project, and don't forget to share your creations with fellow crafters!


