Are you pondering what to do with an old chair that's gathering dust in the corner? It's time for a creative turning point! Upcycling old chairs is not just a method to breathe new life into them, but it's also a step towards sustainability. By focusing on eco-friendly materials and innovative ideas, your old chair can transform into a piece of art that carries both aesthetic value and a story.
The process of upcycling brings together the joy of creativity and the satisfaction of contributing positively to the environment. Get ready to find your perfect chair, prepare it for the transformation, and choose the best materials for the job. As we dive into the transformation process, be inspired by the endless possibilities that upcycling offers.
Continue on to discover a step-by-step guide that will take your old chair from forgotten to favorite.
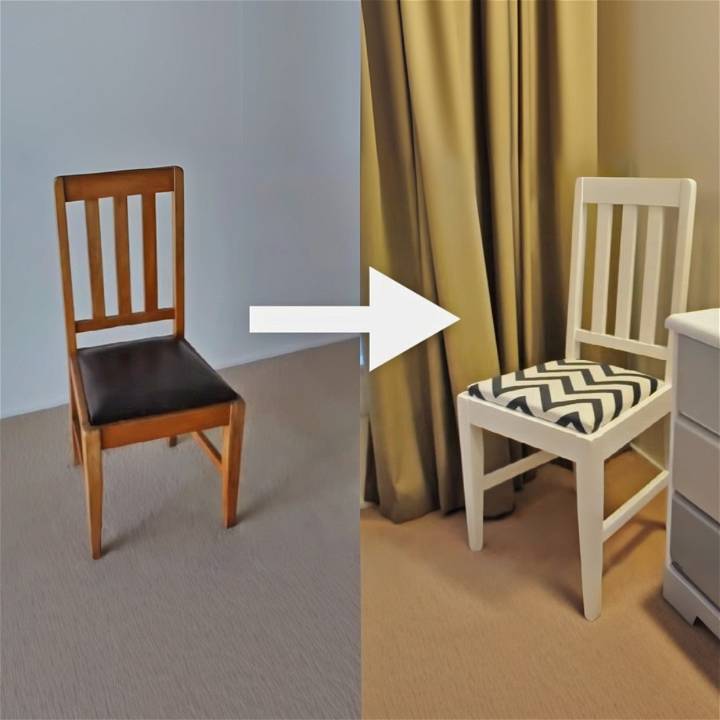
How to Upcycle Old Chairs
Learn how to upcycle old chairs with creative DIY ideas and techniques. Transform your old furniture into beautiful pieces for your home.
The Joy of Giving Old Chairs New Life
Upcycling old chairs is not just a creative outlet but also a significant step towards a more sustainable and eco-friendly lifestyle. By breathing new life into pre-loved chairs, we can significantly reduce the amount of waste destined for landfills and conserve the resources that would otherwise be used in manufacturing new furniture. This guide will help you transform an old chair into a stunning piece of home decor, all the while keeping our planet in mind.
Finding Your Perfect Chair
Before you start, the hunt for the perfect chair to upcycle is a crucial step. Thrift stores, garage sales, and online marketplaces are treasure troves for pre-loved chairs that are just waiting for a new lease on life. Choosing to refurbish an existing piece not only saves it from becoming waste but also limits the demand for new, resource-intensive furniture.
Preparing Your Chair
Once you've found a suitable chair, preparation is key. A thorough cleaning and a quick assessment of any repairs needed are the first steps in the upcycling process. Tightening loose screws or replacing worn-out parts can make your chair as sturdy as ever.
Choosing Eco-Friendly Materials
The materials you choose for your project have a direct impact on the environment. Opting for water-based paints instead of solvent-based ones is a simple yet effective way to reduce harmful emissions. Similarly, when choosing fabrics, look for natural or recycled options that are kinder to our planet.
The Transformation Process
Transforming an old chair can be as simple or elaborate as you wish. Here are some ideas to get you started:
- Painting: A fresh coat of paint can work wonders. Remember to use eco-friendly paint for a sustainable makeover.
- Reupholstering: Changing the fabric can completely alter the chair's look. Choose sustainable fabrics to keep your project environmentally friendly.
- Adding details: Personal touches like new knobs, stencils, or decoupage can add character to your chair.
The Environmental Impact
By upcycling a chair, you're making a positive environmental impact. You reduce the demand for new resources, minimize waste, and avoid contributing to the pollution associated with manufacturing new furniture. Additionally, choosing sustainable materials for your project furthers your positive impact on the planet.
Upcycling chairs is beneficial for you and the environment, showcasing creativity and sustainability.
Step by Step Instructions
Learn how to upcycle old chairs with our step-by-step guide below:
Step 1: Gather Your Materials
Before diving into your project, make sure you have all necessary materials:
- An old wooden chair
- A good quality paint in the color of your choice
- A water-based primer (optional, for better paint adherence)
- Sandpaper (if your chair has a glossy finish or rough patches)
- A drop cloth or old newspapers
- A small paint roller and brushes
- Fabric for reupholstering the chair’s cushion
- A hot glue gun with glue sticks
- Scissors
Step 2: Cleaning and Preparing Your Chair
Start by giving your chair a thorough cleaning to remove any dirt, dust, or grease. If your chair has a glossy finish or any rough spots, lightly sand those areas. This helps the paint stick better and ensures a smooth finish. Wipe the chair down after sanding to remove any dust.
Step 3: Painting
Lay down your drop cloth or newspapers to protect your floor, and if you’re inside, ensure the room is well-ventilated. If you opted for a primer, apply a coat and let it dry according to the instructions. Then, begin painting your chair with your chosen color. Rollers can make the job quicker, but use a brush for the nooks and crannies. It might look patchy after the first coat but don’t worry. Apply two or three coats for even coverage, allowing each coat to dry thoroughly.
Step 4: Reupholstering the Cushion
While your paint dries, focus on the cushion. If there isn’t one, or it needs replacing, now is the time to do so. Otherwise, lay your new fabric face down and place the cushion on top. Cut the fabric, leaving enough to wrap around the edges. Heat up your hot glue gun and start securing the fabric to the underside of the cushion. Pay special attention to folding the corners neatly for a professional finish. Trim any excess fabric.
Step 5: Reassembling
Once the paint on your chair and the glue on your cushion are dry, it’s time to put it all back together. If the cushion was screwed on, reattach it. For a glue-on cushion, apply a fresh layer of glue to the chair seat and press the cushion firmly into place.
And You’re Done!
Congratulations! You’ve successfully given an old chair a new lease on life. This personalized piece of furniture is not only a testament to your creativity but also a step towards sustainable living.
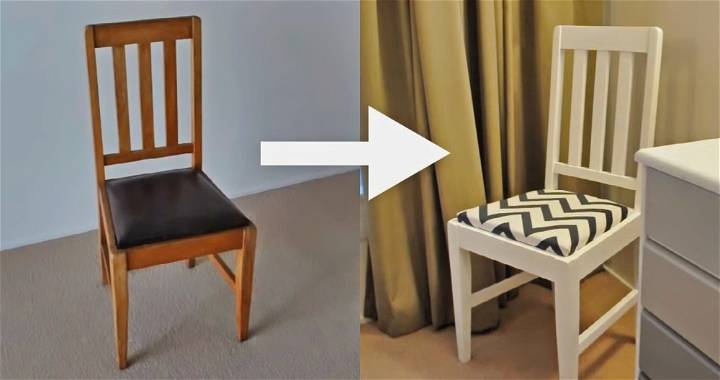
Video Tutorial
For a step-by-step video tutorial on upcycling an old chair, watch CharliMarieTV’s Upcycled old chair DIY.
It pairs well with this written guide, turning abstract instructions into hands-on learning through visual demonstration.
Upcycling Techniques for Old Chairs
Upcycling old chairs can breathe new life into them, transforming them into unique pieces that add character to your space. Beyond basic sanding and painting, there are numerous techniques you can employ to elevate the final look. Understanding the intricacies of each method ensures you achieve the best results.
Sanding Grits and Their Uses
Sanding is crucial for preparing the chair surface. Different grits serve various purposes:
- Coarse Grit (40-60): Ideal for removing old varnish or paint. This grit is aggressive and should be used with caution to avoid damaging the wood.
- Medium Grit (80-120): Once the top layer is removed, switch to a medium grit to smooth out the surface. It's perfect for erasing any scratches left by the coarse grit.
- Fine Grit (150-220): The final step before painting or staining. Fine grit sandpaper ensures a smooth finish, essential for a polished look.
Types of Paint Finishes
Choosing the right paint finish can dramatically affect the appearance and durability of your upcycled chair.
- Chalk Paint: Known for its matte finish, chalk paint doesn't require pre-sanding, making it a convenient option. It's ideal for achieving a vintage look. However, it may require a wax or sealant for durability.
- Milk Paint: Eco-friendly and non-toxic, milk paint provides a uniquely vibrant finish. It's perfect for building an antique look but can be unpredictable in terms of consistency and coverage.
- Lacquer: Offering a glossy finish, lacquer is durable and resistant to damage. While it provides a professional look, the application requires precision and proper ventilation due to strong fumes.
Advanced Upcycling Techniques
Decoupage
- Choose Your Material: Select a pattern or image from napkins, fabric, or wallpaper.
- Prepare the Surface: Ensure the chair is clean and smooth. Apply a base coat if necessary.
- Apply Glue: Use a decoupage medium or white glue, applying it both under and over the material.
- Smooth Out: Carefully smooth out any bubbles or wrinkles with a brush or sponge.
- Seal: Once dry, apply a sealant to protect your work.
Stenciling
- Select a Stencil: Choose a design that fits the style of your chair.
- Secure the Stencil: Use painter's tape to hold it in place.
- Apply Paint: Using a stencil brush, apply paint in a dabbing motion.
- Remove Stencil: Carefully lift the stencil away to reveal the design.
- Seal: Protect your design with a clear topcoat.
Distressing
- Paint Your Chair: Apply one or two coats of paint, depending on the desired look.
- Sand Edges: Once the paint is dry, use fine-grit sandpaper to distress the edges and raised details.
- Wax: For an aged effect, apply a dark wax over the paint, wiping away excess.
By upcycling, you can turn an old chair into a creative masterpiece. Remember, patience and experimentation are essential for success.
Troubleshooting Common Upcycling Issues
Upcycling an old chair can transform it into a stunning piece of furniture. However, you might encounter a few hiccups along the way. Here's how to tackle some common problems effectively.
Dealing with Loose Joints or Wobbly Chairs
Loose joints are often the culprit behind a wobbly chair. To address this:
- Tighten Screws: First, check if the chair has screws at the joints. If so, simply tightening these can solve the problem.
- Wood Glue: For wooden chairs, apply wood glue to the loose joints. Clamp the joints tightly until the glue dries completely.
- Epoxy Resin: In cases where wood glue isn’t enough, use a two-part epoxy resin for a stronger bond. This is particularly useful for parts that are under high stress.
Removing Stubborn Paint or Varnish
Old paint or varnish can be difficult to remove. Here are some tips:
- Chemical Strippers: Apply a chemical paint stripper and follow the instructions carefully. Always wear gloves and work in a well-ventilated area.
- Sanding: For tougher jobs or finer control, sanding by hand or with an electric sander can remove paint or varnish. Start with coarse grit sandpaper and finish with a finer grit for a smooth surface.
- Heat Gun: A heat gun can soften old paint, allowing you to scrape it off more easily. However, be cautious of the heat damage to the wood.
Repairing Minor Cracks or Chips in the Wood
Minor cracks or chips can mar the appearance of your chair but are often easy to fix:
- Wood Filler: Apply wood filler to any cracks or chips, following the product instructions. Once dry, sand the area until it's flush with the surrounding wood.
- Sawdust and Glue: For a DIY filler, mix sawdust from the same type of wood with wood glue to form a paste. Fill the crack, let it dry, then sand smooth.
Upcycling is more than fixing old furniture; it's about giving new life. Solutions for beautiful, functional, sturdy results.
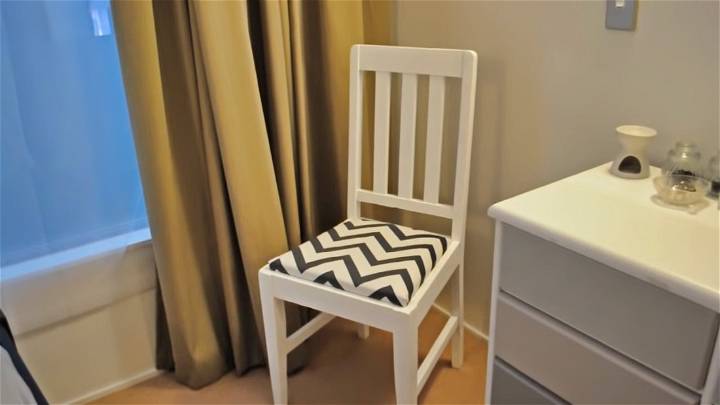
Upcycled Old Chair DIY FAQs
Discover the answers to your most pressing questions about upcycling old chairs with this comprehensive DIY FAQ guide. Dive in today!
What materials do I need to upcycle an old chair?
To start your upcycling project, you will need:
- An old wooden chair
- High-quality paint in your chosen color
- Water-based primer (optional, for better paint adherence)
- Sandpaper (various grits)
- A drop cloth or old newspapers
- A small paint roller and brushes
- Fabric for reupholstering the chair’s cushion
- A hot glue gun with glue sticks
- Scissors
How do I choose the right chair for upcycling?
Look for chairs that are structurally sound but may need cosmetic updates. Thrift stores, garage sales, and online marketplaces are great places to find such pieces. Avoid chairs with significant damage that cannot be easily repaired.
Can I upcycle a chair without sanding it?
Yes, you can use chalk paint, which requires minimal to no prep work and can be applied directly to most surfaces without sanding. However, for the best results and durability, lightly sanding to remove gloss and make a surface that paint can adhere to is recommended.
What are the steps to reupholster a chair cushion?
- Remove the existing cushion from the chair, if applicable.
- Lay your new fabric face down and place the cushion on top.
- Cut the fabric, leaving enough to wrap around the edges.
- Use a hot glue gun to secure the fabric to the underside of the cushion.
- Fold the corners neatly and trim any excess fabric.
How do I fix loose or wobbly chair joints?
Tighten any visible screws first. If the chair remains wobbly, apply wood glue to the joints and clamp until dry. For a more durable solution, especially for high-stress areas, consider using a two-part epoxy resin.
What should I do if the paint looks patchy after the first coat?
Patchiness after the first coat is common. Allow the first coat to dry completely, then apply a second (or third, if necessary) coat for even coverage. Make sure each coat is thoroughly dry before applying the next.
How can I make my upcycled chair more durable?
After painting, apply a clear sealant or topcoat to protect the paint from chips and wear. For upholstered parts, choose a durable fabric and ensure it's securely attached to withstand regular use.
What are some creative upcycling techniques I can try?
Beyond painting and reupholstering, consider decoupage, stenciling, or distressing for a unique look. Each technique offers a way to add personal touches and style to your chair.
How do I deal with stubborn paint or varnish when preparing my chair?
Use a chemical stripper following the product's instructions, sand the surface starting with coarse grit and moving to finer grits, or use a heat gun to soften the paint for easier removal. Always prioritize safety by wearing protective gear and working in a well-ventilated area.
This FAQs section aims to answer your common questions on upcycling an old chair, guiding you through a rewarding project that not only saves furniture from landfills but also adds a personalized touch to your home.
Conclusion:
In conclusion, upcycling old chairs presents a wonderful opportunity to transform a neglected piece of furniture into something unique and environmentally friendly. Through our comprehensive guide on how to upcycle old chairs, we've shared insights from the joy of giving old chairs new life to selecting eco-friendly materials and the actual transformation process.
We've also provided step-by-step instructions and tackled common upcycling issues to assist you in your DIY journey. Now that you have all the necessary information and inspiration, it's the perfect time to give your old chair a second chance and contribute positively to the environmental impact by reducing waste. Happy upcycling!


