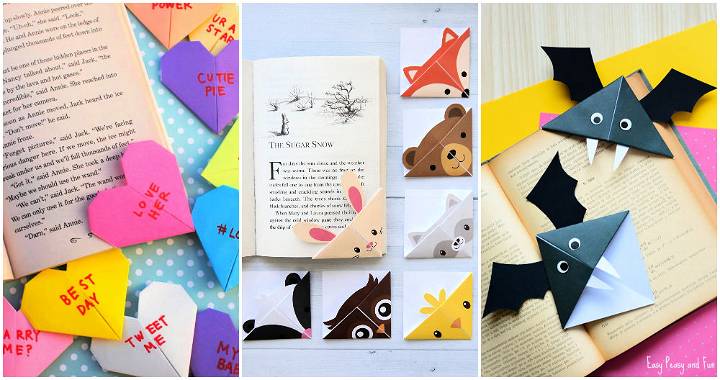
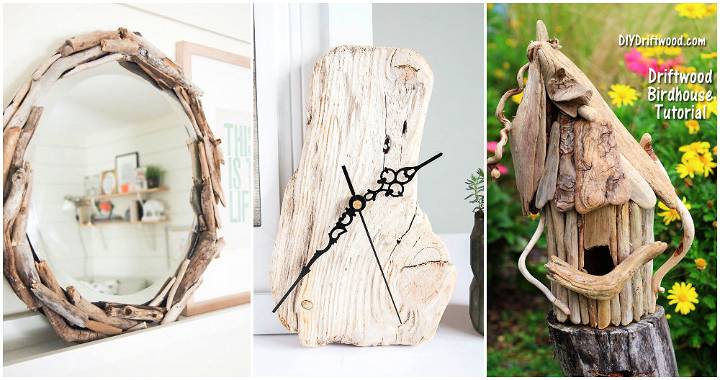
Exploring the world of wood slice crafts offers an exciting avenue for creativity and expression. These crafts with wood slices stand out for their versatility and natural beauty, appealing to anyone eager to bring a touch of nature into their home decor or personal projects. From making rustic signs to unique door hangers, the possibilities are endless, offering a fruitful playground for your imagination and crafting skills.
Heading into the realm of wood slice crafts, one is presented with various techniques and ideas that enable the transformation of simple wood slices into intricate art pieces. This guide is designed to walk you through the essential tips and techniques, ensuring that your crafts with wood slices not only look beautiful but also stand the test of time.
Ready to get started? Let's delve deeper into how you can master the art of wood slice crafts, starting with selecting the right pieces to finish touches that make all the difference.

Tips and Techniques for Wood Slice Crafts
Making wood slice crafts can be a delightful and rewarding hobby. Here are some tips and techniques to help you get the best results:
Selecting the Right Wood Slices
- Look for dry wood: Freshly cut wood slices can warp or crack as they dry. It's best to use wood that has already been dried.
- Uniform thickness: Ensure your slices are cut to a uniform thickness for a consistent look in your projects.
- Smooth surfaces: Choose slices with smooth surfaces to make painting or varnishing easier.
Preserving the Bark
- Handle with care: The bark can easily be damaged or detached, so handle your wood slices gently.
- Seal the bark: Apply a clear sealant to the edges to help keep the bark intact.
Finishing Techniques
- Sanding: Smooth the surface of your wood slice with fine-grit sandpaper before painting or varnishing.
- Painting: Use acrylic paints for vibrant colors. Apply a primer first if you want a more opaque look.
- Varnishing: Protect your finished craft with a coat of varnish. It will enhance the natural wood grain and provide durability.
The key to successful wood slice crafts is patience and practice. Don't be afraid to experiment with different techniques to find what works best for you.
Easy Wood Slice Craft Ideas
Discover creative and economical ways to enhance your home's ambiance with Dollar Tree wood slices. These simple DIY hacks transform ordinary wood slices into beautiful, rustic farmhouse decor pieces that are not only aesthetically pleasing but functional, too. Let's embark on this crafting journey together for an enjoyable and fulfilling experience.
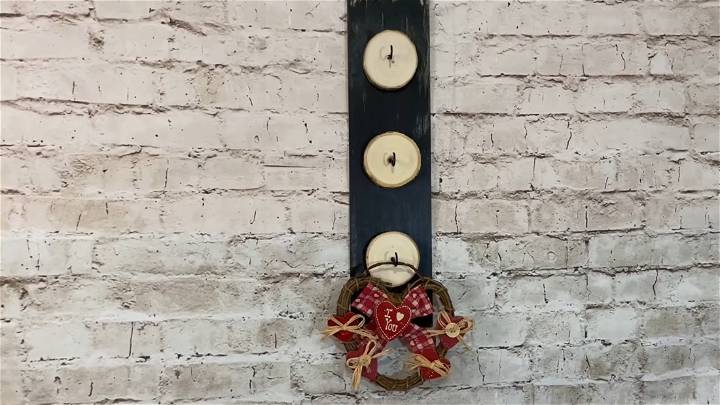
DIY 1: Rustic Wood Slice Sign
Materials:
- Dollar Tree large blank wood sign
- Black paint (for a distressed look)
- Wood slices (about three)
- Wood glue and hot glue
- Gorilla Glue sticks (for the hot glue gun)
- Screw hooks
Steps:
- Prepare the Wood Sign: Start by removing any hangers from the wood sign. Apply a coat of black paint to give it a distressed, rustic look. Let it dry completely. Use a heat gun to speed up the drying process if necessary.
- Arrange Wood Slices: Decide on the placement of your three wood slices on the sign. Try to evenly space them out.
- Glue Wood Slices: Apply both wood glue (for durability) and hot glue (for immediate hold) to the back of each wood slice and press onto the wood sign. Ensure they are firmly attached.
- Install Hooks: Carefully drill pilot holes into the center of each wood slice. Screw in a hook into each, ensuring they are securely fastened.
- Reattach the Hanger: Once everything is set, reattach or add a new hanger to the back of the sign.
- Decorative Options: Feel free to add embellishments or keep it simple and rustic, based on your preference.
DIY 2: Wash Your Hands Door Hanger
Materials:
- Wood slice (medium size)
- Vinyl words cut from a Cricut machine ("Wash Your Hands")
- Transfer tape
- Mod Podge
- Beads and jute string
- Ribbon or bow for decoration
Steps:
- Prepare the Vinyl Decal: Cut and weed your vinyl words. Use transfer tape to ready them for application.
- Prep the Wood Slice: Apply a layer of Mod Podge on the wood slice and let it dry. This ensures the vinyl sticks properly.
- Apply Vinyl Decal: Carefully place your vinyl words on the wood slice, adjusting for the best fit.
- Seal with Mod Podge: Apply another coat over the vinyl to seal it.
- Make the Hanger: Thread beads onto the jute string. Make sure it's long enough to hang from a doorknob. Secure the string through a pre-drilled hole in the wood slice and tie it off.
- Final Touches: Add a decorative ribbon or bow at the top where the string exits the wood slice for a charming finish.
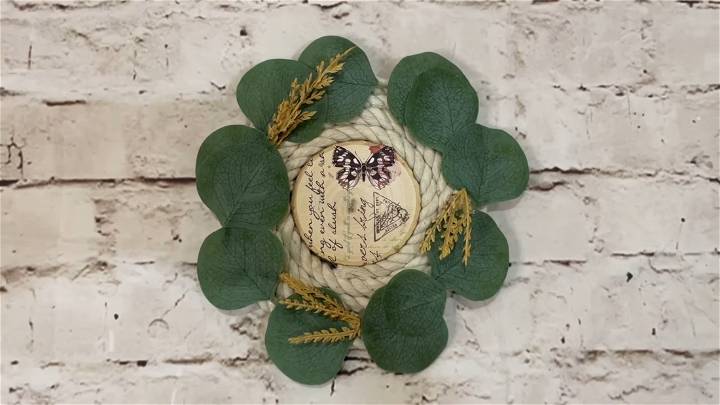
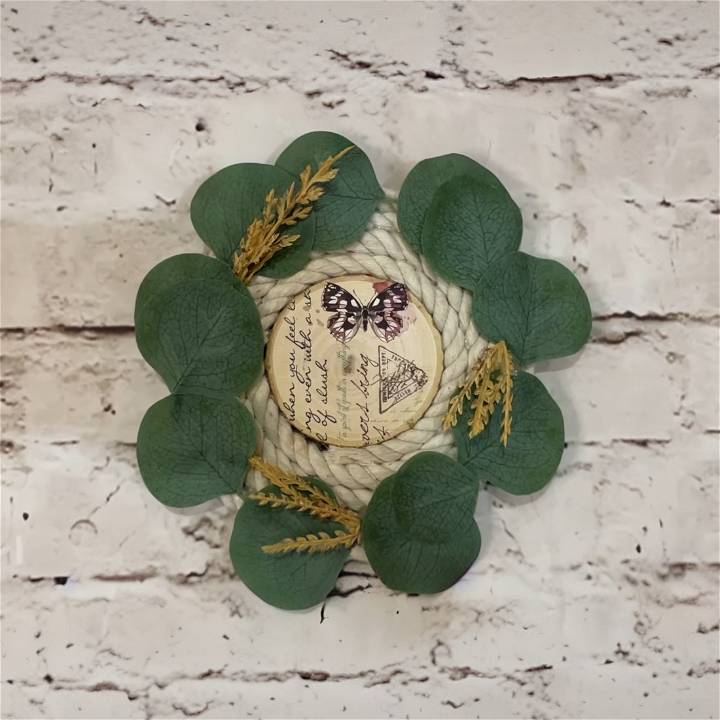
DIY 3: Nautical Rope Encircled Wood Slice Decor
Materials:
- Wood slice (any size)
- White nautical rope
- Hot glue gun
- Greenery or eucalyptus pieces
- Additional decorative elements (like wheat pieces)
Steps:
- Wrap the Rope: Start by hot gluing the end of the nautical rope to the wood slice. Wrap the rope around the slice four times or until you're satisfied with the look. Cut and secure the end with more hot glue.
- Add Stability: Glue small rectangular pieces to the back of the roped area to prevent it from being flimsy.
- Decorate with Greenery: Arrange your chosen greenery around the roped area, securing each piece with hot glue. Follow the circular shape for a cohesive look.
- Additional Embellishments: Feel free to add more decorations, such as wheat pieces or a motivational quote, personalizing it to your taste.
Video Tutorial
For a step-by-step visual guide on making these DIY projects, watch the "3 brilliant ways to use dollar tree wood slices | home decor DIY hacks!
It pairs seamlessly with this written guide, enhancing understanding with visual instructions that are easy to follow and implement.
These DIY projects from Dollar Tree make affordable and stylish home decor items for all skill levels.
Upcycling Ideas for Wood Slice Crafts
Upcycling is a fantastic way to breathe new life into materials that might otherwise be discarded. With wood slice crafts, you can transform leftover or fallen tree slices into beautiful, functional art. Here's how to do it:
Finding Wood Slices
- Fallen Branches: After storms, check your yard or local parks for fallen branches that can be cut into slices.
- Firewood: Look through firewood piles for pieces that can be repurposed into crafts.
- Lumber Scraps: Visit a local sawmill or woodworking shop and ask for any scrap pieces suitable for slicing.
Creative Project Ideas
- Coasters: Sand down smaller slices to make rustic coasters for your home.
- Wall Art: Arrange various sizes of wood slices on a canvas and secure them to make a unique piece of wall art.
- Clocks: Add clock mechanisms to larger slices for a charming, rustic timepiece.
Sustainability Tips
- Natural Finishes: Use beeswax or linseed oil for a natural, eco-friendly finish.
- Reuse: If a craft doesn't turn out as expected, repurpose the wood slice for another project.
By upcycling wood slices, you not only make something beautiful but also contribute to a more sustainable world. Let your creativity flow, and see what amazing projects you can come up with!

Safety Precautions in Wood Slice Crafting
When engaging in wood slice crafts, safety should always be your top priority. Here are some guidelines to ensure you craft safely:
Handling Tools
- Wear protective gear: Always use safety glasses and gloves when cutting wood.
- Sharp tools: Keep your cutting tools sharp; dull tools can be dangerous and cause accidents.
Working Environment
- Stable surface: Work on a stable table to prevent wood slices from slipping.
- Good lighting: Ensure your crafting area is well-lit to avoid mishaps.
Maintenance and Care for Wood Slice Crafts
To keep your wood slice crafts looking their best for years to come, follow these maintenance tips:
Cleaning
- Dust regularly: Use a soft brush or cloth to remove dust from your wood slice crafts.
- Avoid water: Do not use water to clean wood slices as it can cause swelling or warping.
Storage
- Avoid direct sunlight: Store your crafts away from direct sunlight to prevent fading.
- Control humidity: Keep your crafts in a controlled environment to prevent the wood from cracking.
By following these safety and maintenance tips, you can enjoy making and displaying your wood slice crafts with peace of mind.
FAQs About Wood Slice Crafts
When it comes to wood slice crafts, many enthusiasts have questions about the process, materials, and techniques. Here's a detailed section addressing some of the most common inquiries:
Choosing Wood Slices
- What type of wood is best for crafting?
- Hardwoods like oak or maple provide durability, while softer woods like pine are easier to carve.
Preparing Wood Slices
- How do I prevent wood slices from cracking?
- Slow drying and sealing the wood with a stabilizer can help prevent cracking.
Decorating Techniques
- Can I use regular paint on wood slices?
- Yes, acrylic paint works well on wood. For a natural look, consider wood stains.
Crafting Ideas
- What are some popular wood slice craft projects?
- Coasters, ornaments, and rustic signs are among the favorites.
Preservation and Display
- How do I protect my finished wood slice crafts?
- Apply a clear sealant to protect against moisture and wear.
Conclusion:
In conclusion, wood slice craft ideas offer a vast array of possibilities for those interested in exploring their creative side through woodworking. By following the tips and techniques highlighted in this article, including selecting the right wood slices, preserving the bark, and mastering finishing techniques, you'll be well-equipped to take on projects from rustic wood slice signs to nautical rope-encircled decor.
Not only are these crafts visually appealing and easy to make, but they also provide a sustainable option for those looking to upcycle materials. Remember to always prioritize safety precautions when working on your projects and to follow best practices for maintenance and care to ensure your wood slice crafts last for years to come. Engage in this fulfilling hobby and bring the natural beauty of wood into your home with crafts with wood slices.


